
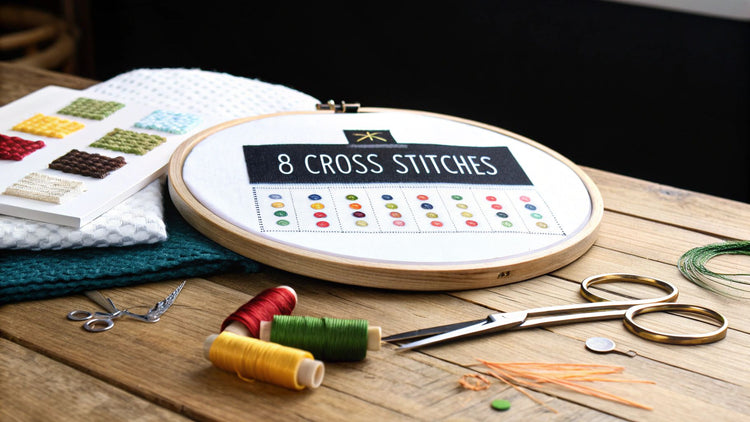
Cross-stitch is an art form celebrated for its beautiful, pixel-like simplicity. But beneath the surface of the classic 'X' lies a rich vocabulary of stitches that can transform a simple design into a textured, photorealistic masterpiece. Understanding the different types of cross stitches is the key to unlocking new levels of detail, dimension, and artistry in your work. Whether you're turning a cherished photo into a timeless keepsake or tackling a complex pattern, knowing when to use a full cross for bold coverage versus a three-quarter stitch for subtle curves can make all the difference.
This comprehensive guide will move beyond the basics, equipping you with a versatile toolkit of essential stitches. You'll discover how each technique contributes a unique effect, from creating smooth outlines with backstitch to adding delicate, raised details with French knots. We will explore not just the "how" but the crucial "why" behind selecting a particular stitch for a specific area of your design.
By mastering these variations, you gain the control needed to execute intricate patterns with precision and bring a new level of sophistication to your projects. This article breaks down eight fundamental stitches, providing actionable insights into their best applications, common challenges, and ideal fabric and thread pairings. Prepare to elevate your craft from a simple hobby to a refined artistic practice, empowering you to create projects with professional polish and breathtaking detail.
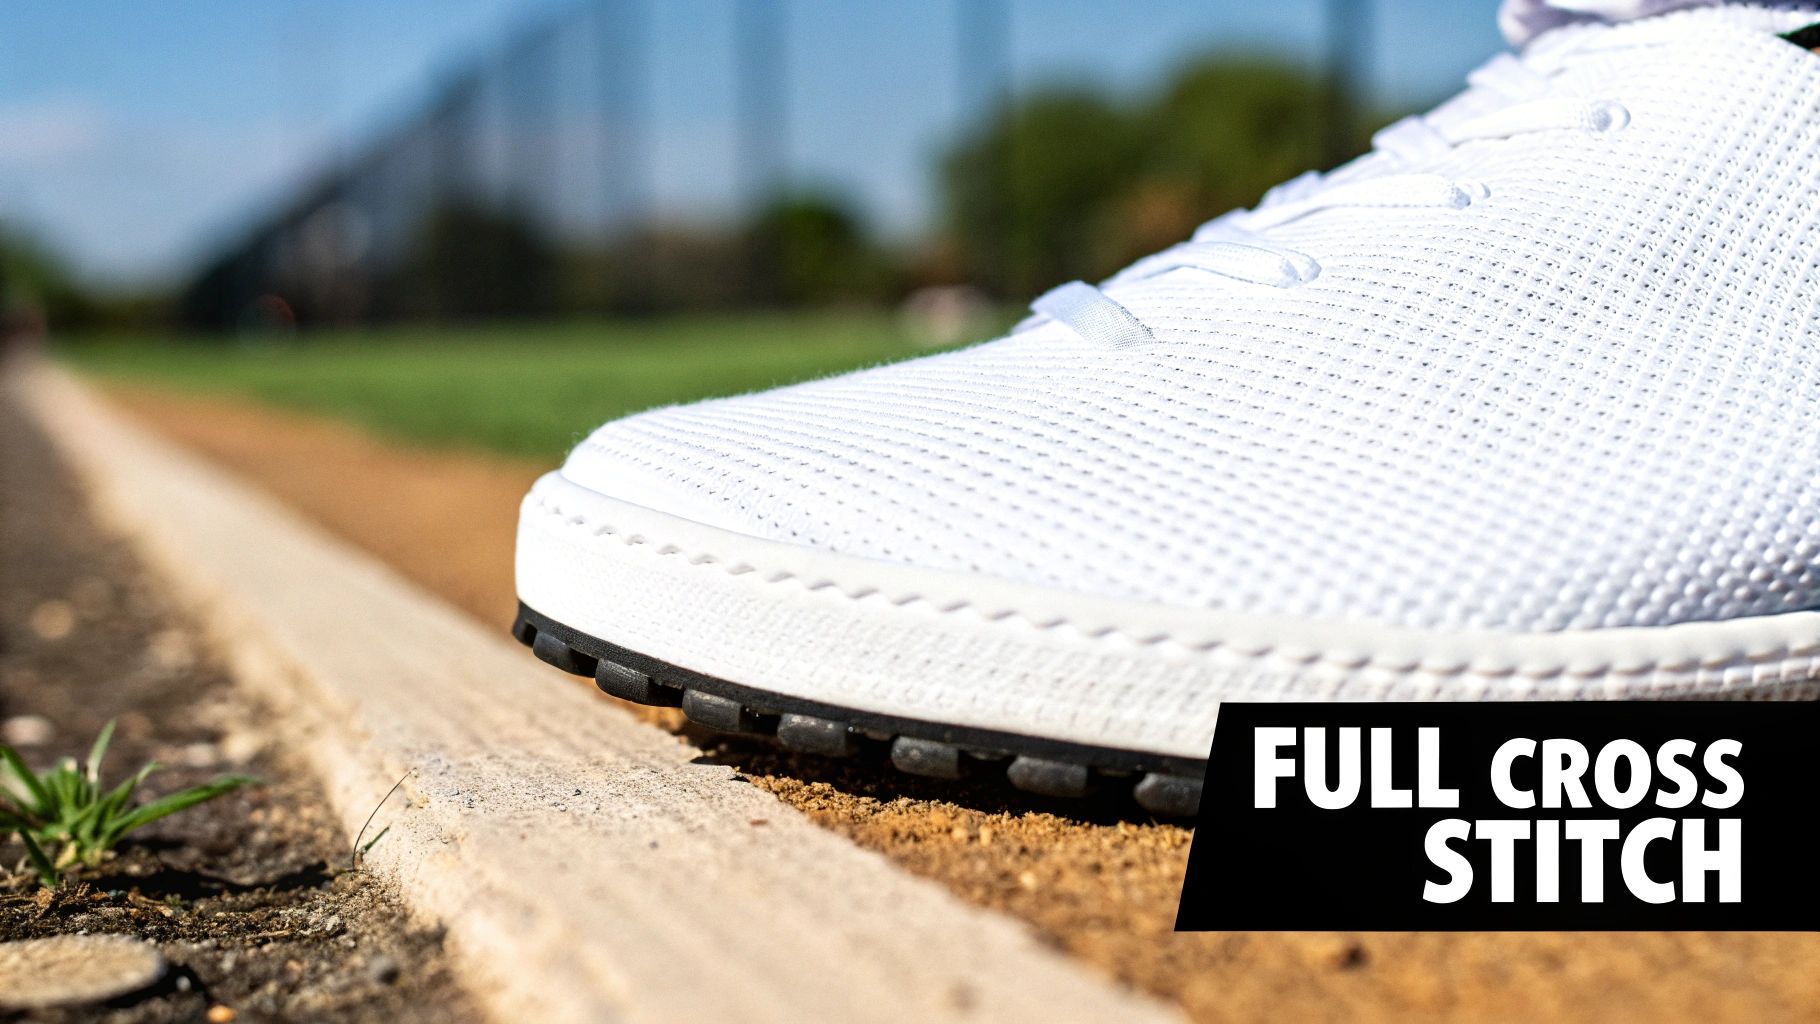
1. Full Cross Stitch (X Stitch)
The full cross stitch, often called the "X stitch," is the cornerstone of all cross-stitching. It is the fundamental technique from which nearly all other stitches in this craft are derived. This stitch consists of two diagonal half stitches that intersect to form a perfect "X" over a single square of Aida or evenweave fabric. As the most common of all the types of cross stitches, it's the primary method for filling in large blocks of color and building the core image of a pattern.
When to Use the Full Cross Stitch
The full cross stitch is your go-to for creating the main body of any design. Its uniform, grid-like coverage is perfect for building detailed, pixelated-style images. It excels in projects that require solid, opaque color fields, such as photo-realistic portraits or vibrant landscapes. The technique is foundational to most modern kits, from simple holiday ornaments to large, custom tapestries like the personalized family keepsakes offered by Cross Stitched. Its simplicity and versatility make it the first stitch any beginner learns and the one that experienced stitchers use the most.
How to Achieve Perfect Full Cross Stitches
Achieving a professional, polished look relies on consistency. The key is to ensure all your "X"s are formed in the same direction across the entire piece. This means completing all your bottom stitches (e.g., from bottom-left to top-right) first, and then crossing them all with the top stitches (e.g., from bottom-right to top-left).
Pro Tip: Stitching in rows using the Danish method (completing a row of half stitches, then returning to cross them) is often faster and helps maintain more even tension than completing each "X" individually (the English method).
Actionable Tips for Success:
- Fabric Choice: For beginners or highly detailed patterns, a 14-count Aida fabric provides the ideal balance of visibility and detail.
- Maintain Tension: Keep your thread tension even but not too tight. Pulling too hard can warp the fabric and create visible holes.
- Organize Your Threads: Before starting, use a thread sorter, like the DMC color sorter, to organize your floss. This is especially vital for photo-conversion projects with dozens of similar shades.
- Work Systematically: Tackle your project in a grid-like fashion, either top-to-bottom or left-to-right, to avoid confusion and ensure complete coverage.
2. Half Cross Stitch (Single Diagonal Stitch)
The half cross stitch is exactly what its name implies: a single diagonal stitch that makes up one half of a full cross stitch. This fundamental technique produces a lighter, more delicate texture compared to the full "X" stitch. While simple in execution, its strategic use is one of the most effective ways to add depth, shading, and subtlety to a design. Among the various types of cross stitches, the half stitch is a powerful tool for creating background gradients and blended color effects, offering a different visual weight that makes foreground elements pop.
When to Use the Half Cross Stitch
The half cross stitch is primarily used for background elements, shading, and creating a sense of distance. It's perfect for stitching skies, water, or out-of-focus backgrounds in landscape pieces. In photorealistic portrait conversions, like those created with the Cross Stitched photo-to-pattern tool, half stitches are invaluable for rendering soft shadows and subtle shifts in skin tone. Their reduced thread usage also makes them an economical choice for covering large, non-focal areas of the fabric.
How to Achieve Perfect Half Cross Stitches
The key to a beautiful half stitch section is unwavering consistency. Every single stitch must lie in the same diagonal direction (e.g., all bottom-left to top-right) to create a smooth, uniform texture. If stitches are made in opposing directions, the area will look messy and uneven, and it will not reflect light uniformly, which ruins the intended shading effect. This directional discipline is what separates amateur work from a polished, professional-looking piece.
Pro Tip: Before starting a large background area with half stitches, double-check your pattern key. Ensure your stitch direction matches the top leg of your full cross stitches for a cohesive and intentionally designed final appearance.
Actionable Tips for Success:
- Plan Your Direction: Decide on your stitch direction before you begin and stick with it. Consistency is the most critical factor for a clean finish.
- Create Visual Hierarchy: Use half stitches for backgrounds and full stitches for the main subject to create a clear visual separation and a three-dimensional effect.
- Blend Colors: The half stitch is excellent for blending similar shades from the DMC palette. Stitching rows of two closely related colors next to each other creates a soft, almost painted gradient.
- Use Fewer Strands: For an even more delicate or distant effect, consider using one less strand of floss for your half stitches than you do for your full cross stitches.
3. Three-Quarter Stitch (3/4 Stitch)
The three-quarter stitch is an advanced technique used to create smoother curves and more refined details than full or half stitches alone can achieve. It consists of one diagonal half stitch and a shorter quarter stitch that meets it in the center of the fabric square, effectively covering three-quarters of the grid space. Among the more intricate types of cross stitches, this stitch is crucial for avoiding the blocky, pixelated look of standard cross-stitch, especially in complex, high-resolution designs.
When to Use the Three-Quarter Stitch
Use the three-quarter stitch whenever your pattern requires soft curves or sharp, angled lines that don't align perfectly with the fabric's grid. It's indispensable for photorealistic portraits, where it helps define delicate facial features like eyes and lips, and in landscape designs to create the organic shapes of flowers or tree branches. Modern pattern generators, such as the Pic2Pat technology used by Cross Stitched for custom photo kits, often incorporate three-quarter stitches to achieve stunningly lifelike results.
How to Achieve Perfect Three-Quarter Stitches
Executing a clean three-quarter stitch requires precision, especially when splitting the fabric threads to place the needle in the center of a square. The stitch is formed by completing a quarter stitch (from a corner to the center) and then adding a full half stitch to complete the 3/4 shape. This technique demands careful control and is often combined with a backstitch outline for maximum definition.
Pro Tip: When working a three-quarter stitch on Aida fabric, use a sharp needle to pierce the center of the square more easily. On evenweave fabric, where threads are more distinct, the needle can slide between the central threads.
Actionable Tips for Success:
- Fabric Choice: Use a 14-count or higher Aida or evenweave fabric. The smaller squares provide a better foundation and make piercing the center more manageable.
- Plan Ahead: For complex patterns, consider charting your three-quarter stitches on a paper copy of your pattern first to visualize their placement and direction.
- Stitch Order: Complete nearby full cross stitches before tackling the three-quarter stitches. This provides an anchor and helps maintain fabric tension.
- Use Shorter Threads: Working with shorter lengths of floss (around 12-15 inches) gives you better control and reduces the risk of knots or uneven tension while maneuvering the needle.
4. Backstitch
If the full cross stitch is the paint, the backstitch is the fine-tipped ink pen that brings a design to life. This linear stitch is used to create sharp outlines, intricate details, and lettering that would be impossible to render with blocky "X"s alone. It traces over the completed cross stitches, adding definition and clarity to the overall image. Among the various types of cross stitches, the backstitch is the key to transforming a pixelated-looking piece into a polished work of art with crisp edges and distinct features.
When to Use the Backstitch
The backstitch is applied after all the cross-stitching is finished, serving as the final detailing step. It is essential for defining shapes that might otherwise blend together, such as outlining a flower petal against a similarly colored background. It's also the go-to stitch for adding text, signatures, and fine details like whiskers on an animal, the delicate lines of a smile in a photo portrait, or the veins on a leaf. In personalized photo kits from Cross Stitched, backstitching is crucial for accentuating facial features and giving the subject a recognizable, realistic appearance.
How to Achieve Perfect Backstitches
A clean backstitch elevates the entire project. The goal is to create a smooth, continuous line, which requires consistent stitch length and even tension. You work this stitch by bringing the needle up through the fabric one stitch length ahead of your starting point, then bringing it back down into the hole where your previous stitch ended.
Pro Tip: For curved lines, use shorter backstitches. This will create a smoother, more rounded appearance and prevent the line from looking jagged or blocky.
Actionable Tips for Success:
- Final Step: Always add backstitches as the very last step. Stitching over them with cross stitches can hide them and create a messy look.
- Thread Count: Use a single strand of floss for delicate, fine lines. For bolder outlines, your pattern may call for two strands.
- Avoid Puckering: Maintain a gentle, consistent tension. Pulling the thread too tightly will cause the fabric to pucker and distort your cross stitches.
- Needle Choice: A slightly shorter, sharper needle (like a tapestry needle in a smaller size) can provide better control for placing precise stitches. For a more in-depth guide, explore our tutorial on how to backstitch in cross stitch.
5. French Knot
The French knot is a decorative, three-dimensional stitch that adds texture and intricate detail to a cross-stitch project. Unlike the flat, grid-based stitches that form the main image, this stitch creates a raised, knotted dot on the fabric's surface. It's formed by wrapping the thread around the needle before passing it back through the fabric, making it one of the most expressive types of cross stitches for adding embellishments and focal points.
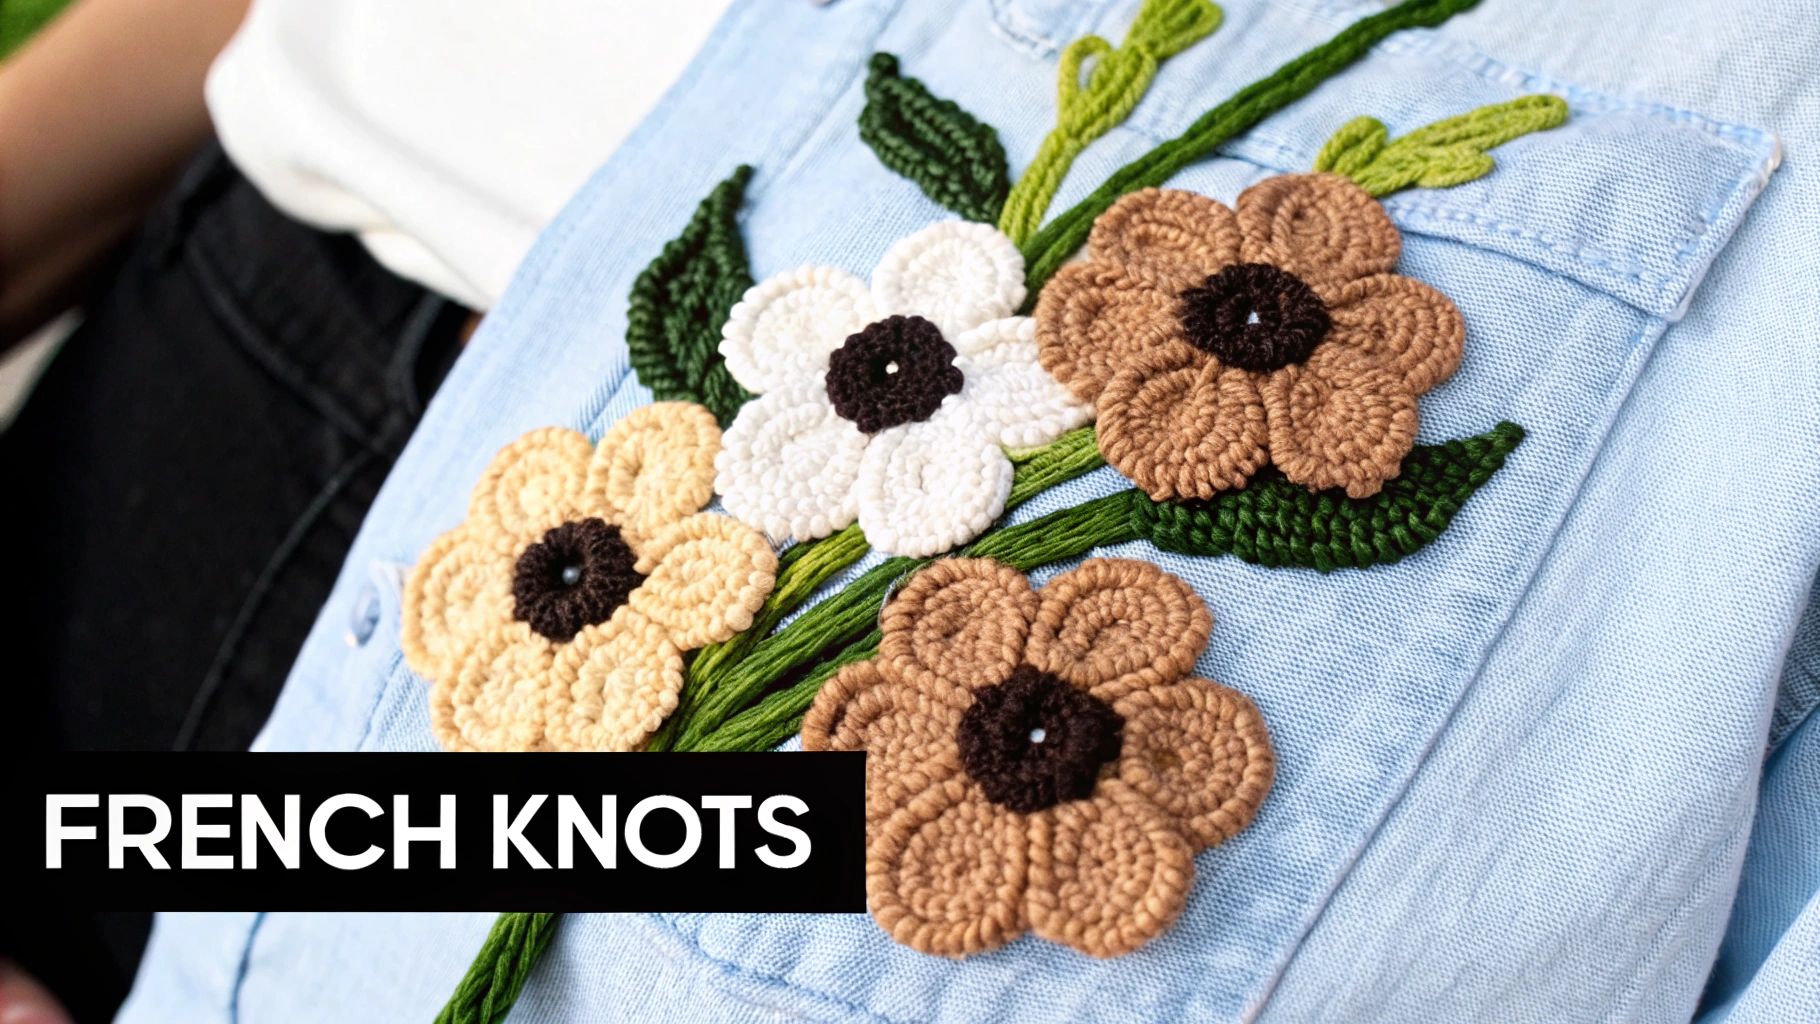
When to Use the French Knot
Use the French knot to create small, dimensional accents that draw the eye and add a touch of realism or flair. It’s perfect for details like the pupils in eyes, the stamens of flowers, or distant stars in a night sky. This stitch excels in bringing life to portraits, adding texture to animal fur, or creating delicate snowflakes in a winter scene. In custom photo kits from Cross Stitched, French knots can be used to highlight specific features, transforming a flat image into a textured keepsake.
How to Achieve Perfect French Knots
Consistency and control are vital for creating uniform French knots. The key is maintaining even tension on the thread as you wrap it around the needle and gently guide it back through the fabric. It is crucial to re-insert the needle very close to, but not in the same hole it came from, to prevent the knot from pulling through to the back. For a deeper understanding and visual guide, explore our detailed tutorial on how to do a cross-stitch French knot.
Pro Tip: The size of the knot is determined by the number of thread strands and wraps around the needle, not the tension. For a standard knot, use two strands of floss and wrap twice. For a larger knot, use more strands or wrap three times.
Actionable Tips for Success:
- Practice First: Before adding knots to your final project, practice on a scrap piece of fabric until you feel confident in creating consistent knots.
- Maintain Tension: Keep the thread taut as you wrap the needle and pull it through the fabric to form a tight, neat knot.
- Precise Placement: Push the needle back through the fabric just a fabric thread away from the original entry point to anchor the knot securely.
- Vary Your Wraps: Typically, one or two wraps are sufficient. For larger, more pronounced knots, try three wraps, but avoid more as it can become messy.
- Secure the Knot: If working on a project that will be handled often, you can secure the knot with a tiny backstitch at its base on the reverse side.
6. Long Stitch (Straight Stitch)
The long stitch, also known as the straight stitch, is a versatile technique used to create smooth, linear elements within a cross-stitch design. Unlike the textured "X"s of the full stitch, this is a single, uncrossed stitch that can span multiple fabric squares, either vertically, horizontally, or diagonally. Among the various types of cross stitches, the long stitch is essential for introducing directional flow, sleek textures, and a sense of movement that the gridded nature of cross-stitch cannot achieve on its own. It is a fundamental tool for adding artistic flair and breaking away from a purely pixelated look.
When to Use the Long Stitch
Use the long stitch to create effects that require clean lines and a sense of direction. It is perfect for rendering elements like flowing hair in a portrait, shimmering reflections on water, or the straight stalks of grass and wheat in a landscape. In minimalist or modern designs, long stitches can form the core of the pattern, creating bold geometric shapes or abstract art. For custom photo conversions, especially those featuring architectural elements or natural scenery, our designers at Cross Stitched often incorporate long stitches to capture details like wood grain, rain, or rays of light with greater accuracy and artistic expression.
How to Achieve Perfect Long Stitches
The key to a beautiful long stitch is maintaining flawless tension and placement. The stitch should lie flat against the fabric without pulling it or sagging loosely. For longer stitches spanning more than three or four squares, it's wise to anchor them with a tiny couching stitch in the middle to prevent snagging and ensure they stay in place over time.
Pro Tip: To create a natural, organic look for elements like fur or grass, vary the length and angle of your long stitches slightly. This subtle irregularity mimics the randomness found in nature far better than perfectly uniform stitches.
Actionable Tips for Success:
- Limit Stitch Length: To prevent snagging and maintain thread integrity, keep individual long stitches from spanning more than four or five fabric squares.
- Plan Your Path: Before stitching, look at the pattern and decide the most logical path for your needle to minimize long threads on the back of your work.
- Control Your Tension: Pull the floss just enough for it to lie flat and straight. Over-tightening will pucker the fabric, while loose stitches can get caught or look messy.
- Combine with Backstitch: For added definition, outline an area filled with long stitches using a backstitch. This technique works exceptionally well for creating sharp edges on elements like flower petals or blades of grass.
7. Blended & Ombré Thread Techniques
While not a stitch in itself, using blended and ombré threads is a transformative technique that elevates the sophistication of any project. This method involves combining strands from different floss colors into a single needle to create a new, custom shade. This technique is one of the more advanced types of cross stitches approaches, allowing for subtle gradients and photorealism that single colors cannot achieve. Variegated or ombré threads, which are pre-dyed with multiple colors along a single strand, offer a similar but less controlled effect, creating beautiful, flowing color transitions.
When to Use Blended & Ombré Techniques
This technique is essential for projects that demand depth, shading, and realism. It's the secret behind lifelike portraits, where subtle shifts in skin tone or hair color are crucial. Use blended threads for creating custom shades to perfectly match a photograph, like in the photo-to-pattern kits from Cross Stitched, where precise coloring brings memories to life. Ombré threads are ideal for natural elements like sunsets, ocean waves, or flickering flames, where a gentle, organic color flow is desired.
How to Achieve Perfect Blended & Ombré Effects
Success with blended threads hinges on careful planning and consistency. To create a blend, simply take one strand from your first color and one from your second (or more) and thread them through your needle together. For ombré threads, the key is letting the natural color progression of the floss do the work, ensuring your stitches flow in a way that showcases the gradient effectively. You can learn more by exploring some advanced cross-stitch techniques that build upon this foundation.
Pro Tip: When blending threads, "railroading" your stitches (using your needle to smooth the strands so they lie flat and parallel on the fabric) is crucial. This prevents one color from dominating the other and ensures a true, even blend.
Actionable Tips for Success:
- Plan Your Blends: Before starting, use a color card or thread sorter to audition color combinations. Place potential floss strands side-by-side to see how they will look when blended.
- Separate and Combine: To avoid tangles, fully separate the individual strands from each color of floss before combining them in your needle.
- Test Ombré Floss: Stitch a small sample swatch with your variegated thread to understand its color repeat pattern. This helps you anticipate how it will look in a larger section.
- Maintain Even Tension: When working with multiple strands from different colors, be mindful that they may pull at slightly different tensions. Strive for smooth, even stitches to prevent puckering.
8. Tent Stitch (Petit Point)
The tent stitch, also known as petit point, is a small, diagonal stitch that resembles a half cross stitch but is used specifically on high-count fabrics (18-count and higher). This technique is celebrated for producing incredibly dense, detailed, and almost paint-like results, making it a favorite for fine art reproductions and heirloom-quality projects. While structurally simple, its application on fine-weave canvas elevates it to one of the most sophisticated types of cross stitches, demanding precision and patience.
When to Use the Tent Stitch
The tent stitch is the perfect choice when your goal is maximum detail and a smooth, tapestry-like finish. Its tiny size allows for subtle shading and intricate details that would be lost on lower-count fabrics. It is the go-to stitch for projects like fine art portrait reproductions, miniature landscapes, and museum-quality replicas of famous artwork. For those seeking the highest level of personalization, the tent stitch is ideal for creating luxury keepsakes from high-resolution photos, a premium option for serious collectors.
How to Achieve Perfect Tent Stitches
Success with petit point is all about having the right tools and a meticulous approach. The fine fabric and tiny stitches require precision, but the stunning outcome is well worth the effort. Consistency in stitch direction is just as crucial here as with a full cross stitch to ensure a uniform and smooth texture.
Pro Tip: Working in short, focused sessions is key to avoiding eye strain and hand fatigue. The intense detail work of petit point is best approached as a marathon, not a sprint.
Actionable Tips for Success:
- Invest in Magnification: Quality lighting and a magnification tool, such as a magnifying lamp or glasses, are non-negotiable for working on high-count fabrics.
- Use the Right Needle: A very fine needle, typically a size 26 or 28, is essential to glide through the tiny fabric holes without distorting them.
- Frame Your Work: Keep the fabric taut on a scroll frame or Q-snap to maintain even tension and prevent distortion as you stitch.
- Manage Your Project: Consider breaking large or complex designs into smaller, manageable sections to maintain your focus and motivation.
Comparison of 8 Cross Stitch Techniques
| Technique | 🔄 Implementation Complexity | ⚡ Speed / Resource Requirements | 📊 Expected Outcomes | 💡 Ideal Use Cases | ⭐ Key Advantages |
|---|---|---|---|---|---|
| Full Cross Stitch (X Stitch) | 🔄 Low — straightforward, beginner-friendly | ⚡ Moderate speed; standard thread (DMC), 14-count Aida; minimal tools | 📊 ⭐⭐⭐⭐ Full coverage, sharp color definition and photorealistic potential | 💡 Beginners, large photo conversions, gift-quality keepsakes | ⭐ Consistent results, easy to learn, smooth color transitions |
| Half Cross Stitch (Single Diagonal) | 🔄 Medium — requires consistent stitch direction | ⚡ Faster than full; uses ~50% thread, economical for large areas | 📊 ⭐⭐⭐ Lighter coverage, subtle blended/shaded effect | 💡 Backgrounds, shading, economical large projects, silk work | ⭐ Saves thread, faster, excellent for subtle gradients |
| Three-Quarter Stitch (3/4 Stitch) | 🔄 High — precise counting and partial stitches | ⚡ Slower; more time and attention; may require splitting threads | 📊 ⭐⭐⭐⭐ Smooth angled edges, precise curves, reduced pixelation | 💡 High-resolution portraits, curved outlines, fine detail work | ⭐ Enables smooth curves, pixel-perfect detail, professional finish |
| Backstitch | 🔄 Low–Medium — simple technique but needs steady tension | ⚡ Fast to execute; minimal thread; added after main stitching | 📊 ⭐⭐⭐ Defines outlines, enhances clarity and facial/detail definition | 💡 Outlines, text/lettering, facial features, finishing touches | ⭐ High visual impact with little thread; refines and frames designs |
| French Knot | 🔄 Medium–High — requires practice for consistency | ⚡ Slow for many knots; uses extra thread; careful tension needed | 📊 ⭐⭐⭐ Adds 3D texture and small focal details | 💡 Eyes, flower centers, small dimensional accents in portraits | ⭐ Creates depth and realism; small but high-impact embellishment |
| Long Stitch (Straight Stitch) | 🔄 Medium — simple but needs tension control | ⚡ Fast; economical on thread but prone to snagging if long | 📊 ⭐⭐⭐ Directional texture and flow, minimalist coverage | 💡 Water reflections, hair texture, grasses, minimalist designs | ⭐ Adds movement and texture quickly; economical and expressive |
| Blended & Ombré Thread Techniques | 🔄 High — blending requires planning and thread management | ⚡ Variable: manual blending is slow; ombré threads are faster; needs many colors | 📊 ⭐⭐⭐⭐⭐ Extremely smooth gradients and tonal transitions | 💡 Portrait skin tones, skies, sunsets, advanced shading | ⭐ Reduces pixelation, enables photorealistic gradients and rich tonal depth |
| Tent Stitch (Petit Point) | 🔄 Very High — fine-count fabric, magnification, great patience | ⚡ Very slow; requires high-count fabric (18+), fine needles, strong lighting | 📊 ⭐⭐⭐⭐⭐ Ultra-high resolution; painting-like, museum-quality detail | 💡 Fine art reproductions, luxury keepsakes, collector pieces | ⭐ Exceptional clarity and resolution; highest fidelity for detail |
From Stitches to Stories: Begin Your Masterpiece Today
You have now journeyed through the fundamental building blocks of needle art, exploring a rich vocabulary of techniques that transform a simple grid into a canvas for your creativity. We've moved from the foundational Full Cross Stitch, the very heartbeat of this craft, to the subtle shading of Half and Three-Quarter Stitches that give your work depth and nuance. You’ve seen how the clean, crisp lines of the Backstitch can define a subject, and how the dimensional pop of a French Knot can add texture and intricate detail where you least expect it. Each of these types of cross stitches is more than just a method; it's a tool for artistic expression.
The true artistry doesn't lie in mastering a single stitch, but in understanding how they work together in harmony. Imagine a detailed portrait: the smooth skin tones are rendered with classic Full and Tent Stitches, the twinkle in an eye is a single, perfectly placed French Knot, and the delicate strands of hair are defined with the flowing precision of the Long Stitch. Blended threads create a soft, photorealistic transition in a sunset, while a strategically placed Three-Quarter Stitch softens the edge of a flower petal. This is where your knowledge becomes power. You are no longer just following a pattern; you are interpreting it, making conscious choices about how to best represent your vision.
Weaving Your Knowledge into a Cohesive Whole
The path from novice to confident stitcher is paved with practice and a willingness to experiment. Don't view this list of stitches as a rigid set of rules, but rather as a palette of options.
- For Beginners: Your immediate goal should be perfecting the Full Cross Stitch. Focus on creating even tension and ensuring all your top stitches lie in the same direction. Once you're comfortable, introduce the Backstitch to a simple project to see how it instantly adds clarity and a "finished" look.
- For Intermediate Stitchers: This is your time to play with fractional stitches. Pick a pattern that includes Three-Quarter and Quarter Stitches to practice creating smoother curves and more detailed elements. Experiment with Blended Thread techniques to see how you can create your own custom shades and gradients.
- For Advanced Crafters: Challenge yourself with high-detail projects that demand a mastery of multiple stitch types. Photorealistic patterns, intricate landscapes, or complex portraits will require you to combine everything you've learned. This is also the perfect stage to explore the subtle differences between the Continental and Basketweave Tent Stitches on finer count fabrics like evenweave or linen.
Key Takeaway: Your needlework is a story told one stitch at a time. The variety of stitches you use determines the richness and complexity of that narrative. Each technique adds a different tone, texture, and emotion to the final piece, allowing you to create heirlooms that are not just visually beautiful, but also deeply personal.
Mastering these types of cross stitches is about unlocking your full creative potential. It elevates your work from a simple hobby to a sophisticated art form. It's the difference between a project that looks good and one that feels alive, capturing the essence of its subject with stunning detail and realism. Whether you are recreating a cherished photograph, stitching a decorative piece for your home, or crafting a one-of-a-kind gift, your command of these techniques will ensure your final piece is a masterpiece. The journey may begin with a single X, but it leads to a world of limitless artistic possibilities. Now is the time to pick up your needle, choose your threads, and begin stitching your own story.
Ready to apply your new skills to a truly personal project? Cross Stitched makes it easy to transform any photo into a detailed, custom cross-stitch kit, complete with a pattern that intelligently incorporates various stitch types to ensure a photorealistic result. Visit Cross Stitched to upload your image and start creating a beautiful, handcrafted heirloom today.


