
Stepping into the world of embroidery floss can feel a bit like an artist standing before a wall of paint. The thread you choose isn't just about color; it dictates the texture, sheen, and entire personality of your finished cross-stitch piece.
Choosing the Right Embroidery Floss for Cross Stitch
When you get down to it, embroidery floss is made from a few key materials. The big three you'll encounter are cotton, silk, and a whole world of specialty threads like metallics and variegated floss.
- Cotton Floss: This is your workhorse. It offers smooth, even coverage and a massive range of brilliant colors, making it the standard choice for most patterns.
- Silk Floss: Think of silk as the luxury option. It brings an unmatched, luminous sheen and a soft feel, perfect for those heirloom-quality projects.
- Variegated Floss: This thread is a bit magical, changing its hue along a single strand. It’s a fantastic way to create subtle, painterly gradients with very little effort.
- Metallic Floss: When you need a pop of sparkle or a brilliant highlight, this is what you’ll reach for.
If you think of your cross-stitch project as a painting, cotton floss is the reliable, versatile acrylic paint, while silk is the rich, glowing oil paint.
Why Cotton Floss Is the Go-To
There’s a good reason why the vast majority of cross-stitch patterns call for standard 6-strand cotton floss. It’s designed to be easily separated, so you can choose the exact thickness you need for your fabric. Plus, it holds dye incredibly well, giving you consistent, predictable results.
Brands like DMC and Anchor have built their reputations on quality cotton, and you can learn more about using cotton embroidery thread in cross stitch to understand why it’s a professional favorite.
When to Reach for Silk Floss
Silk is for those special projects that deserve a little something extra. It catches the light in a way that cotton just can't, creating a soft, luminous finish. Consider using it for wedding samplers, detailed portraits, or any piece you want to have a truly luxurious feel.
- Pros: Incredible shine, feels wonderfully smooth to stitch with.
- Cons: It can be slippery and a bit more challenging to handle, not to mention more expensive.
Exploring the Fun of Specialty Threads
You don't have to switch brands to add some flair to your work. Variegated and metallic threads are fantastic tools to have in your stash. A variegated floss can create the effect of a soft watercolor wash, blending colors for you. Metallic threads are best used as accents—a little goes a long way to add sparkle without making your fabric too stiff.
Your floss choice sets the emotional tone of your stitching, much like a color palette in painting.
Matching Your Floss to Your Project
Here's a quick cheat sheet for picking the right thread:
- Large Samplers or Full-Coverage Pieces: Stick with cotton. It’s cost-effective and provides the steady, even coverage you need.
- Heirloom Gifts: Elevate them with silk floss for that gorgeous, radiant sheen.
- Small Motifs (Skies, Flowers, Water): Try variegated floss to get beautiful, smooth color shifts.
- Accents and Details: A touch of metallic thread can highlight stars, crowns, or magical elements perfectly.
Getting Your Floss Ready to Go
A little prep work saves a lot of headaches later.
- Before you start, sort your skeins by number and check the dye lots to ensure they match.
- Cut your floss into manageable lengths, about 18 inches (45 cm), to prevent annoying knots and tangles.
- Winding your floss onto bobbins or floss drops will keep your workspace tidy and your threads organized.
Pro Tips for Floss Care
To keep your thread in top condition, store your skeins in a cool, dry place away from direct sunlight, which can cause fading over time. Some stitchers also like to "condition" new floss by gently running it across a block of beeswax or a silicone thread conditioner to make it glide more smoothly.
Troubleshooting Common Floss Issues
Even the best of us run into thread troubles. Here’s how to handle them:
- Fraying: If the end of your thread is splitting, try trimming it or dipping the very tip in a tiny bit of water to hold the fibers together.
- Tangling: A thread conditioner can work wonders. If you're getting a lot of knots, your thread length is likely too long.
- Color Mismatch: This is the stitcher's nightmare! Always double-check your skeins side-by-side in natural light before you begin a project, especially if you bought them at different times.
With a better understanding of your materials, choosing the right floss will start to feel like second nature. You'll be able to confidently pick the perfect thread to turn every project into a little work of art. Happy stitching
Getting to Know Your Embroidery Floss
Choosing the right floss can take your cross-stitch project from nice to absolutely stunning. It’s not just about the color; every type of thread feels and looks different coming off the needle, which completely changes the texture, shine, and even the sturdiness of your finished piece.
Getting a feel for the different options out there gives you the creative freedom to bring your vision to life exactly as you imagined it. Let's break down the most common types of floss and get to know their unique personalities.
- Cotton Floss (the trusty 6-strand standard)
- Silk Floss (for a luminous, high-end finish)
- Metallic Floss (for that pop of sparkle)
- Variegated Floss (creates beautiful, gradual color shifts)
The Workhorse: Common Cotton Floss
For most of us who cross-stitch, standard cotton floss is our bread and butter. You'll see brands like DMC and Anchor everywhere, and for good reason—they offer dependable quality and a truly staggering range of colors.
It's made of six strands that are twisted together but separate easily, which is perfect. This lets you decide exactly how thick your stitches should be, whether you're working on a 14-count Aida or a much finer linen. From first-timers to seasoned pros, cotton is the go-to for its consistency and no-fuss performance.
Cotton floss gives you a reliable canvas of color, making every stitch predictable and beautifully even.
- You can customize the strand count for perfect coverage on any fabric.
- It's affordable, which is a huge plus for those large, thread-hungry projects.
- The colors are colorfast, meaning your hard work won't bleed in the wash.
When you're tackling a big sampler with full coverage, using two or three strands of cotton usually gives you a nice, solid look without making the stitches look bulky. And because it's so forgiving, if you make a mistake, it’s not a nightmare to unpick and restitch.
Stepping Up Your Game with Specialty Threads
When your project needs a little something extra—a touch of luxury or a bit of flair—specialty threads are your best friend. A few stitches of silk or metallic floss can elevate a simple design into a real treasure.
Think of silk floss as a soft whisper of light across your fabric; it has a glow that cotton just can't replicate. Metallic threads, on the other hand, are like tiny flecks of glitter catching the light, perfect for adding just a hint of sparkle.
- Silk Floss: Unbeatable shine and a super smooth feel as you stitch.
- Metallic Floss: High-impact sparkle, best used for accents and highlights.
- Variegated Floss: A single strand flows through multiple shades, creating seamless transitions.
Mixing these specialty threads with your standard cotton can create some amazing, almost painterly effects and really make certain parts of your design pop. Just a heads-up: these threads can be a bit prima-donna-ish. They often require a slower, more patient hand to keep them from tangling or fraying.
A Quick Look at Strand Structure
Most of the embroidery floss you'll buy is made of six individual strands, or plies, that are gently twisted together to form one thicker thread. The magic is that they are designed to be separated easily.
This structure is what lets you fine-tune your work. You can pull out just one, two, or three strands to get the perfect thickness for your specific fabric count, ensuring your stitches look just right. Knowing this helps you manage your thread better, avoid knots, and keep your stitches looking smooth and uniform.
Common Floss Mistakes (and How to Avoid Them)
We’ve all been there. Every stitcher, no matter how experienced, runs into a floss-related headache now and then. Catching these common slip-ups early can save you a ton of frustration.
- Using a thread that's way too long. It seems efficient, but it's a one-way ticket to Tangle City.
- Ignoring dye lots. If you run out of a color mid-project, a new skein might be a slightly different shade.
- Mixing different brands in the same area. A DMC red and an Anchor red might look close, but they're often just different enough to be noticeable.
Practical Tips for Picking Your Floss
Choosing the right floss is about more than just the material or color. You've got to think about the fabric you're using, the final look you're aiming for, and honestly, how the thread feels to work with.
- Match your strand count to your fabric count. Two strands on 14-count Aida is standard, but you might want three for better coverage or one for a delicate look on 28-count linen.
- Stitch a tiny test swatch. It's the best way to see how a thread's shine and texture will actually look on your fabric.
- Buy enough of one dye lot. For large areas of a single color, try to buy all the skeins you'll need at once.
- Label everything! Good organization is key, especially when your collection starts to grow.
How to Organize Your Floss Stash
A tidy floss collection is a happy floss collection. Keeping your threads organized not only looks nice but also makes starting a new project so much quicker and more enjoyable.
- Bobbins: Winding floss onto plastic or cardboard bobbins and storing them in clear cases is a classic for a reason.
- Floss Drops: These are great for keeping all the colors for a single project together on a ring.
- Zip Bags: Simple, cheap, and effective, especially for storing full skeins or keeping different dye lots separated.
No matter what system you choose, make sure you label each bobbin or drop with the brand and color number. You'll thank yourself later.
Comparing Common Embroidery Floss Types
To make things a bit clearer, here’s a quick-glance table comparing the most popular floss types. Use this as a guide when you're trying to decide what's best for your next cross-stitch masterpiece.
| Floss Type | Material | Key Characteristic | Best For | Things to Consider |
|---|---|---|---|---|
| Cotton | 100% Cotton | Smooth, even coverage; easily separable strands | Beginners, full-coverage pieces, pretty much anything! | Has a matte, low-sheen finish. |
| Silk | Pure Silk | Incredible high-gloss luster and a soft feel | Heirloom projects, skin tones in portraits, fine details | It's more expensive and can be slippery to work with. |
| Metallic | Polyester Core, Metal Wrap | Bright, eye-catching sparkle | Holiday designs, magical elements, decorative accents | Can be stiff, prone to fraying, and requires patience. |
| Variegated | Cotton Blend | Gradual color changes within a single strand | Landscapes, water, fur, or creating organic texture | The color changes are random, so they might not land where you want. |
Ultimately, the best choice comes down to your pattern's needs and your own personal preference. Don't be afraid to experiment!
What's Happening in the Floss Market?
Believe it or not, the world of embroidery floss is a big business that helps fuel all our creative projects. With the resurgence of crafting and DIY culture, the market has seen some exciting growth.
The global embroidery floss market was valued at $1.2 billion and is projected to hit $1.85 billion by 2033, growing at a rate of 4.9% per year. You can learn more about these embroidery floss market insights.
For us stitchers, this growth is great news. It means we're seeing more colors, more innovative new fibers, and better prices becoming available.
With this foundation, you're ready to tackle the sometimes-confusing world of floss numbers and color systems, which we'll dive into next.
How to Understand Floss Numbers and Color Systems
When you first look at a cross-stitch pattern, all those numbers and symbols can feel like you’re trying to crack a secret code. In a way, you are! Those floss numbers are the universal language that connects a designer's vision to your needle, ensuring that when a pattern calls for DMC 310, every stitcher in the world knows that means a specific, solid black.
Think of it as a recipe. Each major brand, like DMC or Anchor, gives every single color it makes a unique number. This system is what allows a pattern to call for DMC 742 and lets you walk into a craft store and find that exact shade of tangerine. Without these numbers, we'd all be guessing, and our projects would never look quite like the picture on the cover.
Cracking the Code on the Skein
Take a look at a new skein of floss. That little paper band wrapped around it is your Rosetta Stone. It will tell you the brand (DMC, for example), the material (100% Cotton), and the most important piece of information: the color number. This number is your best friend when you're shopping for a project or trying to organize your stash.
This is the number you'll see on your pattern’s color key or legend, usually right next to a symbol. You just play a matching game: find the symbol on the chart, look it up in the key to get the color number, and grab that skein. It’s a beautifully simple system that guarantees your finished piece will look just how the designer imagined it.
Why Dye Lots Matter for Large Projects
You might also spot another number on that paper band: the "dye lot." This little number identifies a specific batch of floss that was all dyed at the same time. Now, for the most part, big brands like DMC are incredibly consistent, and you'll probably never notice a difference from one batch to the next on smaller projects.
But... if you're tackling a massive, full-coverage piece with huge areas of a single color—think a big blue sky or a solid background—a tiny shift between dye lots can suddenly become noticeable. It can look like a faint line or patch that's just a little "off."
A dye lot is like a fingerprint for a batch of color. To guarantee perfect color consistency across a large project, it's always best to purchase all the skeins you'll need for a specific color from the same dye lot at the same time.
Navigating Between Brands with Conversion Charts
So, what do you do when a pattern calls for an Anchor thread but your local shop only carries DMC? This is where conversion charts save the day. They're an absolutely essential tool for every stitcher. These charts are basically translators, giving you the closest possible match from another brand. For instance, a chart will tell you that Anchor 1021 is a very close cousin to DMC 742.
While these charts are amazing, keep in mind they provide the closest match, which isn't always a perfect one. Different companies use different dyes and manufacturing processes, which can create subtle differences in the thread's sheen or exact hue. If you need to substitute, a good rule of thumb is to convert all the colors in the project to one brand to keep the look consistent. For a detailed guide, you can find a comprehensive embroidery thread color conversion chart to help you make confident substitutions.
Here are a few tips I've learned for using conversion charts:
- Trust reliable sources: Stick to charts from well-known needlework sites or shops. They've done the hard work for you.
- Use your eyes: If you can, hold the two skeins side-by-side in natural light. Sometimes what looks good on a screen is slightly different in person.
- Stay consistent: Try not to mix and match brands within the same color family (e.g., all the blues or all the greens) in one project. This helps avoid any jarring shifts in tone.
Getting comfortable with these numbering systems is more than just organizing your craft box. It's about gaining the confidence to tackle any pattern you want, knowing how to substitute colors when you're in a pinch, and making sure your final project is a beautiful, cohesive piece of art.
Preparing Your Floss for Flawless Stitching
The real secret to smooth, tangle-free stitching starts long before you thread your needle. It's all in the prep work. This is the quiet technique that elevates good stitching to great stitching, turning a potentially frustrating process into something smooth and meditative. Think of it as your essential pre-flight check before you start creating.
Just like a chef meticulously preps their ingredients before cooking—a practice known as mise en place—a good stitcher should do the same with their floss. This small investment of time upfront pays off big time. It helps you avoid those dreaded knots, tangles, and uneven stitches that can ruin a project. It’s all about setting yourself up for success.
Finding the Perfect Length
First things first: cut your floss to a manageable length. It might seem efficient to work with a super long piece of thread, but that's actually the number one cause of knots and fraying. The sweet spot is what many of us call the "stitcher's yard," which is usually around 18 to 20 inches long—roughly the distance from your fingertips to your elbow.
This length is long enough to let you stitch for a good while without re-threading constantly, but short enough to keep the thread from twisting back on itself as you pull it through the fabric. If you're working with metallic or specialty threads, which are notorious for fraying, you'll want to go even shorter, maybe 12 to 15 inches.
The Art of Separating and Stripping Floss
Your standard skein of cotton floss is made of six individual strands twisted together. Your pattern will almost always tell you how many strands to use—most commonly two for projects on 14-count Aida. The key is to separate them one by one. Don't just try to peel two off at once.
Here’s how to separate your strands cleanly:
- Hold the cut piece of floss firmly with one hand.
- With your other hand, gently pinch a single strand and pull it straight up and out.
- The remaining strands will bunch up a bit, but they won't knot. Just smooth them out with your fingers and repeat for the next strand.
Once you have the strands you need, here's a pro-level tip: stripping. This just means letting each strand hang freely to untwist and relax on its own before you group them back together to thread your needle.
Stripping your floss allows the individual strands to lie flat next to each other as you stitch, rather than twisting around one another. This simple trick results in fuller, smoother, and more even stitches with much better coverage.
Starting Clean with the Loop Method
How you begin your first stitch can make the back of your work look almost as neat as the front. The loop start is a fantastic, knot-free technique that gives you a super secure and clean beginning. The only catch is that it only works when you're stitching with an even number of strands (like two or four).
Here's how you do it:
- Take a single strand of floss that's double the length you'd normally use (so, about 36 inches).
- Fold it perfectly in half.
- Thread the two cut ends through the eye of your needle, which will leave a loop at the other end.
- Bring your needle up from the back of the fabric to make the first leg of your cross stitch, but don't pull the floss all the way through.
- Flip your work over, pass your needle through the loop on the back, and pull gently. It will lock the thread in place.
This method completely eliminates the need for a knot, which means less bulk on the back of your project and no unsightly bumps showing through to the front.
Mastering these simple preparation steps is becoming more important as the needlecraft hobby continues to boom. The market for needlecraft patterns is projected to more than double, from $1.2 billion to an estimated $2.4 billion by 2032, thanks to online communities and the well-known therapeutic benefits of crafting. This incredible growth means we can expect even more innovation and variety in embroidery floss for cross stitch. You can learn more about the growth of the needlecraft market on dataintelo.com.
This infographic breaks down the essential floss information, from its product code to why you should care about dye lots.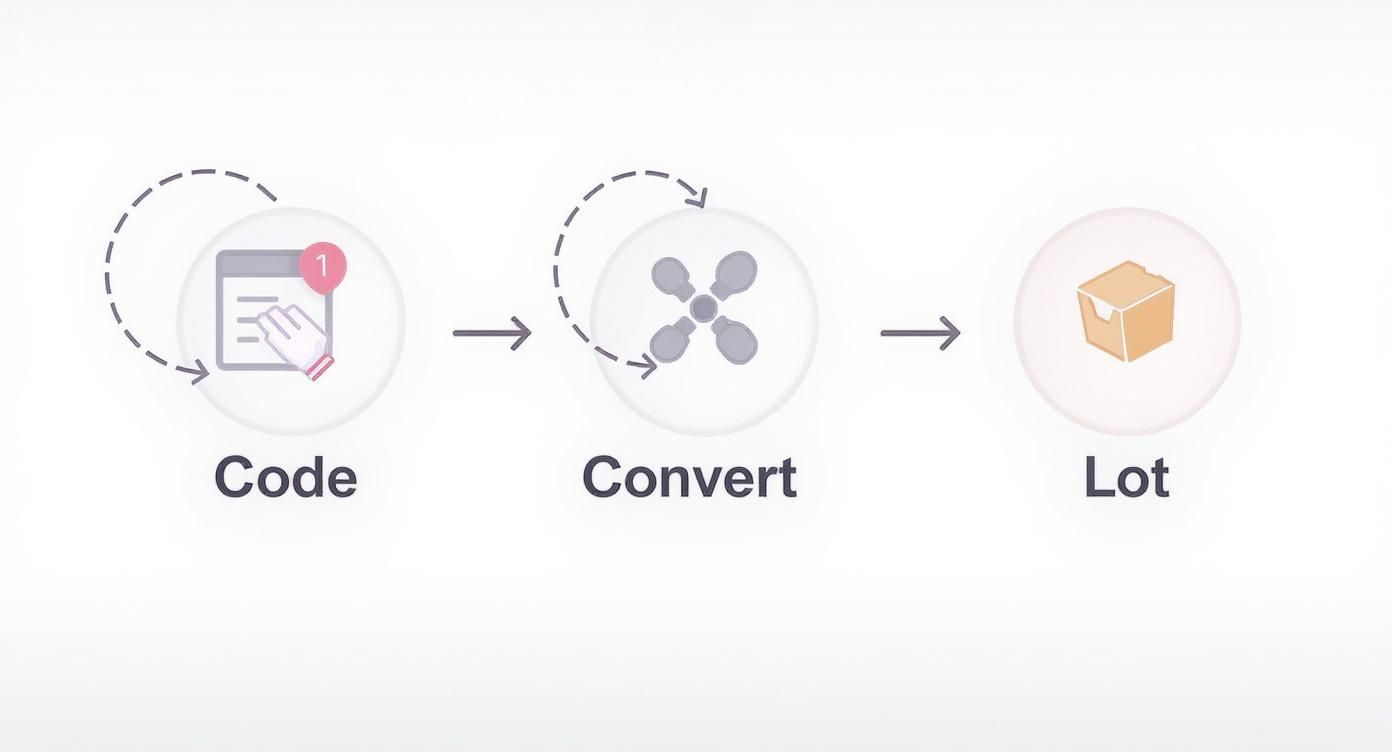
As you can see, it all starts with identifying the right color code. From there, you might need to convert it to a different brand's number, and finally, always check the dye lot to ensure all your skeins match perfectly for larger projects.
Expert Tips for Storing and Organizing Your Floss
If you've been cross-stitching for a while, you know the truth: your floss collection will grow. What starts as a few colors for a kit soon explodes into a vibrant, chaotic rainbow of skeins. Getting that collection organized isn't just about making it look pretty; it's about making your stitching time more relaxing and efficient. A good system protects your investment and saves you a ton of time.
When your floss is tidy, you can grab the exact shade you need in a heartbeat instead of digging through a tangled mess. Proper storage also shields your threads from their mortal enemies—sunlight, dust, and moisture—keeping every strand as vibrant as the day you bought it. Let’s walk through a few of the best ways to bring some beautiful order to your colorful chaos.

Bobbins and Storage Boxes: The Classic Method
Winding your floss onto bobbins is probably the most popular organization system out there, and for good reason. It’s simple: you just wrap each skein around a small plastic or cardboard bobbin, stick a label on it with the color number, and file it away in a special storage box.
This system is a dream come true if you have a massive collection and love seeing all your colors laid out before you. The clear plastic boxes let you spot shades instantly, and the neat, uniform rows of bobbins are incredibly satisfying to look at.
Think of the bobbin method as turning your floss stash into a functional library of color. Each bobbin is like the spine of a book—clearly labeled and easy to pull off the shelf the moment inspiration strikes.
The one downside? It takes a good chunk of time to wind all that floss upfront. Some stitchers also feel that winding can leave little kinks in the thread, but in my experience, these usually straighten out once you cut a length to stitch with.
Floss Drops and Rings: Project-Based Organization
A fantastic alternative that's gaining a lot of fans is using floss drops. These are little tags with two holes—one for a binder ring and a larger one where you loop your floss. You label the drop with the color number and your project's symbol, pop them all on a ring, and you've got a perfect, portable palette for your current work-in-progress.
This method is brilliant for anyone who focuses on one or two projects at a time. It also keeps the floss in its original, straight form, so you don't have to worry about the kinks that can sometimes come from tight bobbin winding.
- Pros: It’s incredibly fast to set up for a new project, keeps the floss smooth, and is super portable.
- Cons: It’s not great for seeing your entire collection at once, and the rings can get a little bulky.
If you're curious about even more storage options, checking out a detailed guide on choosing a cross stitch thread organiser can give you more ideas tailored to how you stitch.
Protecting Your Embroidery Floss Investment
No matter which system you land on, protecting your floss from the elements is non-negotiable. The two biggest culprits that can ruin your beautiful threads are sunlight and dust.
Sunlight: Direct UV light is a notorious color-killer, quickly fading the gorgeous dyes in both cotton and silk. Always store your floss in a dark place—a closet, a drawer, or inside a solid-colored container works perfectly. Please don't leave your project bag sitting in a sunbeam!
Dust and Debris: Over time, dust can work its way into the fibers of your floss, making it look dull and drab. Your best line of defense is an enclosed system, like plastic boxes with lids or zippered project bags. This keeps out dust, pet hair, and whatever else is floating around, ensuring every stitch you make is with perfectly clean, brilliant thread.
Answering Your Biggest Cross Stitch Floss Questions
Every stitcher, whether you've been at it for years or are just threading your first needle, eventually hits a snag. Questions pop up. From wrestling with fussy specialty threads to figuring out a smart color swap, getting a straight answer can be the difference between a project you love and one that gets tossed in a drawer.
This is your go-to guide for those tricky "what if" moments. Think of it as having an experienced stitcher sitting right next to you, ready to help you navigate any floss-related challenge with confidence.
How Many Strands of Floss Should I Use?
This is the big one, the question I hear more than any other. The truth is, there's no single right answer—it all comes down to your fabric. The "count" of your fabric, which is just a fancy way of saying how many little squares fit into one inch, is your guide. It tells you how many strands you'll need for stitches that look full and lush, not thin or overcrowded.
For Aida cloth, which is what most of us use, here's a reliable cheat sheet for standard 6-strand cotton floss:
- 11-Count Aida: Go with three strands. It'll give you that really plush, full coverage you want on a more open weave.
- 14-Count Aida: This is the sweet spot for many stitchers. Two strands is the gold standard here, providing perfect coverage that’s neat and tidy.
- 16-Count Aida: Two strands still works beautifully. Your stitches will look just a little bit finer and more defined.
- 18-Count Aida: You've got options. Two strands gives you solid, traditional coverage. But if you want a more delicate, almost vintage look, dropping down to one strand can be absolutely beautiful, especially for highly detailed patterns.
When in doubt, always check your pattern first. The designer might have a specific look in mind. And if you're still on the fence? Just stitch a tiny test patch in a corner. It's a few minutes of work that can save you a ton of frustration later.
Can I Substitute a Different Brand of Floss?
Yes, you sure can! But you have to be a little bit of a detective about it. While the big players like DMC and Anchor have very similar color palettes, they're almost never a perfect one-to-one match. A DMC red might be a touch warmer than its closest Anchor cousin, for instance.
The key to a successful swap is a good floss conversion chart. These charts are a stitcher's best friend, listing the closest color number equivalents between brands. My best advice? Either commit to one brand for the whole project from the get-go or convert all your colors before you make a single stitch. Mixing and matching brands within the same color area can sometimes create subtle (or not-so-subtle) shifts in your finished piece.
What Should I Do If I Run Out of a Dye Lot?
Running out of a specific dye lot, especially when you're filling in a huge block of sky or a background, can feel like a stitching emergency. We've all been there. Because of the nature of the dyeing process, a new skein might be just a shade off from your old one.
Don't panic! The trick is to "blend" the new skein into the old one. For a few rows, try stitching with one strand from the old dye lot and one strand from the new dye lot together in your needle. This simple technique creates a gentle, gradual transition that the eye won't even notice.
Of course, the best way to deal with this problem is to avoid it entirely. Whenever you're buying floss for a large, solid-colored area, try to buy all you'll need at once. Take a second to check the little paper bands on the skeins and make sure the dye lot numbers match up.
This kind of attention to detail is part of what’s driving the hobby's resurgence. The global cross-stitch market, which was valued at USD 0.15 billion, is projected to hit USD 0.22 billion by 2033. This boom is powered by a new wave of crafters looking for personalized, hands-on projects, which often require that crucial color consistency. You can learn more about the cross-stitch market's steady growth on businessresearchinsights.com.
How Can I Make Metallic Threads Easier to Use?
Ah, metallic threads. They add that gorgeous, eye-catching sparkle, but let's be honest—they can be a real pain to work with. They love to tangle, fray, and generally misbehave. But with a few tricks up your sleeve, you can tame them.
- Work with Shorter Lengths: This is non-negotiable. Cut your metallic thread way shorter than you would cotton, somewhere around 12 inches is perfect. A shorter thread means less friction and wear as it passes through the fabric.
- Use a Thread Conditioner: A product like Thread Magic or even just a little beeswax is a game-changer. A quick swipe conditions the thread, helping it glide smoothly through the fabric instead of fighting you every step of the way.
- Blend It with Cotton: For an easier experience and a more subtle shimmer, try using one strand of metallic along with one strand of a similar-colored cotton floss. The cotton acts as a stabilizer, making the metallic thread infinitely more cooperative.
How Do I Wash My Finished Project Safely?
That final wash is what gives your project its professional, polished look, getting rid of any hoop marks, oils, and dust. The good news is that high-quality cotton floss from brands like DMC is colorfast, so you don't have to worry about the colors bleeding.
Just follow these simple steps to give your piece a gentle bath:
- Fill a clean basin with cool or lukewarm water and add a couple of drops of a mild, clear soap (a gentle dish soap works great).
- Let your project soak for a bit, swishing it around gently. Never wring or scrub it!
- Rinse it completely under cool, running water until the water runs clear and all the soap is gone.
- Place your piece flat on a clean, fluffy towel. Roll it up like a burrito and press gently to soak up the extra water.
- Unroll it and lay it flat on a dry towel to air dry the rest of the way.
One quick note: if you used any special hand-dyed flosses, it's always a smart idea to test a little scrap for color bleeding before you submerge your entire masterpiece.
Ready to turn your favorite memories into timeless art? At Cross Stitched, we make it easy with custom photo-to-pattern kits, complete with high-quality DMC threads and everything you need to start stitching. Create your personalized masterpiece today at https://cross-stitched.com.


