
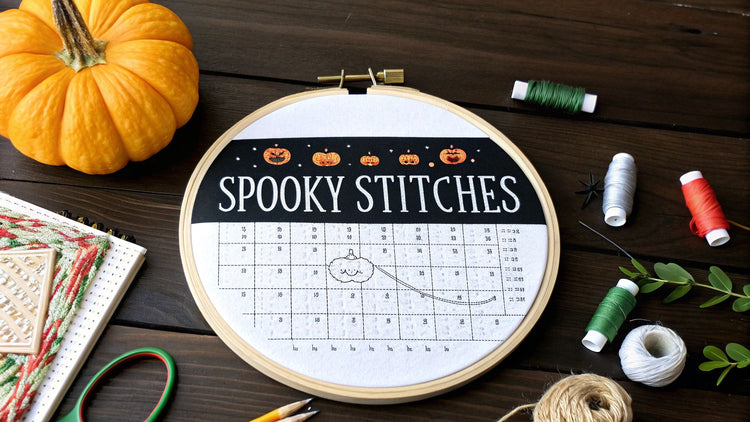
Imagine making your very own Halloween decorations, one stitch at a time. That's the magic we're about to dive into. This guide is your key to using Halloween cross stitch charts as a creative blueprint, helping you turn simple thread and fabric into everything from cute little pumpkins to stunning gothic masterpieces.
Your Blueprint for Spooky Stitches
This is more than just a craft—it’s a chance to put a personal stamp on your spooky season. Whether you're a total beginner wondering where to even begin or a seasoned stitcher looking for new ideas, we'll walk you through the whole process. You’ll learn how to pick the perfect pattern, get your supplies in order, nail the basic techniques, and show off your finished work with pride.
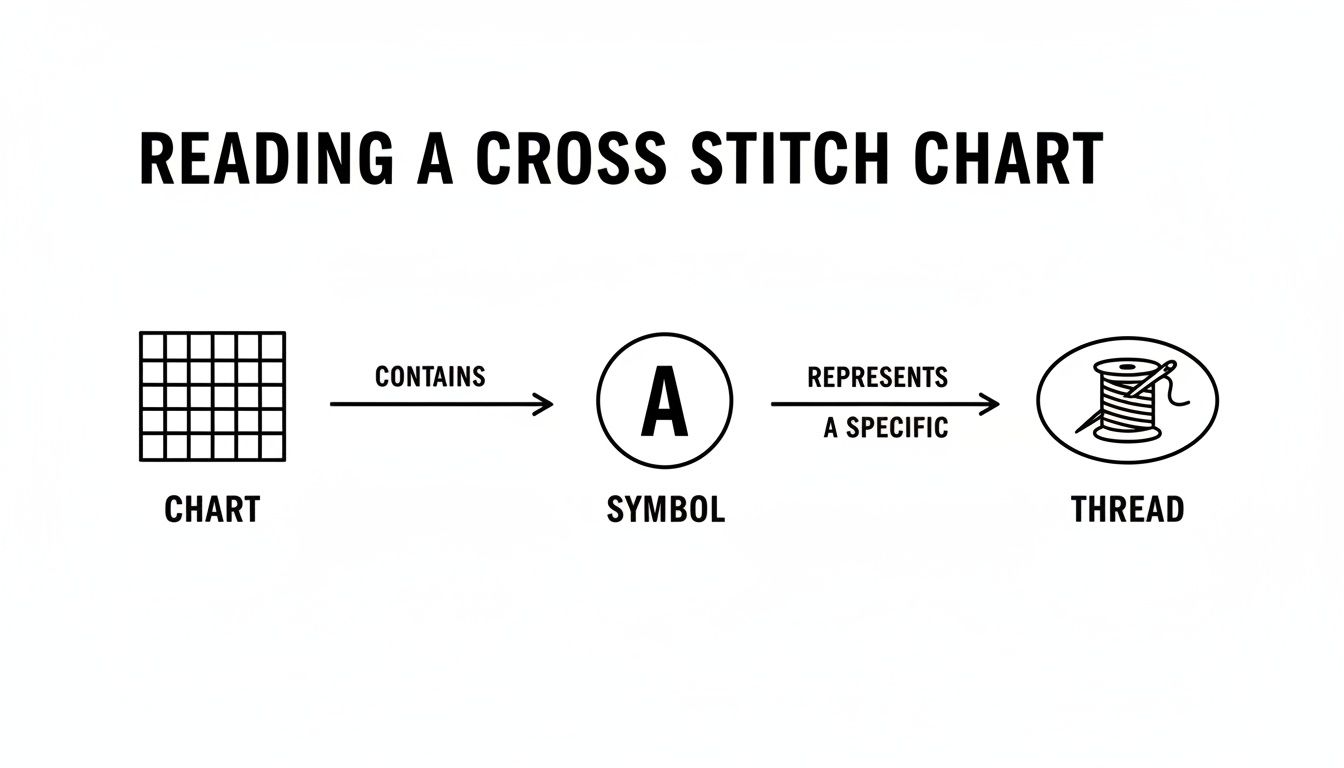
Think of cross stitching as painting by number, only you're using a needle and thread. A Halloween cross stitch chart is simply a gridded pattern that shows you precisely where each stitch goes and which color to use. Every square on the chart represents one "X" on your fabric. It's your map to a beautiful finish.
Why Halloween Cross Stitch Is So Popular
There's something special about Halloween themes in needlework. This craft lets you create decorations that are uniquely yours and can be treasured for years, far beyond what you can find in a store. Plus, the act of stitching itself is wonderfully mindful and relaxing—it’s the perfect way to spend a cozy autumn evening.
And it's not just a feeling; the numbers back it up. Spooky stitching is a huge part of the crafting world. Halloween-themed charts make up an estimated 10–20% of all seasonal pattern offerings on big online marketplaces. In a global market worth around USD 0.15 billion, holiday designs—with Halloween leading the charge—consistently account for about 15% of all new patterns each year. You can dive deeper into the cross-stitch market trends to see just how massive this creative hobby has become.
Cross stitch is a journey of patience and precision. Each tiny 'X' contributes to a larger, beautiful image, turning a blank piece of fabric into a work of art that tells a story—or in this case, a spooky tale.
What You Will Learn in This Guide
Consider this guide your go-to stitching companion, whether you're tackling your first ghost or designing an elaborate haunted house. We'll cover all the essentials you need to bring your Halloween vision to life.
Here’s a quick look at what’s coming up:
- Decoding the Chart: We'll demystify how to read any cross stitch chart, from figuring out the symbols to finding the best place to start.
- Essential Supplies: You'll learn all about the different fabrics, threads, and needles and how to pick the right tools for your specific project.
- Finding Your Perfect Pattern: Discover tips for choosing a Halloween design that perfectly suits your skill level and creative taste.
- Mastering Key Techniques: We'll give you simple, clear instructions on the basic stitches that will make your work look clean and professional.
- Finishing with Flair: Get some creative ideas for washing, ironing, and displaying your spooky artwork so everyone can admire it.
How to Read a Halloween Cross Stitch Chart
Think of a cross stitch chart as the treasure map for your Halloween project. At first glance, that grid filled with strange symbols can look a little intimidating, but it’s actually a brilliant system that tells you exactly what to stitch and where. Once you crack the code, you’ll be able to tackle any design with confidence.
The whole thing works like a pixelated image. Each tiny square on the chart's grid represents one single "X" you'll stitch onto your fabric. It’s that simple—a perfect one-to-one relationship.
The Anatomy of a Cross Stitch Chart
Every pattern, from a tiny ghost to a sprawling haunted house, is made of the same basic parts. Getting to know them is the first step to bringing your spooky vision to life.
- The Grid: This is the foundation of your chart. It's a network of lines forming squares, and it's your guide for counting. You'll notice that the grid lines are usually darker or thicker every ten squares, which makes finding your place so much easier. This grid is a direct map of the woven squares on your Aida cloth.
- The Symbols: Inside each square on the grid, there's a symbol. It might be a letter, a number, a little shape, or sometimes a block of color. Every unique symbol stands for one specific color of floss.
- The Legend (or Key): Here's your decoder ring! The legend is a list that matches every symbol in the pattern to its corresponding thread color. It will almost always give you a brand and number, like DMC 310 for that perfect, spooky black.
All you have to do is find a symbol on the grid, look it up in the legend, and grab that color. The system takes all the guesswork out of the process, letting you just enjoy the rhythm of stitching.
A cross stitch chart is really just a visual language. Once you learn to read the grid, symbols, and legend, it's like becoming fluent. You can stitch anything you can dream up.
Finding Your Starting Point
"Okay, but where do I actually start?" This is probably the most common question I hear from new stitchers. Thankfully, most charts give you a hand. Look for little arrows or triangles along the top and side edges of the grid.
These markers point to the dead center of the design, both horizontally and vertically. The spot where those two imaginary lines cross is the absolute middle of your pattern, and that’s exactly where you should begin.
So, why start in the middle? It’s the best way to make sure your finished design is perfectly centered on your fabric, with nice, even borders all around. To find the center of your fabric, just fold it in half one way, then fold it in half the other way. The point where the creases meet is your starting point. Easy!
Common Chart Types and How to Follow Them
Not all charts are created equal. While the grid-and-symbol system is the standard, the way a pattern is presented can change. Knowing the main types will help you stitch any project you fall in love with. For a closer look, our guide to understanding cross stitch graphs goes into even more detail.
You’ll usually run into one of two chart styles:
- Symbols on Color Chart: This is a popular one. It shows blocks of color on the grid with symbols printed on top. The color gives you a quick visual idea of what the finished piece will look like, but the symbol is what gives you the exact thread information. This is super helpful for telling apart two very similar shades of orange in a pumpkin, for example.
- Black and White Symbol Chart: This is the classic, old-school style. It’s just black symbols on a plain white grid. These are great because they're cheap to print and there's no risk of your printer's colors being slightly off. With these, you rely completely on the legend to choose your floss.
No matter which type of chart you're using, the method is the same. I always recommend working in small sections and marking off stitches as you go. A highlighter on a paper copy of the chart (never the original!) or just a pencil works wonders. It's a simple trick that saves you from losing your place, especially in detailed Halloween patterns with tons of color changes.
Gathering Your Essential Stitching Supplies
Alright, you've picked out the perfect spooky Halloween chart! Now comes the fun part: gathering your supplies. Walking into a craft store can feel a little overwhelming with all the options, but don't worry. You only need a few key things to bring that design to life.
Let's focus on the big three: fabric, thread, and needles. Getting these right is like using quality ingredients for a recipe—it makes the whole process smoother and ensures your finished piece looks absolutely fantastic.
Choosing Your Fabric Canvas
The foundation for any cross stitch project is your fabric. For pretty much everyone, from total beginners to seasoned pros, Aida cloth is the way to go. It's a cotton fabric cleverly woven into a perfect grid, which makes creating those neat little 'X' stitches a breeze.
You'll see Aida fabric labeled with a "count," like 14-count, 16-count, or 18-count. This number just tells you how many squares (and therefore, stitches) you can fit into one inch of the fabric.
A simple way to think about fabric count is like screen resolution. A lower number, like 14-count, means bigger squares and a larger final picture—it's perfect for beginners. A higher number, like 18-count, means tiny squares, giving you a more detailed and compact design.
For most Halloween patterns, 14-count Aida is an excellent choice. The squares are big enough to see easily, which is a lifesaver for your eyes and keeps the stitching fun and relaxing. If you want to dive deeper, you can learn more about choosing the right https://cross-stitched.com/blogs/what-is-cross-stitch/cross-stitch-material for your project.
To see just how much fabric count matters, check out this quick comparison for a 100x100 stitch pattern:
How Fabric Count Affects Final Project Size
| Aida Fabric Count | Stitches Per Inch | Finished Size (Inches) | Ideal For |
|---|---|---|---|
| 11-Count | 11 | 9.1" x 9.1" | Kids' projects, easy-to-see stitches |
| 14-Count | 14 | 7.1" x 7.1" | Most popular, great for all skill levels |
| 16-Count | 16 | 6.3" x 6.3" | More detailed projects |
| 18-Count | 18 | 5.6" x 5.6" | Fine detail work, experienced stitchers |
As you can see, the higher the count, the smaller your finished piece will be.
Picking Your Perfect Palette Of Thread
Now, let's talk color! The thread used in cross stitch is called embroidery floss, and the gold standard is DMC. Their six-strand cotton floss is famous for its quality, and its massive color range comes with a simple numbering system that makes finding the exact shade you need incredibly easy.
Your Halloween chart will have a key or legend that lists the specific DMC numbers for each part of the design. You'll definitely see classics like DMC 310 for a deep, spooky black or DMC 742 for that perfect pumpkin orange.
Want to add a little extra magic to your Halloween piece? Try some specialty threads:
- Glow-in-the-Dark Floss: This stuff is amazing for ghosts, stars, or spooky lettering. Just a few stitches and your design will eerily come to life when the lights go out.
- Metallic Threads: A little glint of metallic thread can make a witch's cauldron bubble or a vampire's cape shimmer. It adds a pop of magic.
- Variegated Floss: This thread has multiple colors blended into a single strand. It's fantastic for creating subtle shading on things like autumn leaves or a haunted sunset sky.
This is the basic idea behind reading any chart: a symbol tells you exactly which color to use.
It’s really that simple. Each symbol on the grid is a direct instruction for a specific thread color.
Needles, Hoops, And Other Necessities
Last but not least, you need a few tools to make stitching comfortable. Cross stitch needles, often called tapestry needles, are different from regular sewing needles. They have a blunt tip and a larger eye. That blunt end is key—it helps you guide the needle through the holes in the Aida fabric without accidentally splitting the threads.
A size 24 tapestry needle is your best friend when working with 14-count Aida.
You'll also want an embroidery hoop. This handy tool holds your fabric tight while you stitch, which helps keep your tension even and stops the fabric from puckering. They come in all sizes, but a 5-inch or 6-inch hoop is a great all-rounder for most Halloween projects.
Once you have your supplies, keeping them organized will make your stitching time so much more relaxing. There are all sorts of smart craft storage solutions out there to keep your threads from turning into a tangled nightmare. With your fabric, floss, and tools ready to go, you’re all set to start your spooky masterpiece
How to Choose Your Perfect Halloween Pattern
Picking out a pattern is the first real creative step in any cross stitch project. It’s the difference between a piece you can’t wait to show off and one that gets tucked away in a drawer, half-finished. Finding a Halloween chart that clicks with your style and skill level is the secret to having a great time stitching.
Let's talk themes, because Halloween has an incredible range. You might be all about whimsical designs with smiling ghosts and candy corn, or maybe you prefer moody, atmospheric scenes of gothic mansions wrapped in fog. From cute little black cats to elaborate sugar skulls, there’s a design out there just waiting for you to bring it to life.
Finding Your Spooky Style
Before you even start browsing, take a minute to think about the vibe you’re going for. This simple step will help you cut through the noise and zero in on a project you’ll genuinely love.
What kind of Halloween are you feeling this year?
- Classic & Cute: Think friendly jack-o'-lanterns, plump ghosts with big eyes, and charming little witches. These patterns are usually bright, cheerful, and perfect for making fun, family-friendly decorations.
- Gothic & Moody: If you lean toward the dramatic, look for charts with haunted houses, spooky graveyards, elegant vampires, or intricate raven silhouettes. These often use a darker, more limited color palette to build a sense of mystery.
- Modern & Minimalist: Not every Halloween piece has to be a huge, detailed scene. You can find tons of sleek, modern patterns that use simple lines and bold colors to create cool pumpkins, bats, or clever, spooky sayings.
- Primitive & Folk Art: This style has a wonderful rustic, handmade charm. It often features stylized figures, muted, earthy colors, and a sampler-like layout that feels both timeless and a little bit spooky.
PDF Patterns Versus All-In-One Kits
Once you've got a theme in mind, you'll find two main ways to get your pattern: as a downloadable PDF or as a complete, all-in-one kit. Neither one is better than the other; it really just depends on your experience and what you already have in your supply stash.
A PDF pattern is exactly what it sounds like—an instant digital download. You buy it, and moments later, it's on your computer or tablet, ready to go. This is a fantastic option if you've already got a good collection of floss and fabric. It's also super budget-friendly.
On the other hand, an all-in-one kit is the definition of convenience. It shows up at your door with everything you need to start: the fabric, all the pre-sorted threads, a needle, and of course, the chart. This is a brilliant choice for beginners because it takes all the guesswork out of gathering supplies. It’s also great for anyone who just wants to open the box and start stitching right away.
Your choice between a PDF and a kit really comes down to convenience versus customization. A PDF offers flexibility and saves money, while a kit provides a streamlined, stress-free start.
Many designers offer both, so you can pick what works for you. You can find individual PDF charts on big craft marketplaces for anywhere from USD 2.50 to USD 12.00, while most pre-packaged kits run between USD 20 and USD 60. Just to give you an idea of how popular these are, a single top-selling seasonal chart from a well-known designer can rack up thousands of downloads. To see some great examples, check out these delightful PDF patterns that capture the Halloween spirit.
What to Look For in a Chart
Besides the actual design, the pattern's description page holds a few key details that tell you a lot about the project you're about to tackle. Paying attention to these clues will help you pick a pattern you’ll enjoy from the very first stitch to the last.
First, check the final dimensions. The designer always lists the finished size based on a specific fabric count (usually 14-count Aida). This helps you picture how big the piece will actually be and make sure you buy the right amount of fabric.
Next, look at the number of thread colors. A pattern with 10-15 colors will be pretty straightforward. A design that calls for 40 or more colors is going to be far more detailed and complex, which means you'll be changing your thread a lot more often.
Finally, see if the chart mentions any advanced techniques. Does it call for backstitching to create outlines, French knots for tiny details like eyes, or fractional stitches to make smoother curves? If you're just starting out, you might want to pick a pattern that only uses full cross stitches. Getting a feel for the basics first is the best way to guarantee a successful—and spooky—finish.
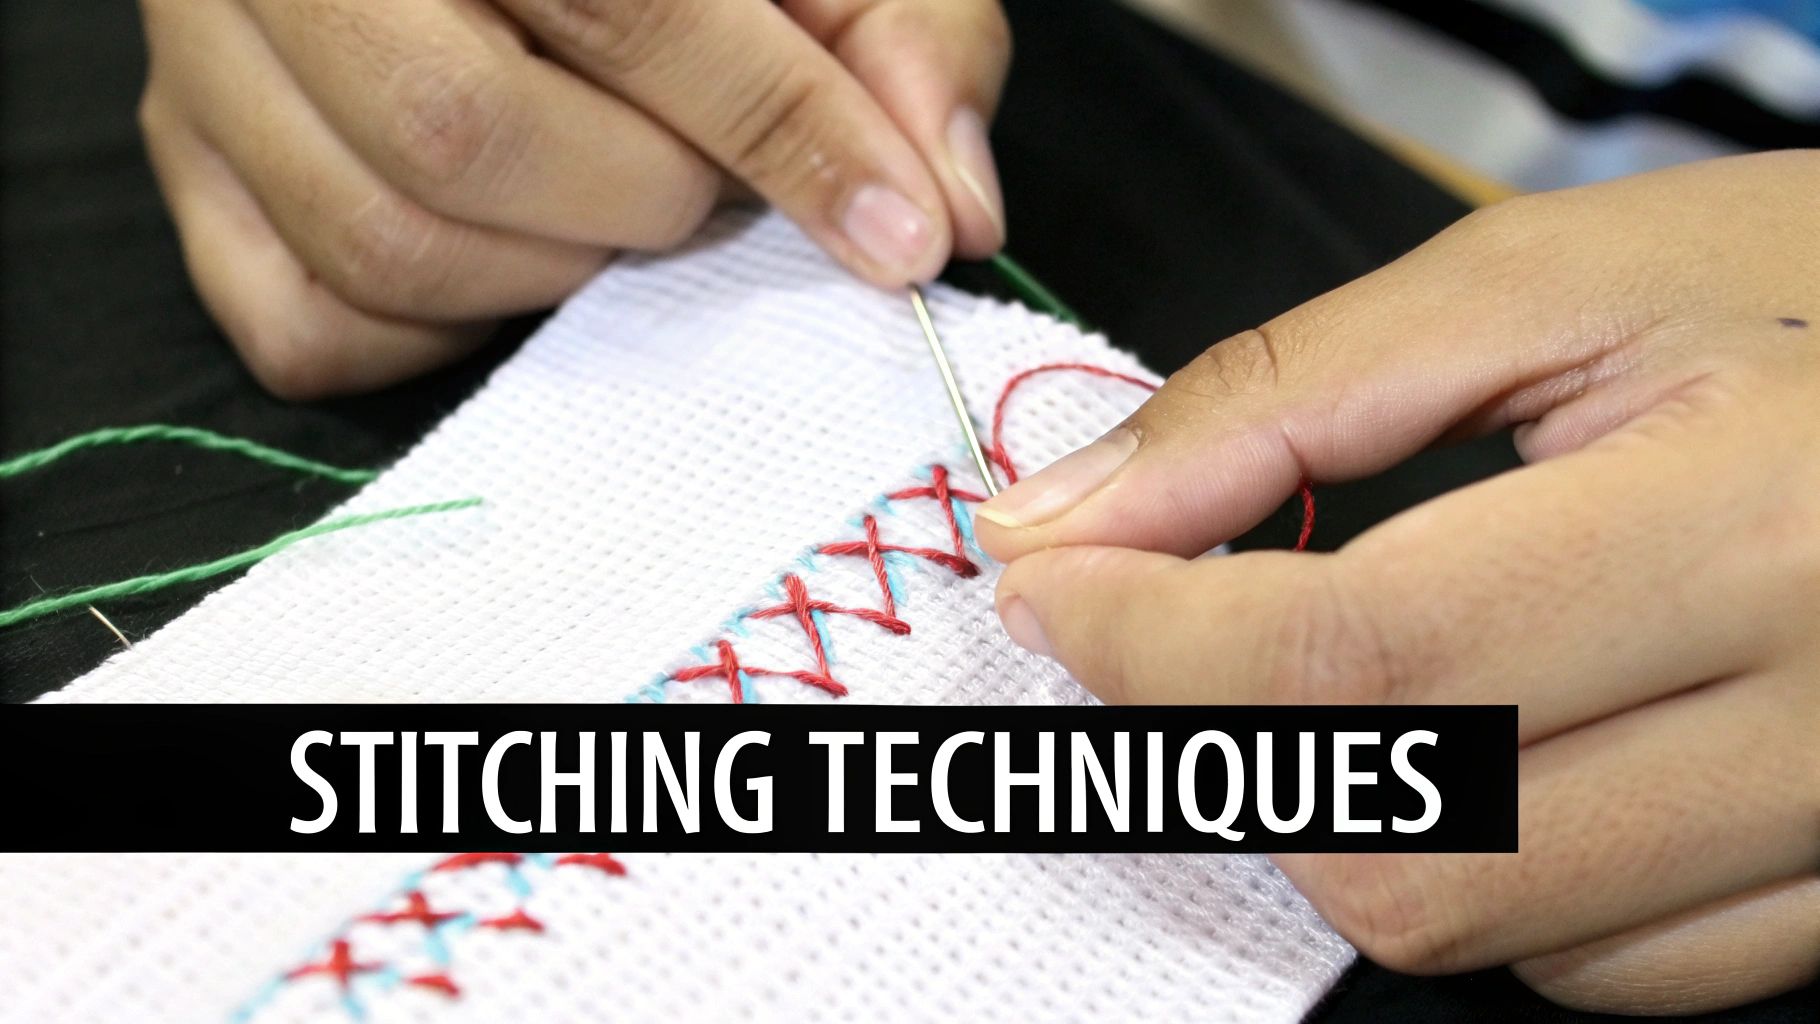
Mastering the Stitches That Make Your Project Pop
Alright, you've got your supplies laid out and your perfect Halloween chart picked. Now for the fun part—actually putting needle to fabric. This is where the magic really happens. We're going to go over a few core techniques that will take your stitching from just "good" to "wow, you made that?"
First, we'll cover the secret to a neat-looking project from front to back: starting and stopping your threads without any messy knots. Then, I'll share the single most important habit for making every stitch look uniform and professional. Finally, we’ll get into the fun little details like backstitching and French knots that add all that spooky personality.
Starting and Ending Your Threads Like a Pro
You might think nobody sees the back of your work, but keeping it tidy is more than just pride—it's practical. Knots can create ugly lumps that show through on the front, ruining that smooth finish you're working so hard for. Learning to stitch without them is a total game-changer.
The loop start is my absolute favorite way to begin. It's clean, secure, and surprisingly easy. This trick works any time you're using an even number of strands, which is most of the time (usually two).
- Instead of cutting two 18-inch strands of floss, cut one 36-inch piece.
- Fold it perfectly in half.
- Thread the two cut ends through the eye of your needle, which leaves a small loop at the other end.
When you make your first half-stitch, come up from the back but don't pull the floss all the way through. Just flip your fabric over, slide your needle through that loop you left, and give it a gentle tug. That’s it! Your thread is anchored flat and secure.
Ending a thread is just as simple. Once you’re done with a color, just weave your needle under the last three or four stitches you made on the back of your fabric. Snip the extra thread close, and you're done. It's just as strong as a knot but completely flat.
The Golden Rule for Gorgeous Stitches
If you take only one piece of advice from this whole guide, let it be this one. For truly beautiful, even-looking cross stitch, the top leg of every single 'X' must go in the same direction. It honestly doesn't matter if your top stitch slants from bottom-left to top-right (/) or from bottom-right to top-left ().
The key is consistency. Pick a direction and commit to it for the entire project.
This one habit does more for a professional finish than anything else. It lets the light reflect off the floss evenly, giving your work a beautiful, silky sheen instead of a jumbled, messy look.
When your stitches all lie the same way, the final piece looks incredibly clean and intentional. It's a small detail that makes a huge impact on your finished Halloween cross stitch charts.
Adding Finesse with Backstitching and French Knots
Many Halloween patterns rely on special stitches to create sharp details and bring the design to life. These are the stitches that turn a few colored blocks into a grinning jack-o'-lantern or a creepy spiderweb. The two you'll see most often are backstitching and French knots.
-
Backstitching: Think of this as drawing with your thread. It’s used to outline shapes, add lettering, or create delicate details like whiskers or spiderwebs. You essentially work backward—bring your needle up one hole ahead of where the stitch ends, then go back down into the previous hole to create a solid line.
-
French Knots: These are perfect for adding tiny, raised dots to your work. They’re fantastic for creating beady eyes, twinkling stars in a night sky, or other little textured embellishments. You just bring the needle up, wrap the floss around it once or twice, and pop the needle back down right next to where you came up, keeping the floss taut as you pull through.
Getting comfortable with these techniques will give you the confidence to tackle any chart that comes your way. They’re the skills that turn your stitched project into a true work of art.
How to Finish and Display Your Spooky Creation
Placing that very last stitch feels amazing, doesn't it? But your project isn't quite ready for its grand debut. The finishing touches are what really make your stitched fabric pop and transform it into a piece of art you'll be proud of.
First things first, let's give your project a gentle bath. After hours of being held, hooped, and handled, your fabric has likely picked up some natural oils from your hands and maybe a few stubborn creases. A quick, careful wash and press will make it look brand new.
Just use cool water with a tiny drop of mild soap. Let your piece soak for a few minutes, then rinse it well without wringing or twisting it. Roll it up in a clean towel and press gently to get the extra water out, then lay it flat to air dry.
When it's still just a little damp, place it face-down on a fresh towel and iron it on a low setting from the back. This little spa treatment gets rid of any hoop marks and wrinkles, giving you a perfectly flat canvas to work with.
Creative Ways to Showcase Your Art
A standard frame is always a great option, but your Halloween cross stitch has so much more potential! Why not turn it into a unique piece of seasonal decor that you get excited to pull out year after year?
Here are a few of my favorite ideas to get your imagination going:
- Decorative Hoop Frame: Who says you have to take it out of the hoop? The hoop itself can become part of the frame! Try painting the outer hoop a spooky black or vibrant orange, wrapping it in festive ribbon, or adding a neat felt backing for a super-polished finish.
- Spooky Mini Pillow: Those smaller Halloween patterns are just perfect for making tiny decorative pillows. All you have to do is sew your finished piece to a backing fabric you love, pop in some stuffing, and stitch it closed. They look fantastic on a shelf or tucked into an armchair.
- Custom Trick-or-Treat Bag: For a truly unique accessory, why not add your stitch work to a tote bag? You can stitch it right onto a canvas bag or create a patch to sew on. It’s a wonderful way to bring a handmade touch to your Halloween fun.
The way you finish your piece is the final brushstroke on your masterpiece. It’s the step that elevates your work from a craft project to a cherished keepsake.
For a deeper dive into these techniques, check out our comprehensive guide on how to finish your cross stitch projects like a pro. These tips will help you display any of your Halloween cross stitch charts with confidence.
Got a few questions rattling around like skeletons in a closet? Let's clear the cobwebs. Here are some quick answers to common questions that pop up when you're working on a spooky stitch.
Frequently Asked Questions
What’s the Best Fabric Count for a Beginner?
If you’re just starting out, 14-count Aida fabric is your best friend. The grid is open and easy to see, which means less eye strain and a much more relaxing experience as you learn the ropes.
Once you feel comfortable, you can always venture into higher counts like 16 or 18. These will give your finished piece a more detailed, refined look. Think of 14-count Aida as the perfect training ground—it lets you focus on the fun part without getting frustrated.
Can I Use Different Floss Colors Than the Pattern Suggests?
Of course! This is where you get to be the mad scientist. Swapping out colors is one of the best ways to personalize your Halloween cross stitch charts or just use up some of the thread you already have in your stash.
The key to a successful color swap is to match the value of the original color. For example, if the chart calls for a dark, moody green, you’ll want to replace it with another dark color—maybe a deep plum or a midnight blue. This keeps the design's contrast and shadows looking just right.
How Do I Use Glow-in-the-Dark Thread?
Using glow-in-the-dark thread is an amazing way to add a genuinely spooky touch to your project. It's perfect for making ghosts, stars, or a full moon really pop when the lights go out. You just stitch with it like any other floss.
A couple of pro-tips can make the process smoother:
- Keep it short: This stuff can be a bit unruly and prone to tangling. Working with shorter strands—around 12 to 15 inches—will save you a ton of headaches.
- Give it a charge: To get that brilliant glow, hold your finished project up to a bright light for a minute or so. Then, kill the lights and watch it come to life!
Ready to capture your favorite spooky memories in a one-of-a-kind stitched piece? Head over to Cross Stitched and explore our custom photo-to-pattern kits to start your next masterpiece. Start creating with Cross Stitched


