
Turning a photo you love or a clever idea into a cross-stitch pattern isn't as hard as it sounds. The basic idea is to translate your vision onto a grid where every little square becomes a single stitch. You can go old-school with graph paper or use one of the many digital tools available today. This is where you get to move beyond store-bought kits and stitch something that’s 100% you.
Bringing Your Cross Stitch Ideas to Life
There's something incredibly satisfying about taking a concept from your head and turning it into a tangible pattern. Whether you're stitching a portrait of your dog or a favorite inside joke, the process always starts the same way: simplifying an image into a grid of colored squares. Getting this first part right sets the stage for the entire project.
It’s no surprise that making custom patterns has exploded in popularity. The global cross-stitch market was valued at around USD 0.15 billion and is expected to keep growing, largely thanks to hobbyists like us who want to design our own stuff. People are moving toward homemade art that really means something to them.
Choosing Your Source of Inspiration
The first real decision you have to make is what you're going to stitch. The thing is, not every image translates well into the blocky, pixel-like nature of cross-stitch.
- Photographs: Look for photos with high contrast and a clear focal point. A simple portrait against a plain background is a much better starting point than a busy landscape with tons of subtle color changes.
- Illustrations & Graphics: Simple cartoons, logos, and line art are perfect. They already have defined shapes and limited color palettes, which makes for a crisp, clean pattern.
- Original Drawings: If you can draw, you're in the driver's seat. Sketching your own design gives you total control from the get-go. If you need a little spark, browsing through simple floral patterns can give you some great ideas that always look beautiful when stitched.
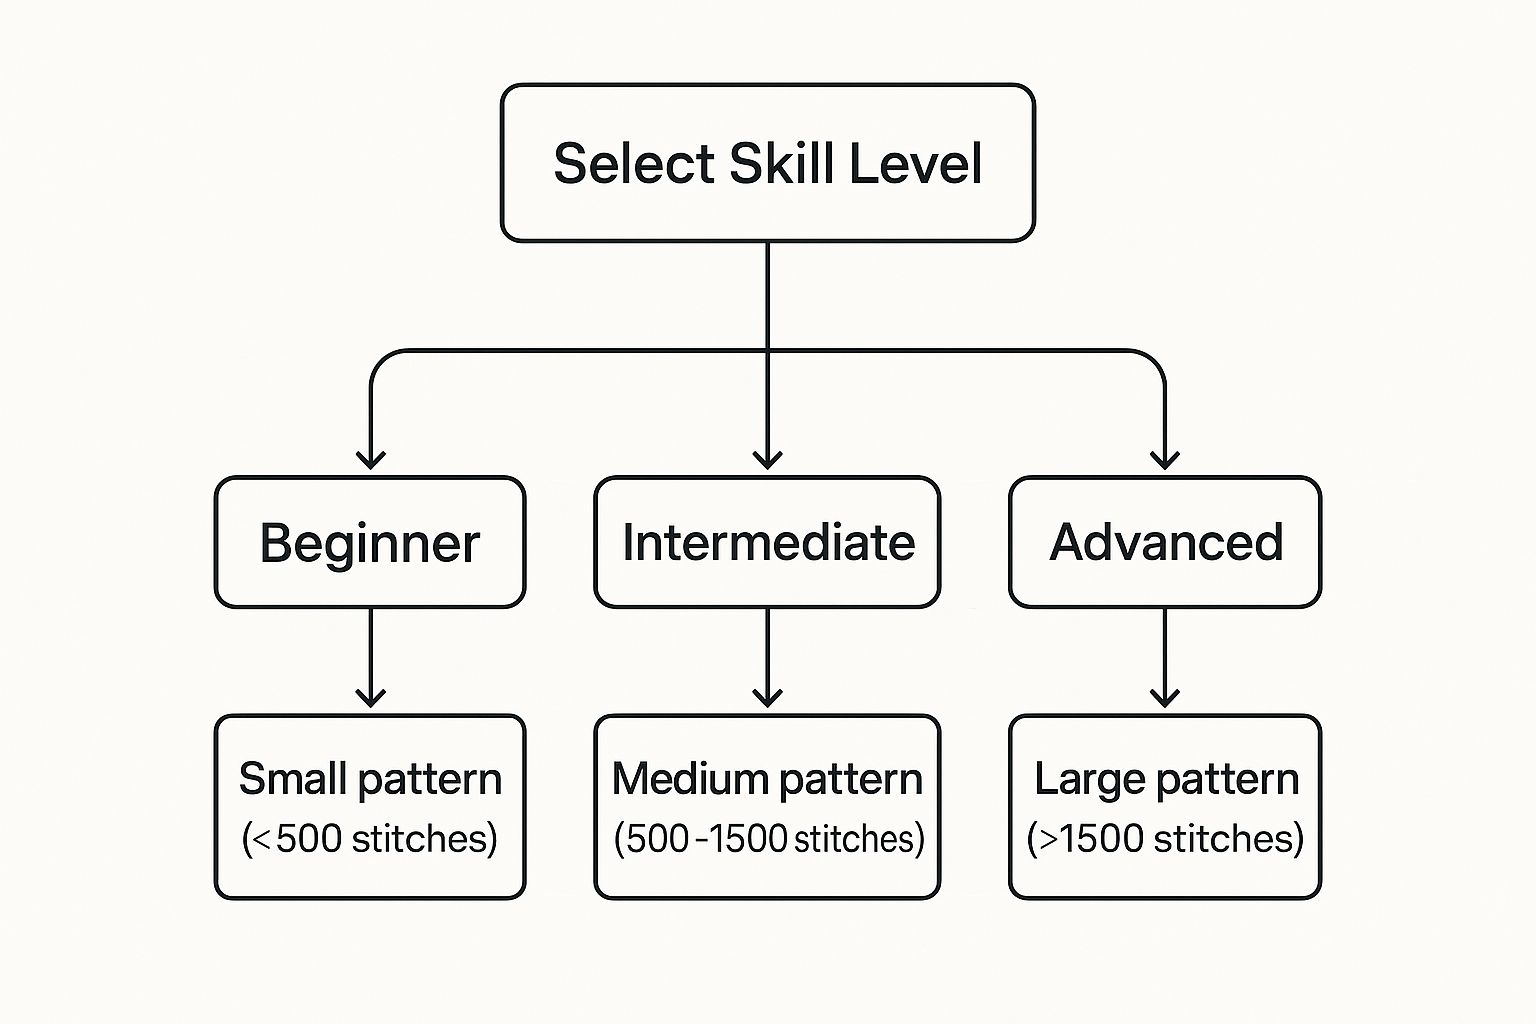
This chart really drives home why starting with a small stitch count is key for beginners. It helps you pick a project you can actually finish without getting frustrated.
Choosing Your Pattern Creation Method
Deciding how to create your pattern is a big step. Each approach has its own learning curve and benefits, so it helps to know what you're getting into before you start.
| Method | Best For | Pros | Cons |
|---|---|---|---|
| Traditional Graph Paper | Small, simple designs; pixel art; beginners wanting to learn the basics. | Inexpensive, no tech needed, gives a hands-on feel for the process. | Time-consuming for large projects, hard to edit mistakes, limited color representation. |
| Online Pattern Generators | Quick photo conversions; beginners who want a fast and easy digital option. | Very fast, user-friendly, automatically generates floss lists. | Limited customization, can produce "confetti" stitches, less artistic control. |
| Dedicated Software | Detailed, complex designs; stitchers who want full artistic control. | Powerful editing tools, precise color control, professional-looking results. | Can have a steep learning curve, often requires a purchase. |
Ultimately, the best method depends on your project's complexity and how much control you want. For a first-timer, a simple online generator might be perfect, while a seasoned stitcher might prefer the power of dedicated software.
Understanding Fabric Count and Final Size
Next up is the fabric. The "count" of your Aida or linen—like 14-count or 22-count—tells you how many stitches you can fit into one inch. This choice is super important because it directly affects how big your finished piece will be.
Lower-count fabrics like 14-count Aida have bigger squares, making them easier on the eyes and resulting in a larger design. On the flip side, higher-count fabrics like 18-count or 22-count have tiny squares, which lets you pack in more detail and keep the final piece smaller.
A classic rookie mistake is designing a pattern without thinking about the fabric first. A 100x100 stitch pattern will be about 7.1 inches on 14-count Aida but only 5.5 inches on 18-count. That’s a big enough difference to mess up your framing plans!
Demystifying Your Color Palette
Finally, let's talk about floss colors. It’s easy to get carried away and want to use every color under the sun, but trust me, limiting your palette is the key to a polished-looking design. Most pattern software comes loaded with floss libraries from brands like DMC, which makes picking your threads a breeze.
When you convert a photo, a program might spit out a list of 100+ colors. A big part of your job as the designer is to whittle that down to something reasonable—usually somewhere between 20 and 40 colors is plenty for a detailed piece. This cleanup step gets rid of "confetti"—those annoying, isolated single stitches of random colors—and makes the whole thing much more fun to actually stitch.
Finding the Right Digital Pattern Maker
Making the leap from graph paper to a digital canvas feels like unlocking a new level in your creative game. The right software can take your photos, sketches, and ideas and turn them into stitchable charts with incredible speed and precision. But with so many options out there—from heavyweight, dedicated programs to simple, on-the-go apps—it's easy to get overwhelmed.
Honestly, the best tool for you boils down to your project's complexity, your budget, and how much hands-on control you really want over the final design. Making this choice is a huge part of learning how to create your own cross stitch patterns from scratch.

The explosion of these digital tools isn't happening in a vacuum. It’s part of a much bigger trend in the needlecraft world. The entire market, which includes both cross stitch and embroidery, is booming, largely driven by our desire for personalized patterns. Market forecasts show the needlecraft pattern sector is set to grow from around $500 million to nearly $776 million by 2033. This surge is all about the rise of downloadable patterns and the tools that let us become the designers. If you're curious, you can explore more data on this expanding market to see the trends for yourself.
Dedicated Cross Stitch Software
If you're serious about pattern design and want maximum control, then dedicated software is the way to go. These programs are built from the ground up by stitchers, for stitchers.
I'm talking about powerhouses like PCStitch or WinStitch. They are packed with specialized features you just won't find in a standard graphics program.
- Advanced Floss Management: You can instantly swap entire color palettes, find the closest DMC equivalent for a custom color, and get scarily accurate estimates of how much thread you'll need.
- Specialty Stitch Support: Adding backstitching for crisp outlines, French knots for a bit of texture, or fractional stitches for smoother curves is a breeze.
- Professional Chart Export: They generate clean, multi-page PDFs complete with symbol keys, color blocks, and black-and-white versions—perfect for printing and stitching from.
Yes, these programs often come with a price tag and a bit of a learning curve, but for creating complex, heirloom-quality pieces, their power is absolutely worth it.
Web-Based Converters and Mobile Apps
Looking for a quick and easy fix? Web-based converters and mobile apps are a fantastic starting point. Many are free or very inexpensive, making them perfect for simpler projects or for when you just want to convert a photo on a whim.
Sites like Stitch Fiddle and Pic2Pat let you upload an image and have a pattern in your hands in seconds. Mobile apps offer that same instant gratification, letting you design right from your phone. They’re fantastic for those spur-of-the-moment creative ideas.
The big trade-off with these simpler tools is control. An automated conversion might leave you with a ton of "confetti"—those annoying, single stitches of random colors. You'll likely need to do some manual cleanup to make the stitching experience more enjoyable.
Using General Graphic Design Software
There’s also a great middle-ground option: using graphic design software you might already have, like the free program GIMP or a professional tool like Affinity Photo. This approach gives you more control than an online converter without requiring you to learn a brand-new, dedicated cross stitch program.
The process usually involves laying a grid over your image and then using a "pixelate" or "mosaic" filter to simulate the stitches. I find this method works wonderfully for designers who are already comfortable in these programs and want to create bold, graphic-style patterns without buying new software.
A Real-World Photo Conversion Example
Let's imagine you want to stitch a portrait of your dog. You run the photo through a converter, and the first result looks… messy. There are way too many colors and random specks everywhere. This is where your eye as a stitcher is crucial.
- Cull the Colors: First things first, slash that color count. A program might suggest 120 different floss colors, but you can get a much cleaner, more beautiful result by manually trimming that down to 25-35. This forces similar shades to merge and simplifies the whole design.
- Adjust Dithering: Dithering is how software fakes color depth by mixing pixels. It can be useful, but too much of it creates that spotty, confetti-like mess. Try turning the dithering setting down—or even completely off—to see if you can get cleaner, more solid blocks of color.
- Manual Cleanup: This is the most important part, and it's where the art comes in. Zoom in and start changing the color of those isolated stitches to match their neighbors. Smooth out jagged lines and refine key details, like the glint in your pet's eye. This is what transforms a robotic conversion into a polished pattern you’ll actually want to stitch.
By taking control of these settings, you’re guiding the software to create a chart that’s not just a technical file but a true piece of stitchable art. Your choice of tool is just the first step on that journey.
Designing Patterns Manually on Graph Paper
As much as I love the convenience of digital tools, there's something incredibly satisfying about designing a cross-stitch pattern by hand. It’s a tactile experience that connects you to the roots of the craft—just you, some graph paper, and colored pencils. This old-school method is fantastic for simpler designs and gives you a real, hands-on understanding of how a pattern comes together, one stitch at a time.
This approach is perfect for projects with a clean, graphic feel. Think bold text, geometric shapes, or those charmingly retro video game sprites. The blocky nature of these designs is a natural fit for the grid on graph paper, making it an intuitive way to map out your ideas.
Gathering Your Essential Supplies
Before you can start plotting out your masterpiece, you’ll need to grab a few basic supplies. The good news is you probably have most of these lying around the house already.
- Graph Paper: This is your canvas. Look for paper with a grid size that's easy on your eyes. I find that a standard 4 or 5 squares per inch is a great starting point for most people.
- Pencils: You'll want a regular graphite pencil for sketching your initial outline. It makes erasing and tweaking the design a breeze.
- Colored Pencils or Markers: These are your "floss." Grab a decent variety of colors so you can build a vibrant palette for your pattern.
- Ruler: A clear ruler is invaluable for finding the center of your grid and keeping any straight lines, well, straight.
- Eraser: Mistakes are just part of the creative process! A good quality eraser will be your best friend.
Having these simple tools at the ready makes the whole process feel much more fluid and enjoyable.
Translating Your Idea to the Grid
The fundamental concept here is incredibly straightforward: one square on your paper equals one full cross stitch on your fabric.
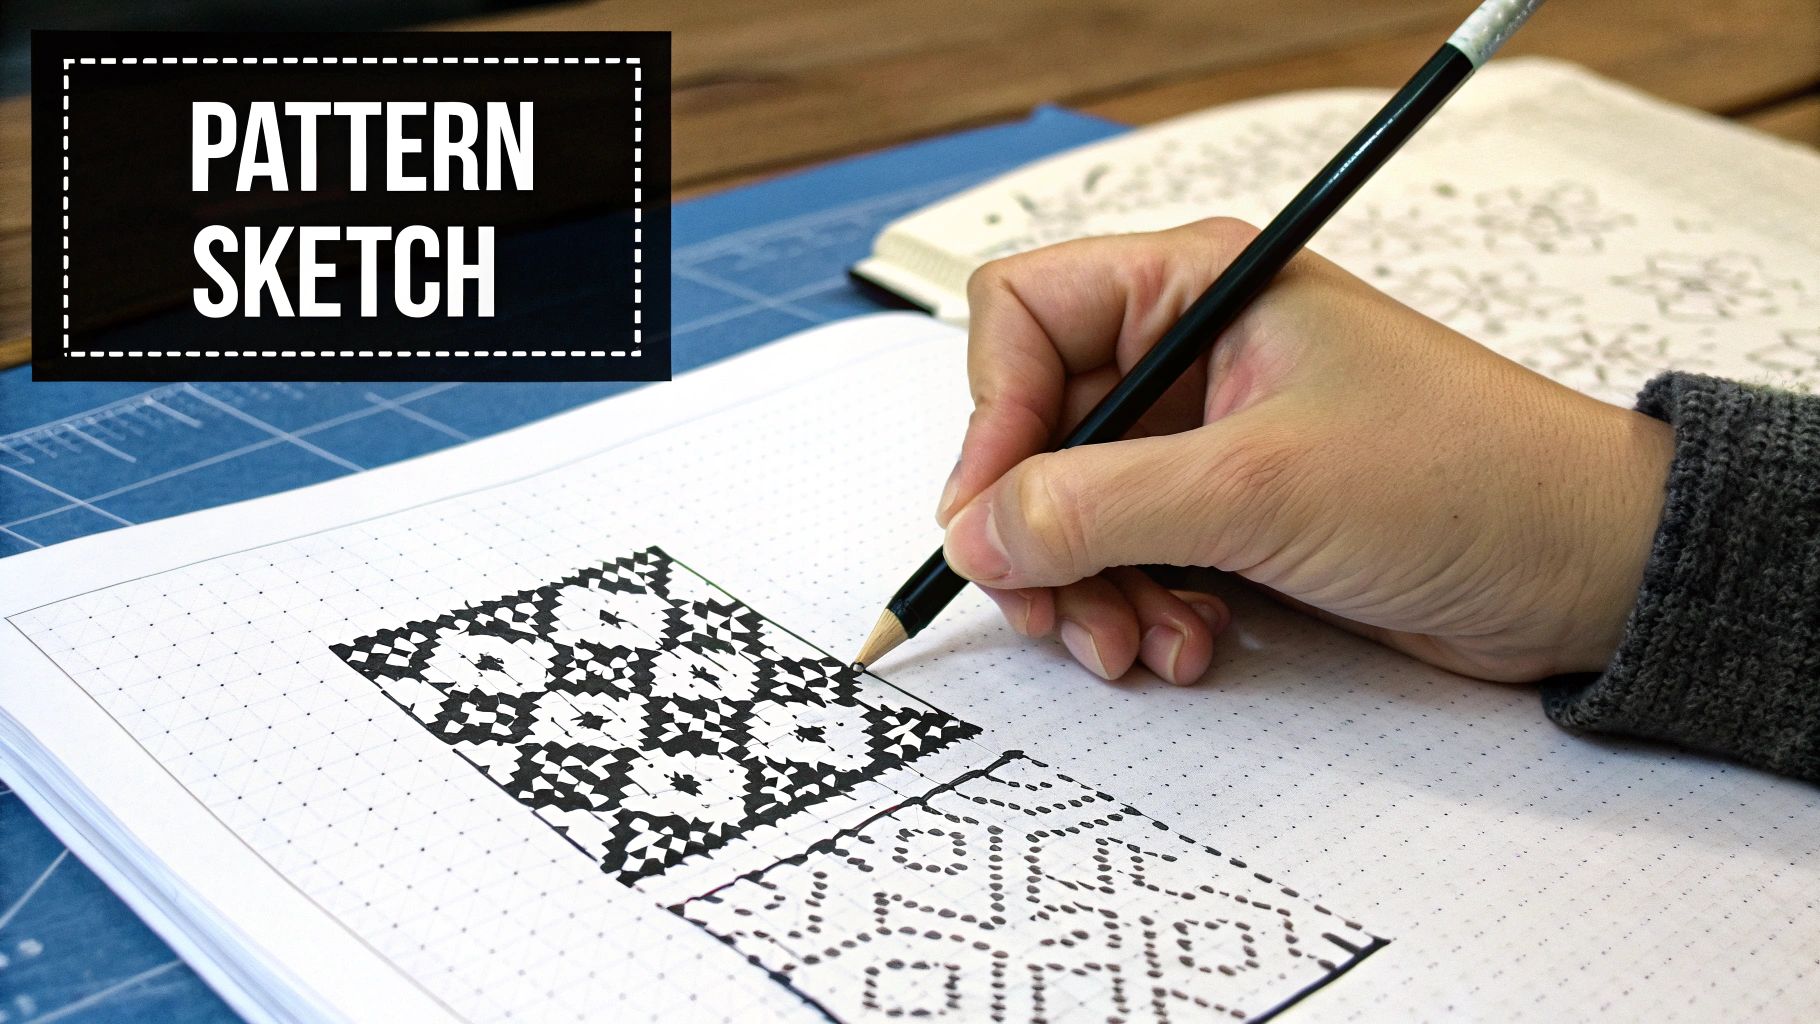
Start by lightly sketching the basic outline of your design onto the graph paper with your graphite pencil. Don't stress about making it perfect right away. The goal is just to block out the general shape and proportions.
Let's say you're designing a simple 8-bit heart. You’d begin by drawing a blocky heart shape, filling in squares to get that classic pixelated look. This first pass is all about getting the scale right. I always recommend counting the squares for the width and height of your sketch to make sure it will actually fit on your planned fabric size.
Once you’re happy with the outline, it’s time for the fun part: coloring it in. This is where your pattern really comes to life, transforming from a simple sketch into a chart you can actually stitch from.
Here's a pro tip from my own experience: Decide on your fabric count before you finalize the size of your design. A pattern that's 50 stitches wide will measure about 3.6 inches on 14-count Aida but only 2.8 inches on 18-count fabric. Knowing this upfront saves you from any frustrating sizing surprises down the line.
Building Your Floss Key
With your design all colored in, the final crucial step is creating a floss key. This is what connects the colors on your paper to specific DMC or Anchor thread numbers, making your pattern truly usable for you or anyone else.
First, create a legend on a separate part of your paper or a new sheet. Draw a small box for each color you used in the pattern.
Next, fill in each box with its color and assign it a unique symbol—like a circle, triangle, or asterisk. This is especially helpful if you ever need to make a black-and-white copy of your chart.
Finally, take your colored pencils to your local craft store or pull up a DMC color card online to find the closest thread match for each one. Write the official floss number right next to its corresponding symbol in your key. This simple process turns your unique drawing into a practical, easy-to-follow guide for stitching.
If you want to dive deeper into how to read these charts, our guide on understanding cross stitch graphs is a great resource.
Refining Your Design with Color and Detail
An automated pattern is a fantastic starting point, but this is where the real artistry begins. Refining the design is what separates a basic, pixelated image from a polished, professional-looking pattern that’s a genuine joy to stitch. It's all about making smart color choices, adding strategic details, and doing a little manual cleanup.
These are the techniques that will take your custom patterns from good to truly great. By focusing on these finer points, you’ll learn how to create cross-stitch patterns that aren't just a grid of stitches, but beautiful pieces of art.
Mastering Your Color Palette
Color theory can sound complex, but for cross-stitch, it's pretty straightforward. The main goal is to build a harmonious palette that uses shading effectively without making your design look muddy or overly complicated with too many similar colors.
When a program converts a photo, it often throws an overwhelming number of colors at you. Your first task is to simplify. I’ve found that aiming for 25-40 colors is a good target for a detailed piece. Trimming the palette forces similar shades to blend, which actually creates a more cohesive and artistic final product.
Here’s how to approach it:
- Blending and Shading: Scan the pattern for areas with harsh, blocky transitions between light and dark. You can manually smooth these out by popping a mid-tone color between them. This simple trick creates a much softer, more realistic gradient.
- Avoiding "Muddy" Colors: Software often defaults to dull, grayish tones for shadows. I always swap these out for richer, darker versions of the base color. For example, use a deep navy for a blue object's shadow instead of a flat gray. It keeps the whole design looking vibrant.
- Brand Consistency: Try to stick to one floss brand, like DMC or Anchor, for a single project. Even with conversion charts, dye lots can vary slightly, and those little differences can sometimes be noticeable. If you do need to mix brands, this thread color conversion chart is an absolute lifesaver.
This deliberate approach to color is what makes a finished piece look intentional and thoughtfully crafted.
Eliminating Confetti Stitches
One of the biggest tells of an unrefined, computer-generated pattern is what stitchers call "confetti." These are the isolated, single stitches of a random color scattered throughout the design.
Not only are they a pain to stitch, but they also rarely add any real visual value. The manual cleanup process is your chance to get rid of them for good.
Go through your chart section by section and simply change the color of these stray stitches to match one of their neighbors. This small act of tidying up makes the pattern significantly easier and more enjoyable to stitch, leading to a much cleaner final piece.
Think of it as proofreading a document. It’s a small step that makes a massive difference in the overall quality and the stitcher's experience.
Adding Definition with Specialty Stitches
While the classic 'X' is the heart of cross-stitch, specialty stitches are the secret weapons that add texture, definition, and that final professional polish. Knowing when and where to use them is a game-changer.
Here are the most common ones I use to refine custom patterns:
- Backstitching: This is your most important tool for adding detail. Use a single strand of black or another dark color to outline shapes, define facial features, add text, or create crisp lines. It’s what makes different elements "pop" off the fabric.
- Fractional Stitches: If you're designing something with curves or smooth diagonal lines (like lettering or a round object), full cross stitches can look jagged. Fractional stitches—like quarter stitches (¼) and three-quarter stitches (¾)—are perfect for smoothing out those edges for a more refined look.
- French Knots: These are perfect for adding tiny, textured dots. I use them all the time for eyes on small characters, stars in a night sky, or the center of a flower. They add a wonderful, three-dimensional quality that you just can't get with a regular stitch.
By thoughtfully incorporating these specialty stitches, you're moving beyond the basic grid and adding a layer of artistry that makes your pattern uniquely yours.
Turning Your Design Into a Stitchable Pattern
Alright, you've put in the creative work. Your design is just right, and you've wrangled every last confetti stitch. Now comes the final, crucial step: turning that design into a clean, easy-to-follow chart that someone can actually stitch from.
This is where the magic happens, transforming your digital or hand-drawn creation into a practical guide. The goal is to make a pattern so clear and professional that you (or anyone else) can pick it up and start stitching without a single moment of confusion.
What Makes a Truly Great Pattern?
A good pattern is more than just a grid with symbols. It’s a complete package that anticipates what a stitcher needs and gives them all the info upfront. Think of it as your project's instruction manual.
Here’s what I always make sure to include in my own patterns:
- A Cover Page: This is your pattern’s first impression. It should have a good-looking mockup or a photo of the finished piece, the title, and the stitch count (for example, 120W x 150H).
- Symbol Charts: I always provide two versions: one in full color with symbols and another in simple black-and-white with symbols. This gives people a choice, as some find black-and-white easier to mark up while they work.
- A Thorough Floss Key: This is the heart of the pattern. Your key needs to list the floss brand (like DMC), the color number, the symbol used on the chart, and the total stitch count for each color. That last bit is a lifesaver for estimating how much floss to buy.
Putting these pieces together makes your pattern instantly more user-friendly and professional.
Getting Your Chart Ready for the World
If you're using software like PCStitch or WinStitch, this part is pretty straightforward. These programs are built to export clean, multi-page PDFs that are ready for printing. I always look for the settings that add grid lines every 10 squares and include a slight overlap between pages—it makes it so much easier for the stitcher to find their place when moving from one page to the next.
A quick pro tip: Always export your chart as a high-quality PDF. It keeps the symbols sharp and easy to read, even when printed. Trust me, nobody wants to squint at a blurry chart.
For those of you working with graph paper, clarity is everything. It might be worth taking the time to redraw a final, neat copy. Or, you can scan your original drawing at a high resolution to create a digital file. Just double-check that your symbols are distinct and your floss key is perfectly legible.
Don't Forget the Fabric Math
One of the most helpful things you can do for a fellow stitcher is to calculate the final fabric size for them. Don't make them pull out a calculator! Your pattern should list the finished dimensions for a few common fabric counts, like 14-count, 16-count, and 18-count Aida.
The math is simple: divide the stitch count by the fabric count. So, a 140-stitch-wide design on 14-count Aida will be 10 inches wide (140 / 14 = 10).
Even more important is reminding them to add a border. I always recommend at least a 3-inch border on all sides. This extra fabric is absolutely essential for hooping the project while stitching and for having enough room to frame it properly later. If you want a hand with this, our cross stitch size calculator is a fantastic tool for getting these numbers spot-on every time.
Final Touches and Protecting Your Work
Last but not least, if you plan to share or sell your creation, it's a good idea to add a small copyright notice. You don't need anything fancy. A simple line at the bottom like "© [Your Name/Brand] [Year] - For Personal Use Only" does the trick. It’s a small detail that helps protect all the hard work you’ve poured into your design.
When you save the final file, a PDF is always the best choice. It's a universal format that anyone can open and print, ensuring your beautiful pattern is ready to be brought to life.
Answering Your Top Pattern-Making Questions
Jumping into pattern design is exciting, but it's totally normal to have a few questions swirl around as you get started. Think of these as the common curiosities and little roadblocks every new designer runs into. Getting them sorted out early on will make the whole process smoother and way more fun.
What Images Make the Best Patterns?
The secret to a great pattern often starts with a great source image. You'll have the most success with pictures that have a clear subject, strong contrast between light and dark areas, and a somewhat limited color palette.
High-resolution photos where the main subject really pops are perfect. Simple illustrations or even pixel art also work beautifully because their shapes are already well-defined.
On the flip side, you’ll want to steer clear of images with super soft gradients, out-of-focus backgrounds, or incredibly tiny details—think wispy strands of hair or delicate lace. When the software tries to translate those, you usually end up with a messy chart full of "confetti" stitches (single stitches of random colors), which can be a real headache to stitch.
How Many Colors Should I Actually Use?
This is a huge one, and here's my advice: less is almost always more. When you first upload a photo, the software might spit out a suggestion for 100+ colors. Don't panic! Your first move should be to slash that number way down.
For a detailed, photo-like project, I typically aim for somewhere in the 20-30 color range. It’s far easier to manually add a couple of essential shades back in later than it is to simplify a pattern that's already a chaotic mess of colors.
A tighter palette forces similar tones to blend together, which surprisingly often results in a more cohesive and artistic-looking piece. And for simpler designs like text or a company logo, you might only need 2-5 colors to make it look fantastic.
A good rule of thumb: Every extra color you add makes the stitching experience more complex. The real art of design is capturing the soul of an image with an efficient palette, making the pattern beautiful and enjoyable to stitch.
Can I Legally Use Any Picture I Find Online?
This is a super important question, especially if you ever dream of sharing or selling your patterns. The short answer is a firm no—you can't just grab any image from Google and turn it into a pattern to sell.
To stay on the right side of the law, you need to either own the copyright yourself or get clear permission from the creator.
That means you should stick to using:
- Your own personal photos.
- Artwork you’ve created yourself from scratch.
- Images from public domain archives (where the copyright has expired).
- Stock photos where you’ve bought a license that specifically allows for creating derivative works.
Now, making a pattern from a copyrighted image just for your own personal use is generally okay. But the moment you share it—even for free—or try to sell it, you're stepping into copyright infringement territory.
Once you get the hang of creating your own unique designs, you might start thinking about turning your hobby into something more. Lots of stitchers sell their patterns successfully, and this excellent guide to monetizing online content is a great resource for learning how to build a small business around your craft.
What's the Best Fabric Count for My First Custom Pattern?
If you're making your very first custom pattern, I can't recommend 14-count Aida enough. It’s the gold standard for a reason. The weave is large enough that you can easily see the holes, making the stitches much less strenuous on your eyes.
It strikes that perfect balance between allowing for a good amount of detail without making the finished project overwhelmingly large. Once you've got a design or two under your belt and feel more confident, you can start playing around with higher counts like 16-count or 18-count Aida to pack in even more detail.
Ready to turn your favorite photo into a beautiful work of art? At Cross Stitched, our custom kits make it easy. We provide everything you need—pre-sorted DMC threads, high-quality Aida fabric, and a clear, easy-to-follow pattern—to bring your memories to life, one stitch at a time. Start creating your personalized masterpiece today at https://cross-stitched.com.


