

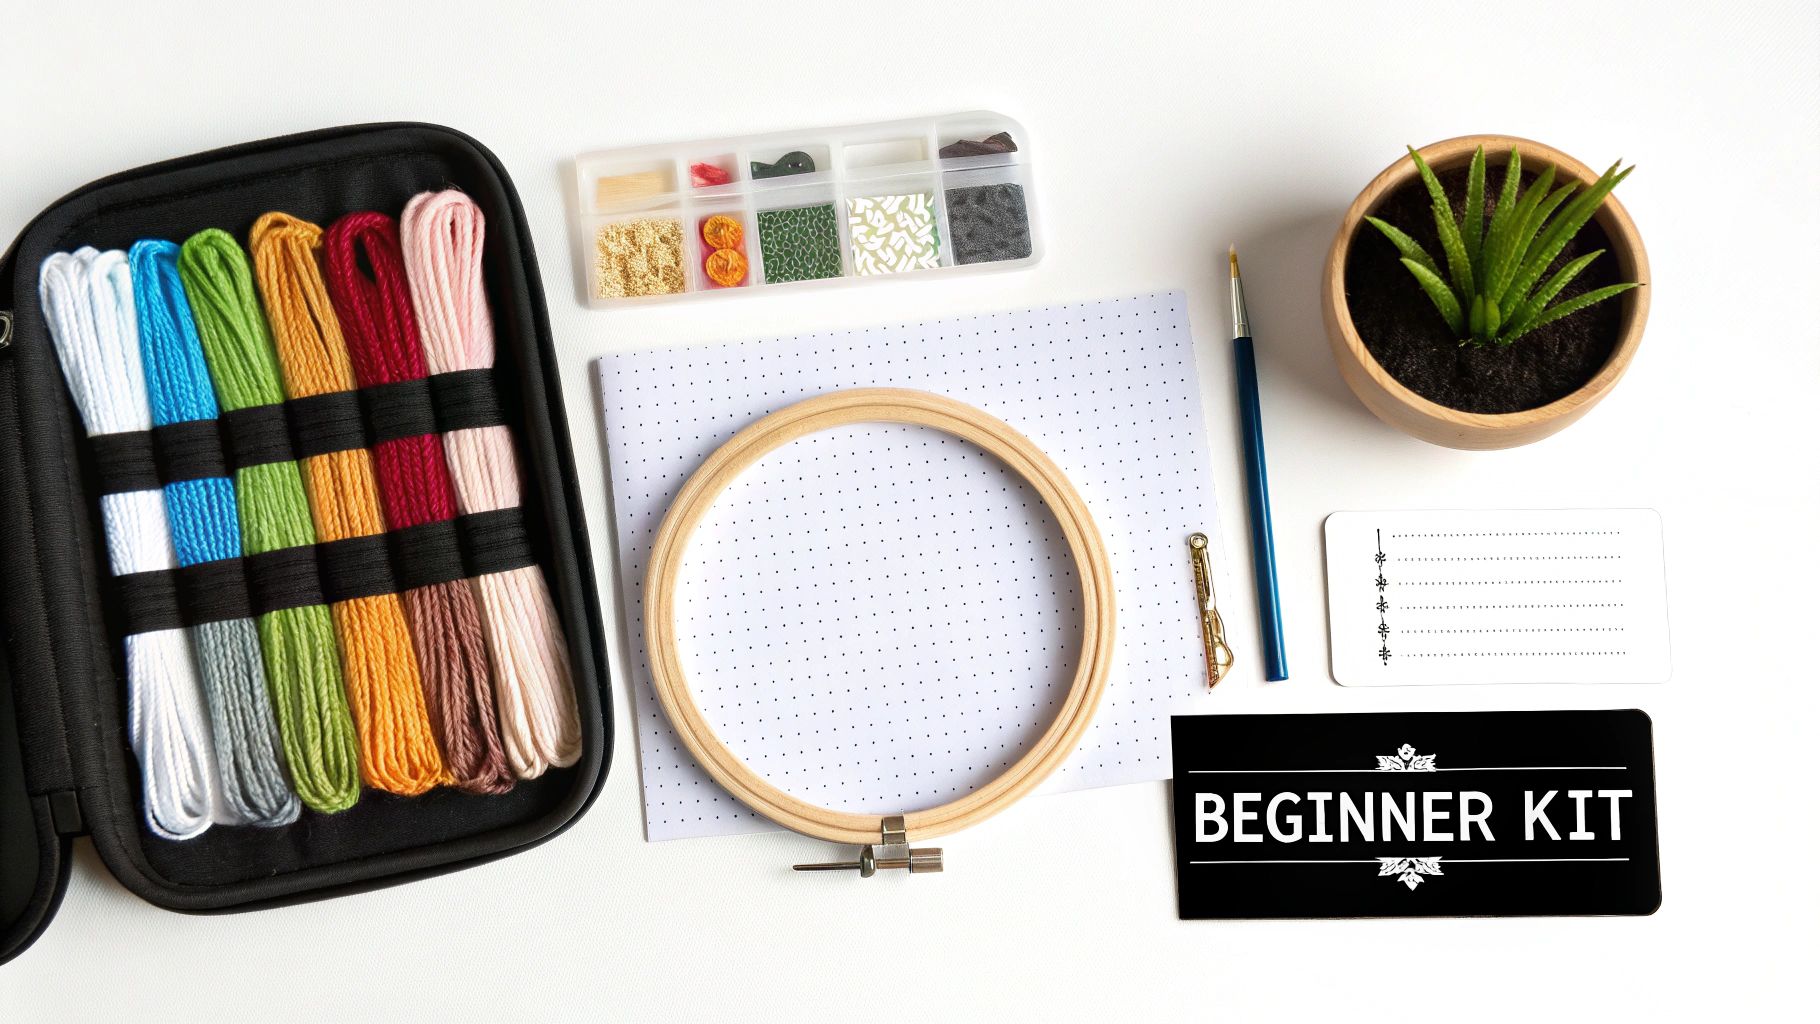
When you're just starting out, the best cross stitch sets for beginners take all the guesswork out of the equation. They bundle up all the essential supplies—fabric, thread, a hoop, and a needle—into one convenient package. This means you have everything you need to create something beautiful right from the moment you open the box.
Why a Beginner Kit Is Your Best First Step
Diving into a new hobby should feel exciting, not like you’re trying to solve a complex puzzle. Think about it this way: if you wanted to bake your first cake, you wouldn't start by milling your own flour, right? You'd probably grab a cake mix. A beginner's cross-stitch kit is your creative cake mix.
It’s this all-in-one approach that makes starting with a kit so smart. You get to skip the overwhelming trip to the craft store, where you'd be faced with a wall of fabric counts, thread types, and needle sizes. With a kit, all those decisions have been made for you, and everything is chosen to work together perfectly.
Guiding Your First Stitches
A great kit doesn't just hand you a pile of supplies; it gives you a clear roadmap. The included pattern and instructions are your personal guides, showing you exactly where each stitch goes and which color to use. This structured learning process helps you build those crucial foundational skills and gain confidence without the frustration of trying to figure it all out on your own.
This beginner-friendly model has been a huge factor in the crafting world's recent boom. In fact, the global cross-stitch market was valued at USD 0.15 billion in 2024 and is expected to climb to USD 0.22 billion by 2033. A huge part of that growth comes from beginners, who now make up over 60% of new stitchers, many of whom are drawn in by kits that make starting so easy.
By removing the initial hurdles, a kit transforms potential frustration into a relaxing, mindful experience. It lets you focus on the rhythmic, calming motion of stitching instead of worrying about logistics and supply runs.
To give you a clearer picture, here’s a quick look at the core components inside a great beginner cross stitch set and why each one is important for a smooth start.
Beginner Kit Essentials at a Glance
| Component | Its Role in Your Project | Why It Helps Beginners |
|---|---|---|
| Aida Fabric | The grid-like canvas for your stitches. | Its evenly spaced holes make it easy to create neat, uniform stitches. |
| Embroidery Threads | The colorful floss used to create the design. | Kits come with pre-selected, pre-cut, and often pre-sorted colors. |
| Embroidery Hoop | A tool to hold the fabric taut while you work. | Keeps fabric from puckering and makes it easier to handle. |
| Tapestry Needle | The blunt-tipped needle used for stitching. | A blunt tip prevents you from splitting the fabric threads. |
| Pattern/Chart | The visual map of your design. | A clear, simple chart is your step-by-step guide to a great result. |
This table shows how each piece plays a vital role in setting you up for success from your very first stitch.
What Makes a Kit Truly Beginner-Friendly
Not all kits are created equal, especially when you're just starting. The best cross stitch sets for beginners have a few things in common that are specifically designed to ensure a smooth, enjoyable start:
- Simple, Manageable Designs: Look for smaller projects with a limited color palette. This helps you get the hang of the basics without feeling overwhelmed.
- Clear Instructions: Easy-to-read charts and straightforward directions are an absolute must for a first-timer.
- Quality Materials: Even as a beginner, working with decent fabric and thread makes the whole process more pleasant and gives you a much better finished piece.
If you enjoy the guided process, you'll find there are all sorts of fantastic DIY craft kits out there for other hobbies, too. Ultimately, a good beginner kit is designed to set you up for a win, turning your initial curiosity into a finished piece you can be genuinely proud of.
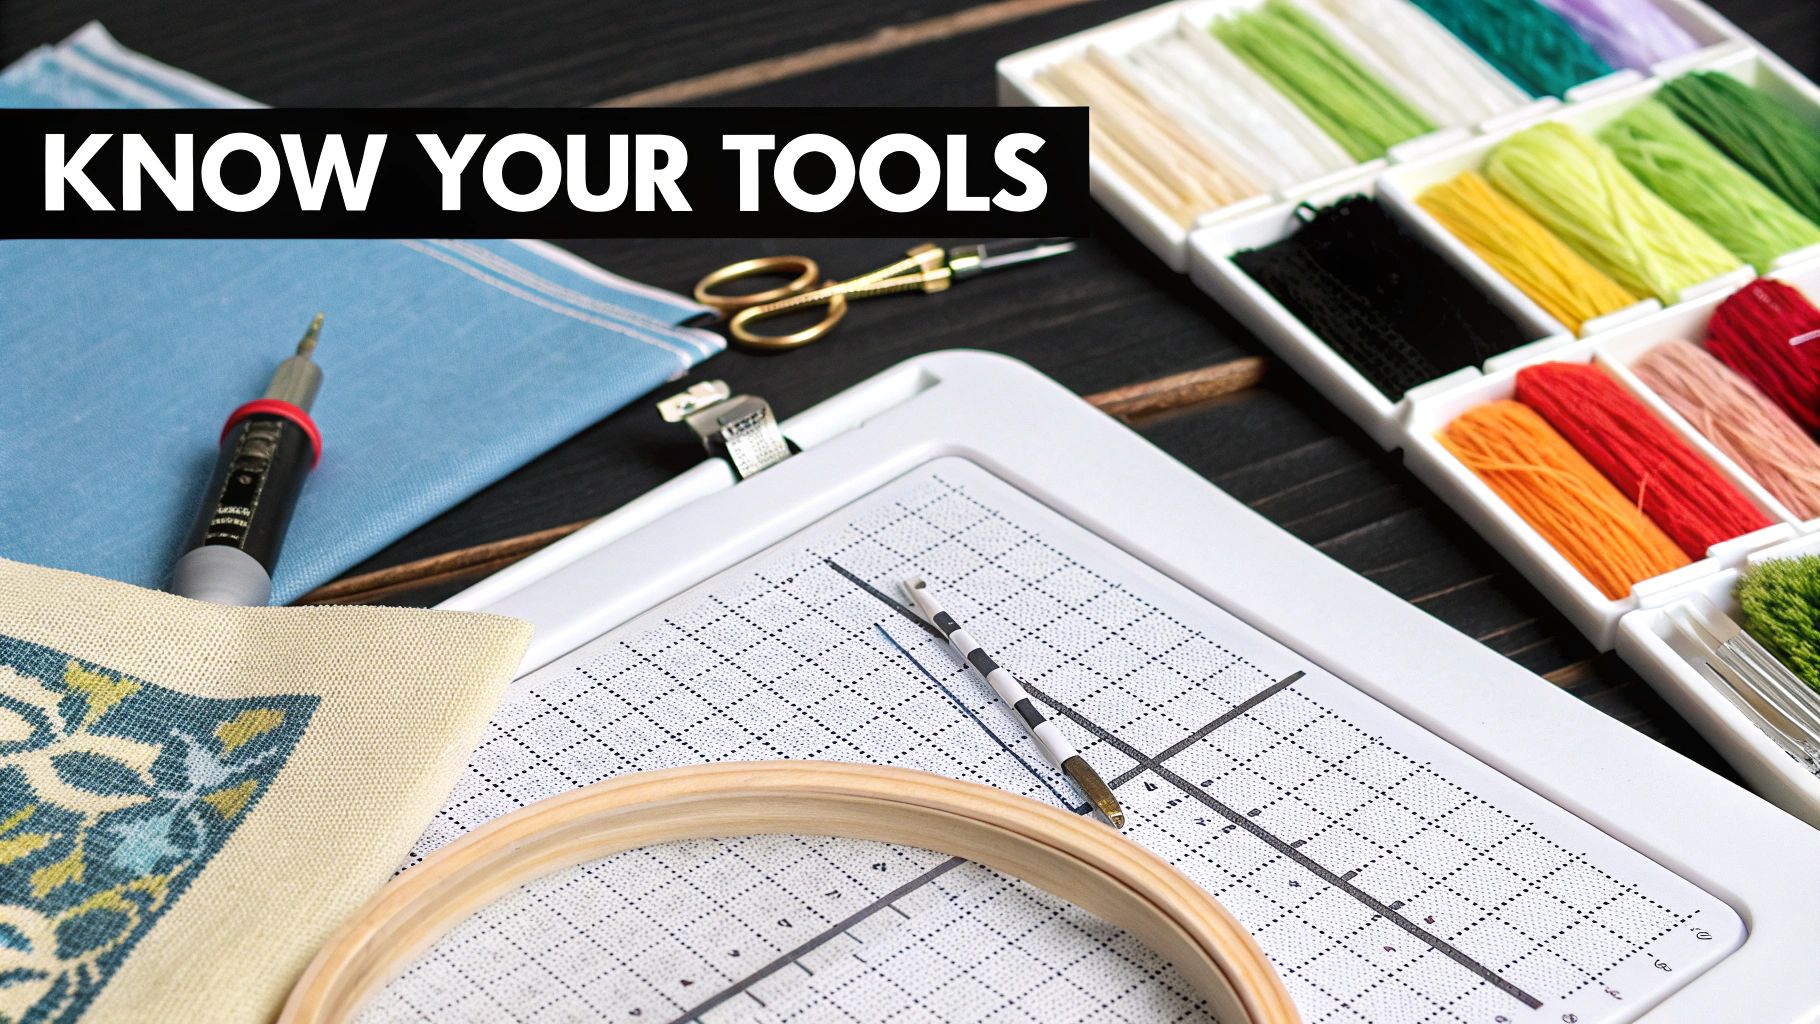
Understanding the Tools in Your First Kit
Opening your first cross stitch kit is a special kind of magic. It’s like a creative promise sitting in a box, ready for you to bring it to life. Inside, you'll find a curated set of tools, and each one has an important role to play. Let's break down what's inside so you can get started with total confidence.
The first thing you’ll probably see is the fabric. Most cross stitch sets for beginners come with a piece of Aida cloth, and for good reason. This fabric is your best friend when you're starting out because its woven grid of tiny squares shows you exactly where to place your needle.
Your Canvas: Aida Fabric Explained
You'll hear the term "count" used with Aida fabric, and it's simpler than it sounds. It just means how many squares (or stitches) you can fit into one inch of fabric. A lower count means bigger squares and chunkier stitches, while a higher count gives you smaller, more detailed stitches.
For anyone new to cross stitch, 14-count Aida is the gold standard. The holes are easy to see, and the stitches are big enough that you feel like you're making real progress quickly. It’s the perfect middle ground—you get a nice-looking result without straining your eyes. Think of it as learning to write on lined paper before moving to a blank page.
Aida fabric is your built-in guide for every single stitch. By starting with a lower count like 14, you're setting yourself up for success, creating neat stitches while you build that all-important muscle memory.
This little table helps visualize how different Aida counts stack up, making it clear why 14-count is such a fan favorite for new stitchers.
Aida Fabric Count Comparison for Beginners
| Aida Count | Stitches Per Inch | Common Use Case | Beginner Friendliness |
|---|---|---|---|
| 11-Count | 11 | Kids' projects, designs meant to be seen from a distance | Very High |
| 14-Count | 14 | The go-to for beginner kits and most general projects | Excellent |
| 16-Count | 16 | Projects needing a bit more detail without being tiny | Good for a Second Project |
| 18-Count | 18 | Detailed patterns, full-coverage pieces, ornaments | Challenging for Beginners |
With the right fabric in hand, you'll be able to focus on the fun part: stitching!
Threads And Needles: The Dynamic Duo
Next up: the thread! In the stitching world, we call this "floss." The best beginner kits will include high-quality DMC cotton floss, which is loved for its vibrant colors, durability, and silky-smooth feel as you stitch.
Look closely at a single strand of floss, and you'll see it’s actually made of six smaller strands twisted together. Most patterns will tell you to use just two of these strands for your stitches.
A lifesaver in any good beginner kit is pre-sorted threads. Instead of getting a tangled nest of colors you have to guess at, your floss comes neatly organized and labeled on a card. Each color corresponds to a symbol on your pattern, saving you a ton of time and frustration.
The final part of this trio is your needle. Cross stitch uses a special kind of needle called a tapestry needle, which has two distinct features that make it perfect for beginners:
- A Large Eye: This makes threading the floss so much easier, especially when you're just getting the hang of it.
- A Blunt Tip: Unlike a sharp sewing needle, a tapestry needle has a rounded tip. It’s designed to glide right through the holes in the Aida fabric instead of piercing the cloth, which keeps your stitches looking uniform.
These three tools are the heart of your kit. Once you've got a project or two under your belt, you might want to explore other handy tools. You can find a whole world of useful cross stitch accessories in our detailed guide.
The Hoop And The Chart: Your Support System
The embroidery hoop is the frame that holds your fabric tight while you work. It’s typically made of two rings that fit together, with a small screw to adjust the tension. Keeping your fabric taut like a little drum is the secret to neat, professional-looking stitches because it prevents puckering and helps you maintain even tension.
Last but not least is the pattern, or chart. This is the blueprint for your entire project. It's a grid filled with symbols, where each symbol represents a specific thread color. A good kit will have a chart that's clear and easy to read, with a simple color key. The chart is your guide, telling you exactly which color to use and where to stitch, leading you from a blank canvas to a beautiful finished piece.
How to Choose Your Perfect First Project
The secret to getting hooked on cross stitch is picking a first project that’s both fun and totally doable. Think of it like learning to cook—you wouldn't jump straight to a five-course gourmet meal. You’d start with something simple and satisfying, like a perfect grilled cheese. The same idea applies here. The right beginner kit is your recipe for success.
Your goal is to find a project that teaches you the basic rhythm of stitching without ever feeling overwhelming. You're looking for a kit that sets you up for a quick, rewarding win. That feeling of finishing your first piece is what builds confidence and makes you excited to start the next one.
Start Small and Simple
When you're looking at cross stitch sets for beginners, the golden rule is to start small. A huge, complex design might look amazing on the box, but it can get discouraging fast. Trust me, a finished 5x5 inch piece you’re proud to display is so much better than a massive 12x16 inch project that ends up abandoned in a drawer.
Keep an eye out for kits with these features:
- A Limited Color Palette: Juggling dozens of thread colors is a skill you'll build over time. For now, a design with just 5-10 colors is perfect. It lets you focus on your stitching technique instead of constantly stopping to switch threads.
- Small Dimensions: A project under 8x8 inches is the sweet spot. You can often finish it in a weekend, which gives you that wonderful "I made this!" feeling that fuels your motivation.
- Big Blocks of Color: Patterns with large, solid areas of a single color are much easier to follow than ones with tiny, confetti-like stitches scattered all over the place.
This approach lets you nail the fundamentals—threading your needle, making neat little 'X's, and securing your threads—without any pressure. If you need some ideas, we've put together a great list of easy cross stitch patterns for beginners that tick all these boxes.
Stamped vs. Counted Kits: A Key Decision
Once you have a size and style in mind, you’ll run into the two main types of kits: stamped and counted. Knowing the difference is a game-changer for a beginner.
A counted cross stitch kit gives you a blank piece of Aida fabric and a separate paper chart. You have to literally count the squares on the fabric and match them to the chart to know where to put each stitch. It’s very precise, but it requires a lot of focus and can be a bit tricky for your first go.
A stamped cross stitch kit, on the other hand, comes with the pattern printed right onto the fabric in color. Your job is simply to stitch over the colored squares with the matching thread. Think of it as a paint-by-numbers, but with a needle and thread.
For your very first project, a stamped kit is almost always the way to go. It completely removes the counting, which is often the biggest hurdle for new stitchers, and lets you get right to the fun part: the actual stitching.
The numbers back this up. Beginner-friendly kits are flying off the shelves, with stamped floral and animal designs leading the pack. By eliminating the need to count, these kits address a pain point for 75% of first-timers. They also boost project completion rates to an impressive 85%, compared to just 40% for loose patterns. You can see more about cross stitch market trends on accio.com.
Choose a Design You Genuinely Love
Finally, and this might be the most important tip of all, pick a design that you absolutely love. Don't just grab a kit because it says "for beginners." You'll be way more motivated to see a project through to the end if you're genuinely excited about how it will look.
Whether it’s a quirky animal, a beautiful flower, or a funny quote, your first project should be something you can’t wait to see come to life. That personal connection is what turns a simple craft into a real hobby. A good kit gives you the tools, but your passion for the design is what provides the magic.
Your Step-By-Step Guide to Making the First Stitch
You've got your perfect beginner kit, and now it's time for the best part—making that first, satisfying stitch. This is the moment it all comes together. Don't worry about being perfect; just enjoy the process. I'm here to walk you through every step, turning that blank fabric into your first little masterpiece.
Think of it like learning the first few chords on a guitar. Once you master the basic motion, you can start creating something beautiful. We'll start by getting your fabric and thread ready, then dive into the simple stitch that forms the heart of every single cross stitch project.
Preparing Your Workspace
A little prep work makes a world of difference. First, find a comfortable chair and a spot with good lighting. Lay out all your materials so they’re within easy reach: your fabric, hoop, pre-sorted threads, needle, and a small pair of scissors. Having everything organized from the start keeps things relaxing and frustration-free.
Now, let's get your fabric set up. Most cross stitch sets for beginners come with Aida cloth that’s already cut to size. If it's a bit creased from the packaging, a quick pass with an iron on a low setting will smooth it out. Next, grab your embroidery hoop. Unscrew the outer ring, place the fabric over the inner ring, and then press the outer ring down on top. Tighten the screw until the fabric is firm and even, almost like the surface of a tiny drum.
A taut canvas is the secret to uniform stitches. It prevents the fabric from puckering and helps you maintain an even tension, which is a key skill for a clean, professional-looking finish.
Threading Your Needle Like a Pro
Alright, let's talk about the thread, which we call floss. A single strand of embroidery floss is actually made of six smaller threads twisted together. Your pattern will almost always tell you to use just two of these strands for stitching. If you try to use all six, you’ll end up with bulky, messy-looking crosses.
Here’s a trick I learned years ago to separate the strands without turning them into a tangled nightmare:
- Cut a length of floss about 18 inches long. A good rule of thumb is the distance from your fingertips to your elbow. Any longer, and it's practically guaranteed to knot up as you stitch.
- Pinch one end of the floss and gently pull out a single strand. The other five strands might bunch up a bit, but they won't tangle.
- Repeat the process to pull out a second strand. Now you have the two you need for stitching.
With your two strands ready, it's time to thread the needle. Tapestry needles have a nice big eye, which helps a lot. The classic method is to just lick the end of the threads to stiffen them and push them through. If you find that tricky, a needle threader is a lifesaver and a fantastic, inexpensive little tool to have on hand.
This simple flowchart breaks down how to pick a great first kit based on things like size and the number of colors.

As you can see, starting with a small, simple project is the surest way to have a successful and fun first experience.
Making the Perfect Cross Stitch
You're all set to make your first "X"! The cross stitch is just two small diagonal stitches layered on top of each other. Find the center of your design on the pattern, and then find the corresponding center point on your Aida cloth. This is where you'll begin.
Here’s how to create a single, perfect cross stitch:
- The First Leg: From the back of the fabric, bring your needle up through the bottom-left hole of one square on your Aida. Leave a two-inch tail of thread hanging at the back.
- Hold the Tail: Don't tie a knot! As you make your next few stitches, just make sure to stitch over this tail on the back of your fabric. This secures it neatly.
- Complete the Diagonal: Push the needle back down through the top-right hole of that same square. You've just made your first diagonal stitch: /.
- The Second Leg: Now, bring the needle back up through the bottom-right hole of the same square.
- Complete the 'X': Finally, go back down through the top-left hole to complete your cross. That's it! You've officially made your first stitch!
When you have a whole row of the same color to do, it's much faster to work in two passes. First, stitch a whole row of bottom-half stitches (going like this: **///// ///// ///// **). Then, work your way back across the row, completing the top half of each 'X' (like this: **\\\ \\\ \\\ **). This not only saves thread but also makes sure all your top stitches lie in the same direction, which gives your finished project that polished, consistent look.
Common Beginner Mistakes and How to Fix Them
Let's be honest—every single person who has ever picked up a needle and thread has made a few mistakes. It’s just part of the process! Think of these common hiccups not as failures, but as your official initiation into the world of stitching. The best part? Nearly every beginner slip-up is surprisingly easy to fix.
This is your friendly guide to navigating those little "oops" moments. We'll tackle everything from those maddening knots to the stomach-drop feeling of realizing a stitch is in the completely wrong spot. Most importantly, I'll show you how to get your project back on track without the drama.
The Problem of Tangled Threads
Ah, the dreaded "thread nest." You pull your needle through the fabric, and suddenly you’ve got a tangled mess on the back. It’s one of the most common frustrations for new stitchers, and it usually happens for one of two reasons: your thread is way too long, or it’s gotten twisted up.
The fix is simple. First, try working with shorter lengths of floss. A good rule of thumb is to cut a piece no longer than the distance from your fingertips to your elbow—about 18 inches is perfect. If you see your thread starting to twist as you stitch, just let your needle and thread dangle freely from your project for a few seconds. Gravity will do the work for you, untwisting it naturally.
Uneven or Loose Stitches
Ever look at your work and notice some 'X's are neat and flat, while others look a bit puffy or loose? That's all about thread tension, which is just a fancy way of saying how tightly you pull your stitches. Finding that perfect, consistent pull takes a little practice. The goal is to get your stitches to lie smoothly against the fabric without causing it to pucker.
Your embroidery hoop is your best friend here. Before you even start, make sure your fabric is pulled taut inside the hoop, almost like a little drum. As you stitch, try to pull each stitch with the same gentle pressure. You'll find a rhythm for it before you know it.
A great trick for consistent tension is to work in two separate passes when you have a row of the same color. First, stitch all the bottom legs of the 'X's in a row (////). Then, come back along the row, stitching all the top legs (\\) to complete the 'X's. This assembly-line method really helps keep everything looking uniform.
The Dreaded Misplaced Stitch
It's a moment every stitcher knows well. You're happily stitching away, admiring your progress, when you spot it: a stitch—or a whole section of them—in the wrong place. Don't panic! You absolutely do not have to live with it, and you definitely don't have to start over.
Fixing it is much less painful than you think. Just slide the tip of your needle under the rogue stitch on the front of your fabric and gently pull it out. If you've got a whole cluster to remove, a seam ripper can be handy, but be incredibly careful not to snag the Aida fabric. It's always worth the extra minute to unpick a mistake and do it right. That little bit of backtracking is a tiny price for a finished piece you’ll be proud to show off.
With these simple solutions in your back pocket, no little error can derail your creative flow. Every mistake is just a lesson that makes you a more confident and skilled stitcher for your next project.
Turning Your Photos Into Custom Cross Stitch Art
So you've finished a few projects. You’ve got the hang of the fabric, the rhythm of the needle, and the satisfaction of seeing an image come to life. Now, a whole new world of creativity is about to open up. You're ready to move beyond following someone else's pattern and start telling your own stories in thread.
This is where the real magic happens: turning your own photos into one-of-a-kind cross stitch art. It's a hugely rewarding step in any stitcher's journey.
Imagine stitching a favorite family portrait, a goofy picture of your dog, or that one breathtaking sunset from your last vacation. This isn't some far-off, expert-level technique anymore. Thanks to modern services, it’s surprisingly easy to create a deeply personal piece, even if you still feel like a beginner.
From Photo to Pattern The Easy Way
The idea is simple. You upload a digital photo, and a specialized service handles the complex work of turning it into a stitchable pattern. But it gets better. The best services don't just give you a chart; they send you an entire kit built around your specific image.
Forget hunting for the right Aida cloth or spending hours at the craft store trying to match dozens of thread colors. An all-in-one custom kit bundles everything you need.
- Your Custom Chart: A clear, easy-to-read pattern generated directly from your photo.
- Aida Fabric: The perfect piece of fabric, pre-cut to the right size and count for your design.
- Pre-sorted DMC Threads: All the exact colors required to match your photo, already organized and ready to go.
- Needles and Instructions: The essentials to get you started the moment you open the box.
This approach takes all the guesswork and prep work out of the equation, so you can jump straight to the fun part: stitching a memory. It’s no surprise this has become such a popular next step. The needlecraft patterns market is projected to hit USD 63.8 billion by 2035, and a whopping 40% of users try a custom design after their first kit, all thanks to this photo-to-pattern technology. If you're interested in the numbers, you can explore the full needlecraft market analysis on industrytoday.co.uk.
Creating a Truly Personal Masterpiece
This is where cross stitch stops being just a hobby and becomes a powerful form of personal expression. There’s something special about stitching a piece from your own life. Each stitch connects you back to the moment—a wedding day, a child’s first smile, or a landscape that means the world to you.
A custom cross stitch kit does more than just replicate an image; it translates a feeling into a physical object. The time and care you put into each stitch infuse the final piece with love, making it a powerful keepsake or an unforgettable gift.
Here’s a quick look at how straightforward these custom kit services are, showing the simple upload and preview options.
This screenshot shows just how simple it is. The process guides you right through uploading your image, picking a size, and seeing a mock-up of what your finished pattern will look like. This technology really does make creating meaningful art accessible to everyone. To get a better sense of how this conversion works behind the scenes, take a look at our guide on how to make cross stitch patterns from photos.
Ultimately, turning a photo into a cross stitch project is the perfect way to combine your new skills with your most important memories. It’s a beautiful way to get your favorite moments off your phone and turn them into treasured heirlooms that can hang on your wall.
Frequently Asked Questions About Cross Stitch
As you get started, you're bound to have a few questions pop into your head. It happens to everyone! Think of this as your go-to spot for the things most beginners wonder about. Getting these basics sorted out will help you stitch with more confidence and keep this new hobby feeling like the fun, relaxing escape it should be.
For example, almost everyone asks how long a project will take. It really depends, but a small beginner kit—something around 5x5 inches—is a perfect weekend project. You can usually knock one out over a couple of cozy evenings. The real goal is to enjoy the rhythm of stitching, not to sprint to the finish line.
How Do I Wash My Finished Project?
So, you’ve placed your final stitch—congratulations! You’ll probably notice the fabric has picked up some natural oils from your hands or has some stubborn creases from being in the hoop. A quick, gentle wash is the perfect way to give your work a fresh, professional look before you show it off.
It’s easy. Just fill a bowl with cool water and add a single drop of mild soap, like a clear dish soap. Swish your piece around for a minute or two, rinse it really well under cool running water, and then lay it flat on a clean towel. To get the excess water out, roll the towel up like a burrito and give it a gentle squeeze. Never wring it out! That can distort your beautiful stitches. After that, just let it air dry completely on a flat surface.
A gentle wash at the end is like the final polish on a piece of furniture. It smooths out any wrinkles, brightens the colors, and gets your work ready to be beautifully displayed.
What Should I Do With My Leftover Thread?
After you finish one of the many cross stitch sets for beginners, you'll definitely have some thread left over. Whatever you do, don't throw it out! That extra floss is crafting gold and the start of your personal supply stash.
You can use these leftover bits for tiny future projects, to fix a small mistake on another piece, or even to start dabbling in your own simple designs. A great habit is to wind the extras onto little bobbins (you can buy them or just make them from cardstock). This keeps them from becoming a tangled mess and makes it easy to see what colors you have on hand. It's how stitchers slowly build an amazing color library over time.
Can I Frame My Cross Stitch Myself?
You absolutely can, and it’s a really satisfying way to complete your project. You don’t need a professional framer; ready-made frames from a craft store or even a home goods store work perfectly.
The key is to mount your finished piece on something sturdy first, like acid-free foam core or heavy cardstock, to keep it from sagging or wrinkling inside the frame. A popular technique is to "lace" the back with a needle and strong thread, pulling the fabric taut around the board before you pop it into the frame. This makes sure your stitching stays perfectly centered and smooth for years to come.
Ready to turn your own cherished memories into timeless stitched art? At Cross Stitched, our custom kits provide everything you need—from pre-sorted threads to a personalized pattern—to create a masterpiece from your favorite photo. Start your custom cross stitch project today!


