

If you're just getting started with embroidery, you might think floss is just fancy thread. But it's so much more than that. Hand embroidery floss is the lifeblood of any stitching project; think of it less like simple string and more like a painter's most versatile brush.
This specialized thread is engineered specifically for needlework, typically made of six loosely twisted strands that you can separate. This unique structure is what gives you, the artist, a ton of creative control.
What Is Hand Embroidery Floss
Standard sewing thread is a single, strong ply meant to disappear into a seam. Hand embroidery floss, on the other hand, is designed to be the star of the show.
Picture a tiny rope made of six individual threads twisted together—that's the magic of standard cotton floss. You're not stuck with one thickness. You can use all six strands for a bold, chunky line, or you can peel away a single strand for details as fine as a pen stroke.
This ability to divide the thread is what makes floss so special. It's the key to adding texture, depth, and detail to your work in a way no other thread can match.
Why Its Structure Matters
Controlling the thickness of your stitching line by simply choosing how many strands to use is a fundamental skill in embroidery. It's what separates a flat design from one that feels alive.
- Create Depth and Texture: Imagine stitching a flower. You could use three or four strands for the lush petals and then switch to a single strand for the delicate veins. This variation makes the design pop.
- Achieve Fine Detail: For tiny lettering, facial features, or other intricate patterns, using a single strand gives you the precision you need to get it just right.
- Fill Areas Efficiently: When you have a larger block of color to fill in, using all six strands acts like a broad paintbrush. It covers the area faster and creates a wonderfully dense, luxurious finish.
Simply put, embroidery floss isn't just thread. It's an adaptable tool that opens up a whole spectrum of creative possibilities. Learning to manipulate its strands is your first real step toward turning simple stitches into textile art.
Once you get a feel for what floss is and why its structure is so brilliant, you'll be ready to dive into all the different fibers, colors, and techniques. This is the foundation for every beautiful piece you'll create.
Exploring the Different Types of Embroidery Floss
When you start out, you probably think embroidery floss is just… floss. But once you dive in, you'll find a whole world of different fibers, each with its own personality. While that classic six-strand cotton skein is the backbone of most projects, getting to know the other options is like an artist discovering new paints—it opens up so many creative doors.
The fact that we have so many choices isn't a surprise. The global embroidery floss market is booming, valued at $1.2 billion and expected to hit $1.85 billion by 2033. This isn't just a corporate trend; it’s driven by people like us, stitchers who are always looking for new ways to bring our ideas to life. You can read more about this on marketintelo.com.
The Classic: Six-Strand Cotton Floss
This is the stuff you see everywhere. It’s the thread that comes in almost every kit and lines the walls of craft stores. Made from mercerized cotton, it has a lovely, smooth finish with just a hint of a sheen. But its real magic is in its structure: it's made of six individual strands that can be easily separated.
This divisibility is what gives you total control. Want a fine, delicate line? Use one strand. Need a bold, chunky stitch? Use all six. Big names like DMC and Anchor have this down to a science, offering hundreds of colors that are consistent and won't fade. It’s the perfect all-rounder, whether you're cross-stitching on Aida or filling in a satin stitch on a jean jacket. You can get a deeper look into the specifics of cotton embroidery thread in our dedicated guide.
This diagram really breaks down how the structure of the floss—its composition and those six little strands—directly impacts what you can create and the final look of your work.
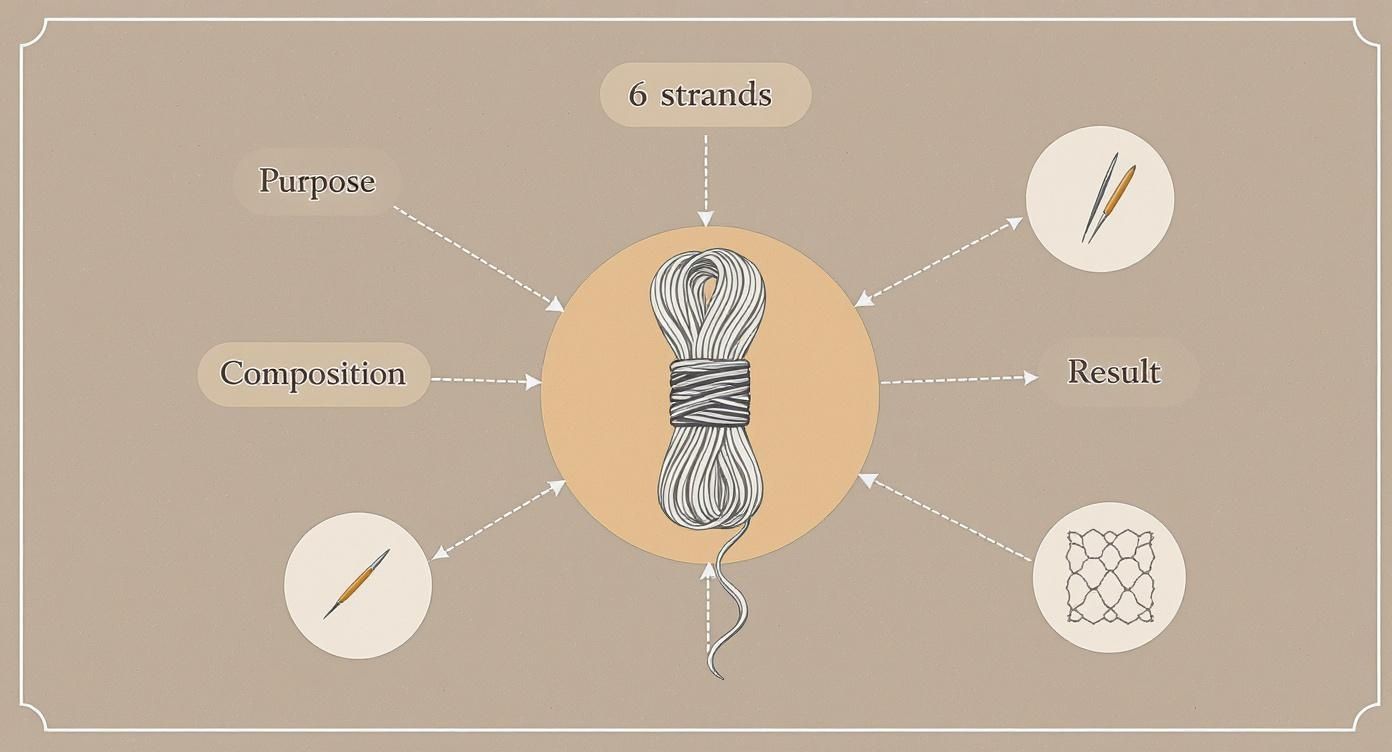
It’s a great visual reminder that how we use these strands is what allows for such a huge range of artistic effects.
Getting Fancy with Specialty Floss
Sometimes, a project just calls for a little something extra. That’s where specialty floss comes in. These threads bring texture, shine, and character to the table that standard cotton just can't match.
Here's a quick look at the most common types you'll run into.
Embroidery Floss Fiber Comparison
| Fiber Type | Key Characteristic | Best For | Handling Tip |
|---|---|---|---|
| Pearl Cotton | Tightly twisted, non-divisible | Bold outlines, Hardanger embroidery, redwork | Choose the right size (e.g., #5, #8) as you can't split it. |
| Rayon Floss | High-gloss, silky sheen | Satin stitches, light-catching details | Can be slippery! Use shorter lengths to avoid tangles. |
| Silk Floss | Ultimate luxury, brilliant luster | Heirloom projects, fine embroidery on delicate fabrics | Glides smoothly but is delicate. Handle with clean hands. |
| Metallic Floss | Sparkle and glitter | Accents, festive designs, adding a "pop" of glamour | Prone to fraying. Use a thread conditioner and short strands. |
Let's break those down a bit more:
-
Pearl Cotton (Coton Perlé): Unlike its six-strand cousin, pearl cotton is a single, non-divisible thread. It has a beautiful, rope-like twist that gives stitches a raised, defined texture. It’s fantastic for things like redwork or Hardanger embroidery where you want your lines to really stand out.
-
Rayon Floss: If you want your stitches to scream "look at me!", reach for rayon. It’s incredibly shiny and slick, perfect for satin stitches that are meant to catch the light. A word of warning, though: that slipperiness can make it a bit tricky to handle, so working with shorter lengths of thread is a good idea.
-
Silk Floss: This is the luxury option. Silk has a gorgeous, unmatched luster and feels incredibly soft. It glides through fabric like a dream and is the go-to for high-end, delicate projects, like stitching on a silk blouse or creating a piece you want to be passed down for generations.
-
Metallic Floss: For that touch of bling, nothing beats metallic thread. It's usually made from a blend of materials to create that signature glitter. It can be a little notorious for tangling and fraying, but the dazzling result is often worth the extra patience. Stitching with shorter strands and using a thread conditioner can make the process much smoother.
Choosing the right floss is all about matching the thread's character to your design's intent. A rustic floral design might shine with matte cotton, while a glamorous monogram could call for the brilliance of silk or the sparkle of metallic thread.
Mastering the Art of Using Floss Strands
The real secret to getting your embroidery to look just right isn't just about the stitches you pick—it's about how you handle the hand embroidery floss itself. That standard cotton skein you bought isn't one single thread. It’s actually a tiny, versatile rope made of six individual threads gently twisted together. Learning how to work with these individual strands is what really takes your stitching from good to great.
This six-strand structure is what gives you total control over the texture and thickness of your work. By simply changing how many strands you thread through your needle, you can completely transform a stitch from something delicate and subtle to something bold and chunky.
How Many Strands Should You Use?
So, how do you decide on the right number? It all comes down to what you're trying to achieve with your design. There aren't any hard-and-fast rules, but there are some solid guidelines that will help you get the look you're after.
-
For Fine, Delicate Details (1-2 Strands): When you're stitching tiny lettering, intricate facial features, or whisper-thin lines, grab just one or two strands. This creates a crisp, precise line, almost like you're drawing with a fine-tipped pen. It’s perfect for capturing those tiny details without making them look clunky.
-
For General Stitching and Outlines (3-4 Strands): This is my go-to for most projects. Using three or four strands gives you a nice, solid line with good coverage. It’s perfect for outlining shapes or filling in medium-sized areas on fabrics like cotton and linen. Many patterns will call for this as a default.
-
For Bold Fills and High Impact (5-6 Strands): Want to make a statement? Use all six strands. This is your best bet for filling in large areas with solid color or for creating a thick, textured line that really pops off the fabric. The result is a chunky, almost three-dimensional stitch that gives your work a ton of personality.
Think of your floss strands like paintbrushes. A single strand is your fine-detail brush for intricate work. All six strands are like your big, broad brush, perfect for slathering on rich color and covering a lot of ground.
The Simple Art of Separating Floss Strands
Separating strands can feel a little clumsy at first, and if you do it wrong, you’ll end up with a knotted mess. The trick is to avoid just yanking them apart from the middle—that’s a one-way ticket to Tangle Town.
Instead, try this completely foolproof method:
- Cut Your Length: First, cut a manageable piece of floss. A length of about 18 inches—roughly the distance from your fingertips to your elbow—is perfect. Any longer and it’s likely to tangle as you stitch.
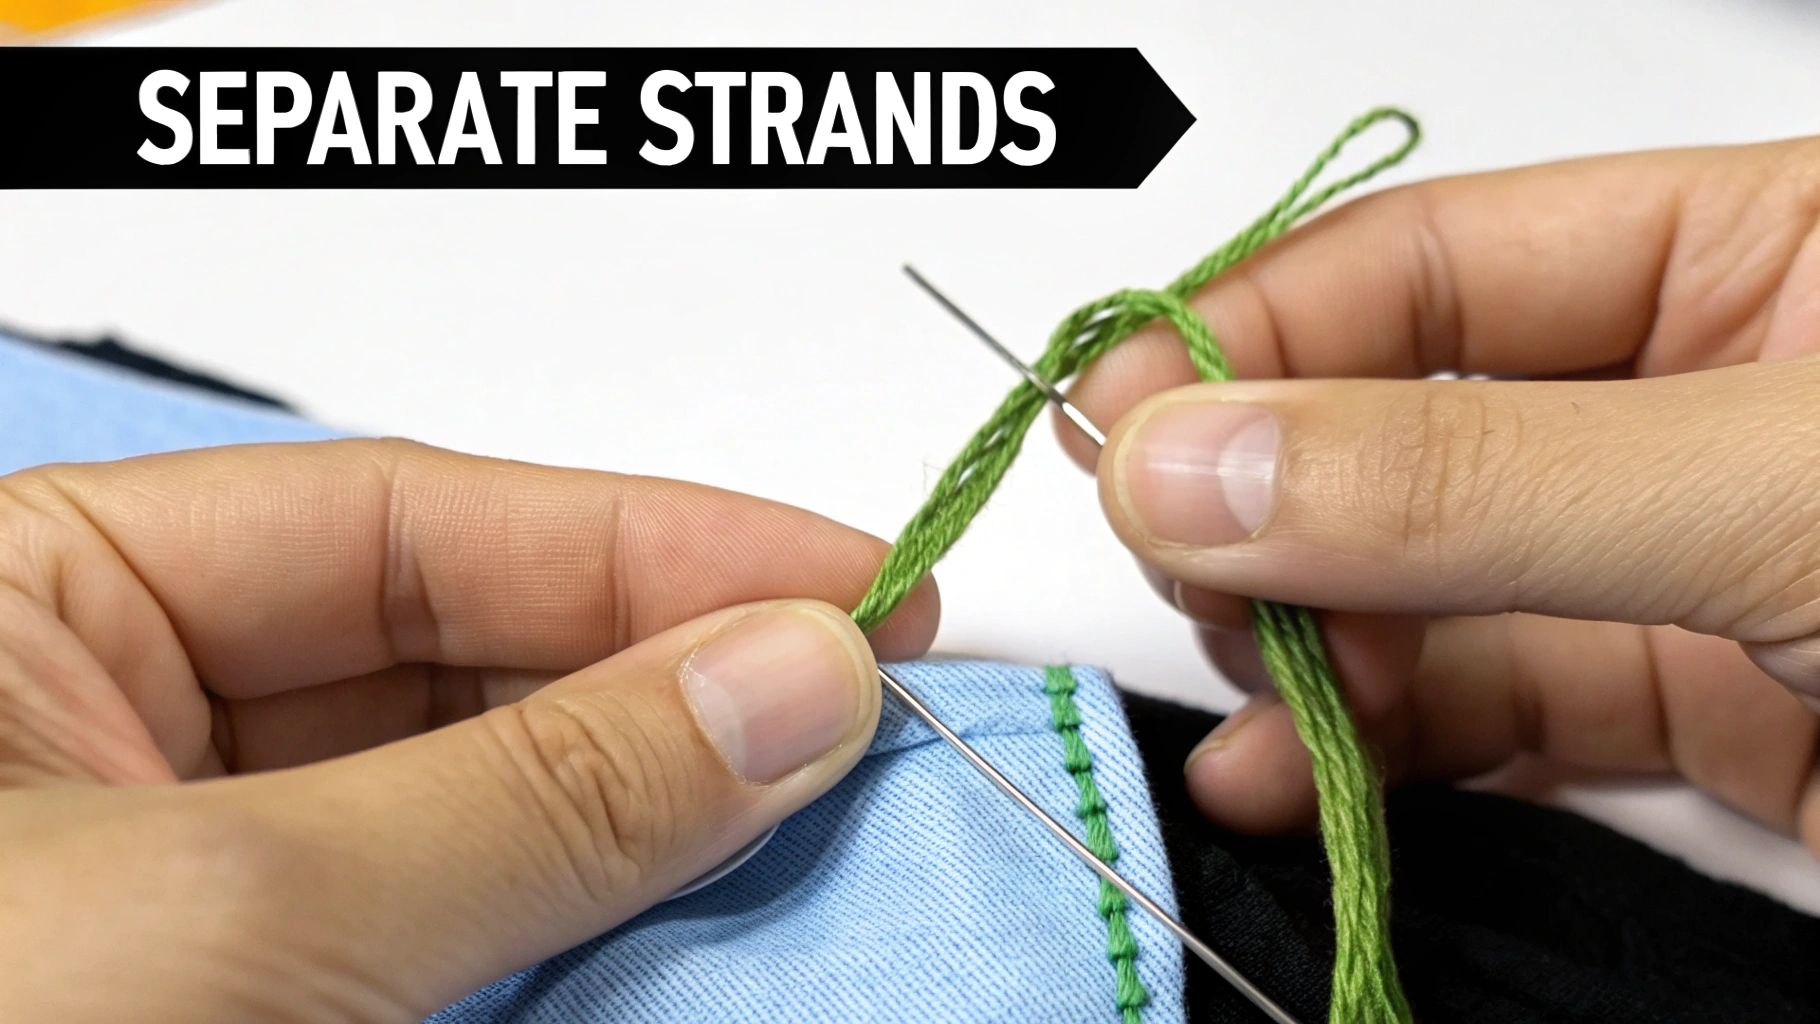
- Pinch and Isolate: Hold the floss with one hand and use your other to fan out the very top. Pinch a single strand between your thumb and forefinger.
- Pull Up, Not Out: Gently and slowly pull that single strand straight up and out of the group. The other five strands will bunch up a bit below your fingers, but they won't knot up. It feels like magic.
- Repeat as Needed: Keep pulling out single strands this way until you have the number you need. Then, just line them all back up together and thread them through your needle as one.
This little technique keeps your hand embroidery floss smooth and ready to stitch, making sure every stitch you make lays flat and looks professional.
How to Choose the Right Floss for Your Project
Walking into a craft store and facing a wall of embroidery floss is a rite of passage for every stitcher. It’s both a thrill and, let's be honest, a little overwhelming. With a rainbow of colors and textures staring back at you, how do you even begin to choose? The secret isn't just about picking pretty colors; it's about thinking through your project's needs first.
Your choice really boils down to a few key questions. What fabric are you using? What kind of texture are you going for? How detailed is your pattern? Answering these will naturally guide you to the perfect floss. A delicate floral on fine linen, for example, needs something entirely different than a bold, graphic patch on a denim jacket.
Fabric and Detail Level
First things first: you have to match your floss to your fabric. Think of it as a partnership—the right pair works together beautifully. A thread that's too heavy can pull and pucker a lightweight fabric, while a thread that's too fine will look skimpy and get lost on a heavy-duty canvas.
- For Sturdy Weaves (Aida, Denim, Canvas): These fabrics are tough and can handle just about anything you throw at them. Go ahead and use all six strands of cotton floss for thick, solid coverage, or try a chunkier thread like pearl cotton for really defined, poppy lines.
- For Delicate Weaves (Linen, Lawn, Silk): These require a much lighter touch. It’s best to stick with just one or two strands of standard cotton floss. This is also where luxurious silk threads really shine, as their finer diameter glides through the delicate weave without a fight.
The same logic applies to the level of detail in your pattern. If you’re stitching tiny, intricate elements like facial features or small text, using one or two strands will give you the precision you need. For filling in larger blocks of color, using more strands will get the job done faster and create a richer, more substantial look.
Texture and Visual Effect
Now for the fun part: what kind of finish do you want? Are you aiming for a classic matte look, a subtle satin sheen, or a full-on-sparkle moment? This is where specialty flosses can take your project from nice to absolutely stunning.
The texture of your floss is a powerful tool. A matte cotton creates a soft, traditional feel, while a high-sheen rayon can make a design look modern and vibrant. Choosing the right finish is as important as choosing the right color.
This kind of creative control is a huge reason why crafting is more popular than ever. In fact, the global market for hand embroidery threads is projected to hit $1.5 billion, thanks in large part to stitchers sharing their unique, textured creations online. You can see more about this trend and its growth on archivemarketresearch.com.
Brands and Budgets
Finally, let’s talk about the floss itself. There’s a reason why brands like DMC and Anchor are the gold standard. They produce consistent, high-quality six-strand cotton floss in a mind-boggling array of colors. Their universal numbering system also makes it incredibly easy to follow patterns from any designer. Our DMC thread colour chart guide is a great resource for navigating their system.
But don't forget the smaller players! Hand-dyed flosses from independent artisans offer gorgeous, variegated colors that can give your work a truly unique, artistic feel. They tend to be a bit pricier, but for a special project where you want a one-of-a-kind result, they are absolutely worth it. In the end, it’s all about balancing your creative vision with your budget to make that perfect final choice.
Little Tricks for a Big Difference in Your Stitching
Working with embroidery floss should be a joy, not a battle against knots and tangles. I've found that a few simple habits can completely transform the experience, turning potential frustration into a smooth, relaxing process. Getting these basics down means you can focus on the creative part, not on damage control.
The single best piece of advice I can give? Cut your floss to a manageable length. It's so tempting to pull a super long piece off the skein, thinking you'll save time by not having to re-thread your needle as often. Trust me, it backfires. That long tail is the number one cause of surprise knots. Stick to a length of about 18 inches—roughly from your fingertips to your elbow. It's the perfect sweet spot to prevent the floss from twisting back on itself as you stitch.
How to Separate Strands Without Making a Mess
Okay, you've got your 18-inch piece. Now you need to separate the strands. Whatever you do, don't just try to peel them apart from the middle. That's a one-way ticket to a knotted bird's nest.
Instead, try this foolproof method. It works every single time.
- Let the cut piece of floss hang down from your fingers.
- Gently pinch just one single strand at the top.
- Smoothly pull that strand straight up and out. The other five strands will bunch up at the bottom, but they won't tangle. It's like magic.
- Do this for each strand you need for your project.
- Once you have the number you want—say, two or three—just group them back together and thread your needle.
Using this little trick ensures the strands lay parallel to each other, which is the secret to getting those beautifully flat, even stitches that make your work look so professional.
Getting That Polished, Professional Look
Beyond just managing your thread, a couple of other things can elevate your stitching from good to great. It really comes down to consistent tension and having the right tools for the job.
Your goal is what I call "Goldilocks tension"—not too tight that it puckers the fabric, and not too loose that the stitches sag. You want the floss to lay gracefully on the surface without pulling or distorting the weave.
Now, for those threads that just don't want to cooperate (I'm looking at you, metallic floss!), a thread conditioner is your best friend. It's usually a tiny pot of silicone or a special wax that you run your thread through before you start stitching. This light coating helps the floss glide through the fabric like butter, taming frizz and preventing fraying. It's a tiny step that makes a world of difference, especially with specialty threads.
How to Properly Store and Care for Your Floss
Once you start building a collection of hand embroidery floss, you'll realize that keeping it all straight is half the battle. Treating your threads with a little care not only protects your investment but, more importantly, makes your stitching time so much more relaxing. Nobody wants to spend 20 minutes untangling a knot before they can even make the first stitch.
Proper storage is really just about keeping your floss clean, organized, and ready to go when inspiration strikes.
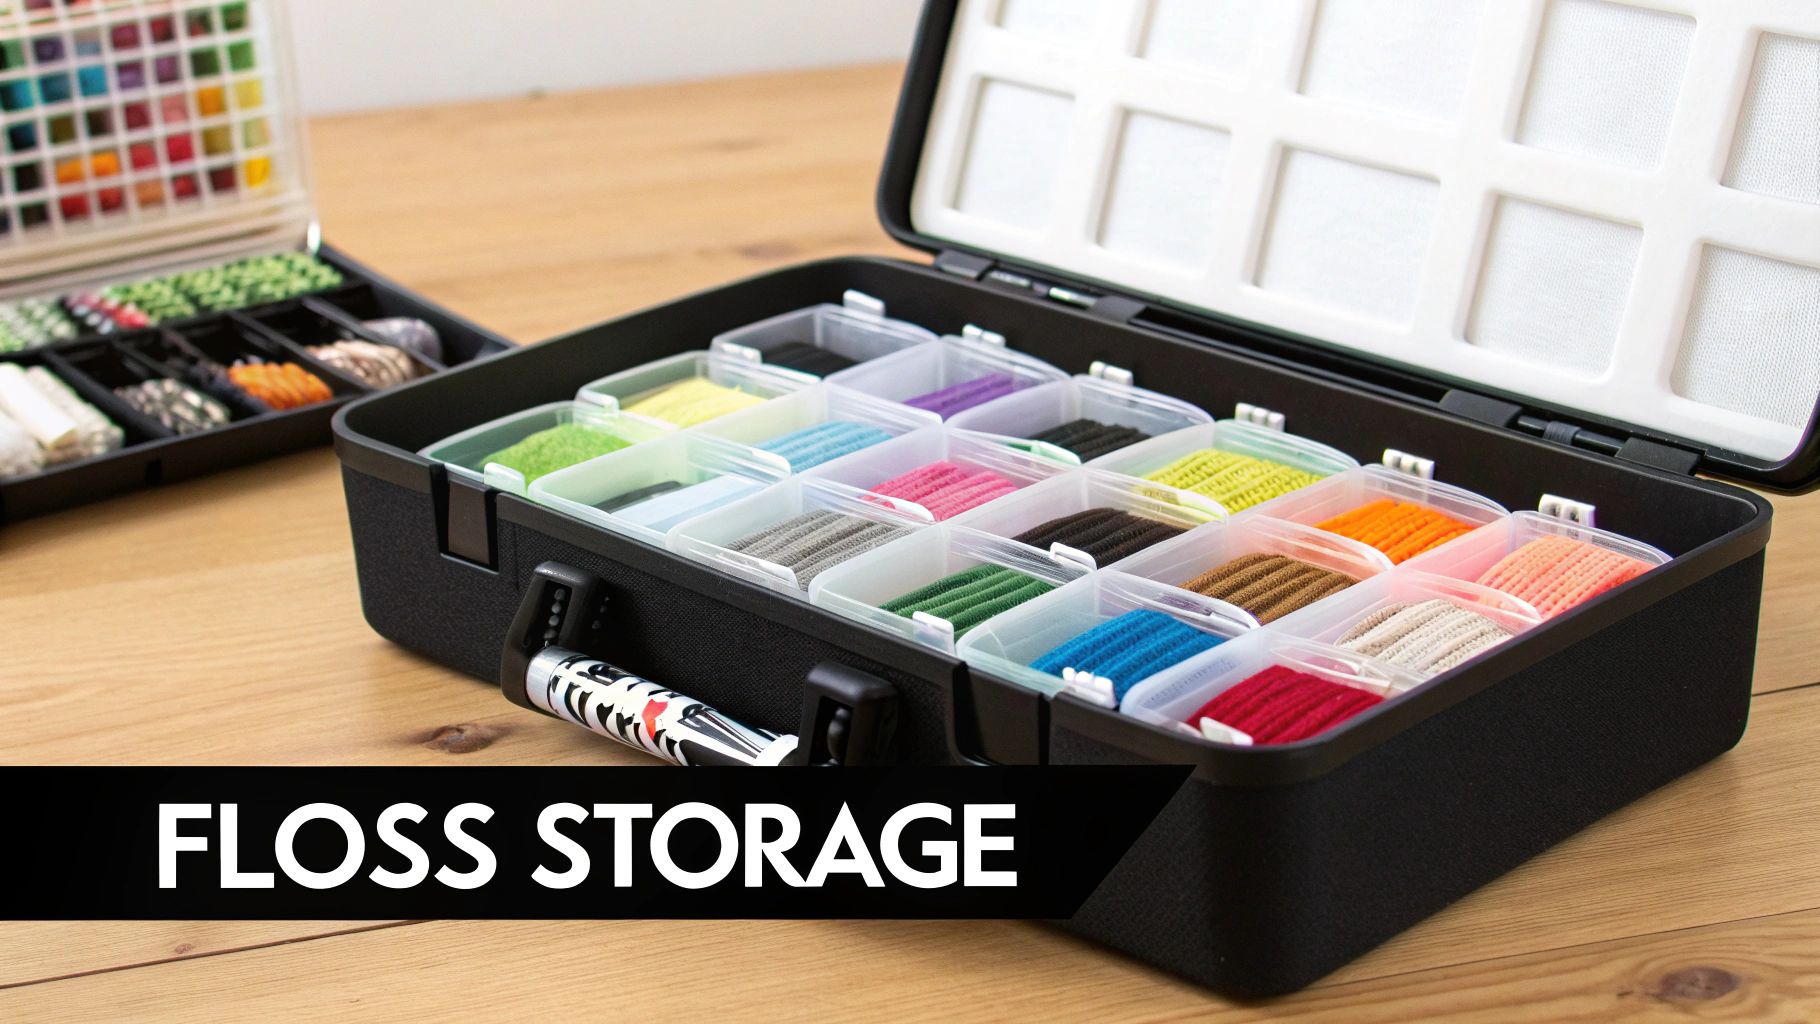
By far the most popular method—and for good reason—is winding your floss onto little plastic or cardboard bobbins. You can then line them up by number in those clear plastic organizer boxes you see at craft stores. It’s simple, cheap, and makes finding that specific DMC shade a total breeze.
As your collection grows, you might want to explore other systems. Some stitchers love hanging their floss on rings (often called "drops"), while others prefer binder systems with clear pockets for each skein. The best method is the one that works for you, but the main goals are always the same: keep your threads out of direct sunlight to prevent fading, and protect them from dust and moisture. A good system saves you time and frustration. For a deeper dive into options, check out our guide to finding the perfect cross-stitch thread organiser.
Caring for Finished Embroidery
Your work isn't truly done after the final stitch. A little post-project care will keep your beautiful embroidery looking vibrant for decades to come. If your piece has picked up some dust or oils from your hands, a gentle hand-wash is the way to go.
The golden rule is to be gentle. Use lukewarm water and just a tiny bit of mild, pH-neutral soap. Let your embroidery soak for a bit and swish it around, but never, ever scrub or twist it. That’s a surefire way to mess up your stitches.
After washing, rinse it completely in cool, clean water until the water runs clear. To dry it, lay the piece flat on a thick, clean towel. Roll up the towel like a burrito and press gently to soak up the excess water—don't wring it out! Then, unroll it and let it air dry the rest of the way on a fresh, dry towel. This careful approach prevents colors from bleeding and ensures your stitches stay as neat as the day you made them.
Hand Embroidery Floss: Your Questions Answered
As you get more comfortable with your needle and thread, you're bound to run into a few questions. Trust me, we’ve all been there! Let's clear up some of the most common curiosities about embroidery floss.
Can I Use Sewing Thread for Hand Embroidery?
In a pinch, you could, but you probably won't like the results. Sewing thread is built for a totally different job—it's a single, tightly-wound strand designed to be strong and disappear into a seam. It just doesn't have the body or texture to create beautiful, decorative stitches.
Embroidery floss, on the other hand, is made from multiple, loosely-twisted strands. This structure is what gives your stitches that classic, full look. Using sewing thread will leave you with thin, almost skeletal-looking work that lacks the visual punch you’re going for.
What Does the Number on a DMC Floss Skein Mean?
That number you see on the little paper band of a DMC or Anchor skein is its color code. Think of it as that color's unique fingerprint, a universal ID that never changes.
This system is an absolute lifesaver for stitchers. It means that whether you buy a skein of DMC 310 (the classic black) today or ten years from now, in your local shop or on vacation, it will be the exact same shade. This consistency is key for following patterns and making sure you can always find the right color if you run out.
The color numbering system is the unsung hero of embroidery. It’s a shared language of color that connects a global community, ensuring stitchers everywhere can reproduce patterns with perfect accuracy.
How Do I Stop Metallic Floss From Tangling?
Ah, metallic floss—the beautiful but notoriously fussy cousin of standard cotton. It’s famous for tangling and fraying, but a few simple tricks can tame it. The single biggest secret? Work with much shorter lengths. A piece around 12 inches long is your sweet spot. Anything longer is just asking for a fight.
You'll also want to slow down your stitching rhythm. Let your needle dangle and untwist every few stitches to release the tension that builds up. Many stitchers also swear by a thread conditioner (like Thread Heaven or beeswax), which coats the fibers and helps them glide through the fabric with less friction and fraying.
Feeling inspired to start your next project? Cross Stitched creates gorgeous custom photo-to-pattern kits, complete with high-quality, pre-sorted DMC floss to bring your vision to life. You can explore our custom cross stitch kits and find everything you need to get started.


