
Diving into a new hobby doesn't have to be intimidating or expensive. When it comes to cross-stitch, finding free patterns perfect for a beginner is surprisingly easy. The internet is brimming with generous designers who share high-quality, simple charts, making sure your very first project is a fun success without you having to spend a penny.
Finding Your First Free Cross Stitch Patterns

Think of your first pattern as a friendly handshake from the cross-stitch community. You really don't need to invest a lot of money to see if you like it. In fact, countless designers and craft communities offer up beautiful patterns specifically to help you learn the ropes. It's a lot like finding free printable artwork for DIY projects—there are tons of great freebies out there to get you started.
These patterns are more than just free downloads; they're thoughtfully designed with new stitchers in mind. They act as a guide, teaching you the basic rhythm of stitching without throwing in complicated techniques that might just lead to frustration.
What Makes a Pattern Beginner-Friendly?
Not all free patterns are made equal, especially when you're just starting out. The best cross stitch free patterns for beginners have a few things in common that set you up for a great experience. You'll want to look for designs that are all about simplicity and clarity.
A truly beginner-friendly pattern usually has:
- Whole Stitches Only: It sticks to the basic "X" shape and avoids tricky things like French knots, fractional stitches, or tons of backstitching.
- A Limited Color Palette: Trying to manage dozens of thread colors can be a headache. The best starter patterns use 10 colors or fewer, which keeps things much more straightforward.
- Small and Manageable Size: Your first project should be something you can finish in a weekend, not something that takes a month. This gives you a quick win and builds your confidence right away.
- Clear, Easy-to-Read Chart: The pattern should have a clean grid with symbols that are easy to tell apart at a glance.
Many craft websites gather collections just for new stitchers, often featuring simple motifs like little fish or potted plants. These are perfect for learning the basics and usually recommend using 11-count Aida fabric, which has larger holes that make your stitches easier to see and keep even. A great place to see these principles in action is this handpicked list of https://cross-stitched.com/blogs/what-is-cross-stitch/beginner-free-cross-stitch-patterns, which are ideal for your first go.
Where to Find Safe and High-Quality Patterns
Okay, so you know what to look for—but where do you actually find these gems? Your best bet is to stick with reputable sources. This way, you can be sure the patterns are well-designed and the instructions are clear.
A well-chosen first pattern is the foundation of a lifelong hobby. It should inspire creativity and build confidence, not create confusion. The goal is to enjoy the process of turning thread and fabric into art.
Start your hunt in these reliable places:
- Designer Websites and Blogs: Many cross-stitch designers offer a handful of free patterns on their own sites. It’s a great way for them to introduce you to their style.
- Craft Community Websites: Large, well-known craft sites often have huge libraries of free patterns that are rated and reviewed by other stitchers.
- Digital Archives and Libraries: You can sometimes find vintage or public domain patterns available for free download in online archives.
To help you navigate the options, here's a quick breakdown of the most common places you'll find patterns and what to expect.
Top Sources for Beginner-Friendly Free Patterns
| Source Type | Pros for Beginners | What to Watch For |
|---|---|---|
| Designer Blogs | High-quality, unique designs. A great way to discover new artists you love. | Designs might be part of a stitch-along (SAL) with staggered releases. |
| Floss Company Websites | Patterns are designed to showcase their thread, so they're often very clear and well-tested. | Color keys will only list their brand of floss, so you may need to convert colors. |
| Craft Marketplaces | Huge variety and many designers offer a freebie to entice you to their paid patterns. | Quality can vary. Stick to designers with lots of positive reviews. |
| Social Media/Pinterest | Visually inspiring and easy to browse for ideas. | Be cautious of links leading to stolen or illegally shared patterns. Always click through to the original designer's site. |
By focusing on simple, clear designs from sources you trust, you'll be well on your way to finding the perfect project to kickstart your stitching adventure.
Reading Your First Cross-Stitch Pattern
When you first lay eyes on a cross-stitch pattern, it can look a little intimidating—like a page of secret code. You'll see a grid full of symbols, numbers, and lines that don't make much sense at first glance. But don't worry, it's simpler than it looks.
Think of that chart as a blueprint for your project. Every single symbol on that page tells you exactly where to put one "X" stitch on your fabric. Once you learn to read this simple language, the whole process becomes incredibly relaxing. Each square on the paper grid matches one square on your Aida fabric, and the symbol inside tells you which color thread to use. It’s basically paint-by-numbers, but with a needle and thread.
The Three Key Parts of Any Chart
Every pattern, no matter how complex, is built from three main components. Get a handle on these, and you can tackle any design. Let's break down what you'll be looking at.
- The Grid: This is the heart of your pattern, the visual map of the design. To make life easier, the grid is usually broken up into 10x10 squares with darker lines. This saves you from counting individual squares; you can just count in blocks of ten.
- The Legend (or Color Key): This is your decoder ring. Typically found along the side or bottom of the chart, the legend shows you what each symbol means. It connects the strange little shapes on the grid to the actual thread colors you'll be using.
- The Center Markings: Look for little arrows or bolded lines along the top and side edges of the grid. If you trace those lines to where they would meet in the middle, you've found the dead center of the pattern. That's your starting line!
Understanding how these three pieces fit together is the secret sauce to reading any cross-stitch chart.
Making Sense of the Color Key
The color key, or legend, is where the magic happens. It’s the tool that turns all those black-and-white symbols into a vibrant, colorful design. Honestly, it's the most crucial part of the chart besides the grid itself.
Think of your pattern's legend as the bridge between the symbols on the page and the colorful threads in your hand. It’s what guarantees every stitch you make helps create the final picture just as the designer imagined.
Here’s what you’ll find in a good color key:
- Symbol: The character on the grid—it could be a star, a circle, a letter, anything.
- Floss Number: A specific brand code, like DMC 310 (for black) or Anchor 1. This number is your golden ticket to buying the exact shade of thread you need.
- Color Name: A simple description like "Christmas Red" or "Light Blue" to give you a general idea.
- Strand Count: A note on how many strands of floss to use for your stitches. As a beginner, you'll almost always be using two strands.
Matching the floss number from the legend to the skeins at the craft store is a critical step. It’s how you make sure your finished piece looks just like the photo on the pattern. If you want to get into the nitty-gritty, you can learn more about how to read detailed cross stitch graphs.
Finding Your Starting Point
One of the first questions every new stitcher asks is, "Where on earth do I begin?" The answer is almost always the same: start in the center. Starting in the middle of your fabric and your pattern guarantees your design will be perfectly centered when it's all done. No lopsided projects here!
Finding the center of your fabric is easy. Just fold it in half lengthwise and crease it gently. Then, fold it in half again widthwise. The point where the two creases cross is the exact middle. You can stick a pin in it or make a tiny, light pencil mark to remember where it is.
Next, find the center of your chart using those arrows on the edges. That center square on the grid is where you’ll make your very first stitch, right on the center point you just marked on your fabric. From there, you just work your way out, following the symbols on the grid one stitch at a time.
Gathering Your Essential Stitching Supplies
Before you can start stitching that cool pattern you found, you’ll need to grab a few basic supplies. The great thing about cross-stitch is that you don't need a lot of expensive equipment to get started. Just a handful of key items will have you on your way to making your first piece.
For many people, the first step is visiting a local hobby shop. It’s a fantastic way to see the rainbow of floss colors and feel the different fabrics in person. It can be really inspiring! But if you feel a little lost looking at all the options, don't worry—we'll break down exactly what you need.
Choosing Your Fabric
The fabric is the canvas for your creation. For anyone just starting out, Aida cloth is, hands down, the best choice. Think of it like a fabric with a built-in grid. It's woven with perfectly spaced holes that show you exactly where to put your needle, which is a huge help for making your stitches look neat and even.
Aida comes in different "counts," which just means the number of squares (or stitches) you can fit into one inch of fabric.
- 14-count Aida: This is the sweet spot for beginners. The squares are big enough to see easily but still small enough to create a detailed picture.
- 11-count Aida: The squares here are even larger, making it perfect for kids or anyone who finds 14-count a bit of a strain on the eyes.
- 16 or 18-count Aida: These have smaller squares for more intricate projects. It's best to work your way up to these once you've got a little experience under your belt.
Needles, Floss, and Hoops
Okay, you've got your fabric. Now you just need three more things to actually start stitching.
Embroidery Floss: This is the colorful thread you’ll be working with. The most popular brand is DMC, and they have a handy number system for their hundreds of colors. A standard bundle, or "skein," of floss is made of six tiny strands twisted together. Most cross stitch free patterns for beginners will tell you to use just two strands at a time for your stitches.
In fact, free beginner patterns are some of the most popular craft downloads online, making up over 40% of all pattern downloads on major craft websites. They almost always recommend that classic combo: 14-count Aida with two strands of floss, because it's just the easiest way to learn.
Tapestry Needles: These are a little different from regular sewing needles. They have a blunt tip and a bigger eye. That blunt end keeps you from accidentally piercing the fabric threads, while the large eye makes threading your floss much less of a headache. A size 24 tapestry needle is the perfect partner for 14-count Aida.
Embroidery Hoop: While you could stitch without one, a hoop makes things so much easier. It holds your fabric tight and flat, which helps you keep your stitch tension even and stops the material from puckering up. A simple 5 or 6-inch hoop, either wood or plastic, is a great place to start. For a deeper dive, check out our full guide to all the essential https://cross-stitched.com/blogs/what-is-cross-stitch/cross-stitch-materials.
The infographic below gives you a quick visual on how to read a pattern chart, which is the next skill you'll need.
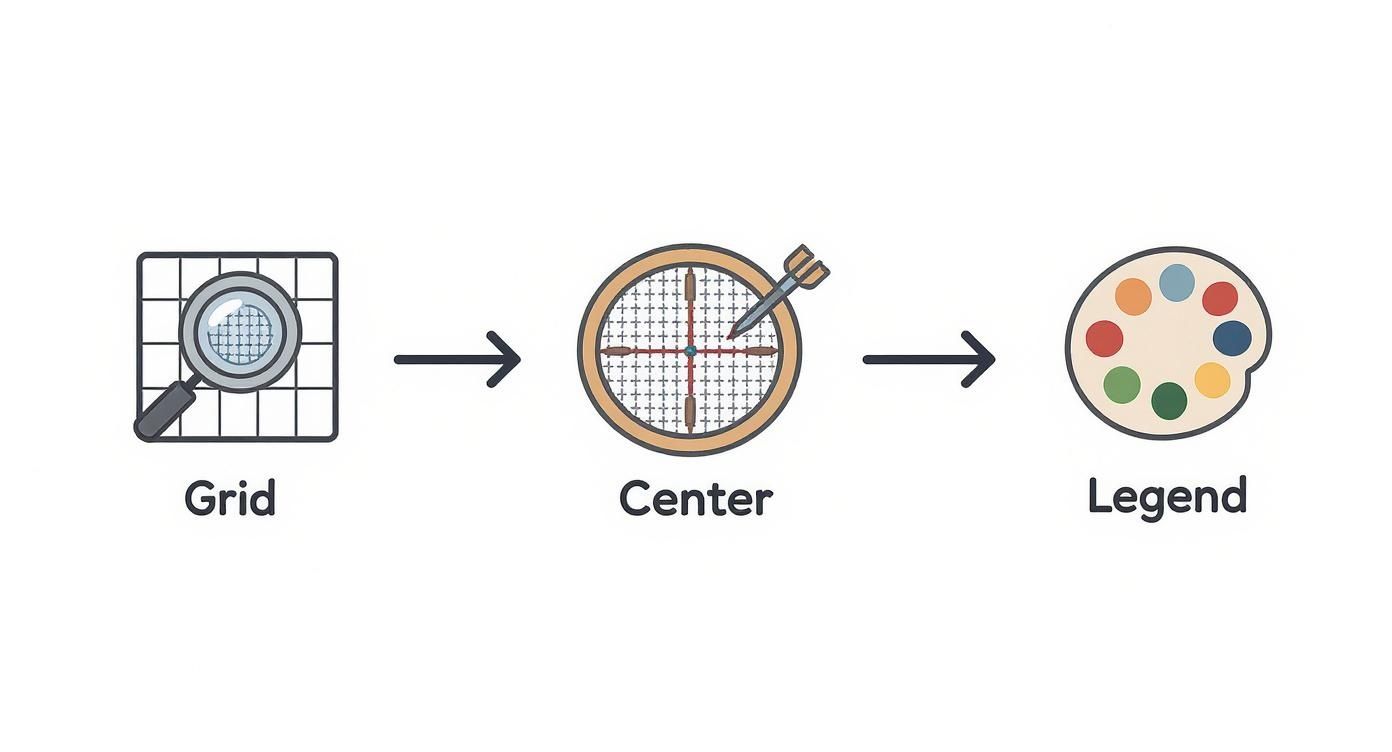
As you can see, it all comes down to three simple steps: understanding the grid, finding the center, and using the color key. With these supplies in hand and a basic understanding of the chart, you're all set to make your very first stitch.
Five Easy and Free Patterns to Start Today
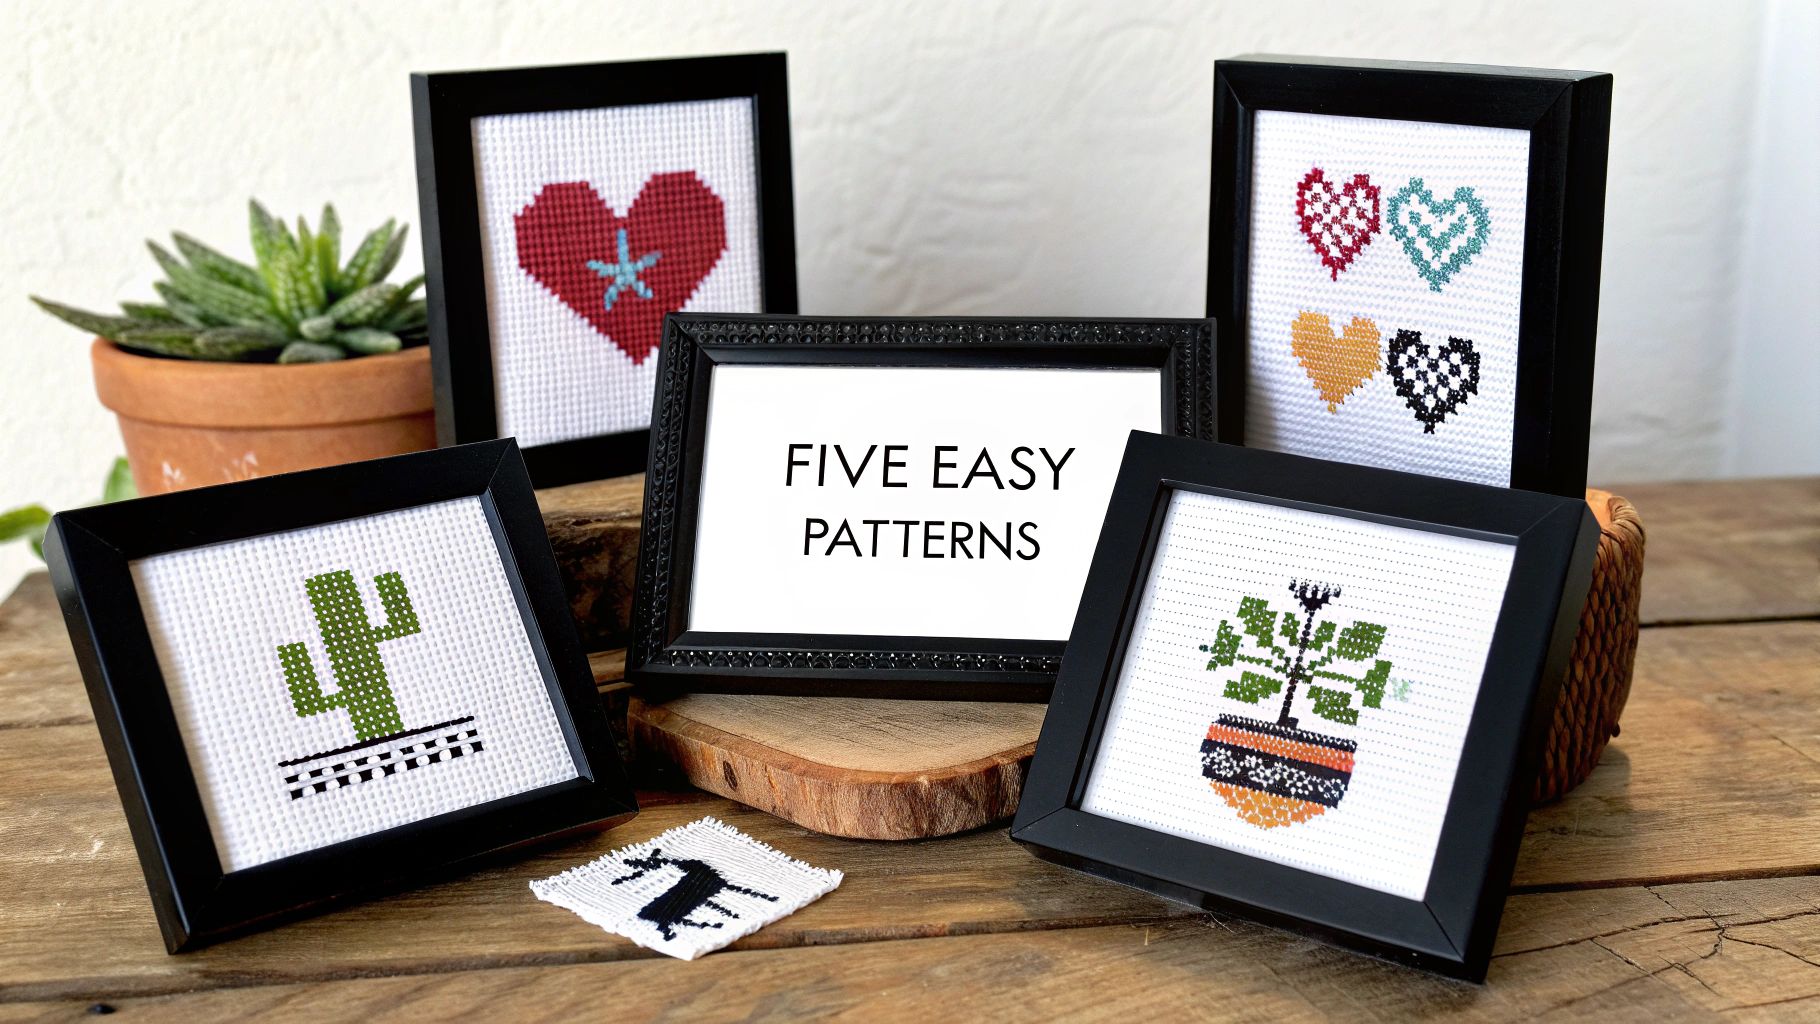
Alright, you know how to read a chart and you've got your supplies lined up. Now for the best part—actually making something! Picking your very first project is a big deal. The goal is to choose something that builds your confidence and gets you excited, not something that feels like an impossible chore.
That's why I've hand-picked five simple and totally free cross stitch patterns for beginners. Each one is designed to be straightforward, with just a few colors and only the basic whole cross stitch. Think of these as your personal starter pack, giving you everything you need to jump in and get that incredible feeling of creating something beautiful with your own hands.
Pattern 1: A Charming Mini Succulent
Who doesn’t love a cute plant you can't kill? This mini succulent is the perfect way to practice simple shapes and see how a few shades of the same color can create a sense of depth. It’s small, incredibly satisfying, and looks fantastic framed in a tiny 3-inch hoop.
- Skill Level: Absolute Beginner
- Stitch Count: 25 wide x 30 high
- Finished Size (on 14-count Aida): Roughly 1.8 x 2.1 inches
- Colors Needed: 4 (three greens, one terracotta)
Because it’s so small, you’ll get a quick win that makes you eager to start the next project. It’s a great way to practice starting and stopping your threads neatly, and the finished piece makes an adorable magnet or keychain.
Pattern 2: A Simple Geometric Heart
Geometric patterns are a beginner's best friend. They're all about clean lines and solid blocks of color, which makes this modern heart design incredibly easy to follow. All you need are three complementary colors to create something surprisingly stylish.
The blocky shapes will help you get really good at counting squares on your Aida cloth, which is a core skill you'll use forever. It’s also a great way to see how different colors pop when placed next to each other. This little heart is perfect for a handmade card or as a patch for a tote bag.
A great first pattern teaches you the rhythm of stitching. It’s not about complexity; it’s about finding the joy in the simple, meditative process of creating one 'X' after another to build a beautiful image.
Pattern 3: A Cute Animal Silhouette
There's a reason animal silhouettes are such a classic choice. You get a charming, recognizable shape without having to worry about tricky details like faces or shading. This simple cat silhouette uses only one color—classic black (DMC 310), making it the ultimate project for focusing purely on your technique.
- Skill Level: Absolute Beginner
- Stitch Count: 35 wide x 40 high
- Finished Size (on 14-count Aida): 2.5 x 2.9 inches
- Colors Needed: 1
With just one color, there's no need to stop and change your thread. This lets you get into a comfortable flow, practice making your stitches look even, and build that all-important muscle memory for perfect tension.
Pattern 4: A Minimalist Mountain Range
If you're drawn to nature-inspired art, this minimalist mountain range is a fantastic place to start. It creates a serene landscape with just a few calming shades of blue and gray. The whole design is just a series of simple, overlapping triangles that are easy to count and stitch.
This pattern gets you comfortable with a slightly larger, but still very manageable, project. The long, clean lines are excellent for practicing how to keep your stitches tidy over longer rows. When you're done, it looks absolutely stunning displayed in a 5-inch embroidery hoop.
Pattern 5: A Bright Little Rainbow
Nothing is quite as cheerful as a rainbow. This pattern is just a series of simple, curved arches made with five bright colors. It might look impressive, but it’s really just a set of colored rows, which makes it the perfect opportunity to learn how to switch between different threads.
This design gives you great practice with a handy technique called "parking," where you leave a thread hanging to pick it up again later in another section. It's a useful skill to learn early on, and the finished piece is a burst of pure positivity for any room.
Finding Your Community and More Inspiration
https://www.youtube.com/embed/hM2LbWWhZmM
Cross stitch can be a wonderfully peaceful solo hobby, but it truly comes alive when you share it with others. Stepping into the global cross stitch community turns your quiet pastime into a vibrant, social experience full of encouragement and endless ideas. It's a bit like joining a book club, but for stitching—you get to share your progress, ask for advice, and celebrate each other's finished pieces.
You really don't have to look far to find your people. Social media has completely changed how stitchers connect, and it’s never been easier for newcomers to find support. Thousands of stitchers gather on platforms like Facebook and dedicated forums to share tips and, just as importantly, free patterns. It’s the perfect place to grow.
Tapping into Online Stitching Circles
Connecting with fellow stitchers is as simple as a click. There are countless online groups and pages dedicated to the craft, and each one offers a unique flavor of inspiration. These digital communities are fantastic resources for finding cross stitch free patterns for beginners and getting quick answers to your questions.
Here are a few places I'd recommend you start your search:
- Facebook Groups: Just search for "cross stitch for beginners" to find groups made specifically for new stitchers. They are often private, which creates a safe, welcoming space to ask questions without feeling judged.
- Instagram: Follow hashtags like #crossstitchbeginner or #xstitchersofinstagram. You'll discover a visual feast of projects that will inspire your next creation and introduce you to some amazing designers.
- YouTube: The cross stitch corner of YouTube is affectionately known as "FlossTube." It's full of creators who share their works-in-progress (WIPs), tutorials, and pattern hauls. Watching a FlossTube video often feels like you're stitching alongside a friend.
Discovering the Magic of Stitch-A-Longs
Once you've settled into a community, you'll probably hear people talking about a "SAL." This stands for Stitch-A-Long, a collaborative project where a mystery pattern is released in small, manageable parts over weeks or even months. Think of it like a TV series for stitching—everyone gets the next piece of the puzzle at the same time and works on it together.
SALs are a fantastic way for beginners to tackle a larger, more detailed project without feeling overwhelmed. Instead of facing a huge, intimidating chart, you only have to focus on one small section at a time. This helps build your skills and confidence bit by bit.
Stitch-A-Longs transform a solitary hobby into a shared journey. They provide the perfect blend of personal accomplishment and community connection, making every stitch part of a larger, collective story.
Many designers offer free or low-cost SALs to build community around their work. In fact, it's estimated that 60-70% of SAL participants are novices or early-level stitchers, which makes these events incredibly beginner-friendly. They offer a structured way to stay motivated while sharing the experience with hundreds of others. It’s an amazing way to see your skills blossom.
You can learn more about what's coming up by exploring the world of cross stitch SALs for the upcoming year.
Common Questions from New Stitchers
Even with the perfect free pattern and a fresh set of supplies, a few questions are bound to come up. That’s totally normal! Every new hobby has a learning curve, and cross-stitch is no different. Think of this as your personal FAQ for getting past those first little hurdles.
We've rounded up the most common questions we hear from people working with cross stitch free patterns for beginners. The idea is to give you quick, straightforward answers so you can get back to what matters—enjoying your stitching.
What Should I Do If I Make a Mistake?
First off, take a deep breath. Don't panic! Every single person who stitches, from first-timers to seasoned pros, makes mistakes. The great thing about cross-stitch is that most goofs are incredibly easy to fix. Your best tool for the job is either a seam ripper or a small, sharp pair of embroidery scissors.
If you catch the error right after you've made the stitch, you can just unthread your needle and gently pull the floss out. If you spot it a bit later, carefully slip your needle or the tip of your seam ripper under the naughty stitch and snip the thread. From there, you can gently pull out the leftover bits from both the front and back of your fabric.
The most important rule in cross-stitch? Be kind to yourself. A misplaced stitch isn’t a failure—it’s just part of the process. Fixing it is just another skill you get to master.
Can I Use a Different Fabric Count?
Absolutely! While most beginner patterns suggest 14-count Aida because it’s easy on the eyes, you can definitely swap it out. The key is just to understand how it will affect your final piece.
- Using a higher count (like 16 or 18-count): Your finished project will come out smaller. The stitches will be tighter and look more detailed, almost like a pixelated image coming into high resolution. You'll probably want to switch to a smaller needle, too, like a size 26 or 28.
- Using a lower count (like 11-count): Your design will end up larger. The bigger squares are fantastic for visibility, but you might want to use three strands of floss instead of the usual two. This helps ensure your stitches look full and provide good coverage over the fabric.
Just don't forget to cut your fabric a bit larger or smaller to account for the size change!
What If I Run Out of a Specific Thread Color?
This happens to everyone, so don't worry. The simplest solution is to just buy another skein of the same color. Jot down the brand and color number (for example, DMC 310) and grab it on your next trip to the craft store.
But what if you're right in the middle of stitching and can't get to a store? You've got options. If you have a very similar shade in your stash, you can "borrow" it, especially if the colors are so close the change won't be noticeable. Another strategy is to simply set that section aside and work on a different part of the pattern with another color until you can restock.
How Do I Wash My Finished Project?
Giving your project a gentle bath after the last stitch is a fantastic finishing touch. It gets rid of any oils from your hands, helps the stitches settle into the fabric, and smooths out any marks left by your hoop. It's a simple step that makes a world of difference.
- Grab a clean sink or basin and fill it with lukewarm water. Add just a few drops of a gentle, dye-free soap—a mild dish soap or a special wash for quilts works perfectly.
- Gently swish your piece around in the water for a couple of minutes. The key here is gently—no scrubbing or wringing!
- Rinse it completely under cool, running water until all the soap is gone.
- Lay your cross-stitch flat on a clean, thick towel. Roll the towel up like a burrito and press gently to soak up the excess water.
- Finally, unroll it and lay it flat on a dry towel to air dry. For a perfectly crisp finish, you can iron it on a low setting from the back while it’s still a little damp. Just place a thin cloth between the iron and your project to protect your beautiful stitches.
Beginner Troubleshooting Quick Guide
Sometimes, you hit a snag and aren't quite sure what's going wrong. This little guide is here to help you figure out some of the most common frustrations for beginners.
| Problem | Likely Cause | Quick Solution |
|---|---|---|
| My thread keeps knotting and tangling. | Your floss is too long, or the strands have gotten twisted. | Let your needle dangle every few stitches to allow the floss to unwind naturally. Try working with shorter lengths of thread (about 18 inches is perfect). |
| My stitches look uneven or messy. | Inconsistent tension or stitch direction. | Pick a direction and stick with it! Always make your bottom stitch go one way (e.g., /) and your top stitch go the other (e.g., ). Try to pull each stitch with the same gentle tension. |
| The back of my work is a hot mess. | "Traveling" with your thread across long distances or using big knots. | To secure your threads, try tucking the tails under a few nearby stitches on the back. Avoid carrying your floss across more than a few empty squares of fabric. |
| My fabric is puckering around my stitches. | You're pulling your stitches too tight. | Relax your grip! Stitches should lie flat on the fabric, not pull it inward. Using an embroidery hoop is a huge help for maintaining even tension across the project. |
Tackling these common issues head-on will make your first few projects so much smoother. Remember, every challenge is just a chance to learn something new, turning you into a more confident and skilled stitcher with every little X you create.
Ready to turn your own cherished photos into timeless art? At Cross Stitched, our custom kits provide everything you need to create a personalized cross stitch masterpiece. From the pre-sorted threads to the high-quality fabric, we make it easy to bring your memories to life one stitch at a time. Start your unique project today at https://cross-stitched.com.


