
A cross-stitch pattern PDF is simply a digital file containing everything you need for a project: the chart, the symbol key, and the complete thread color list. The best part? It's instantly accessible on your computer, tablet, or phone, letting you skip the shipping times and costs and get right to stitching.
Welcome to the World of Digital Cross Stitch

The move from paper patterns to digital ones has been a huge leap for stitchers, opening up a world of flexibility and creative freedom. A cross-stitch pattern PDF is more than just a file; it's your ticket to creating without limits. Picture this: you find the perfect design online and can start stitching it just minutes later. That’s the real magic of digital.
This immediate access is a lifesaver for those spontaneous projects or last-minute handmade gifts. No more waiting by the mailbox or discovering your dream kit is sold out.
Benefits for Every Skill Level
It doesn't matter if you're just starting out or have been stitching for years—digital patterns have something for everyone. If you're new, you can find tons of free, simple PDFs to practice with without spending a dime.
For the more experienced crafters, the creative doors swing wide open. You can turn your own photos into one-of-a-kind, heirloom-quality pieces using pattern generators like Pic2Pat. This amazing tool takes any image you upload and converts it into a full cross-stitch chart, complete with a DMC thread guide. Suddenly, that favorite family portrait or a picture of your beloved pet becomes your next project.
The true beauty of a cross-stitch pattern PDF lies in its versatility. You can print it out, view it on a tablet to zoom in on details, and mix and match it with your own stash of supplies. You're in complete control.
Digital vs Traditional Cross Stitch Patterns At a Glance
Here’s a quick comparison to help you decide which pattern format best fits your stitching style and projects.
| Feature | Cross Stitch Pattern PDF | Traditional Printed Pattern |
|---|---|---|
| Accessibility | Instant download, start stitching immediately. | Requires shipping or a trip to the store. |
| Cost | Often cheaper, with many free options available. | Higher price point, typically includes physical materials. |
| Customization | Easily customized with tools like Pic2Pat. | Fixed design; no customization possible. |
| Portability | Can be viewed on any digital device (phone, tablet). | Bulky to carry, can be damaged by spills or tearing. |
| Storage | Stored digitally, taking up no physical space. | Requires physical storage space, can get lost or damaged. |
| Environmental Impact | Eco-friendly, no paper waste unless you choose to print. | Contributes to paper waste and shipping-related emissions. |
| Supplies | You source your own fabric, thread, and needles. | Often sold in kits with all necessary supplies included. |
While both have their place, the flexibility and instant gratification of PDFs are hard to beat for modern stitchers.
The Rise of Digital Crafting
The shift to digital patterns isn’t just a passing trend; it reflects a major movement in the crafting community. In fact, the needlecraft patterns market—where cross-stitch PDFs are a huge part—is valued at USD 34,026.8 million in 2025 and is expected to soar to USD 63,872.9 million by 2035. This explosive growth is fueled by the DIY boom and new technologies making creativity more accessible than ever. You can explore more on this market growth at Future Market Insights.
Bridging Digital Patterns with Physical Kits
One of the coolest things about a cross-stitch pattern PDF is that you're not stuck in a purely digital world. It's incredibly easy to pair your favorite digital design with the convenience of a physical kit.
For example, after you’ve generated that perfect pattern from a photo, you can take the thread list it provides and order a custom kit from a company like Cross Stitched. This gives you an all-in-one package that arrives with:
- Pre-sorted DMC threads in every color you need.
- The ideal size and count of Aida fabric for your project.
- Needles and any other tools to get you started.
This hybrid approach truly offers the best of both worlds. You get the limitless choice of a digital pattern combined with the curated convenience of a high-quality kit. It takes all the guesswork out of gathering supplies and ensures you have everything on hand to bring your chart to life.
Finding or Creating Your Perfect Digital Pattern
Every new project starts with that spark of inspiration you feel when you find the perfect design. Getting your hands on that ideal cross-stitch pattern PDF is the first, most exciting step, and lucky for us, there are a few great ways to do it. The best part about digital patterns is that a whole world of art is just a click away.
For many stitchers, the first stop is an online marketplace. Sites like Etsy are absolute treasure troves, packed with thousands of unique designs from independent artists all over the world. You can find anything from sleek, modern patterns to massive, full-coverage pieces that look like paintings—all ready for you to download instantly.
Another great avenue is tracking down free patterns from talented designers. A lot of creators will share complimentary charts on their blogs or social media. It's a fantastic way to get a feel for their style, and these are often smaller projects you can knock out over a weekend. Plus, it’s a zero-risk way to try a new technique.
Creating a Truly Personal Pattern
Finding a pre-made pattern is fun, but there's nothing quite like stitching something that's 100% you. This is where photo-to-pattern generators come in, and they've completely changed the game for personalized crafts. These tools let you upload any photo and magically transform it into a stitchable work of art.
Just imagine turning a favorite wedding photo, a goofy picture of your pet, or a breathtaking vacation landscape into a cross-stitch heirloom. That’s exactly what tools like the integrated Pic2Pat generator are for. They analyze your image and spit out a detailed PDF chart, complete with a full DMC thread list.
The global cross-stitch market, which leans heavily on the easy access of PDF patterns, was valued at USD 0.15 billion in 2024. It’s expected to keep growing, hitting USD 0.22 billion by 2033. This tells us that more and more people are looking for accessible, creative hobbies that are also great for stress relief. You can dig into more stats on this trend over at Business Research Insights.
How to Use a Photo-to-Pattern Generator
Using a tool like Pic2Pat is surprisingly simple. You just upload your image and then play with a few key settings to get the best result.
Here's the kind of clean interface you'll see when you start.
This is where the magic begins. You'll upload your photo and pick your thread brand—DMC is the go-to for most cross-stitchers.
After you've uploaded your picture, you’ll have a few important decisions to make. These choices will directly impact how clear and enjoyable your final cross stitch pattern PDF is to work on.
- Pick Your Fabric Count: This is all about stitches per inch. A lower count, like 14-count Aida, gives you bigger, chunkier stitches. A higher count, like 18 or 22, means tinier stitches and a more detailed, refined final piece.
- Set the Final Size: Decide how big you want your finished project to be. For example, a detailed portrait might look great at 8”x12”. But if you're stitching a sweeping landscape, you'll want a larger canvas—maybe 24”x32”—to really capture all the detail.
- Tweak the Thread Count: This might be the most important setting of all. Limiting the number of different floss colors helps prevent what we call "confetti"—those tiny, scattered single stitches of very similar shades. A smaller color palette creates more defined blocks of color, which makes the chart much easier to read and stitch.
Pro Tip: Not every photo translates well into a pattern. For the best results, start with an image that has high contrast, a clear subject, and a simple background. A busy, cluttered photo often turns into a messy, confusing chart.
Finalizing Your Custom PDF
Once you've locked in your settings, the generator will work its magic and create a multi-page PDF for you. This file is your complete roadmap. It will include a full-color mock-up of the finished design, the symbol-based chart you'll actually stitch from, and a comprehensive legend that links every symbol to its specific DMC thread number.
This kind of tool puts you in the designer’s chair, opening the door to endless personalization. If you're just dipping your toes into digital patterns, you might want to check out our guide with a bunch of free downloadable cross stitch patterns PDF to practice with and build up your confidence.
Getting Your PDF Pattern Ready for Stitching
You’ve got your cross-stitch pattern PDF, and now the real fun begins: turning that digital file into something you can actually stitch from. This is where you set yourself up for a smooth, enjoyable project, whether you're a fan of paper charts or prefer working from a screen.
The first big decision is whether to print a black-and-white symbol chart or a full-color one. While the color version is pretty, I almost always print the black-and-white symbols. Why? Because the symbols are clear and distinct, which is a lifesaver when you’re juggling shades of floss that look nearly identical. A full-color chart is great as a digital reference on your tablet, but for the actual stitching, symbols are your best friend for avoiding mistakes.
This simple flow chart shows the journey from a spark of an idea to a pattern ready for your needle.
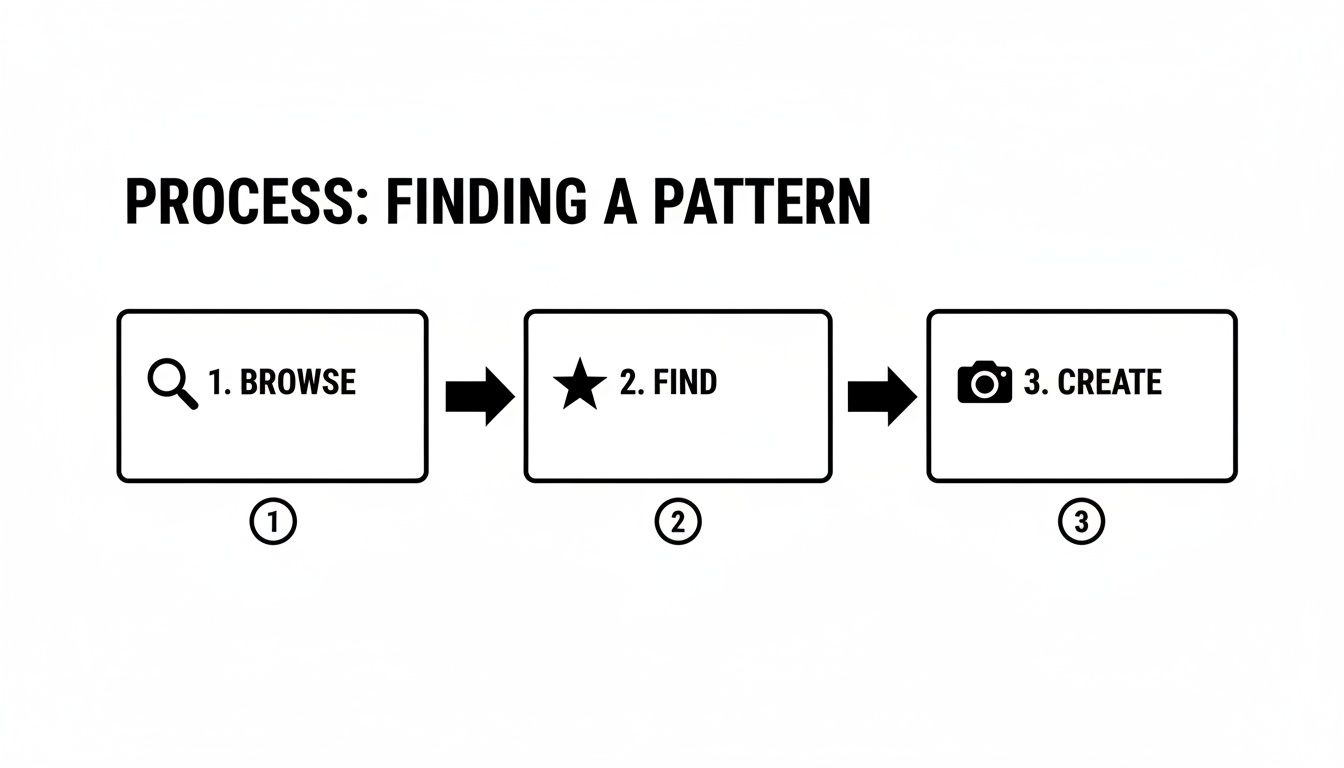
It really highlights how flexible digital patterns are—you can go from inspiration to creation in just a few clicks.
Dialing In Your Printer Settings
When you’re ready to print, don't just hit the button and hope for the best. A few moments spent tweaking your printer settings can make a world of difference, saving you from squinting at a blurry chart hours into your project.
First off, always choose the highest quality print setting your printer offers, usually labeled "Best" or "High Quality." This keeps the symbols sharp and easy to read. I also recommend using a slightly heavier paper than your standard copy paper—something like a 24 lb stock. It holds up much better to being handled, highlighted, and folded.
Your scaling choice is just as important.
- Fit to Page: This is perfect for smaller, single-page designs. It just shrinks the whole chart to fit neatly on one sheet.
- Actual Size (100%): For large, complex patterns, this is my go-to. It prints the chart at its intended size across multiple pages, which keeps the symbols big enough to see without straining your eyes.
Assembling a Multi-Page Pattern
Let's imagine you've just generated a huge 24"x32" pattern from a beautiful landscape photo. Your printer will likely spit out 12 to 16 individual pages. The trick is to piece them together without creating a jumbled mess.
Most multi-page patterns include overlap guides or page numbers to help you out. Before you even think about tape, lay all the pages out on a large table or the floor. Get a feel for the layout. Then, using scissors or a paper cutter, trim the margins off one side of each page—I usually do the right and bottom edges consistently.
This little step lets you line up the grid lines perfectly. Tape them together from the back, and you’ll have a clean, seamless master chart that flows perfectly from one page to the next.
I always think of this step as putting together a map for a stitching adventure. It gives you a bird's-eye view of the entire project and gets you mentally prepared for the journey ahead. A well-prepared chart is one of your most important tools.
The needlecraft pattern market is booming, with forecasts showing it will hit USD 500 million in 2025 and surge to USD 776 million by 2033. This growth is fueled by the incredible accessibility of digital patterns. A cross-stitch pattern PDF can slash production costs by up to 70% compared to printed kits, making this wonderful hobby more affordable for everyone.
And if you happen to download a cross-stitch pattern PDF in another language, don't panic. There are great resources for translating PDF patterns while preserving their layout. Of course, having the right tools from the start is half the battle, so make sure you're all set by checking our guide on what you need for cross stitch.
Making Sense of Your Cross Stitch Pattern
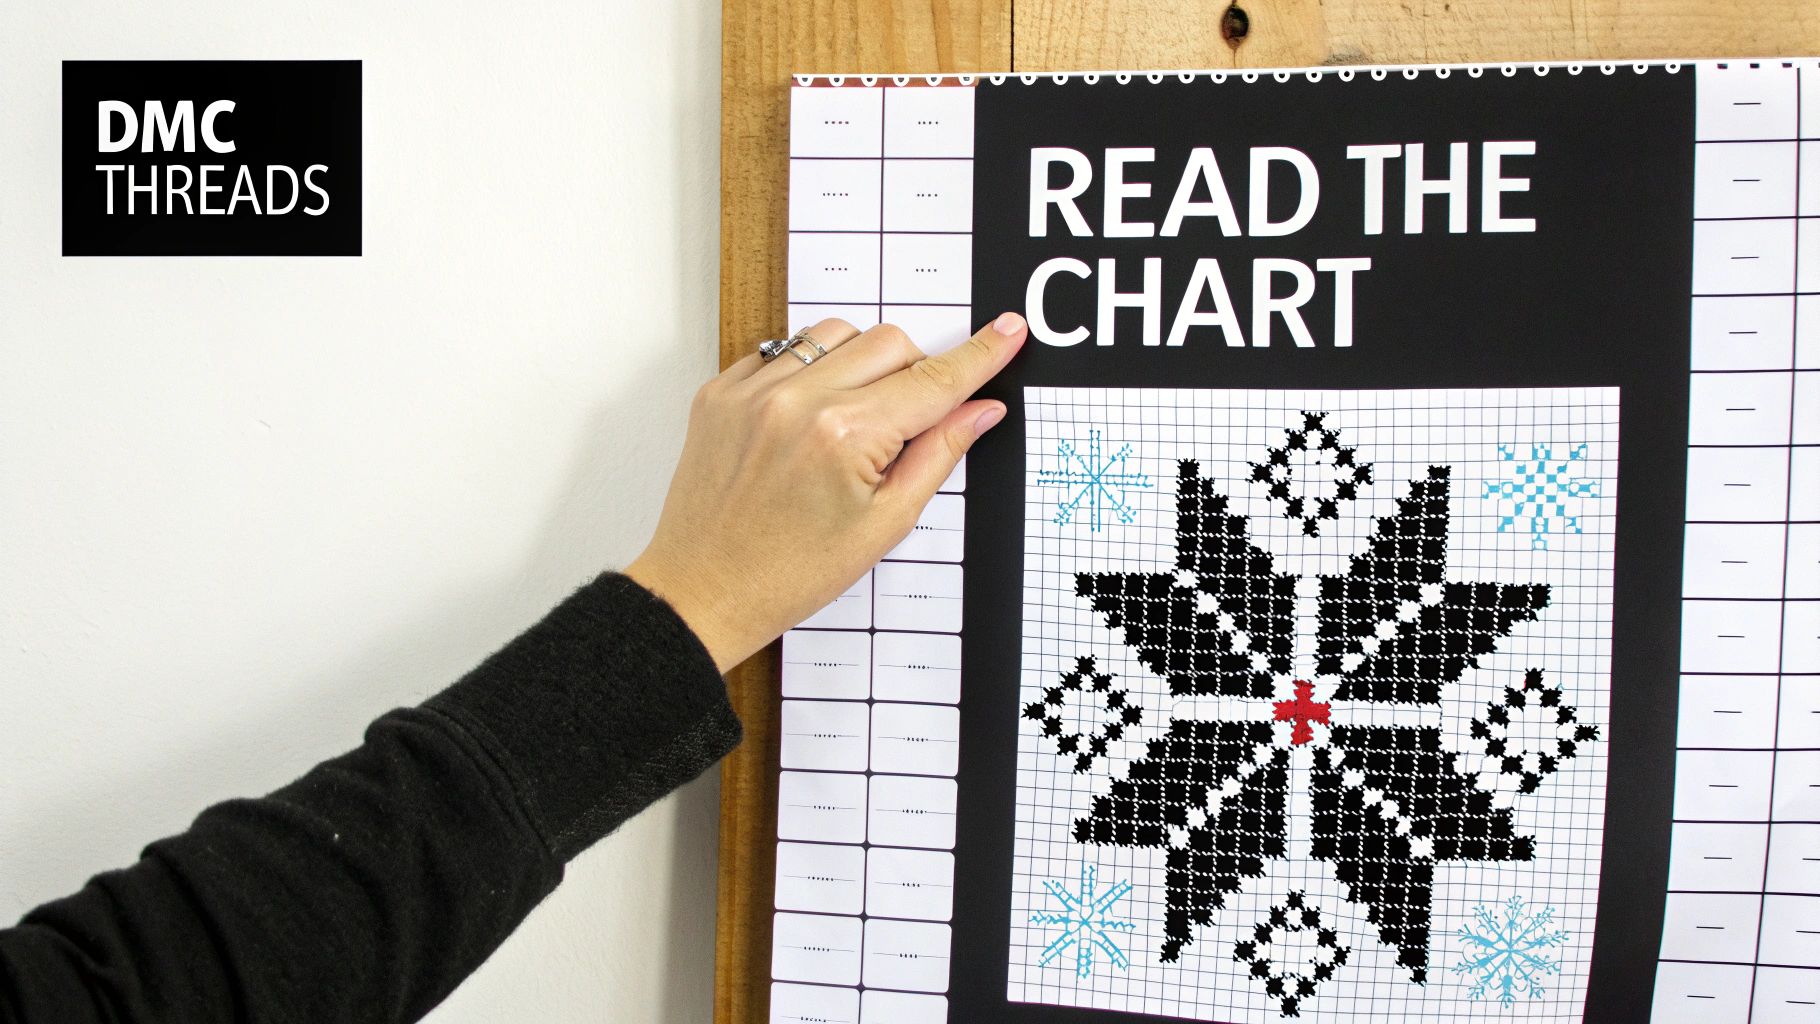
Alright, you’ve got your cross stitch pattern PDF open. At first glance, it can look like a page of cryptic code—a jumble of symbols, lines, and numbers that might feel a little overwhelming. But I promise, once you learn the language, reading a cross-stitch chart is second nature.
Think of it as the blueprint for your project. Every single mark on that page has a specific job, guiding you from a blank piece of fabric to a finished masterpiece.
Every pattern, whether it's a simple little bookmark or a massive, full-coverage piece, is built around three fundamental parts. Get these down, and you're golden.
- The Grid: This is the chart itself. It's a grid of squares, and each tiny square represents one single cross stitch you'll make on your fabric.
- The Symbol Key (or Legend): This is your decoder ring. It shows you what each symbol on the grid means by matching it to a specific floss color.
- The Thread List: This part tells you exactly which thread brand and color number to use (usually DMC) and often suggests how many strands you'll need for each stitch.
The Grid, The Key, and How They Work Together
The process is really quite straightforward. You spot a symbol on the grid, find that same symbol in the key, and then grab the thread color listed beside it.
Let's say a square on your grid has a black circle (●). You'd just glance over to your key, find the ● symbol, and see that it's calling for DMC thread number 310, which is classic black. Simple as that.
You'll also notice the grid has heavier lines every 10 squares, both up and down and side to side. These create a handy 10x10 reference grid, which is a lifesaver for counting stitches and not getting lost, especially in big blocks of the same color.
If you want to get into the nitty-gritty of how charts are designed, our guide on cross stitch graphs has some great visual examples and extra details.
A little tip I've learned over the years: print out just the symbol key and keep it right beside you as you stitch. I like to load my floss onto a thread organizer and label each color with its symbol from the chart. It feels like a bit of prep work, but it saves so much time fumbling for the right color later.
A Quick Guide to Common Symbols
Your symbol key will be your main guide, but most designers use a fairly standard set of symbols for different types of stitches. This table breaks down some of the most common ones you'll encounter.
Common Cross Stitch Symbols and What They Mean
| Symbol Type | What It Represents | Stitching Tip |
|---|---|---|
| Filled Squares/Circles | A standard full cross stitch (X) using the specified color. | This is the most common stitch. Use the number of strands recommended in the pattern key. |
| Diagonal Lines (/) | A half stitch. The line shows the direction of the top leg. | Great for shading and creating a sense of distance. Pay close attention to the slant's direction. |
| Small Symbols (+, •) | A French knot or colonial knot. | The key will specify. Practice on a scrap piece of fabric first to get your tension right. |
| Solid Lines (—) | Backstitch. This is used for outlining and adding fine details. | Usually done after all the cross stitches are complete. It really makes the design pop. |
| Quarter/Three-Quarter Stitches | A partial stitch used for curves and details. Represented by smaller symbols in the corners of a square. | These can be tricky. A sharp needle helps to pierce the center of the Aida square accurately. |
Understanding these basics will help you tackle almost any pattern with confidence. Always refer back to your specific pattern's key, as a designer might use a symbol in a unique way.
The Golden Rule: Always Start in the Center
Before you even thread your needle, the single most important thing to do is find the center of your pattern and the center of your fabric. This guarantees your design ends up perfectly positioned. Trust me on this—there is nothing more heartbreaking than realizing you're about to run out of fabric on one side of your project.
Most cross stitch pattern PDF files make this easy by marking the center of the grid with arrows or bold lines on the horizontal and vertical axes. Just follow those lines to where they meet, and that's your starting point.
Here's how to find the center of your fabric:
- Take your Aida cloth and fold it neatly in half lengthwise.
- Now, keeping it folded, fold it in half again widthwise.
- The corner where the two folds intersect is the exact center of your fabric.
I usually mark this spot with a pin or just make a small, temporary crease with my fingers. This is where you'll make your very first stitch. From there, you'll work your way outwards, ensuring your finished piece is beautifully balanced and ready for framing.
Tackling Common PDF Pattern Problems
Even the most carefully prepared project can hit a snag. When you're eager to get that first stitch in, the last thing you want is a printer that won't cooperate or a chart that’s impossible to read. Let’s walk through some of the most common frustrations stitchers run into with a cross stitch pattern PDF and the simple, real-world fixes I use to get back to stitching.
From disappearing grid lines to symbols the size of a pinprick, most of these issues are thankfully easy to solve. We'll tackle them one by one so you can get from your screen to your fabric without any more headaches.
Solving Printing Puzzles
I can't tell you how many times I've heard from fellow stitchers whose patterns just won't print right. The edges get chopped off, the symbols are too small—it's a classic problem. Here’s how to fix it.
My Printer Is Cutting Off the Grid Lines!
This is a really common one. It almost always happens because your printer's built-in margins are wider than the margins of the PDF file. The printer tries to be "helpful" by automatically zooming in to fill its own printable area, which ends up cutting off the edges of your chart.
The fix is usually just a single click in your print settings.
- Before you hit "Print," look for an option called "Fit," "Fit to Page," or "Scale to Fit."
- Choosing this tells your printer to shrink the pattern just enough to fit inside its margins. Problem solved.
The Symbols Are Too Small or Way Too Big!
If your chart comes out with symbols that are either microscopic or comically huge, the scaling setting is once again the likely culprit. This is especially common with large, multi-page patterns that are designed to be printed at a very specific size.
To get it right, find the "Actual Size" or "100%" scaling option in your print dialog. This overrides any "fit" settings and prints the cross stitch pattern PDF exactly as the designer created it, even if it means spreading it across several pages. You can then just tape the pages together to form your master chart.
Here's a little trick that has saved me so much paper and ink over the years: always print just one test page first. It’s a tiny step that lets you check your settings and avoid the frustration of reprinting an entire 20-page pattern.
Keeping Your Place on the Chart
Once you've got your pattern perfectly printed, the next challenge is tracking your progress, especially on a big, complex piece with lots of similar symbols.
The simplest method is often the best: grab a highlighter. As you finish a block of stitches, just mark over those symbols on your paper chart. I tend to use a light yellow or pink—something bright enough to see easily but not so dark that it completely hides the symbol in case I need to double-check my work later.
If you’d rather not permanently mark up your chart, a magnetic board is a fantastic tool.
- Just place your paper chart on a metal board (even a cheap cookie sheet works!).
- Use a long magnetic strip to mark the row you’re working on.
- As you finish each row, you just slide the magnet down to the next one.
This keeps your hands free and your eyes locked on the right spot, which dramatically cuts down on miscounts or skipped rows.
Going Paperless with a Tablet
Want to save some ink and make your project super portable? Using a tablet is a brilliant way to go. When you load your cross stitch pattern PDF onto a device, you can zoom in on those really dense, tricky sections—a real lifesaver for your eyes.
I’m a big fan of using a PDF annotation app on my tablet. You can import your pattern and use a stylus (or even your finger) to "highlight" your completed stitches right on the screen. It works just like a paper chart and a highlighter, but without the paper. Apps like GoodNotes or the built-in markup tools on most devices are perfect for this. It’s a clean, eco-friendly way to stitch anywhere, from your couch to a coffee shop, without having to manage a bunch of papers.
Common Questions About Cross Stitch Pattern PDFs
Once you start using digital patterns, a few questions always seem to pop up. It's totally normal! Here are some of the most common ones I get from fellow stitchers, with straightforward answers to help you stitch with confidence.
Can I Use a PDF on My Tablet Instead of Printing?
Oh, absolutely. In fact, using a cross stitch pattern PDF on a tablet or phone is my go-to method these days. It saves a ton of paper and is just so much more convenient.
The biggest win is the ability to zoom in. For those intricate patterns with tons of detail, or for anyone whose eyes need a little help, being able to blow up a section of the chart is a total game-changer. No more squinting!
There are also some brilliant apps out there like Pattern Keeper and GoodNotes that let you import your PDF and mark off your stitches digitally as you go. You’ll never lose your place again, and your project becomes completely portable.
My one word of warning: make sure your device is fully charged before you settle in for a long stitching session. There’s nothing more frustrating than having your screen go dark just as you're getting into a good rhythm!
What Is the Best Way to Organize My Digital Patterns?
A little bit of organization now will save you a massive headache later. The trick is to find a system that feels natural to you and stick with it.
I suggest creating a main folder called something simple like "Cross Stitch Patterns" on your computer or a cloud service like Google Drive or Dropbox. This gives all your patterns a single home.
From there, break it down with subfolders. How you categorize them is up to you, but here are a few ideas that work well for a lot of people:
- By Designer: Perfect for when you know you want to stitch something from a particular artist you love.
- By Theme: Think "Holidays," "Landscapes," "Animals," or "Samplers."
- By Status: A simple "To Do," "In Progress," and "Completed" system is great for tracking your projects.
The moment you download a new cross stitch pattern PDF, get into the habit of renaming it to something descriptive like "DesignerName_PatternName.pdf." It makes finding what you're looking for so much faster than scrolling through a list of generic file names.
My Custom Photo Pattern Has Too Many Similar Colors
Ah, the dreaded "confetti" effect! This is a super common issue when you're turning photos into patterns, where you end up with tons of single stitches in nearly identical colors. It can make stitching feel like a real chore.
The best way to deal with this is to tackle it at the source. When you’re using a tool like Pic2Pat, play around with the settings. Try reducing the total number of thread colors. Forcing the generator to use, say, 35 colors instead of 50, makes it group similar shades into bigger, more satisfying blocks of color.
It also pays to be picky about your source image. Photos with good contrast, a clear subject, and a simple background will always translate better into a stitchable pattern. A busy photo with lots of subtle color gradients is practically guaranteed to give you confetti.
If you already have the pattern, you can still simplify things as you stitch. If you see a small patch with three or four shades that are almost the same, just pick one of those DMC colors and use it for the entire area. It’s a small change that can make the process way more enjoyable without really affecting the final picture.
How Do Cross Stitched Kits Work with Another Designer's PDF?
That’s a great question, and it really shows how flexible cross-stitching can be. Our kits are designed to give you everything you need for any project you’ve set your heart on.
So if you’ve found a cross stitch pattern PDF from another designer that you're dying to start, you can absolutely use our supplies to bring it to life. It's a simple process.
First, open up that PDF and look for the thread key or legend. This chart is your shopping list—it will tell you every DMC thread number you need. It will also usually recommend a fabric type and color, like 14-count Aida in white.
With that list in hand, you can just pop over to our shop and order the individual DMC threads and the exact cut of Aida fabric your pattern calls for. This way, you get to stitch that amazing pattern you found while still using the high-quality, perfectly prepped materials from our kits. It's the best of both worlds!
Ready to turn your favorite photo into a work of art? At Cross Stitched, we make it easy to create a personalized kit with everything you need, from pre-sorted DMC threads to the perfect Aida fabric. Start designing your custom cross-stitch project today at https://cross-stitched.com.


