
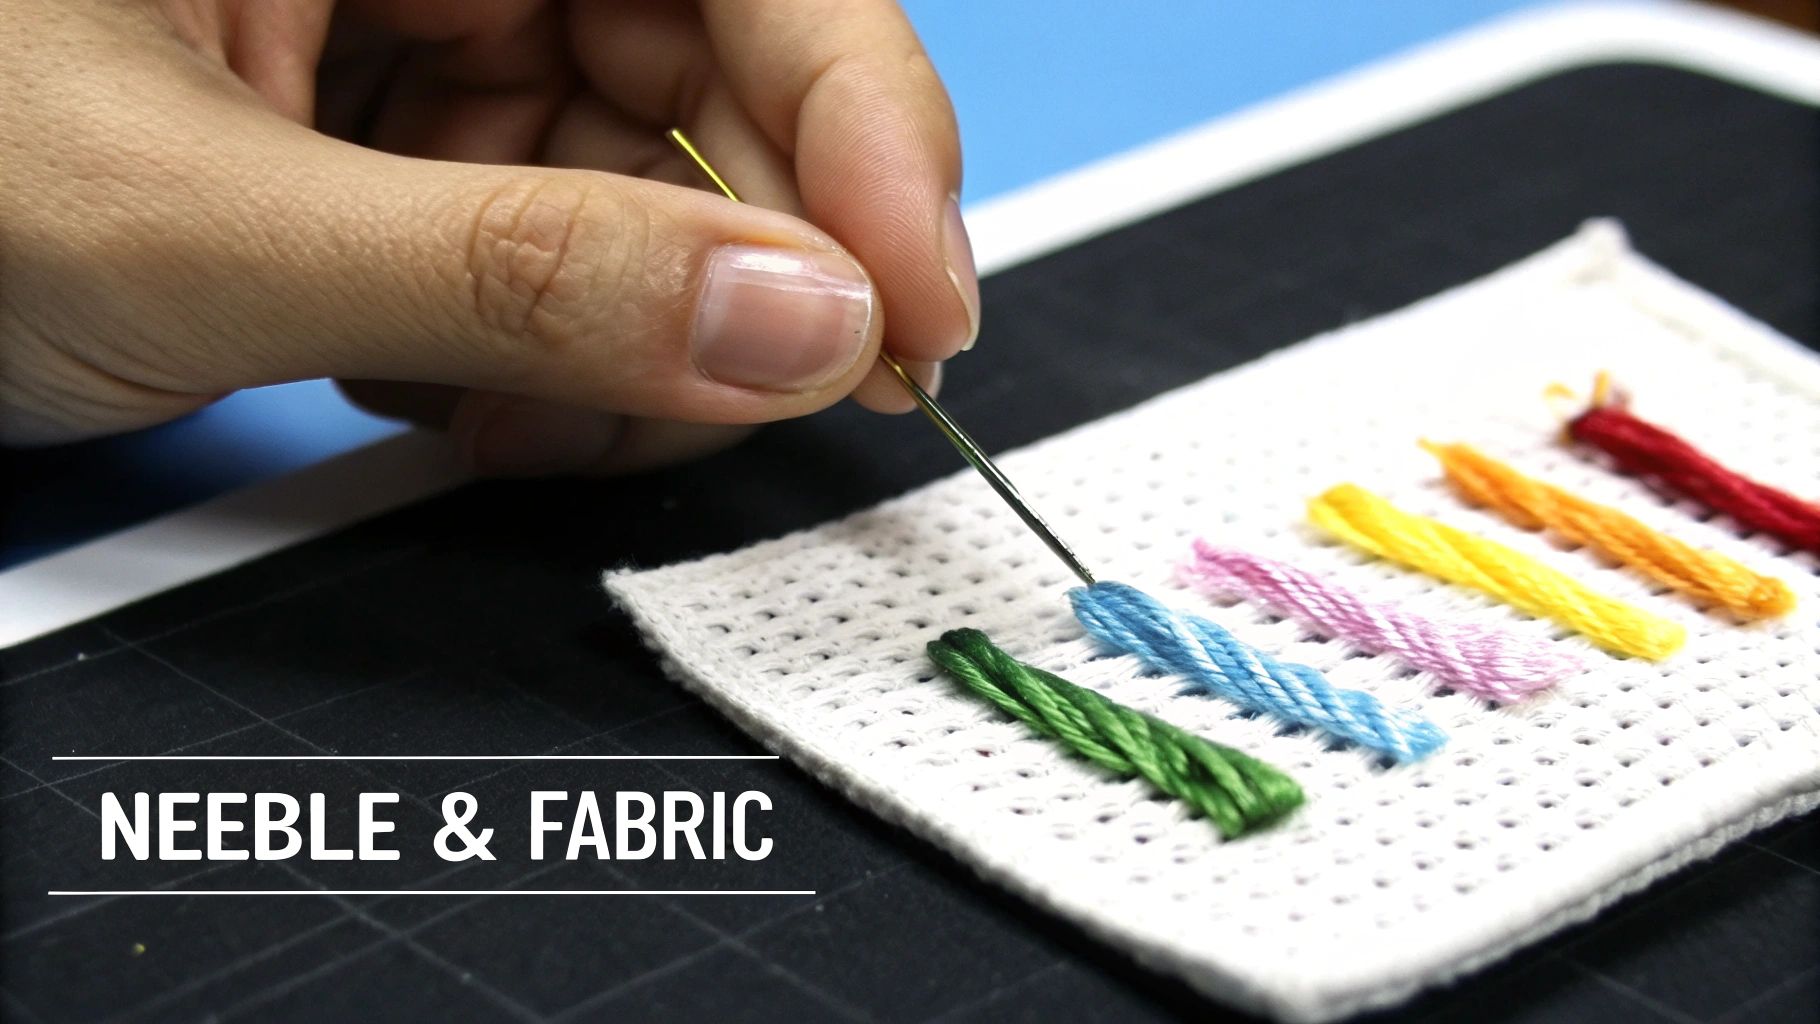
Trying to pick the right embroidery needle can feel a bit overwhelming, but an embroidery needles size chart is your best friend here. The most important thing to get your head around is how the sizing works: the smaller the needle size number, the larger and thicker the needle actually is. It's a bit counterintuitive, but a size 18 needle is much beefier than a delicate size 26.
Your Quick Reference Embroidery Needle Size Chart
Nailing the right needle choice is what separates a frustrating project from a fantastic one. A good match means no shredded thread and no unsightly holes in your fabric—just smooth, beautiful stitches. The idea is to pick a needle that opens up a hole just big enough for your thread to slide through comfortably, without any struggle or leaving a gaping hole behind.
To make things easier, here’s a quick breakdown of the three main players in the embroidery needle world.
Embroidery Needle Types at a Glance
This table sums up the go-to needles you'll encounter. Think of it as your cheat sheet for grabbing the right tool for the job.
| Needle Type | Size Range | Key Features | Best For |
|---|---|---|---|
| Crewel | 1-12 | Sharp tip, medium eye | Surface embroidery on tightly woven fabrics like cotton or linen. |
| Tapestry | 13-28 | Blunt tip, large eye | Counted-thread work like cross-stitch and needlepoint on Aida or canvas. |
| Chenille | 13-26 | Sharp tip, large eye | Stitching with thick threads, ribbons, or yarn on heavy fabrics like denim. |
Each needle has its own specialty, from piercing fabric for freestyle designs to gliding between the threads of evenweave for cross-stitch.
This simple flowchart can also help you visualize the decision-making process based on what you're stitching with and what you're stitching on.
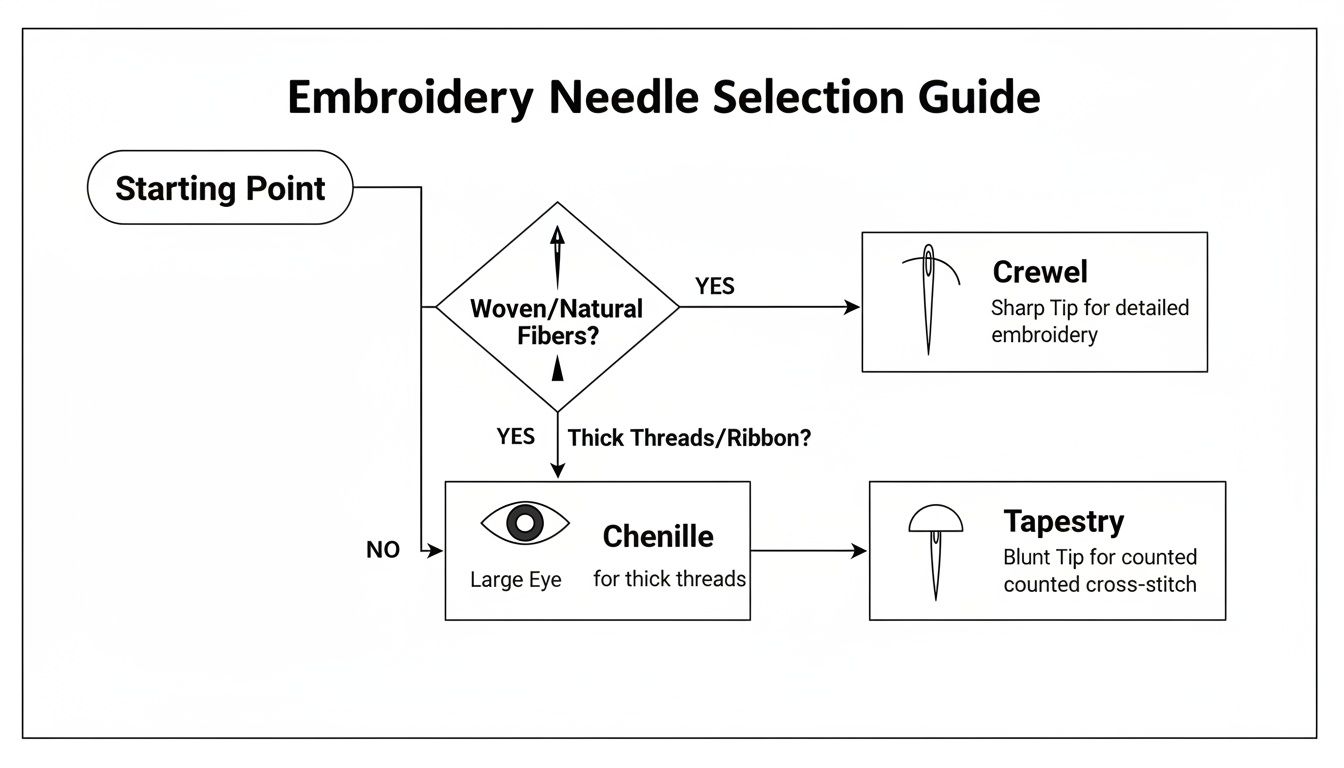
Ultimately, it comes down to a simple question: Do you need to pierce the fabric fibers (go for a Crewel or Chenille), or do you need to slide between them (Tapestry is your answer)?
How to Read an Embroidery Needle Size Chart
Jumping into an embroidery needles size chart can feel a bit backward at first. There’s one core rule you need to know, and it's a bit of a curveball for beginners: the numbering system is inverse.
Simply put, the smaller the number, the bigger the needle. A size 18 needle is a thick, sturdy workhorse, while a size 28 is incredibly fine and delicate. It’s a strange system, but once you get the hang of it, it makes perfect sense. This logic holds true across all the main types you'll encounter—Crewel, Tapestry, and Chenille needles.
Understanding the Inverse Relationship
Think of it this way: a size 18 needle is built for heavy lifting. Its thicker shaft can muscle through dense fabrics like denim or canvas, creating a hole large enough for thick yarns or multiple strands of floss to pass through without a fight. The eye is also much larger, making it a breeze to thread.
On the other end of the spectrum, a tiny size 28 needle is a precision tool. Its hair-thin shaft glides between the threads of high-count Aida or linen, leaving almost no trace. This is exactly what you want for delicate work with a single strand of thread.
Once you master this "smaller number, bigger needle" concept, you unlock a whole new level of control over your stitching. Crewel needles, for example, typically range from size 1 to 12, with 1 being the largest. You’ll often find beginner-friendly variety packs with sizes 3-9, which stock about 70% of hobbyist kits. For a deeper dive, you can find more on sewing needle standards on Wikipedia.
Practical Sizing Examples
Let’s see how this plays out in a couple of common projects:
-
Heavy Fabric Project: Imagine you’re stitching on a denim jacket with all six strands of cotton floss. You'll need a lower-numbered needle, like a size 5 Crewel or a size 18 Chenille. Its strength will keep it from bending or breaking, and the large eye prevents your floss from shredding as you pull it through the tough fabric.
-
Fine Detail Work: Now picture a delicate portrait on 22-count Hardanger fabric using a single strand of silk. A high-numbered needle is your only option here, perhaps a size 28 Tapestry. It’s fine enough to slip through the fabric’s tight weave without leaving a noticeable hole, ensuring your tiny, neat stitches are the only thing that stands out.
The Complete Guide to Embroidery Needle Types
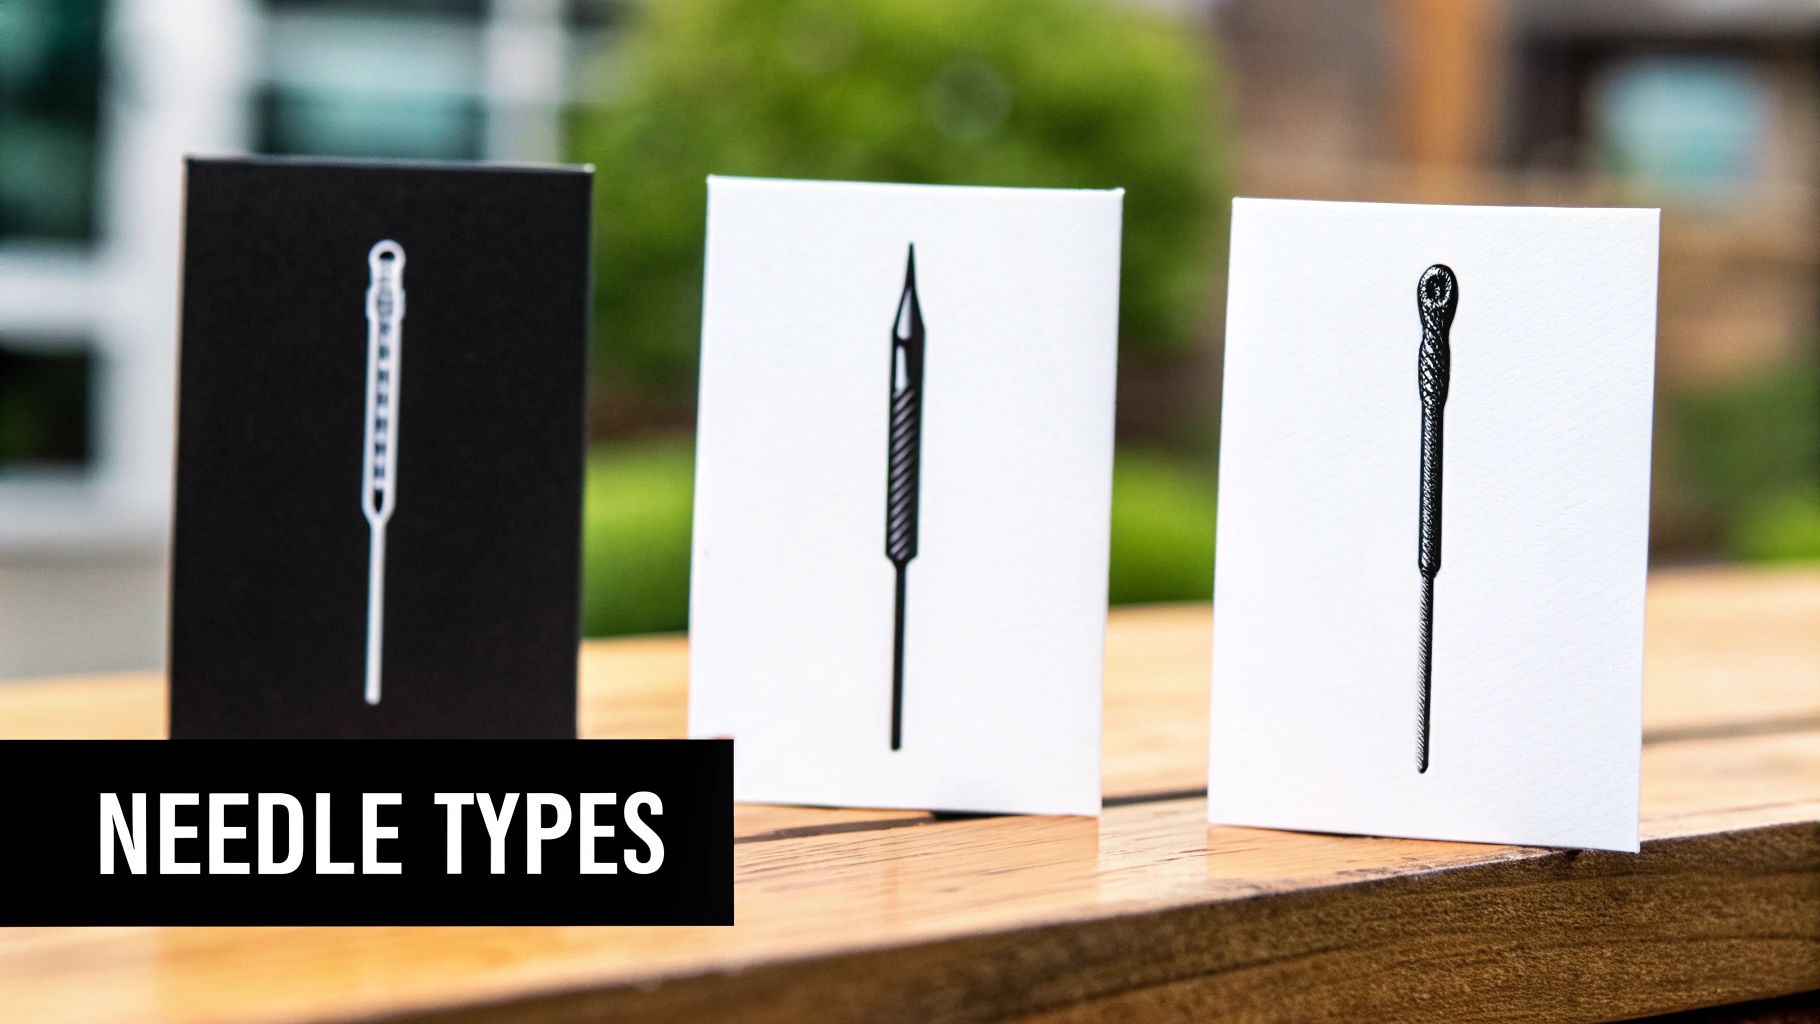
While an embroidery needles size chart is great for getting the numbers right, truly mastering your craft comes from knowing which type of needle to pick up. You'll run into three main players in the embroidery world: Tapestry, Crewel, and Chenille needles. Each one is built for a specific purpose, and picking the right one is the secret to getting your thread to glide through the fabric without a fight.
It’s this kind of know-how that makes a difference, whether you're buying needles one by one or getting a whole portable sewing kit with various needles and tools. The right needle can be the difference between a project you love and one you want to abandon.
Tapestry Needles: The Cross-Stitch Essential
Tapestry needles are easy to spot. They have two defining characteristics: a blunt, rounded tip and a large, elongated eye. They are, without a doubt, the go-to needle for any counted-thread embroidery, especially cross-stitch and needlepoint.
That blunt tip is the key. It's designed to slip neatly between the threads of evenweave fabrics like Aida and linen, not pierce them. This keeps you from splitting the fibers, which helps maintain a perfect grid and keeps your stitches looking clean and uniform.
- Best Use: Cross-stitch, needlepoint, and blackwork on Aida, linen, or canvas.
- Size Range: Usually available in sizes 13-28.
- Pro Tip: For 14-count Aida, a size 24 Tapestry needle is the gold standard. It’s what you’ll find in almost every cross-stitch kit out there.
Crewel Needles: The Surface Embroidery Specialist
Crewel needles—often just called "embroidery needles"—are basically the polar opposite of Tapestry needles. They have a very sharp tip and a medium-long eye. It's not as big as a Tapestry eye, but it’s still roomy enough to handle standard embroidery floss.
Their sharp point is made to cleanly pierce tightly woven fabrics. This makes them the perfect tool for any surface embroidery where you're essentially drawing a design on top of the fabric instead of working within a grid.
Think of Crewel needles as your fine-tipped pen for "drawing" with thread. They give you the precision needed for stitches like satin stitch, French knots, and stem stitch on fabrics like cotton, felt, or twill that don't have that open, grid-like weave.
Chenille Needles: The Heavy-Duty Hybrid
Chenille needles are a clever hybrid, borrowing the best features from the other two types. They combine the sharp point of a Crewel needle with the large, long eye of a Tapestry needle. This combo makes them surprisingly versatile, especially when you’re working with heavier threads.
The sharp point can muscle through dense fabrics like denim, canvas, and wool, while that big eye can handle thicker threads like pearl cotton, ribbon, or yarn without shredding them.
- Best Use: Crewelwork (which traditionally uses wool), ribbon embroidery, and any project involving thick yarns.
- Size Range: Typically run from size 13-26.
- Practical Example: If you’re embellishing a wool blanket with some chunky yarn, a size 18 Chenille needle has both the strength to get through the fabric and an eye big enough for the job.
Matching Your Needle to Fabric and Thread
This is where all that technical info about an embroidery needles size chart really comes to life. Getting a polished, professional finish is all about creating the perfect team: your needle, your fabric, and your thread. The goal sounds simple, but it’s crucial. Your needle needs to make a hole just big enough for the thread to glide through without a fight, but small enough that the fabric snugs back up around the stitch.
Think of your needle as a temporary pathway. If it’s too big, it bulldozes a permanent hole in your fabric, leaving ugly gaps. But if it's too small, you'll be wrestling it through every stitch, and all that friction will shred your beautiful floss.
The Fabric and Needle Relationship
First things first, look at your fabric's weave. Tightly woven fabrics like quilting cotton or linen don't have much space between their threads. For these, you’ll need a sharp, slim Crewel needle to pierce the fibers cleanly.
On the other hand, Aida cloth is specifically designed with an open, even weave for counted-thread work like cross-stitch. A blunt Tapestry needle is your best friend here because it finds the holes and slips between the threads instead of splitting them. Try using a sharp needle on Aida, and you risk messing up the grid, which leads to messy, uneven stitches.
Here's a quick test I always use: thread your needle and pull it through a spare corner of your fabric. If you have to yank it or you hear a popping sound, the needle is too big. If the thread looks fuzzy after a few passes, the eye is too small and it's fraying your floss.
Thread Thickness and Needle Eye
The next piece of the puzzle is the thread. The eye of your needle has to be large enough for your chosen floss to pass through comfortably. Trying to jam multiple strands of floss through an eye that's too small is a fast track to frustration and frayed thread.
Remember, a higher needle number (like a size 28) means a smaller needle with a tiny eye, perfect for a single strand of floss. A lower number (like a size 22) has a much larger eye that can handle several strands with ease. This becomes especially important when you're working with different types of hand embroidery floss, from standard six-strand cotton to chunkier pearl cottons.
Common Pairings for Success
Getting these combinations right will make your stitching life so much easier. Here are a few go-to pairings that I recommend:
- 14-Count Aida Fabric: A size 24 Tapestry needle is the classic choice. This is what you’ll find in most cross-stitch kits, and it works perfectly with two or three strands of floss.
- 18-Count Aida Fabric: When you move to a finer fabric, you need a finer needle. Switch to a size 26 Tapestry needle so it won't distort the tighter weave.
- Denim or Canvas: For heavy-duty fabrics, especially if you're using all six strands of floss, grab a size 5 Crewel or a size 18 Chenille needle. You'll appreciate their strength and larger eye.
- Lightweight Linen: When doing delicate surface work with just one or two strands, a size 9 or 10 Crewel needle will give you the precision you need without leaving noticeable holes.
When you correctly match these three elements, you’ll see the difference immediately. Your stitches will lie flat, your thread will stay smooth, and your finished project will have that clean, expert look we all strive for.
Choosing the Right Needle for Cross-Stitch Kits
Ever open a brand-new cross-stitch kit and wonder why that specific needle was included? It’s no accident. Kit designers put a lot of thought into matching the needle to the fabric count and the recommended number of floss strands for the project. The goal is to set you up for success right from the start.
Most all-in-one kits you'll find, especially ours at Cross Stitched, will include a size 24 Tapestry needle. This isn't just a popular choice; it’s become the go-to standard because it works beautifully with 14-count Aida cloth, the most common fabric used in kits. A size 24 has a blunt tip that glides smoothly through Aida’s open weave and an eye that’s just right for the usual two or three strands of floss.
When to Swap Your Kit Needle
The needle that comes with your kit is almost always the best tool for that specific project. But there are a couple of good reasons why you might want to reach for something different. Knowing when to make a switch can make your stitching more comfortable and even improve how your final piece looks.
- Personal Comfort: We all stitch a little differently. If the needle in your kit feels too short, too long, or is just plain awkward to hold, don't hesitate to change it. Swapping it for another size 24 from a brand you prefer, or even one with an ergonomic grip, can make all the difference in your stitching sessions.
- Changing Fabric: Sometimes you want to use a different fabric than what's provided. If you decide to stitch your pattern on a higher-count fabric, say 18-count Aida instead of the original 14-count, the kit's needle will be too bulky. You'll need to move down to a finer size 26 Tapestry needle to avoid distorting the fabric's smaller holes.
It's these little details that really matter in the embroidery world. In fact, industry data shows that tapestry needles in sizes 22-28 are used in a whopping 55% of projects on Aida and evenweave fabrics. This helps put into perspective why your kit is curated the way it is. If you're curious, you can find more great insights about hand embroidery needles and how to choose them on needlenthread.com.
At the end of the day, knowing your tools is what turns a hobby into a craft. Just as understanding optimal dimensions is crucial for selecting the right embroidery needle, discovering how to know your snowboard size is key for performance and comfort. To dive deeper into this topic, be sure to read our detailed guide on cross-stitch needles sizes.
Troubleshooting Common Embroidery Needle Problems
Even with the perfect embroidery needles size chart in hand, every stitcher runs into frustrating issues from time to time. But don't worry—most of these common hiccups can be traced right back to a simple mismatch between your needle, thread, and fabric.
Understanding the cause is the first step to a quick fix, letting you get back to your project without wasting time or materials.
Why Is My Thread Fraying or Breaking?
There's nothing more annoying than seeing your beautiful floss get fuzzy, thin, or even snap mid-stitch. More often than not, the culprit is a needle eye that's just too small for the thread you're using.
When the eye is too narrow, it creates a ton of friction. Every single pull through the fabric literally scrapes and shreds the delicate fibers of your floss. A low-quality needle with rough, microscopic burrs inside the eye can do the same kind of damage, acting like a tiny knife on your thread.
- The Fix: Simply switch to a needle with a larger eye. For example, if you're struggling with six strands of floss on a size 9 Crewel needle, try moving up to a roomier size 7. Always inspect your needles and toss any that are old, rusty, or bent.
Why Is My Fabric Puckering or Tearing?
If your fabric is bunching up or wrinkling around your stitches, that’s a classic sign your needle is too big for the fabric's weave. A needle that's too thick has to force its way through, distorting the surrounding fabric threads and causing those dreaded puckers.
A good rule of thumb is that your needle should part the fabric threads, creating a hole just large enough for your floss to glide through smoothly. You shouldn't have to wrestle it, but it also shouldn't leave a gaping hole behind.
On finer, more delicate fabrics, a needle that’s too large won't just pucker the material—it can permanently tear the fibers.
- The Fix: Downsize to a finer needle (a higher number). If you're working on 18-count Aida and a size 24 Tapestry needle is causing puckering, switching to a more suitable size 26 should solve the problem.
Properly threading your needle also makes a big difference in reducing drag and friction. If you need a refresher, check out our guide on how to thread a cross stitch needle.
Your Embroidery Needle Questions, Answered
Even with the best charts in hand, some questions always seem to come up when you're in the middle of a project. Let's tackle some of the most common ones so you can stitch with confidence.
Can I Just Use a Regular Sewing Needle for Embroidery?
You can, but you probably won't like the results. It's a bit like trying to paint a detailed watercolor with a house-painting brush—it's just not the right tool for the job.
Standard sewing needles have tiny eyes that just aren't built for the thicker strands of embroidery floss. Forcing floss through that small opening will shred and weaken your thread before you even make a single stitch. Their sharp points are also designed to pierce fabric tightly for seams, which is the opposite of what you want in counted-thread work where a blunt Tapestry needle is designed to glide between threads.
How Do I Know When It's Time to Replace My Needle?
Needles aren't forever! They get dull, bent, and develop tiny, invisible burrs that can snag your fabric and thread. Think of them as a consumable, not a permanent tool.
Keep an eye out for these tell-tale signs:
- It's suddenly harder to stitch. If you feel like you're forcing the needle through the fabric, the point is likely dull.
- Your floss is fraying. When thread starts shredding for no obvious reason, the culprit is often a rough, damaged spot inside the needle's eye.
- It looks discolored or rusty. Any tarnishing means the protective coating is gone, and that discoloration can easily transfer to your beautiful fabric.
My rule of thumb? Start every big project with a fresh needle. They're inexpensive, and nothing beats the smooth, easy glide of a brand-new needle right from the start.
What’s the Deal With Different Needle Coatings?
You've probably seen needles advertised with nickel, platinum, or even gold plating. This isn't just for looks; these coatings serve a very practical purpose. A quality coating makes the needle's surface incredibly smooth, which means less friction as it passes through your fabric.
Nickel-plated needles are the standard and work great for most situations. However, stitchers with nickel sensitivities might prefer gold-plated or platinum-plated needles, which are naturally hypoallergenic. These premium coatings also offer a buttery-smooth finish that can make stitching on tightly woven or stubborn fabrics feel almost effortless.
The constant improvement in needle manufacturing is part of a long, fascinating history. Artisans have been refining their tools for centuries, with needle technology directly influencing the complexity of their designs. In fact, the Victoria and Albert Museum has samplers dating back to the 1400s that show just how much needle choice has always mattered. You can dive deeper into the history of needlework samplers on VAM.ac.uk.
Ready to turn a cherished photo into a work of art? At Cross Stitched, we create custom, all-in-one cross-stitch kits with everything you need to bring your memories to life. Design your personalized kit today!


