
There's something uniquely special about creating your own Christmas decorations. Cross stitch, with its simple, mindful rhythm of X-shaped stitches, is the perfect way to capture that holiday magic. It’s a craft that invites you to slow down and create something truly meaningful, whether you're tackling your first-ever kit or turning a beloved family photo into a stitched work of art.
Crafting Holiday Memories, One Stitch at a Time
Welcome to the wonderfully cozy world of Christmas cross stitch! This is where your own creativity gets to mingle with festive tradition. For so many of us, it’s more than just a hobby—it's a way to pause during a wonderfully chaotic season and make something with real heart. Whether you've been stitching for years or are just picking up a needle for the first time, think of this guide as your creative partner.
Weaving this simple craft into your December can quickly become one of your most cherished Christmas traditions. The simple act of pulling thread through fabric connects us to a long history of handmade artistry, allowing us to create tangible pieces of holiday joy.
The Growing Appeal of Handmade Holidays
Have you noticed how much people appreciate a handmade gift? This desire for personal, thoughtful presents has led to a huge comeback for needlecrafts. It's not just a feeling; the global market for needlecraft patterns was valued at a staggering USD 1.2 billion in 2023 and is expected to more than double by 2032. You can read more about this trend over at dataintelo.com.
This isn't just a market trend; it shows a real shift towards more meaningful celebrations. Instead of grabbing another mass-produced item, people are choosing to invest their time and love into creating gifts.
A Christmas cross stitch project can be so many things:
- A personalized ornament marking a baby's first Christmas.
- A detailed family portrait stitched from a favorite holiday photo.
- A set of festive little coasters for your hot cocoa mugs.
- A beautiful wall hanging that your family will treasure for years.
The real magic of a Christmas cross stitch isn't just in the finished piece. It’s found in the quiet, mindful hours you spend creating it. Each stitch holds an intention, a memory, or a little piece of holiday hope.
This guide is here to walk you through all the possibilities. We'll cover everything from picking the right materials and fabrics to putting the final touches on your piece so it's ready to display or gift. Let's get stitching
Transforming Photos Into Timeless Stitched Art
There's something incredibly special about capturing a fleeting holiday moment—your child’s face lit up by the Christmas tree, a candid family laugh around the dinner table, or even just the quiet beauty of a snowy landscape outside your window. Now, what if you could immortalize that memory not just in a photo frame, but in thread? Turning a personal photo into a custom Christmas cross stitch is one of the most meaningful ways to create a true family heirloom.
You're literally translating a digital image into a tangible piece of art, one stitch at a time. The secret to a beautiful result, though, lies in starting with the right photograph. A stunning finished piece always begins with a great source image.
Selecting the Perfect Holiday Photo
Let's be honest: not every photo is a good candidate for a cross-stitch pattern. The best ones are always high-resolution images with a clear subject, good lighting, and strong contrast. A photo that’s a bit blurry, too dark, or has a chaotic background will lose all its charm when broken down into a grid of tiny squares.
When you're digging through your camera roll, keep these things in mind:
- Focus is a Must: Make sure the most important parts of the photo are sharp. Soft, blurry edges just turn into a muddle of confusing stitches.
- Good Lighting is Your Best Friend: Look for photos where you can clearly see the difference between light and shadow. This contrast is what defines shapes and facial features—it’s crucial for a portrait that actually looks like the person.
- Keep the Background Simple: A clean, uncluttered background keeps the focus right where it should be: on your subject. A simple portrait against a plain wall or a snowy field almost always translates better than one taken in a messy living room.
By simplifying the visual information from the very beginning, you're giving the pattern-generating software the best possible material to work with. The goal is to capture the essence of the memory, not to replicate every single speck of dust in the background.
This little flowchart breaks down the basic workflow for bringing your custom Christmas stitch to life.
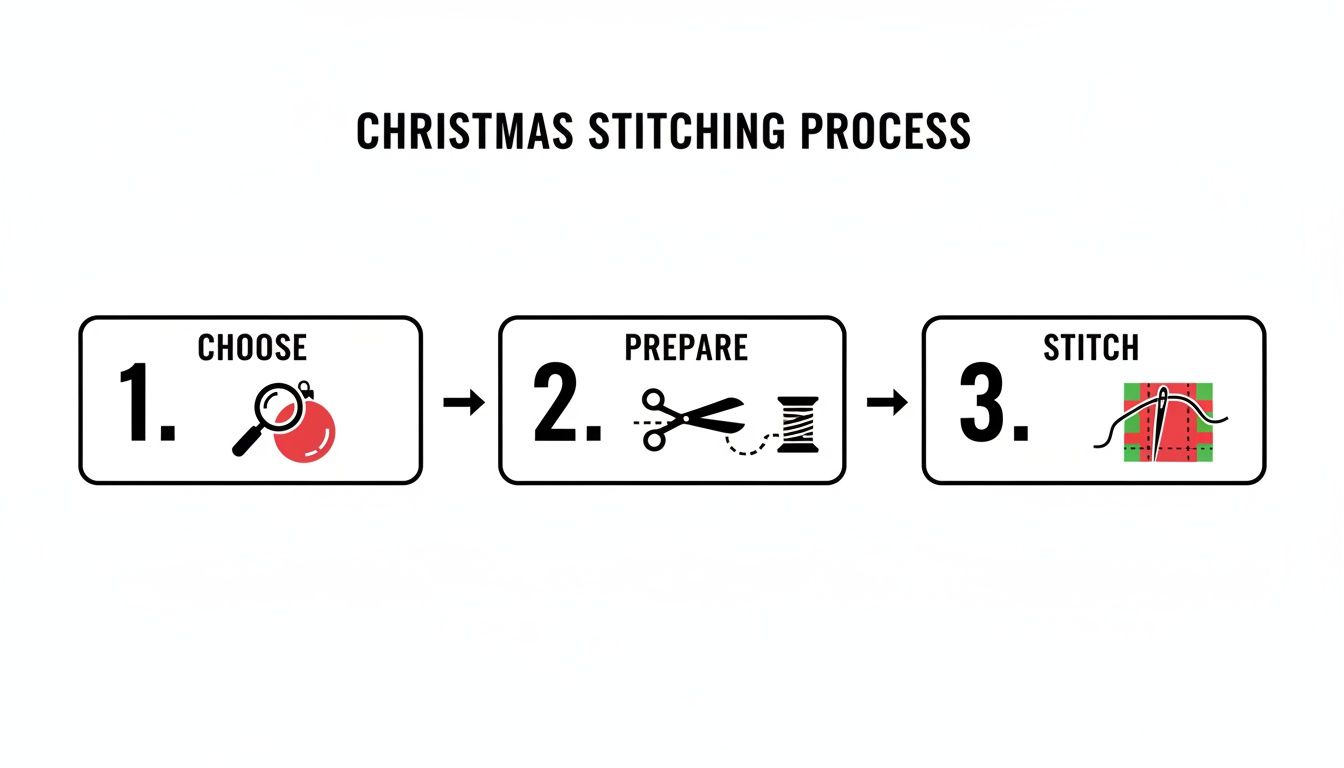
As you can see, choosing the right image is the absolute first step. Get that right, and you're well on your way.
From Pixels to Patterns
Once you've picked the perfect photo, modern tools make the conversion process surprisingly straightforward. Online photo-to-pattern generators do all the heavy lifting for you, analyzing your image and spitting out a printable chart. They even assign a specific DMC thread color to each "pixel" and generate a complete shopping list of floss. If you want to see a similar concept in action, you can explore how AI tools turn a picture into a coloring page, which also simplifies complex images into lines and colors.
When you generate your pattern, you'll have some choices to make about the final size and the fabric count. A larger piece stitched on a higher count fabric (like 18-count Aida) will allow for much more detail, capturing those subtle expressions and textures perfectly. On the other hand, if you're making a small ornament, a lower fabric count with fewer colors can create a wonderfully charming, stylized look.
For a really deep dive into this, our guide on how to turn a photo into a cross stitch pattern walks you through everything step-by-step. This personalized approach is what makes your final Christmas cross stitch more than just a project—it becomes a cherished story told in thread.
Choosing the Right Fabric and Threads
The fabric and thread you choose are the very foundation of your Christmas cross stitch project. Getting these right from the start makes the whole process so much more enjoyable and, honestly, has a huge impact on how your finished piece looks. It’s like being an artist—your fabric is the canvas, and your thread is the paint. The right combination sets the tone for the entire piece.
 embroidery hoop, with colorful fabric and thread samples.">
Most stitchers, especially if they're just starting out, will work with Aida cloth. It’s a wonderful cotton fabric with a clear, easy-to-see grid that takes all the guesswork out of placing your stitches. You'll see it described by its "count," which is simply the number of squares (or stitches) you can fit into one inch.
Understanding Fabric Counts
The whole idea of fabric "counts" might seem a bit technical at first, but it's really straightforward. A lower count number means bigger squares, and a higher count means smaller, more refined stitches.
- 14-Count Aida: This is the workhorse of the cross-stitch world. It's what you'll find in most kits, and it's perfect for beginners. The holes are big and easy to see, which helps you get into a rhythm quickly. A pattern stitched on 14-count will turn out larger than the same one on a higher-count fabric.
- 16-Count and 18-Count Aida: When you're ready for more detail, moving up to a 16 or 18-count fabric is a great next step. The smaller squares allow for more intricate work—think delicate snowflakes or the fine details on a Santa's face. Your finished project will be smaller and have a more polished look.
If you want to dive deeper into all the options out there, we've put together a full guide on the best fabric for cross stitch to help you choose.
Lately, especially with budgets in mind, many stitchers are sticking with versatile and affordable Aida. I've noticed a real trend towards smart savings; for instance, choosing a 20-count Aida over a fancy 40-count linen can cut your fabric costs by up to 50% without compromising the final look. It’s a savvy move, especially considering that the last few months of the year can account for 35-45% of all annual cross-stitch sales. You can find some great discussions about these seasonal crafting trends on YouTube.
Cotton vs Silk Threads
Okay, you've got your fabric. Now for the fun part: the threads! The two main choices you'll face are the classic DMC cotton floss and the beautifully lustrous silk threads.
| Thread Type | Best For | Key Characteristic |
|---|---|---|
| DMC Cotton | All-purpose projects | Durable, matte finish, vast color range. |
| Silk Threads | Special heirloom pieces | Beautiful sheen, smooth texture, elegant finish. |
DMC cotton floss is the industry standard for good reason. It’s tough, it’s affordable, and it comes in an unbelievable range of colors, so you’ll never struggle to match a pattern. It has a classic matte finish that gives projects a warm, traditional feel.
Then you have silk threads, which add that little something extra. They have a gorgeous natural sheen that catches the light, making them perfect for those special Christmas projects where you want a bit of shimmer—think angel wings or the glint of a star. They do cost more, but for an heirloom piece, that elegant finish is absolutely worth it.
Ultimately, it all boils down to the final look you're imagining. If you’re stitching a rustic, cozy Christmas stocking, DMC cotton is the perfect fit. But for a delicate, shimmering ornament you hope to pass down for generations? Silk will make it truly unforgettable.
Getting Your Stitches Just Right
You've picked your fabric and have all your threads lined up—now for the best part. This is where the magic happens, where you get to sit down and bring that festive design to life, one stitch at a time. It’s pure, mindful creation. Getting a few basic techniques down will make the whole process so much more enjoyable and will make a huge difference in how your finished piece looks.
Remember, the goal isn't just to follow a pattern. It’s to create something that looks polished and neat from every angle, front and back. The small things, like how you begin and end a length of thread, are what separate a good project from a great one.
Starting and Stopping Without Knots
If there's one habit every stitcher should develop, it’s the loop start method. It’s a game-changer, especially when you're working with an even number of strands, like the standard two strands for 14-count Aida fabric. Instead of tying a knot, you take a single, longer strand and fold it perfectly in half. Thread the two cut ends through your needle, then bring the needle up from the back of your fabric, leaving a little loop behind.
When you make the first leg of your first stitch, just slip your needle through that loop on the back before going back down. That’s it! Your thread is now anchored securely, and the back of your work is completely flat.
Why does a tidy back matter so much?
- No Lumps: A smooth back ensures you won't see any weird bumps or shadows on the front of your piece, especially after you wash and iron it.
- Easier Framing: It makes mounting your project for framing a thousand times easier.
- No More Snags: Knots are notorious for catching other threads while you work, causing all sorts of tangles and headaches. The loop start avoids this entirely.
When you’re ready to end a thread, the aim is the same: keep it clean. Just run your needle under the back of the last three or four stitches you made. Pull it snug and snip the thread close to the fabric. It holds just as well as a knot but looks infinitely better.
Juggling Colours and Keeping Tension Even
Christmas patterns are famous for their vibrant (and often complex) colour palettes. Looking at a chart with dozens of symbols can be a little intimidating. A great technique for managing this is called "parking." Instead of stitching all of one colour before moving on, you work a small area, then bring your thread up in the next spot that symbol appears on the chart. You just let it hang out—or "park"—on the front while you switch to a different colour. It's a fantastic way to keep your place in a really detailed design.
As you get into the rhythm of stitching, keep an eye on your tension. You want each "X" to lie flat and smooth against the fabric. If you pull your thread too tight, the fabric will start to pucker and warp. If it’s too loose, the stitches will look a bit puffy and uneven. The secret is finding a consistent, gentle pull for every single stitch.
Strive for a rhythm where each stitch is a twin to the one before it. Consistent tension is the secret ingredient that gives a finished cross stitch project its smooth, almost pixel-perfect appearance. It's a skill that develops with practice, transforming your work from handmade to handcrafted.
And finally, don't sweat the small mistakes. If you realize you've miscounted, it's almost always better to unpick it and fix it right away than to try and make it work later on. Got a knot? Don't yank it. Gently tease the strands apart with the tip of your needle. Patience is your best friend here, and every little tangle you fix is a lesson learned for the next project.
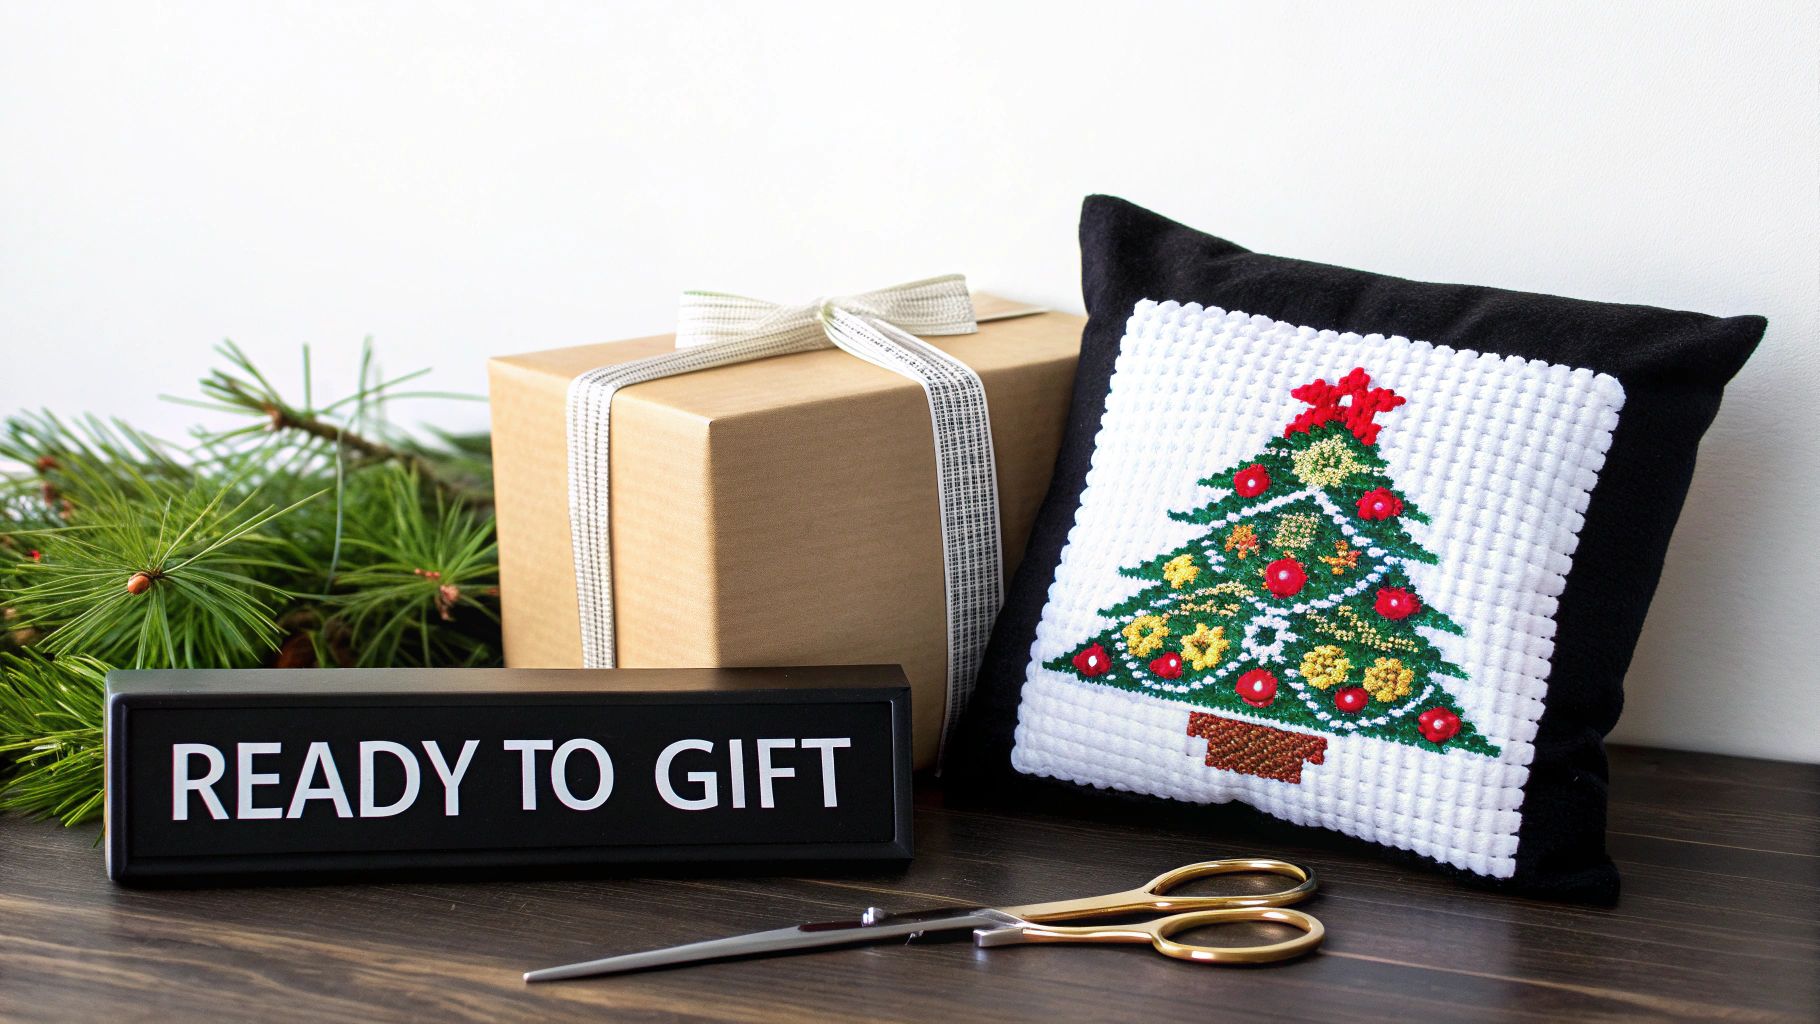
Putting the Final Touches on Your Handmade Creation
There’s nothing quite like tying off that final stitch, is there? But before you sit back and admire your work, a few finishing steps can turn your Christmas cross stitch from a lovely project into a truly stunning piece of art. It’s these final details that make all the difference, ensuring your creation is ready to be displayed or gifted with pride.
First things first, let's give your piece a gentle wash. I know, it can feel a bit nerve-wracking to submerge something you've spent hours on, but it's the best way to remove hand oils, dust, or any stubborn hoop marks. Just swish it around in a bowl of lukewarm water with a tiny drop of mild soap. Rinse it well in cool water, then lay it flat on a clean, fluffy towel to air dry.
When it's still just a little bit damp, place your work face-down on another clean towel and press it with a warm iron. This little trick helps smooth out any wrinkles and makes your stitches pop, giving them a beautiful, uniform look. For a really deep dive into getting that perfect, professional look, you can learn more about how to properly finish a cross stitch project.
Thinking Beyond the Traditional Frame
A classic frame is a wonderful choice, of course, but don't feel limited to hanging your work on the wall! Your Christmas cross stitch has the potential to become so much more.
Smaller festive designs are absolutely perfect for one-of-a-kind tree ornaments. You could mount them in a tiny embroidery hoop, stick them onto a small wooden disc, or even finish them as little pillows stuffed with cotton and maybe a dash of cinnamon for a festive scent.
For your larger pieces, why not try one of these ideas?
- A Festive Pillow: Stitch your design onto a panel and then sew it onto some beautiful coordinating fabric like velvet or flannel. It instantly becomes a gorgeous decorative cushion for the sofa.
- A Christmas Stocking: A finished cross stitch makes a stunning centerpiece for a handmade stocking. It’s a surefire way to create a future family heirloom.
- A Gift Bag or Tag: A small, sweet motif can be attached to a simple fabric gift bag, making the wrapping an extra special part of the present.
Your handmade creation isn't just a decoration; it’s a piece of your time, care, and holiday spirit. Presenting it thoughtfully shows the recipient just how much love went into every single stitch.
The Art of Gifting a Handmade Treasure
Giving someone a handmade gift is offering them something irreplaceable. People truly value the time and skill involved. In fact, even in collector markets, 30-40% of high-end patterns sold each year are Christmas-themed. Certain vintage designs, like some early Mirabilia Christmas patterns, can fetch nearly $50, which just goes to show how much people appreciate unique stitch work.
The final presentation is everything. Wrap your finished piece in some nice tissue paper and place it in a lovely box. Adding a sprig of holly or a handwritten note that shares the story behind the piece is a beautiful touch. This kind of thoughtful packaging really honors the time you invested and helps turn your gift into a keepsake they'll treasure for years.
Common Questions About Christmas Cross Stitch
As you get ready to dive into your next festive project, a few questions always seem to come up. It doesn't matter if you're a seasoned stitcher with a closet full of floss or just unwrapping your very first kit—getting these queries sorted out can make the whole process so much more fun.
Let’s talk about some of the things I hear most often from fellow stitchers.
One of the biggest hurdles is timing. It’s incredibly easy to look at a pattern in July and think, "Oh, I have plenty of time!" Trust me, the holidays have a way of sneaking up on you. As a rule of thumb, I always suggest starting your Christmas cross stitch projects in late summer or early fall. That way, you can enjoy the process without the frantic, late-night stitching sessions in December.
How Long Does a Christmas Project Really Take?
This is the million-dollar question, isn't it? The time it takes can swing wildly depending on the project's size, the complexity of the pattern, and how many different colors you're juggling. It's not just about the final dimensions; a small but intricate design can take longer than a larger, simpler one.
To give you a rough idea of what you're getting into:
- Small Ornaments: A simple, palm-sized ornament is a great weekend project. A beginner could probably knock one out in 5 to 8 hours.
- Medium Custom Kits: An 8x12 inch custom photo kit is a bigger commitment. You're likely looking at 40 to 80 hours of stitching here.
- Large Heirlooms: For those big, beautiful tapestries with tons of detail and shading? Those are a true labor of love, often taking hundreds of hours to complete.
Honestly, planning is everything. If you know the time investment upfront, you can pick a project that feels like a relaxing escape, not a race against the clock.
Choosing the Right Materials and Tools
For anyone new to cross stitch, walking into a craft store can feel a bit overwhelming. The question I get asked most is about fabric count, and my answer is almost always the same for beginners: go with 14-count Aida. The "count" just means how many stitches you can make in one inch. A lower number like 14 means the little woven squares in the fabric are larger, which makes them way easier to see and work with. It's a game-changer for reducing eye strain.
Another classic frustration? Tangled thread. The easiest fix I've found is to work with shorter lengths of floss—about 18 inches is the sweet spot. Before you make your first stitch, just let the thread dangle from your needle for a second. You'll see it naturally untwist itself. And when you pull the thread through the fabric, do it smoothly instead of yanking. It works wonders.
Finally, let's talk about turning a photo into a pattern. The quality of your final piece starts with the quality of your photo. Always pick a picture that's well-lit, in sharp focus, and has good contrast between your subject and the background. Blurry, dark photos with messy backgrounds just don't translate well into a stitchable pattern; all those important details get lost. A crisp, clear digital photo is the perfect foundation for a beautiful heirloom you'll be proud of.
Ready to turn a favorite holiday memory into a timeless piece of art? At Cross Stitched, we make it simple to get started. You can explore our custom photo-to-pattern kits and find everything you need for your next project.


