
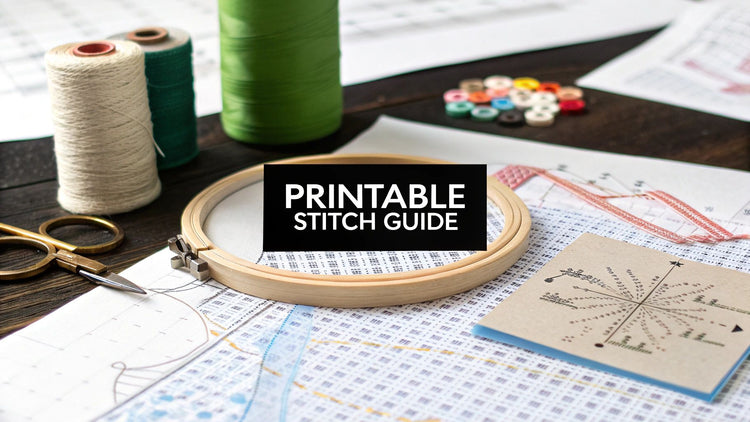
I'm so excited to share this with you! Here's your essential, free printable embroidery stitch guide—a downloadable resource I’ve designed to be your go-to companion for every single project. Think of it as a complete visual library of the most common and useful stitches, from basic outlines to beautiful decorative flourishes, all in one handy spot.
Your Essential Printable Embroidery Stitch Library
 embroidery hoop, scissors, fabric stack, and a 'Printable Stitch Guide' display.">
A personal stitch library really is the ultimate cheat sheet. Instead of breaking your creative flow to look up a tutorial on how to get a French Knot just right or nail a perfect Satin Stitch, you can have a physical reference right there on your craft table. I've built this printable guide to be that trusted tool, helping you learn faster and stitch with more confidence.
Build Your Stitching Confidence
Whether you're just starting out or have been stitching for years, having a clear, reliable guide makes all the difference. It takes the guesswork out of the equation and helps you master new techniques in no time. Our guide is designed specifically for clarity and ease, so you can focus on the joy of creating.
This resource is so much more than a simple list of stitches; it's a solid foundation for your growth as an artist. With these fundamental techniques at your fingertips, you'll be able to:
- Improve Accuracy: Just follow the clear diagrams and step-by-step instructions for consistent, beautiful stitches every time.
- Expand Your Skills: You can easily experiment with new stitches like the Chain Stitch or Lazy Daisy, knowing you have a reliable guide to fall back on.
- Increase Project Success: Feel confident selecting the perfect stitch for any part of your design, from crisp outlines with a Backstitch to silky smooth fills with a Satin Stitch.
Having a printable guide completely changes how you approach new patterns. It turns those moments of uncertainty into opportunities for learning, making sure your crafting time is relaxing and productive, not frustrating.
For anyone just gathering their tools, getting the basics sorted is key. You can learn all about the essential embroidery supplies for beginners in our detailed article. This printable library is the perfect next step once you have your hoop, fabric, and floss ready to go.
Getting Your Stitch Guide Printed and Assembled
Alright, you've downloaded the **printable embroidery stitch guide**, so now for the fun part: turning that digital file into a real-life tool you can keep right next to your stitching hoop. Getting it printed and put together the right way means you'll have a durable, easy-to-read reference that will last you through countless projects.It really pays to spend a moment on your printer settings. You want every diagram and bit of text to be super crisp, so you're not squinting to figure out the next step.
My Go-To Printer and Paper Tips
- Printer Settings: When the print dialog box pops up, look for an option like "High Quality" or "Best Quality." This makes a huge difference in the clarity of the diagrams.
- Paper Choice: I strongly recommend using something thicker than standard copy paper. A good cardstock or even a matte photo paper feels substantial and keeps the ink from bleeding through, which is key.
- Color Settings: If your printer gives you the option, sticking with a standard CMYK color profile will give you the truest colors, which is especially helpful for matching those DMC thread recommendations.
Creative Ways to Put It All Together
Once your pages are printed, you can get creative with how you assemble your guide to make it work for you. The easiest method is just using a three-hole punch and popping the pages into a binder. This is great because you can easily add new stitches or notes as you go.
If you want something a bit more bomb-proof, I love laminating the pages. It protects them from the inevitable coffee spills and general wear and tear, so your guide will look great for years. Once laminated, you can use a single binder ring to create a handy little flip-book that’s easy to toss in your project bag. Speaking of projects, as you get ready to start your next piece, it's also a great time to brush up on how to transfer designs onto fabric.
Getting to Know the Foundational Stitches
Every amazing embroidery project, no matter how intricate, starts with a handful of core stitches. Before you dive into the fancy stuff, you've got to get comfortable with the basics—the stitches that create clean lines, bold outlines, and those tiny little details that make a piece pop. This section of your printable embroidery stitch guide is all about these essential workhorses.
We'll walk through the three most crucial stitches for any newcomer: the Running Stitch, the Backstitch, and the Split Stitch. I like to think of them as the alphabet of embroidery. Once you have them down, you can start combining them to form words and tell incredible stories with your needle and thread.
Running Stitch: The Simple Starting Point
The Running Stitch is almost certainly the first stitch you'll ever try, and for good reason—it’s wonderfully simple and quick to do. It produces a neat dashed line, which is perfect for creating simple borders, adding a decorative touch with visible mending, or just tacking fabric layers together.
- Difficulty: Beginner
- Best For: Outlines, borders, and decorative topstitching.
- How to: Just bring your needle up from the back of the fabric at point A, then push it back down a short distance away at point B. Come back up at C and repeat the motion. The real trick here is keeping your stitch length and the gaps between them consistent.
Backstitch: The Ultimate Outline Tool
When you need a solid, continuous line, the Backstitch is your absolute best friend. It’s far stronger and creates a much cleaner look than the Running Stitch, making it the go-to for outlining shapes, stitching letters, or defining any element that needs to be sharp and clear. This one is a true cornerstone of both embroidery and cross-stitch. To really dig into its role, you can find a deep dive on our guide, backstitching">https://cross-stitched.com/blogs/what-is-cross-stitch/what-is-backstitching.
Counted thread embroidery, which is the technique behind cross-stitch, is actually the fastest-growing part of the industry. Since 70% of beginners start there, having a handy printable guide can slash the learning curve by as much as 40%, making stitches like the Backstitch feel much more approachable right from the start.
Pro-Tip: If you're struggling to see the tiny details when learning new stitches, investing in the best craft light with magnifying glass is a game-changer. It seriously helps with getting your stitches even and consistent.
Split Stitch: For Lines with Texture
The Split Stitch is what you turn to when you want a line with a bit more oomph. It creates a beautiful textured line that looks almost like a tiny, delicate braid. It’s absolutely perfect for lettering and outlines where a standard Backstitch just feels a little too plain.
- Step 1: Start by making a single, simple straight stitch.
- Step 2: Now, bring your needle up directly through the center of that stitch you just made, splitting the floss in two.
- Step 3: Take the needle back down into the fabric a stitch-length away to create the next part of the line.
- Step 4: Just keep repeating this motion, always surfacing through the middle of the stitch you just laid down.
Exploring Filler Stitches For Color And Texture
Once you've got your outlines down, the real fun begins: filling those shapes with color and texture. This is where your embroidery truly comes alive. Filler stitches are what turn simple line art into a vibrant, touchable piece of art. This part of your printable embroidery stitch guide will walk you through the essential stitches for bringing your designs to life, from the smooth sheen of a flower petal to the subtle texture of a grassy field.
Think of these stitches as your coloring tools. They're perfect for filling in larger areas like leaves, skies, or the clothing on a stitched character. Each one creates a completely different effect, and your choice can totally change the personality of your piece. Let's start with the most famous filler stitch of them all: the Satin Stitch.
Satin Stitch For A Smooth, Lustrous Finish
When you picture that perfectly smooth, glossy embroidered surface—that's the Satin Stitch. The whole idea is to lay straight stitches right next to each other, so close that they completely cover the fabric underneath. It’s the go-to choice for filling in small- to medium-sized shapes where you want a silky, elegant look, like on petals, leaves, and bold lettering.
I'll be honest, getting a flawless Satin Stitch takes some practice, but the stunning result is worth every bit of effort. The secret is keeping your stitch tension even and making sure all your stitches lie perfectly parallel, like tiny, shiny planks of wood.
- Difficulty: Intermediate
- Best For: Small shapes, flower petals, and monograms where a silky finish is desired.
- Pro-Tip: For larger shapes, I highly recommend outlining the area with a Split Stitch first. This creates a slightly raised edge that acts like a dam, helping you keep all those Satin Stitches neat and contained.
A common frustration with Satin Stitch is puckering, which happens when the stitch tension pulls and distorts the fabric. To avoid this, make sure your fabric is drum-tight in your hoop. Seriously, it should bounce a coin. Also, resist the urge to pull your stitches too tight. Using fewer strands of floss (two or three) can also make a huge difference in reducing tension.
Long and Short Stitch For Blending Colors
If you've ever wanted to "paint" with thread, the Long and Short Stitch is your new best friend. This is an incredibly versatile filler stitch that lets you blend different shades of floss seamlessly, creating beautifully realistic gradients and shading. It's the perfect solution for larger areas where a Satin Stitch would be too long and at risk of snagging.
You'll work this stitch in rows of interlocking long and short stitches. The first row sets the foundation, and every row after that fills in the gaps, creating a smooth, blended surface with no harsh lines between colors.
- Step 1: Start by making a row of alternating long and short stitches that follow the edge of your shape.
- Step 2: For the next row, you can switch colors or stick with the same one. Bring your needle up through the fabric, splitting the stitches in the row right above it.
- Step 3: Just keep filling the shape with more staggered rows, blending your colors as you work your way down.
Choosing the right filler stitch really comes down to the effect you're after. Do you want something smooth and shiny, or soft and textured? To help you decide, here’s a quick guide to compare some of the most common options.
Filler Stitch Selection Guide
| Stitch Name | Best For | Texture Effect | Thread Count Tip |
|---|---|---|---|
| Satin Stitch | Small, defined shapes; lettering; petals. | Smooth, flat, and shiny. | Use 2-3 strands for a silky finish. 6 strands can look bulky. |
| Long & Short Stitch | Large areas; blending colors; creating gradients. | Smooth with a woven, painterly look. | Varies by project, but 2-3 strands per color gives great control. |
| Seed Stitch | Backgrounds; adding subtle texture; simple fills. | Lightly speckled and delicate. | 1-2 strands works best to keep stitches looking like tiny "seeds." |
| French Knot | Adding dense, bumpy texture (like sheep's wool). | Highly textured, bumpy, and three-dimensional. | 2-3 strands for delicate knots; 4-6 for bold, chunky knots. |
This table is just a starting point, of course. The best way to learn is to grab some scrap fabric and play around with different stitches and thread counts to see what you like best!
Seed Stitch For Delicate Texture
For a more subtle, delicate fill, the Seed Stitch is a wonderful choice. This technique is as simple as it sounds: you just scatter tiny, straight stitches randomly across an area. The result is a lightly textured, speckled fill that adds a bit of gentle interest without overpowering your main design.
It's incredibly easy to pick up and is perfect for backgrounds, filling in large, simple shapes, or just adding a little something to an otherwise empty space. You have complete control over the density—place the stitches closer together for a heavier texture or spread them out for a whisper of detail.
Adding Flair With Decorative Stitches
Once you’ve got the hang of the basics, you get to the really fun part: decorative stitches. This is where your embroidery projects start to take on a life of their own. These are the little flourishes and details that give your work its unique character and texture. Think of them as the jewelry for your fabric—they draw the eye and turn a simple design into something truly special.
These stitches are perfect for all those tiny details, like little flowers, stars, or interesting accents. The real beauty of decorative stitches is just how versatile they are. A single French Knot, for instance, can be the center of a flower, a tiny berry on a vine, or one of many knots creating a wonderfully textured surface. Getting these down will open up a whole new world of creativity.
French Knots For Perfect Dots
The French Knot is a classic decorative stitch that makes a neat, raised dot. It definitely has a reputation for being a bit fiddly, but honestly, a little bit of practice is all it takes to get uniform knots every single time. They're my go-to for adding texture, making tiny flower buds, or creating the centers of bigger blooms.
- Difficulty: Intermediate
- Best For: Flower centers, eyes, berries, and adding pointillist-style texture.
- How to: Bring your needle up through the fabric. Wrap the floss tightly around the needle two or three times, then poke the needle back into the fabric right next to where it came up (but not in the exact same hole!). Keep the wrapped floss taut against the fabric as you gently pull the needle all the way through to the back.
Lazy Daisy Stitch For Petals And Leaves
The Lazy Daisy, which is really just a detached chain stitch, is a wonderfully simple way to create perfect little teardrop shapes. If you arrange these single loops in a circle, you can whip up a lovely, delicate flower in seconds. It’s one of those incredibly satisfying stitches that looks much more complicated than it actually is.
- Difficulty: Beginner
- Best For: Flower petals, small leaves, and decorative borders.
- Pro-Tip: You control the loop's size by where you place that tiny anchor stitch. For long, thin petals, place the anchor stitch further away from the loop. For rounder, chubbier petals, place it very close.
The global embroidery market was valued at a whopping $2,572.16 million back in 2021, and it's absolutely booming thanks to the rise of DIY crafting. Printable guides are a huge part of this growth, making skills like the Lazy Daisy and French Knot easy for anyone to learn. You can read more research on the embroidery market to see just how big this trend is getting.
This little decision tree can help you pick the right stitch depending on whether you're going for a smooth or textured look.
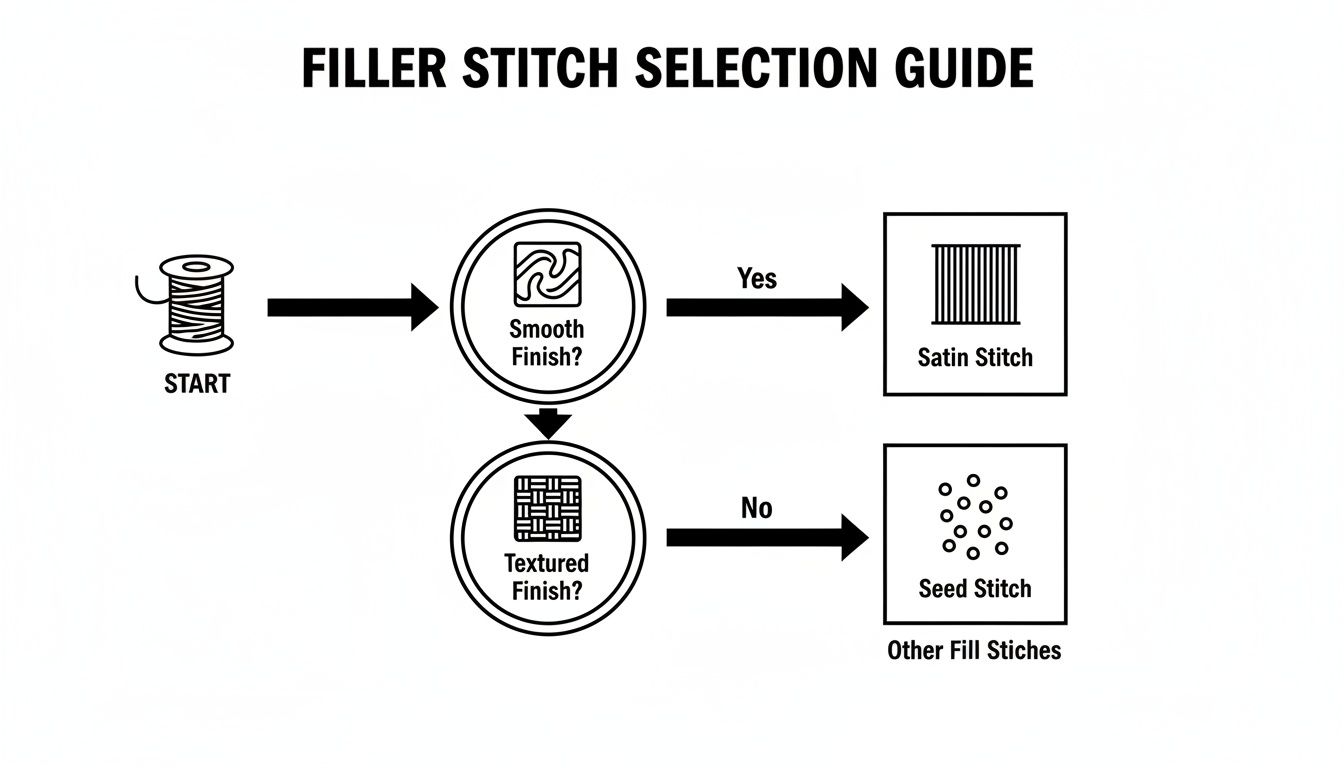
As you can see, the path is pretty clear: if you want a smooth, sleek surface, Satin Stitch is your best bet. For areas where you want more texture, you'll want something like the Seed Stitch.
Chain Stitch For Bold Lines And Fills
The Chain Stitch is one of the most hardworking stitches you can learn. It forms a series of connected loops that look just like a chain, creating a bold, textured line. It’s fantastic for outlines, but it also makes a great filler stitch when you work the rows tightly together, giving you a cool woven texture. There are also tons of variations on this stitch, so it's a technique that can really grow with you.
Essential Techniques For Cross-Stitch
Unlike the free-flowing nature of many embroidery stitches, cross-stitch is all about creating beautiful, uniform patterns on a grid. This part of your printable embroidery stitch guide covers the foundational techniques every cross-stitcher needs, whether you're working from a kit or designing your own piece.
The secret to clean, professional-looking cross-stitch is consistency. It all comes down to one simple rule: make sure the top leg of every single "X" crosses in the same direction. This small detail is what gives your finished work that lovely, polished look.
The Basic Cross-Stitch
This simple "X" is the heart and soul of every cross-stitch design. It’s made of two diagonal stitches that fit perfectly within the squares of Aida or evenweave fabric. You can make each "X" individually, or you can work a whole row of half stitches and then come back along the row to complete them. That second method is often called the Danish method, and it's a real time-saver.
- Difficulty: Beginner
- Best For: Filling in areas of color and forming the main body of any gridded design.
- Pro-Tip: Working in rows is usually faster and makes your floss go further. You'll find you're starting and stopping your thread far less often.
The Half Stitch And Quarter Stitch
Sometimes, a full "X" is just too blocky for the detail you need. For creating smooth curves or intricate lines, you'll need to turn to fractional stitches.
- Half Stitch: Just like it sounds, this is one diagonal leg of a full cross-stitch. Designers often use it for backgrounds to create a lighter texture or a sense of distance.
- Quarter Stitch: This tiny stitch is your best friend for fine detail. It goes from a corner to the dead center of a fabric square, making it perfect for shaping things like eyes or delicate script.
These core techniques are the building blocks of the craft. With the embroidery machine market projected to reach $1.20 billion by 2025, more people than ever are picking up a needle and thread. It makes sense that printable guides are so popular, especially when you consider that 70-80% of beginner-friendly patterns are cross-stitch. Discover more insights into the embroidery machine market.
Getting these stitches right is crucial, especially on the Aida fabric that comes in most kits. Your printable guide is the perfect visual reference to keep by your side, so when a pattern calls for a tricky quarter stitch to get a curve just right, you'll know exactly what to do.
Troubleshooting Common Stitching Problems
Even seasoned stitchers have days where things just don't go right. Before you get too frustrated and think about tossing your project aside, take a breath. Most common stitching snags have surprisingly simple solutions. That's why I've included this quick-lookup section in your printable embroidery stitch guide—so you can find the fix and get back to what you love.
More often than not, the troublemaker is tension. If your fabric is puckering around your stitches, you're likely pulling the thread too tight. On the other hand, if your stitches look loopy and loose, your tension is too slack. The goal is a gentle, even pull that lets the stitch sit flat on the fabric without causing any distortion.
Quick Fixes For Stitching Headaches
Sometimes, the issue isn't how you're pulling the thread, but the materials you're using or a tiny quirk in your technique. Let's tackle two of the most classic frustrations: tangled floss and stitches that just won't stay uniform.
-
Tangled Floss and Knots: Is your thread constantly tying itself into pesky knots on the back of your fabric? This usually happens because of the natural twist in the embroidery floss. The easiest fix is to simply let your needle and thread dangle every few stitches. You'll see it spin and untwist itself. I also highly recommend working with shorter lengths of floss—an 18-inch piece is a great starting point and will save you a world of headaches.
-
Uneven Stitch Sizes: Getting that perfectly uniform row of backstitches or running stitches can be tricky. If yours look a little irregular, the best advice is to slow down and really focus on making each stitch identical in length. For something like a satin stitch, where alignment is everything, don't be afraid to draw some light parallel guidelines with a water-soluble pen. It's a total game-changer for keeping your fill stitches smooth and even.
Remember, running into these issues isn't a sign of failure—it's just part of the process. Every single stitcher deals with them. See each little challenge as a chance to better understand how your thread and fabric play together. It's how you really hone your craft.
Frequently Asked Embroidery Questions
Even with the best guide in hand, a few questions always seem to surface, especially when you're just getting your needle and thread ready. I've pulled together some of the most common questions I hear from fellow stitchers to give you quick, clear answers.
How Many Strands of Floss Should I Use?
This is probably the number one question for anyone new to embroidery. Standard embroidery floss comes with six strands, but you'll almost never use all six at once. The key is to match the number of strands to the effect you want.
For most general stitching, like outlines and filling in medium-sized areas, two or three strands is the sweet spot. This gives you a nice, solid line that’s visible but not chunky. If you're working on very fine details, like tiny facial features or delicate lettering, drop down to a single strand.
What Are the Best Materials for a Beginner?
When you're just starting, you want a fabric that's forgiving and easy to work with. I always recommend a light-colored, medium-weight cotton or a linen blend. These fabrics have a nice, even weave that makes it easy to guide your needle and see your stitches clearly.
As you get more comfortable, you might want to explore different textures and weights. It’s worth taking a moment to understand more about fabric characteristics, as the fabric you choose can really change the final look and feel of your work.
How Do I Transfer My Pattern to the Fabric?
Getting your design from paper to fabric can feel intimidating, but there are a few straightforward methods that work great.
- Light Tracing: The classic window method. Just tape your pattern to a sunny window, lay your fabric over it, and you'll be able to see the design right through it. Trace the lines with a water-soluble pen or a pencil. A lightbox works even better if you have one.
- Transfer Paper: This is like carbon paper for fabric. You simply sandwich a sheet of it between your pattern and your fabric. Then, trace over your pattern with a stylus or pen, and the pressure will transfer the design onto the cloth.
- Printable Stabilizer: This is my favorite trick, and it's a game-changer. You print your design directly onto a special sticky, water-soluble stabilizer sheet. Then you just peel off the backing, stick it onto your fabric, and stitch right through it. When you’re finished, a quick soak in water dissolves the stabilizer completely, leaving only your beautiful stitching behind.
Ready to turn your favorite photos into timeless keepsakes? Cross Stitched makes it simple to create your own custom cross-stitch kits. Get everything you need delivered to your door and start stitching your memories today at https://cross-stitched.com.


