

If you've ever thought about trying a new hobby that's both relaxing and rewarding, dipping your toes into cross-stitch with some free patterns is the perfect way to start. It’s a chance to see if you like the craft and make something lovely without spending a dime.
Why Cross Stitch Is Your Next Favorite Hobby

Welcome to the wonderfully calming world of cross-stitch. If you've been looking for a creative outlet that actually helps you de-stress and leaves you with something beautiful to show for it, you've found your match. This isn't about mastering complicated techniques or buying a bunch of expensive gear; it's about the simple, rhythmic pleasure of creating a picture one stitch at a time.
The real magic of cross-stitch is just how simple it is. The whole craft is built on one easy-to-learn stitch: the 'X'. That’s it. This makes it incredibly welcoming for absolute beginners. There's a special kind of satisfaction that comes from watching a colorful design bloom from a blank piece of fabric, one little square at a time. It's a truly meditative process that lets your mind focus and unwind from the day.
An Accessible and Growing Craft
By starting with free patterns, you can jump right in and see if cross-stitching is for you without any financial pressure. And you'll be in good company—the community is booming, part of a bigger movement back to handmade crafts.
In fact, the global cross-stitch market was valued at around USD 0.15 billion and is expected to hit USD 0.22 billion by 2033. This surge is largely thanks to all the amazing online resources, especially free patterns that make it easy for new people to get hooked. You can read more about this in the full cross-stitch market growth report.
Think of it this way: cross-stitch is basically "paint-by-numbers," but with a needle and thread. Each symbol on the pattern tells you exactly which color to use, giving you a clear, easy-to-follow map for your project.
This guide is your first step into a fun community and a timeless skill. You don’t need any artistic experience to get started, just a bit of curiosity. Now, let’s talk about the few simple tools you'll need to begin your journey.
Gathering Your Essential Cross Stitch Toolkit
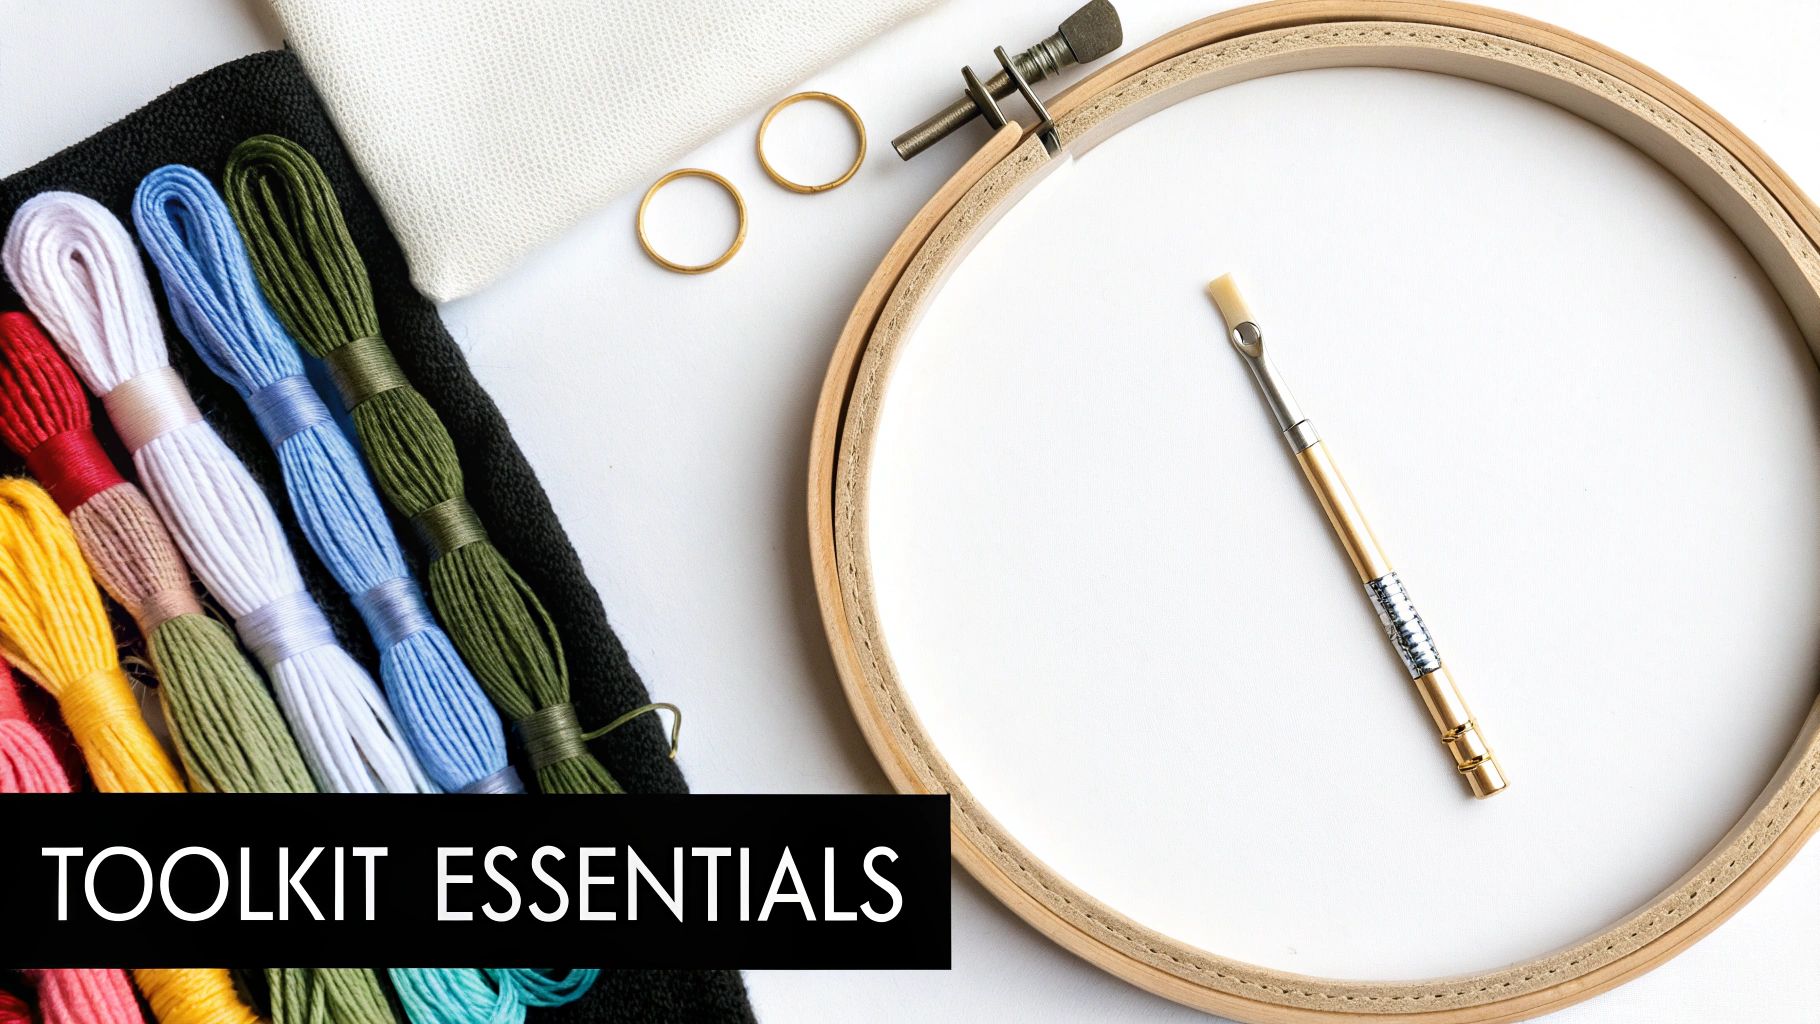
Before you can dive into that beautiful free pattern you've downloaded, you'll need to gather a few simple tools. One of the best things about cross stitch is how affordable it is to get started—you only need a handful of core items to begin.
Think of this as your foundational toolkit. Everything here has a specific job that makes your first stitching experience smooth, fun, and tangle-free.
You can find all these supplies at most craft stores or online, and many shops even sell beginner kits that bundle them all together. For a deeper dive, check out our complete guide to essential cross stitch materials.
The Core Four Supplies
Your adventure into the world of cross stitching for beginners free patterns truly starts with these four non-negotiable items. They’re the backbone of every single project you'll create.
-
Aida Fabric: This is the magic ingredient! Aida is a specially woven fabric with a clear, grid-like pattern of tiny squares, creating the perfect canvas for your stitches. As a beginner, 14-count Aida is your best friend. The "count" just means how many squares (or stitches) fit into one inch. At 14 stitches per inch, the holes are big and easy to see.
-
Embroidery Floss: This is the colorful thread that brings your design to life. A standard skein of embroidery floss is actually made of six individual strands twisted together. Most patterns, especially when working on 14-count Aida, will call for you to use just two of these six strands at a time.
-
Tapestry Needles: These aren't your typical sewing needles. Tapestry needles have a blunt tip and a much larger eye. The blunt tip is designed to slide easily through the holes in your Aida fabric without accidentally piercing the threads. The bigger eye? It makes threading your floss so much less frustrating. For 14-count Aida, a size 24 tapestry needle is the perfect match.
-
An Embroidery Hoop: This simple tool is a game-changer for keeping your fabric taut while you work. A tight, drum-like surface makes it much easier to guide your needle and prevents your stitches from looking loose or distorted. A basic 5 or 6-inch wooden or plastic hoop is all you need to get started.
A common beginner mistake is pulling stitches too tight, which can pucker and warp the fabric. An embroidery hoop holds the fabric stable, helping you naturally develop a consistent, even tension for a much cleaner, more professional finish.
To make things even easier, here's a quick shopping list you can reference.
Beginner's Cross Stitch Shopping List
This table breaks down exactly what you need and why, so you can walk into the craft store with confidence.
| Supply | What to Look For | Why You Need It |
|---|---|---|
| Aida Fabric | 14-count in a light color (like white or oatmeal) | The large, visible grid is perfect for learning and easy on the eyes. |
| Embroidery Floss | DMC or Anchor brand, colors listed in your pattern | These are high-quality, colorfast cotton threads that come in hundreds of shades. |
| Tapestry Needles | Size 24 | The ideal size for 14-count Aida—not too big, not too small. |
| Embroidery Hoop | 5 or 6-inch wooden or plastic hoop | Keeps your fabric taut for even stitching and is a comfortable size to hold. |
With just these four items, you are officially ready to tackle your first project. Now that your toolkit is assembled, let's find that perfect pattern and figure out how to read it.
Finding and Reading Your First Free Pattern
Now that you have your tools, it's time for the fun part: picking a project! The internet is packed with cross stitching for beginners free patterns, so you can easily find a simple, beautiful design that gets you excited to start stitching.
The whole online crafting world has really blown up. In fact, the needlecraft pattern market was valued at around USD 1.2 billion in 2023 and is expected to hit USD 2.4 billion by 2032. A big reason for that growth is how accessible free patterns have made hobbies like cross-stitch. It means anyone can give it a try without spending a ton of money upfront. You can see more about the growth of the needlecraft market on dataintelo.com if you're curious.
How to Actually Read a Cross Stitch Chart
Alright, so you've downloaded a pattern. You’re probably looking at a page full of strange symbols on a grid and thinking, "What on earth is this?" Don't panic! It’s much more straightforward than it looks. This chart is basically your map.
Think of it like a pixelated picture. Every single square on that grid equals one "X" stitch you'll make on your fabric. Inside each square, you'll see a symbol, and that symbol tells you which color floss to use.
- The Grid: This is the main design, showing you exactly where to place each stitch.
- The Legend (or Key): This is your decoder. It’s usually off to the side and lists every symbol from the grid next to its matching floss color number (like DMC 310 for black, for example).
This simple flow breaks down how you'll go from pattern to first stitch.

Seeing it broken down like this helps make those first few steps feel less intimidating. It's all about starting your project with confidence.
Finding the Center Is Your First Move
Before you even think about threading that needle, the most important thing you need to do is find the center—of both your pattern and your fabric. This is a non-negotiable step. It ensures your finished design sits perfectly in the middle, not shoved awkwardly into a corner.
Most patterns make this easy by marking the center with arrows along the top and side. Just trace those lines with your finger until they meet in the middle. That's your starting point.
Finding the center of your fabric is just as simple. Gently fold it in half lengthwise and pinch a small crease. Then, do the same thing widthwise. Where those two creases cross? That's the exact center of your fabric, and it's where your very first stitch will go.
The golden rule for almost every cross-stitcher is to start in the center and work your way out. It’s the best way to avoid the nightmare of running out of fabric on one side.
If you're looking for some great starter projects to practice on, check out our library of free downloadable cross-stitch patterns in PDF format. They're perfect for getting the hang of these first steps. Once you've got your center marked, you're officially ready to start stitching
How to Make the Perfect Cross Stitch
Alright, this is the moment we’ve been waiting for. You’ve got your fabric locked into its hoop, your pattern is ready, and now it’s time to actually put thread to Aida. Forget any intimidating diagrams you might have seen online—we're going to break this down into a simple, rhythmic motion that will feel like second nature before you know it. The goal here is to create that iconic, neat little 'X' that makes up every cross stitch design.
First things first, let's get your floss ready. Remember how a standard skein of embroidery floss has six individual strands? For most projects, especially on 14-count Aida cloth, you’ll only use two of those strands at a time. Go ahead and cut a piece of floss about 18 inches long—a good rule of thumb is the length from your fingertips to your elbow. Any longer, and you're just asking for a tangled, frustrating mess. Trust me on this one.
Now, gently separate two strands from the six. The key here is to do it slowly, one by one, to keep them from bunching up into a knot. Once you have your two strands, thread them through the eye of your size 24 tapestry needle. If you find yourself squinting and struggling, a simple needle threader is a lifesaver and a worthy addition to your toolkit.
Finding Your Stitching Rhythm
With your needle threaded and ready, you can finally make that very first stitch. We’ll start right at that center hole you found on your fabric. The beauty of cross stitch is its simplicity, but there are two main ways to form your 'X's. There’s no right or wrong answer here; it’s all about finding what feels most comfortable for you.
-
The English Method: This is where you complete one full 'X' before moving on to the next. You'll bring the needle up from the back, make a diagonal stitch (like this: /), bring it up again in the next hole, and cross back over to finish the 'X' (like this: \). It's perfect for areas where you have single, scattered stitches of the same color—what stitchers often call "confetti stitches."
-
The Danish Method: This one is my personal favorite for stitching rows of the same color because it's so much faster. You work across the row completing just the bottom half of each stitch first (so you'll have a line of /////). Then, you simply work your way back, crossing each stitch to complete the 'X's (\\\). It creates a wonderfully efficient and satisfying rhythm once you get into the groove.
Most people find the Danish method easier to master for big blocks of color because it really helps keep your stitch tension even. Give both a try and see which one feels more natural in your hands.
The Secret to a Polished Look
If I could give you only one piece of advice to make your work look amazing right from the start, it would be this: make sure all your top stitches face the same direction.
This simple habit is the number one thing that separates a beginner's work from a more polished, professional-looking piece. It allows the light to hit the floss evenly, giving your finished project a smooth, uniform sheen. It's a tiny detail that makes a massive difference in the final result.
It truly doesn't matter if your top stitches all go from bottom-left to top-right (/) or from bottom-right to top-left (\), as long as you pick one and stick with it for the entire project. This consistency is what creates that beautiful, satisfying texture.
If you ever lose your place, just look at the last few stitches you made to remind yourself which way the top "leg" of your 'X' should lie. For a deeper dive into different techniques, you can explore our guide on the basic cross stitch stitches.
By focusing on this one simple rule, you're building a foundational habit that will make every future project look fantastic. Your work will look neater, your colors will pop, and you'll feel an incredible sense of pride as you watch your design come to life.
Finishing and Displaying Your First Project
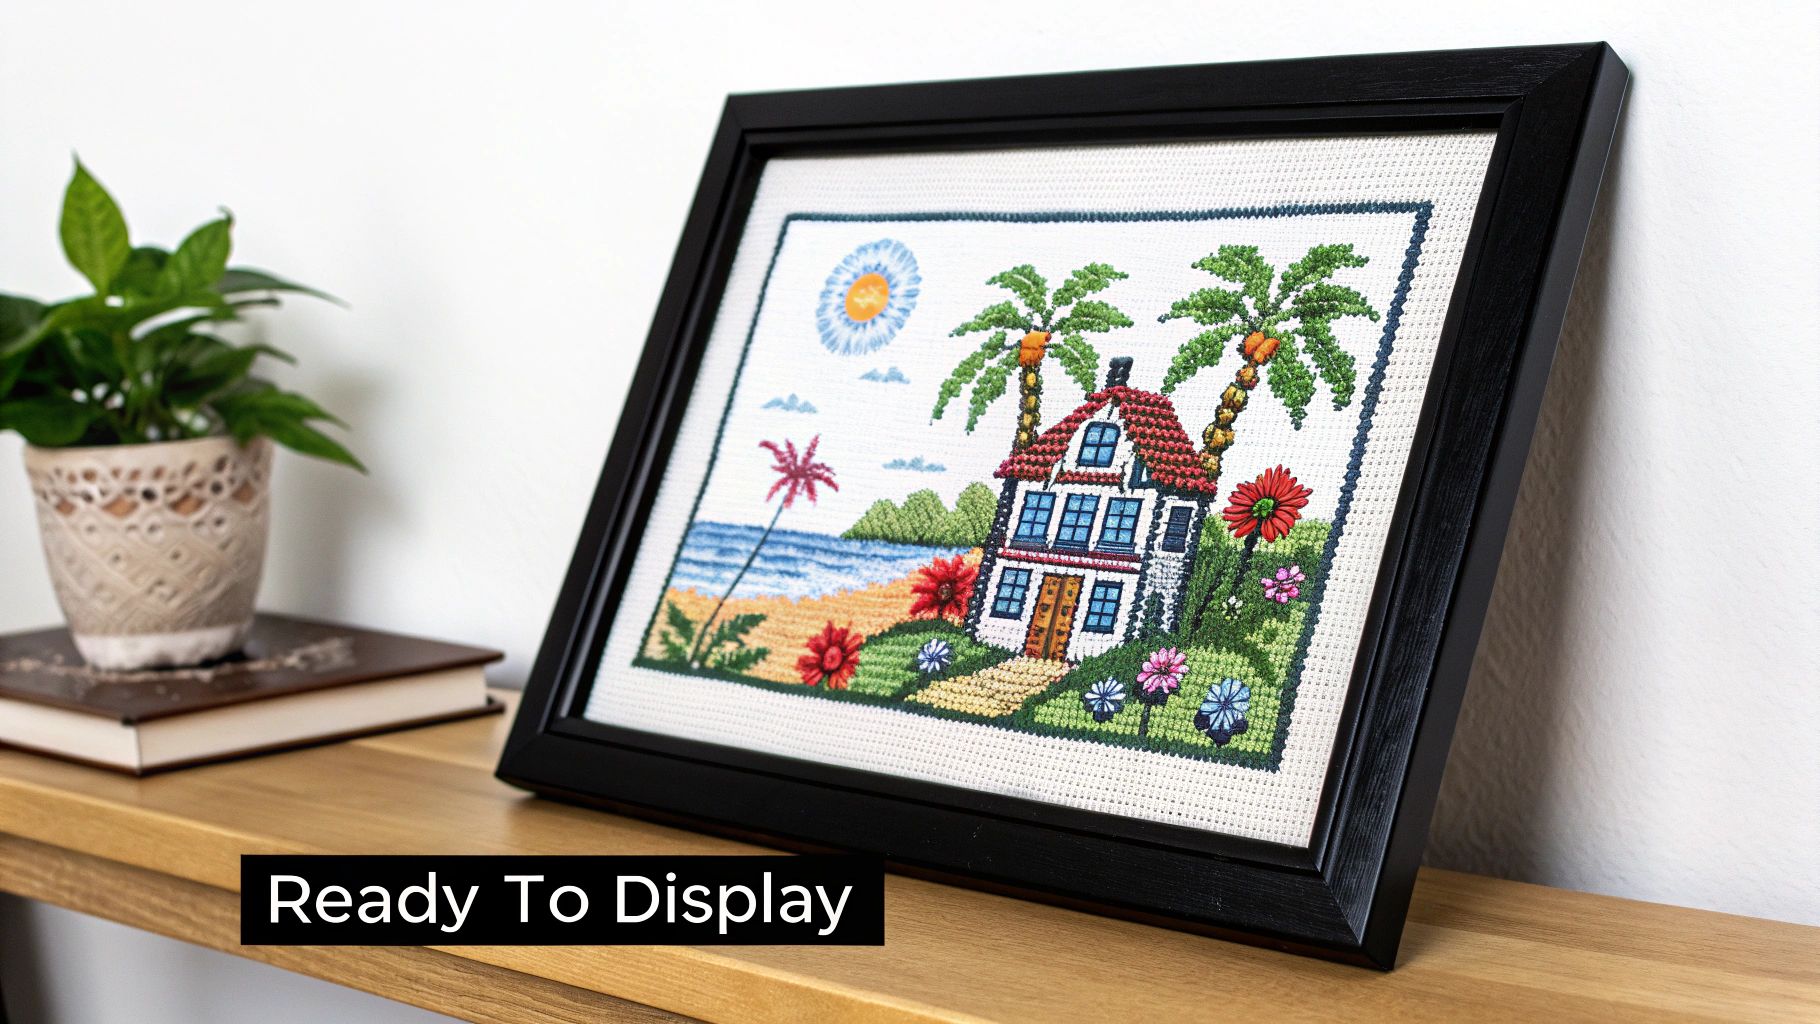
Tying off that very last stitch is an amazing feeling, isn't it? But the journey isn't quite over. Taking a little time for the finishing touches is what separates a practice piece from a little work of art you'll be excited to show off. These steps will give your work a polished, professional look and help it last.
First up, let's give your piece a gentle bath. This is a crucial step to wash away any hoop marks, creases from folding, and the natural oils from your hands that inevitably get on the fabric while you’re stitching.
Just fill a clean sink or basin with lukewarm water and add a tiny drop of a gentle soap. I find clear dish soap or a dedicated quilt wash works perfectly. Let your cross stitch soak for a few minutes, swishing it around gently. Then, rinse it completely under cool, running water. The number one rule here: never wring it out! That can distort your stitches. Instead, lay it flat on a thick, clean towel, roll it up like a burrito, and press gently to soak up the extra water.
Getting It Ready for Display
Now for the ironing. With your cross stitch still a little damp, place it face down on a fresh, dry towel. Set your iron to a medium heat setting—and make sure the steam is turned off. Press the back of the fabric until it’s perfectly smooth and dry. Ironing it this way, face down on a soft surface, protects your stitches and prevents them from getting squashed flat.
With your piece all clean and pressed, it’s time for the really fun part: deciding how you want to display it. You’re part of a huge movement! The global market for needlecraft patterns is already valued at around USD 34 billion, and it's only getting bigger. It's a clear sign that people everywhere are falling back in love with unique, creative hobbies. You can learn more about the booming needlecraft market on futuremarketinsights.com.
The best way to display your work is whatever feels right for the design and for your home. Don’t just default to a standard frame—think of this as the final, creative step of your project.
Creative Display Ideas
Looking for some inspiration? Here are a few of my favorite ways to show off a finished piece, especially when you’re just starting with cross stitching for beginners free patterns:
- In-Hoop Framing: This is probably the most popular and easiest method for a reason—it looks fantastic. Just center your finished design in a clean embroidery hoop, trim the extra fabric in a circle around the back (leaving about an inch or two), and then use a simple running stitch or a bit of hot glue to secure the fabric edge to the inside of the inner hoop.
- Small Pillow or Sachet: Turn your art into something you can use. Simply sew your cross-stitch piece to a nice backing fabric, leaving a small opening. Stuff it with pillow filling—maybe add some dried lavender for a sachet—and stitch it closed.
- Traditional Picture Frame: For a classic, gallery-style look, mount your cross stitch onto a piece of acid-free foam board. Use straight pins along the edges to pull the fabric taut and secure it to the back before putting it into the frame.
Got Questions? I've Got Answers
When you're just starting out with cross stitching for beginners free patterns, you're going to have questions. Everyone does! Even the most seasoned stitchers once asked the very same things. Let's walk through some of the most common ones so you can feel totally confident picking up that needle and thread.
Think of this as a chat with a friend who’s already made all the beginner mistakes for you. Getting these basics down will make your stitching journey so much more fun, and you'll end up with a project you can't wait to show off.
How Can I Make the Back of My Project Look Tidy?
You've probably heard that a neat back is the sign of a pro stitcher. The biggest secret to achieving this isn't some complex technique—it's simply to avoid using knots. Knots are lumpy and can often be seen or felt from the front of your piece, which you definitely don't want.
A much better way is the "loop start," which is perfect when you're using two strands of floss (a very common practice).
- Start by cutting one long strand of floss.
- Fold it perfectly in half.
- Thread the two cut ends through your needle, leaving a loop at the other end.
When you bring your needle up from the back of the fabric for your very first stitch, don't pull it all the way through. Leave that little loop on the back. After you make the first half of your 'X' on the front, just pass your needle through that loop on the back before you complete the stitch. It pulls tight and secures your thread flat against the fabric. Magic!
And when you're done with that thread? Just run the tail under three or four finished stitches on the back before snipping it close.
What's the Best Fabric for a Beginner?
Let’s talk fabric count. This is just a simple way of saying how many squares (or stitches) there are per inch of fabric. For anyone new to the craft, 14-count Aida cloth is the gold standard. The "14" tells you there are 14 squares per inch, making them big enough to see and work with easily.
Once you get a feel for it, you might want to experiment with higher counts like 16 or 18. The squares are smaller, which allows for more detail in your final piece. But when you're just learning the ropes, 14-count is the sweet spot. It's easy on the eyes and gives a beautiful, classic cross stitch look.
A lot of beginners think a higher fabric count is somehow "better," but that's a myth. The right fabric is whatever works best for the pattern and for your eyes. For newcomers, that's almost always 14-count.
Can I Just Use Regular Sewing Thread?
I know it's tempting, especially if you have a sewing kit handy, but please stick to proper six-strand embroidery floss. Sewing thread is just one thin strand, and it won't give you the coverage you need to fill in the squares on Aida cloth. Your stitches will look thin and gappy, with a lot of fabric showing through.
Embroidery floss, on the other hand, is made of six individual strands that are designed to be separated. Using two of those strands gives your stitches that full, plush look that makes cross stitch so satisfying. It’s what creates that classic texture and makes the colors pop.
What's the Easiest Way to Fix a Mistake?
First off, mistakes aren't just common—they're practically guaranteed. Don't sweat it! If you catch an error right away, you can usually just use the tip of your needle to gently unpick the stitch. No big deal.
If you find a mistake a little later, you might need to carefully snip the wrong stitch with some tiny embroidery scissors and pull the threads out. But here's a crucial piece of advice I wish someone had told me sooner: if the mistake is minor, like a slightly off-color stitch in a really busy part of the design, sometimes the best fix is to do nothing at all.
Seriously, just leave it. This is a handmade piece of art. Its little quirks are what make it uniquely yours. Chasing perfection will only drive you crazy—the real joy is in the process.
Ready to turn your favorite memories into timeless art? At Cross Stitched, we make it easy with our custom photo-to-pattern kits. Upload your picture, and we’ll send you everything you need—pre-sorted threads, high-quality fabric, and a clear chart—to create a masterpiece. Start your personalized cross stitch project today!


