
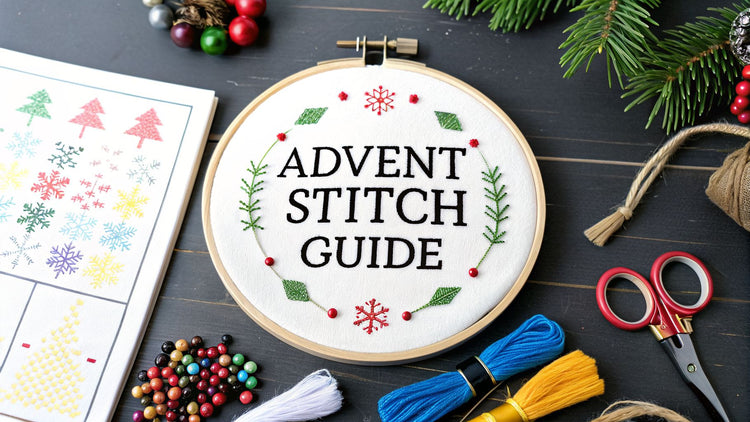
An advent calendar cross stitch isn't just another holiday decoration. It's a handmade, reusable piece of art where you stitch 24 small, festive designs, revealing one each day from December 1st to Christmas Eve. It beautifully merges the joy of holiday anticipation with the mindful craft of needlework, resulting in an heirloom that can be treasured for years to come.
Crafting a New Holiday Tradition

Starting a project like this is more than just a creative whim; it's the beginning of a new tradition. This guide is your roadmap to creating a piece that captures both the excitement of the holiday countdown and the quiet focus of stitching.
We'll walk through everything from sparking that first idea to putting in the final stitch, giving you the confidence to create a calendar your family will cherish for generations. This modern spin on a classic has really resonated with crafters, becoming a beloved part of getting ready for the holidays.
The Rise of Handmade Holiday Heirlooms
The cross stitch advent calendar has become a huge seasonal favorite for crafters around the world, especially in the UK, US, and Europe. In 2023, just one popular brand sent their curated advent calendar boxes to over 10 countries, marking a 25% year-over-year growth in international sign-ups for craft-focused advent boxes. It's clear that hobbyists are looking for meaningful alternatives to the usual chocolate calendars. You can read more about this trend in the Caterpillar Cross Stitch 2024 round-up.
This trend points to a bigger desire for meaningful, lasting holiday items. In fact, stats show that 68% of stitchers would rather create durable, reusable crafts than just have consumable treats during the holiday season.
Why Stitch an Advent Calendar
Making your own cross stitch advent calendar is a uniquely rewarding experience. It’s not just another project—it becomes a centerpiece of your holiday decor and a source of joy year after year.
- A Personalized Touch: Unlike anything you can buy in a store, you get to customize every single detail. You choose the color palette, the style, and the tiny motifs that mean something to your family.
- Mindful Crafting: The steady, gentle rhythm of stitching is incredibly calming, offering a perfect escape during a notoriously busy season.
- Building Anticipation: The process of stitching the calendar itself builds excitement for the holidays. Then, the daily ritual of revealing a new motif becomes something the whole family looks forward to.
- An Enduring Heirloom: This is a project built to last. Your finished calendar can be brought out every December, gathering new memories with each passing year.
How to Design Your Custom Advent Calendar

This is where the real fun begins—bringing your unique vision to life. You can jump right in with a beautiful pre-made pattern or go the extra mile and design something completely from scratch. Honestly, there's no right or wrong answer here; it all boils down to how much time you have, your comfort level, and just how custom you want this keepsake to be.
First things first: what’s the theme? Are you picturing classic Christmas charm with tiny stockings, intricate snowflakes, and little gingerbread men? Maybe a cozy winter woodland scene filled with miniature animals? Don’t feel boxed in by tradition, though. Some of the most memorable calendars are born from inside jokes or family passions—think tiny stitched versions of your favorite movie characters or local landmarks.
Sourcing Your Perfect Pattern
You're in luck because finding the perfect pattern has never been easier. The online cross-stitch community is bursting with incredible designers. Digital advent calendar patterns have become especially popular, with thousands of listings popping up on marketplaces every holiday season. It's not just a niche interest; one particular "Advent Calendar Cross Stitch Chart" from 2019 has been a consistent top seller, downloaded over 5,000 times by 2024. This trend is fascinating to watch and you can see it for yourself on digital craft platforms like Etsy.
Of course, for something that is truly one-of-a-kind, nothing beats designing your own pattern. This is how you weave in personal photos and inside jokes, turning a fun project into a priceless family heirloom.
Here's a quick look at the different paths you can take when deciding on a design.
Comparing Advent Calendar Design Approaches
| Design Approach | Best For | Skill Level | Creative Control |
|---|---|---|---|
| Pre-Made Pattern | Stitchers who want a beautiful, proven design without the guesswork. Great for saving time. | Beginner to Advanced | Limited to color choices |
| Photo-to-Pattern | Creating a deeply personal heirloom from a favorite memory or photograph. | Intermediate | Moderate (depends on photo) |
| From-Scratch Design | The ultimate creative freedom to build a theme from your imagination. | Intermediate to Advanced | Total creative freedom |
Each approach has its own charm. A pre-made pattern lets you focus purely on the joy of stitching, while a custom design adds that extra layer of personal meaning.
Turning Photos into Patterns
Imagine taking that one perfect holiday photo—maybe the kids’ first time meeting Santa—and turning it into 24 tiny stitched moments. It’s entirely possible with tools like our Pic2Pat pattern maker. You just upload an image, and it converts the picture into a stitchable chart, essentially breaking it down into a grid where each colored square equals one cross stitch.
If you’re going this route, here are a few tips I've learned from experience:
- Keep the Image Simple: Photos with clear subjects and simple backgrounds translate much better into cross stitch. A close-up portrait will work wonders compared to a busy group shot where details get lost.
- Crop for Impact: Zero in on what matters most in the photo. Cropping the image to highlight a single face or a specific object makes for a much stronger and more recognizable stitched piece.
- Adjust Colors and Size: Our tool lets you limit the number of thread colors, which is a lifesaver for keeping the project from becoming overwhelming. You can also tweak the final pattern dimensions to make sure it fits perfectly into your calendar layout.
Pro Tip: Don't feel like you have to stitch a miniature version of the entire photograph for each day. Instead, pick out 24 tiny, iconic details from the main image. From a family Christmas photo, for instance, you could chart a single shiny ornament, a cool pattern from someone's sweater, or even just a smiling eye.
Charting your design and making sure each of the 24 motifs is sized correctly is the foundational work that makes the whole project come together. A cohesive color palette is the final touch that ties everything into one stunning piece. If you want to dive deeper into creating patterns from scratch, we have a whole guide on how to design cross stitch patterns that can walk you through it.
Gathering Your Essential Cross Stitch Supplies
With your design finalized, we get to my favorite part of any new project: picking out all the supplies! Getting your materials together is a ritual in itself, and having everything ready to go makes the whole stitching experience so much more enjoyable. It's the key to making sure your finished advent calendar looks polished and holds up for many Christmases to come.
The fabric you choose is the literal foundation of your piece. For an advent calendar, which is packed with 24 little designs, your fabric choice really matters. Aida cloth is the go-to for most stitchers, and for good reason—its grid is perfectly clear and easy to count. If you're aiming for a more traditional, heirloom feel, evenweave or linen provides a beautifully smooth surface, though they do require a bit more concentration.
Choosing the Right Fabric and Count
Fabric "count" simply means how many stitches you can fit into one inch. For a project like this, I've found that 14-count or 16-count Aida is the sweet spot. The stitches are big enough that you won't be squinting, but they're small enough to give you crisp, clean details on your mini motifs.
Figuring out how much fabric you need is one of those measure-twice-cut-once situations. Running out of room is a cross-stitcher's worst nightmare! Here’s how I break it down:
- Find Your Stitch Count: Your pattern will tell you the design's full size in stitches (e.g., 140 stitches wide by 280 stitches high).
- Do the Math: Just divide the stitch count by your fabric count. So, if your design is 140 stitches wide and you're using 14-count Aida, the stitched area will be 10 inches wide (140 ÷ 14 = 10).
- Add a Healthy Border: This is non-negotiable. Always add at least 3 inches of extra fabric on all four sides. For our 10-inch design, this means your fabric piece should be at least 16 inches wide (10 + 3 + 3). This extra room is crucial for handling, framing, or sewing the final calendar.
Trust me on this: a generous border is your best friend. It stops the edges from fraying while you work and gives you the fabric you’ll need to turn your beautiful stitching into a functional advent calendar.
Selecting Threads and Essential Tools
Now for the fun part—the colors! I always recommend using a high-quality embroidery floss like DMC. The colors are incredibly vibrant, they're consistent from skein to skein, and they won’t fade over time. Of course, when you get a custom kit from Cross Stitched, we've already done the hard work for you and provide all the pre-sorted DMC threads you'll need. A little pro-tip: organize your floss on bobbins right away. It saves you from the inevitable tangled mess later.
Besides your fabric and thread, you'll need a few other tools to make your life easier.
- An embroidery hoop or frame is a must for keeping your fabric tension even, which leads to neater stitches.
- You'll also need tapestry needles, usually size 24 or 26 for 14-count Aida.
- Understanding the broader world of essential sewing notions can also be a huge help when it comes to the finishing and assembly stages.
If you're building your toolkit from scratch, our guide to embroidery supplies for beginners has a great checklist to make sure you have everything you need.
Stitching Techniques for Miniature Motifs
An advent calendar is really a collection of tiny masterpieces. The magic of the finished piece comes down to how crisp and clean each of those 24 little designs looks. Stitching on such a small scale takes a bit of finesse, and a few specific techniques will give you that polished, professional finish you're after.
The biggest hurdle with small designs is what's happening on the back of your fabric. With so many starts and stops, it's incredibly easy to end up with a lumpy, tangled mess of knots. A bulky back doesn't just look messy; it can cause puckering on the front and turn the final assembly into a real headache. Your goal should be a back that’s almost as neat as the front.
Keeping Your Stitches Tidy
The secret to a clean back is simple: get rid of the knots. One of the best methods for this, especially when you’re using two strands of floss, is the loop start. It’s incredibly secure and leaves virtually no trace on the back.
Here’s how you do it:
- Cut a single strand of floss, but make it twice as long as you normally would.
- Fold it perfectly in half, which creates a small loop at one end.
- Thread the two loose ends through the eye of your needle.
- Bring the needle up from the back of the fabric, but don’t pull it all the way. Leave that little loop hanging out on the back.
- Make the first half of your cross stitch (
/). Before you go back down, pass your needle through the loop on the back and gently pull the thread taut.
That one simple move anchors your thread securely without a knot. When you’re ready to end that thread, just weave the needle under a few completed stitches on the back before snipping it close to the fabric.
A clean back isn't just a point of pride for a stitcher; it's a practical must-have for an advent calendar. It ensures the whole piece lies flat, which is critical when you're mounting it or sewing on the pockets.
Managing Confetti Stitches
Miniature motifs are often packed with confetti stitches—those single, isolated stitches of color that seem to pop up out of nowhere. They can be a real pain because they demand so many starts and stops for just one or two stitches. Instead of constantly starting a new thread, try to plan a path for your needle.
If you have a few confetti stitches of the same color that are reasonably close (say, within an inch or so), you can "travel" with your floss on the back. Just run your thread under some existing stitches to get from one point to the next. The trick is to avoid carrying the thread across large, empty areas of fabric, as the color might show through to the front, especially on lighter fabrics.
A classic debate in the stitching world is whether to complete one motif at a time or work color by color across the entire project. For an advent calendar, a hybrid approach often works best.
| Stitching Method | Pros | Cons | Best For... |
|---|---|---|---|
| Motif by Motif | Gives a great sense of accomplishment with each finished square. | Can be less efficient with thread usage. | Stitchers who enjoy seeing quick, tangible progress. |
| Color by Color | More efficient use of thread; less starting and stopping. | Takes longer to see any single motif come to life. | Stitchers who prefer getting into a rhythm with one color. |
For an advent calendar cross stitch, I almost always recommend completing one full motif at a time. The satisfaction you get from finishing a tiny design each time you sit down to stitch is a huge motivator. It turns one massive project into a series of small, manageable wins, which makes it much easier to see it through to the end.
Finishing Your Cross Stitch Advent Calendar: The Final Assembly
This is my favorite part—where all those hours of stitching finally come together to create a real, functional advent calendar. It’s the moment your project transforms from a beautiful piece of fabric into a holiday heirloom that's ready to hang on the wall.
Before you even think about cutting or sewing, you need to prep your finished piece. This isn't just a fussy extra step; it's what makes your stitches pop and ensures the fabric is perfect for construction. I always gently hand-wash my cross stitch in cool water with a tiny bit of mild soap, rinse it well, and then roll it in a clean, fluffy towel to soak up the extra water. While it’s still a little damp, lay it face down on another clean towel and press it with a warm iron. This works wonders for getting rid of hoop marks and any oils from your hands, setting your stitches beautifully.
What Style of Calendar Will You Make?
With your piece washed, pressed, and looking pristine, it's time for the big decision: how will you construct it? There’s no single "right" way to do this. Honestly, the best method really depends on your sewing confidence and the vibe you’re going for.
Here are a few popular options I’ve seen and tried:
- The Classic Pocket Calendar: This is the most traditional route. You add a backing fabric and then stitch 24 individual, numbered pockets onto the front. It’s perfect for tucking in little chocolates, notes, or tiny toys.
- The Wall Hanging with Hooks: A much simpler, and very charming, alternative. You create a wall hanging and attach 24 small brass hooks or even decorative buttons. Little ornaments or treat bags can then be hung from each spot.
- The Lift-the-Flap Design: This one is clever. A separate piece of fabric is attached behind your stitched piece, with small, numbered flaps that you lift to reveal one of your stitched motifs each day.
If you’re just starting out, the wall hanging with hooks is probably the most forgiving. It requires far less precise sewing than making 24 perfectly uniform pockets!
No matter how you finish it, the quality of the final product all comes back to good stitching habits from the very beginning.

This really shows how a tidy start and consistent stitches are the foundation for a professional-looking piece, which makes the whole assembly process go so much smoother.
Putting It All Together
Whichever style you land on, the core assembly steps are pretty similar. You'll need a backing fabric, like a nice sturdy felt or some coordinating cotton, cut to the exact same size as your stitched Aida or linen.
Place your cross stitch and the backing fabric with their "right" sides facing each other. Sew around three and a half sides of the perimeter, leaving a small gap so you can turn it right-side out.
My Pro Tip: Before turning, always clip the corners diagonally. This tiny step is a game-changer. It gets rid of bulky, rounded corners and gives your calendar crisp, clean edges that look so much more professional.
After turning it right-side out, I use something blunt like a chopstick to gently poke out the corners until they’re sharp. Give the whole thing one final press with the iron, making sure to tuck in the raw edges of the opening. A few quick, neat ladder stitches will close that gap almost invisibly.
If you want to hang it with a dowel, just fold the top edge over to the back and stitch it down to create a channel. This final finishing touch is what turns your project from a craft into a keepsake. If you're looking for more detailed instructions on these techniques, our guide on how to finish a cross stitch project has a ton of great info.
Your Advent Calendar Stitching Questions, Answered
Even the most seasoned stitchers run into questions when tackling a project as big as an advent calendar. Let’s get some of the most common ones out of the way so you can dive in with confidence and really enjoy the process.
Thinking through these little details now saves you from any last-minute panic later on. It’s all about making smart choices upfront so the creative journey is just as fun as the finished calendar.
When Should I Start My Advent Calendar Project?
If you want to avoid a frantic race to the finish line in November, I always recommend starting by late summer or early fall. Kicking things off around August or September gives you a comfortable cushion to get all 24 motifs stitched without the holiday pressure cooker.
Think about it this way: a single small design might take you anywhere from one to three hours. If you aim to stitch just one little motif every couple of days, the whole project feels relaxed and totally doable. Plus, this schedule leaves you plenty of time for the final assembly, which is its own fun little project.
What's the Best Fabric Count for a Detailed Calendar?
For most advent calendar designs, you really can't go wrong with 14-count or 16-count Aida. It hits that sweet spot between showing off all the lovely details in your tiny motifs and still being easy on the eyes to stitch. Your little designs will look wonderfully crisp and clear.
Now, if you've chosen a pattern with a ton of fractional stitches or delicate backstitching, you might want to switch things up. A 28-count or 32-count evenweave or linen (stitched over two threads) can give your project a more refined, heirloom look. It all comes down to how complex your pattern is and what you feel most comfortable working with.
Can I Turn a Single Large Pattern Into an Advent Calendar?
Absolutely! This is one of my favorite ways to get creative with the advent concept. A popular method is to take a large, festive scene—maybe a charming Christmas village or a snowy forest—and stitch the whole thing. Then, you can add 24 tiny buttons or sparkly seed beads to mark different spots to "visit" each day.
Here's a fun twist: stitch a tiny, separate ornament and physically move it to a new location on the big scene each day. Another clever idea is to grid your large pattern chart into 24 sections. Your advent activity then becomes stitching one of those blocks every day in December.
What Are Some Creative Ideas for Filling the Calendar?
The pockets and hooks of your beautiful handmade calendar deserve more than just the usual candy. Think about what would bring a genuine smile to your family’s faces each morning.
Here are a few non-candy ideas I love:
- Small Craft Supplies: For the fellow crafter in your life, tuck in a new skein of sparkly metallic floss, a cute needle minder, or a fun pair of embroidery scissors.
- Family Activity Slips: Write simple activities on slips of paper. Think "Watch a holiday movie tonight," "Bake gingerbread cookies," or "Go for a drive to see the lights."
- Story Segments: Type out a short Christmas story, cut it into 24 paragraphs, and place one in each pocket. Reading a piece of the story together every night can become a treasured tradition.
- Festive Trinkets: Little treasures like small toys, fun stickers, temporary tattoos, or even collectible coins make each day feel special and exciting.
Ready to turn a cherished holiday photo into a timeless advent calendar? With Cross Stitched, you can create a custom kit from any picture, and we’ll send you everything you need to start stitching your next family heirloom. Design your personalized cross stitch kit today!


