
So, you’re ready to dip your toes into the wonderfully relaxing world of cross stitch? That's fantastic. There's something truly satisfying about creating a piece of art with just a needle and thread. The best way to get started without feeling overwhelmed is with a good beginner kit. It takes all the guesswork out of the equation, giving you everything you need—fabric, thread, a needle, and instructions—to jump right in.
Picking Your First Project
I get it, starting a new craft can feel like you're standing at the bottom of a mountain. But cross stitch is different. It's known for its almost meditative quality. That simple, repetitive motion of pulling floss through fabric to create neat little 'X's is a fantastic way to quiet a busy mind. Trust me, it’s an outlet anyone can pick up, no "artistic talent" required.
The secret to a great first experience? Choosing the right project. A solid starter kit clears all those initial hurdles. You won't have to wander the aisles of a craft store trying to decipher fabric types or match dozens of thread colors. Instead, you get a perfectly coordinated package designed for success.
Why a Kit Is a Beginner's Best Friend
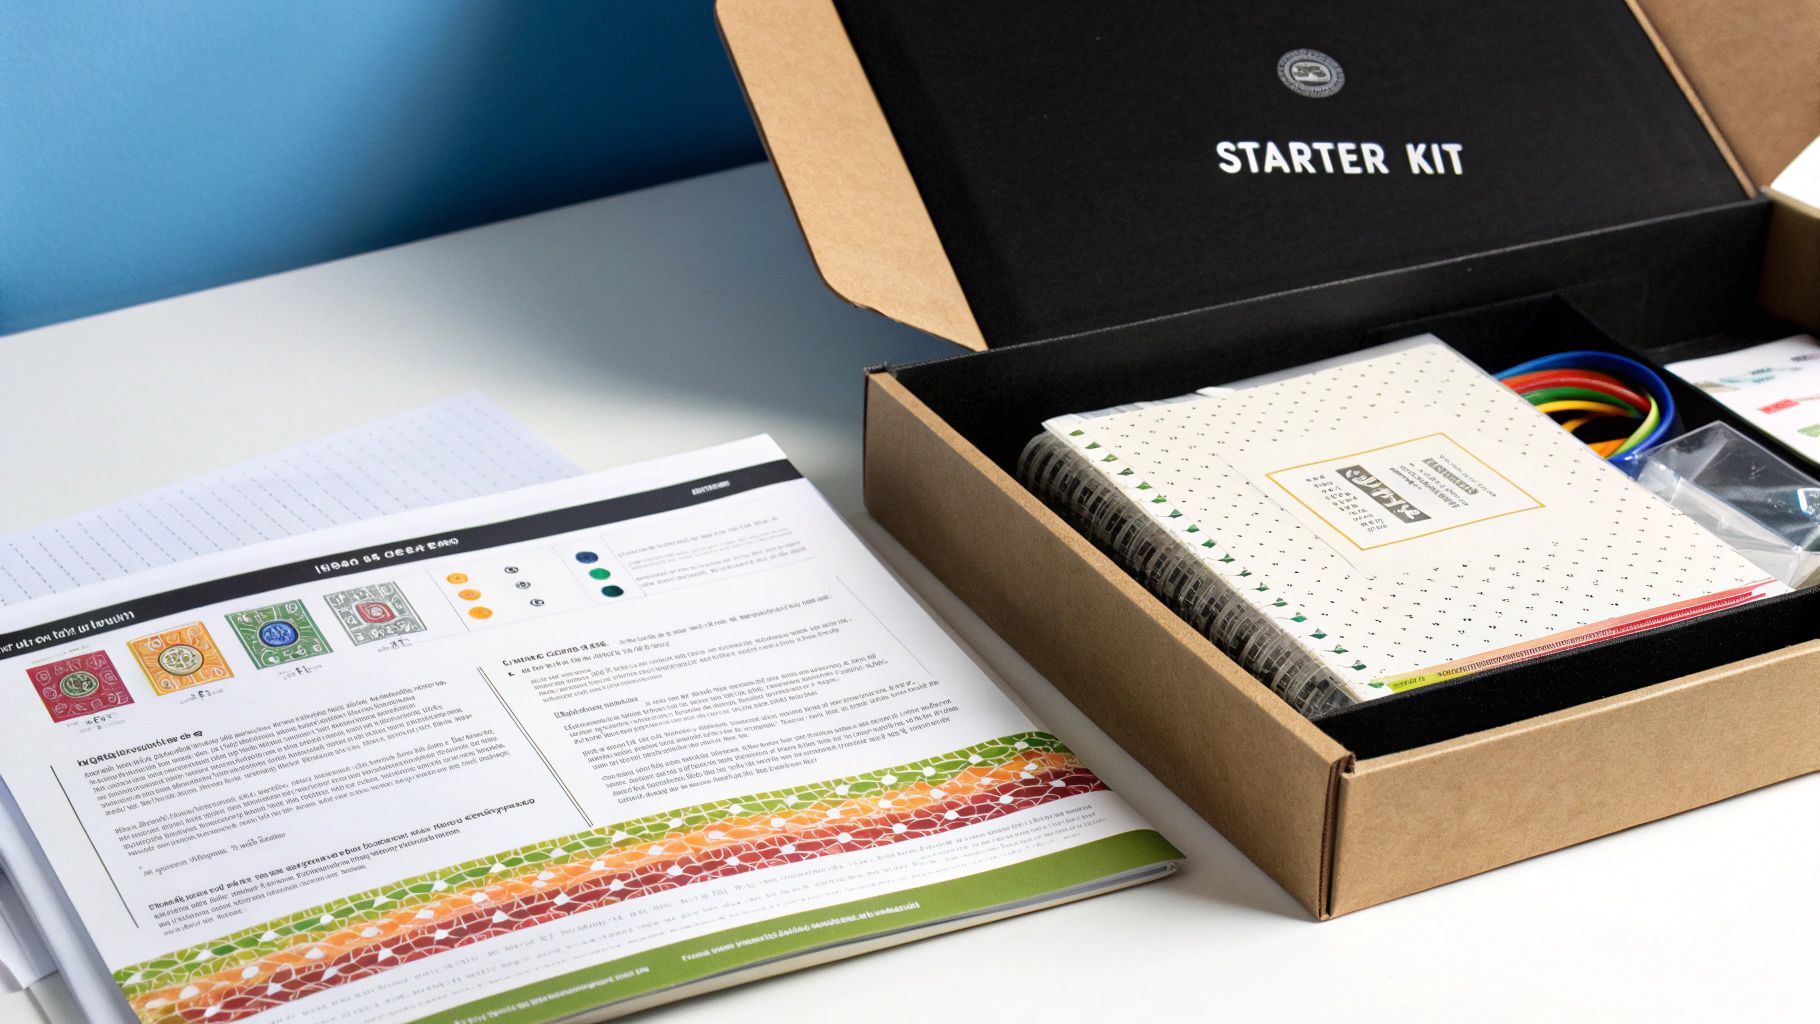
Think of a good beginner kit as your personal stitching coach. It’s been put together by someone who knows what works, ensuring your first project is a joy, not a headache. The patterns are usually small and straightforward, the instructions are easy to follow, and all the materials are hand-picked for a newcomer.
This approach lets you build your skills and confidence from the ground up. Before you know it, you'll have mastered the essentials:
- Reading a basic pattern (often called a chart).
- Keeping your embroidery floss from turning into a tangled mess.
- Making your stitches look even and neat.
- And most importantly, finishing a project you can be proud to show off!
The goal of your first project isn't perfection; it's to have fun and learn the ropes. A well-made beginner kit lets you focus on the simple pleasure of stitching, not on stressing about supplies.
It’s no surprise that needlecrafts are making a huge comeback. The global market for needlecraft patterns is projected to skyrocket, hitting an estimated USD 63.9 billion by 2035, and cross stitch is a huge part of that wave. You can dig into the numbers and see the full needlecraft market forecast for yourself. For you, this just means there are more amazing designs, helpful resources, and a massive, welcoming community to cheer you on.
To help you choose wisely, here's a breakdown of what makes a beginner kit truly great.
Key Components of a Great Beginner Cross Stitch Kit
This table highlights the essential items you should find in a quality kit. Knowing what to look for will ensure you have everything you need for a smooth and enjoyable first project.
| Component | What to Look For | Why It Matters for Beginners |
|---|---|---|
| Aida Fabric | 11-count or 14-count Aida cloth. The lower the count, the larger the holes. | Large, easy-to-see holes make it much simpler to guide the needle and create uniform stitches, reducing eye strain and frustration. |
| Embroidery Floss | Pre-sorted and labeled threads. Look for good quality cotton floss. | No need to guess which color is which! This saves a ton of time and prevents mix-ups. Quality floss is also less likely to tangle or fray. |
| Tapestry Needle | A blunt-tipped needle, usually size 24 or 26. | Tapestry needles are designed to pass through the holes in Aida fabric without splitting the threads, which is exactly what you want for cross stitch. |
| Pattern/Chart | A clear, easy-to-read chart with symbols. A color chart is a huge plus. | A simple, uncluttered pattern is key. If you can't easily tell the symbols apart, you're setting yourself up for mistakes. |
| Instructions | Step-by-step beginner's guide covering the basics, like how to start and end a thread. | You need more than just the pattern. Good instructions will walk you through the fundamental techniques you'll use in every project. |
| Embroidery Hoop | Often included, a 4-inch or 5-inch hoop is ideal for small starter projects. | A hoop holds the fabric taut, making it much easier to stitch evenly. It also helps prevent hand cramps. |
Having these components in your first kit sets you up for a fantastic stitching experience from the very first 'X'.
How to Choose Your Perfect First Kit
Walking into the world of beginner cross-stitch kits can feel a bit like being a kid in a candy store. There are so many exciting options! The trick is to find one that genuinely sparks your interest but won't be secretly difficult. Your first kit really does set the tone for your new hobby.
Think of it like learning to cook. You wouldn't tackle a five-course meal on day one, right? You'd probably start with something simple and satisfying, like scrambled eggs. The same idea applies here. A small, charming design is your recipe for a successful—and fun—first project.
Start Small and Simple
Your main goal with a first project is to get the hang of the basic movements and build a little confidence. A small pattern with just a handful of colors is perfect for this. I always recommend looking for kits that are roughly 5x7 inches or smaller.
Why? A manageable size means you’ll finish it faster, and getting that first "win" is incredibly motivating. It's what makes you want to pick up a needle and thread again.
Some of my favorite starting points for beginners are:
- Modern Geometric Patterns: These are great because they're full of straight lines and solid color blocks, which makes following the chart a breeze.
- Cute, Simple Animals: Think of a cartoonish cat or a simple little fox. They are often designed specifically with beginners in mind.
- Basic Floral Motifs: A single succulent or a simple bloom can be a beautiful and straightforward first stitch.
My biggest piece of advice: Pick a design you actually love. You're going to be looking at it for a while, so make sure it’s something that makes you smile. That little bit of joy is what will carry you across the finish line.
Pay Attention to Fabric Count
The fabric included in your kit is just as crucial as the design itself. Most beginner kits come with Aida cloth, a type of fabric woven into a perfect grid of holes that makes finding your place incredibly easy. The key detail you need to look for is the fabric "count."
This number simply tells you how many stitches (or squares) there are per inch of fabric.
For your very first project, 14-count Aida is your best friend. The holes are large enough to see easily, which means less eye strain and fewer mistakes when you're learning where to put the needle. While 11-count has even bigger squares, I find that 14-count gives you a slightly more detailed, polished look without being any harder to work with.
For now, I'd steer clear of kits with 16-count or 18-count Aida. The higher the count, the smaller the squares, which can be a real headache when you're just starting out. Stick with 14-count to make sure your first experience is fun, not frustrating.
If you want to dive deeper into all the options, we have a complete guide to choosing the best cross stitch kit for beginners that breaks it all down.
Getting to Know Your Kit Materials
Opening your first cross-stitch kit is an exciting moment. Inside that package is everything you need to create something beautiful with your own hands. Let's walk through what you've got so you can feel completely comfortable before you even thread your needle.
The heart of any kit is, of course, the fabric. Most beginner cross stitch kits come with something called Aida cloth. It's a fantastic cotton fabric that's woven into a perfect grid of tiny squares. This grid is what makes cross-stitch so beginner-friendly—it literally gives you a map to follow.
Your Stitching Toolkit
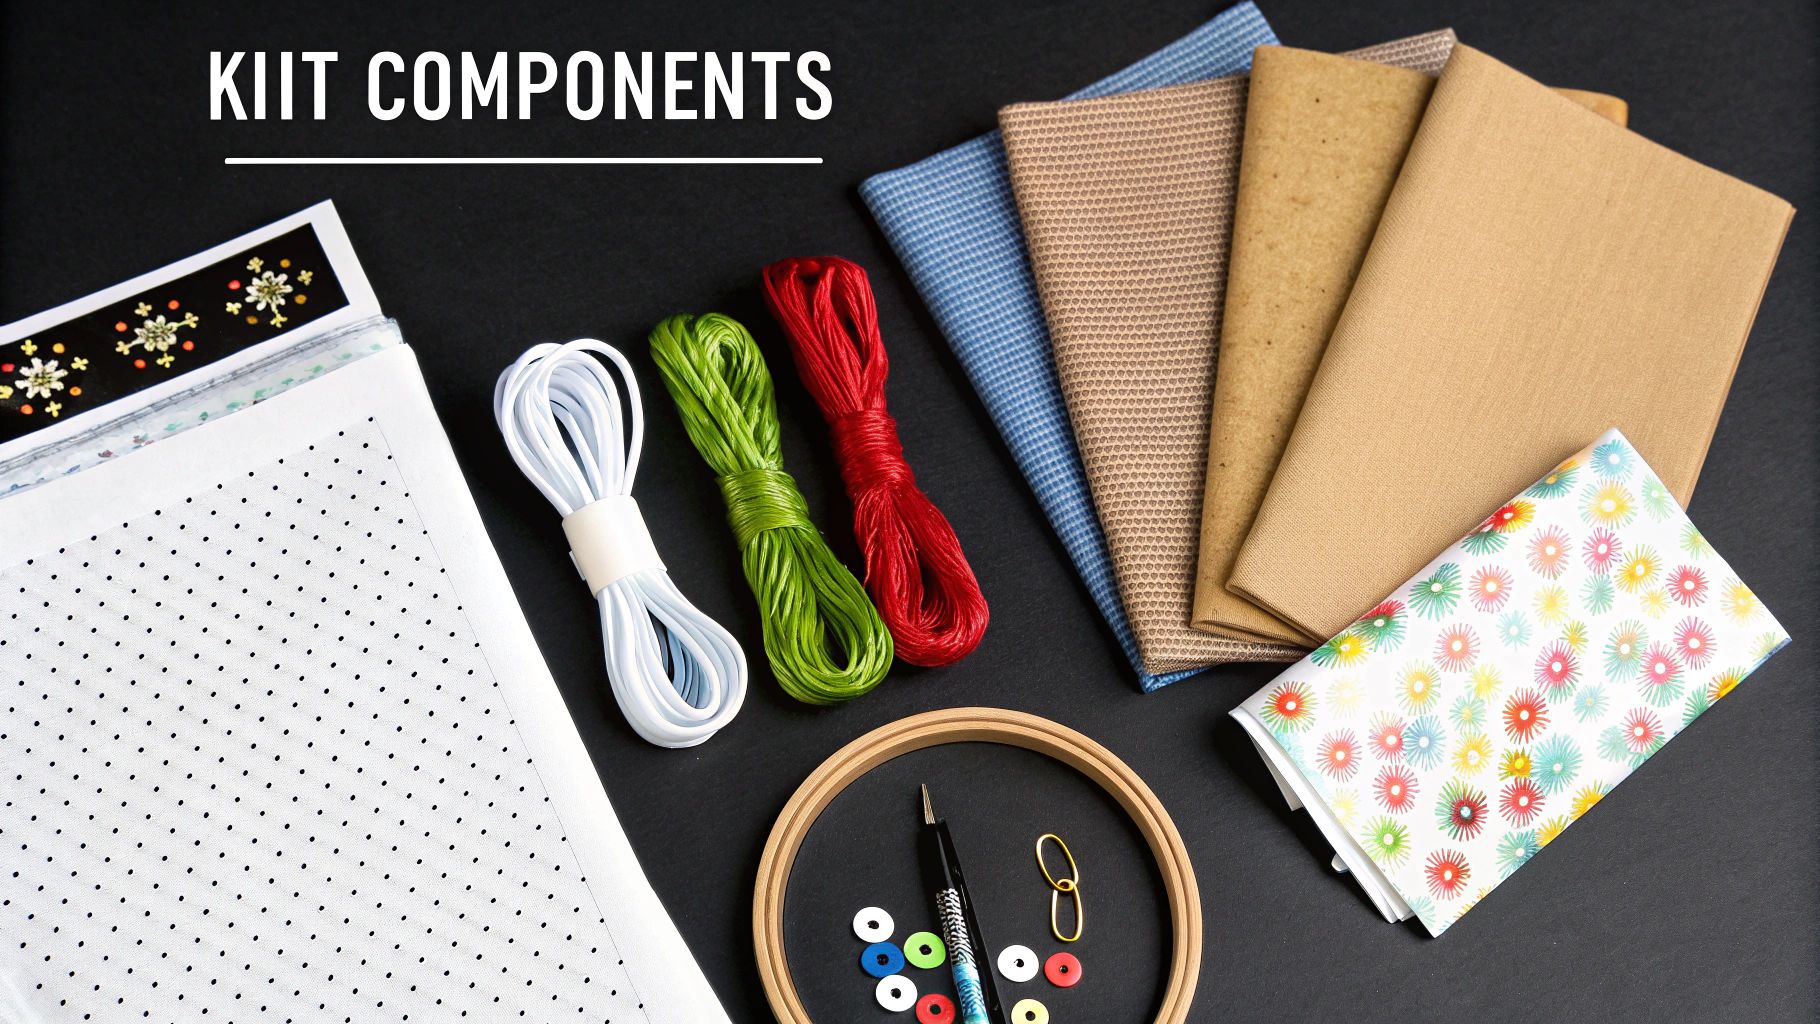
Along with the fabric, a few other essential tools are included to bring your design to life.
- Embroidery Floss: These are the colorful threads you'll be stitching with. A good kit will have these pre-sorted and labeled to match the pattern, which is a huge help and prevents any color mix-ups.
- Tapestry Needle: Take a look at the needle. You’ll notice it has a blunt tip and a larger eye than a typical sewing needle. That’s on purpose! It’s designed to slide smoothly through the holes in the Aida fabric without snagging the threads.
- Embroidery Hoop: This handy gadget is your secret weapon for keeping the fabric tight and even. A taut surface makes it so much easier to get your stitches looking neat and uniform.
It's also important to have realistic expectations about how long a project will take. This is a craft of patience, after all.
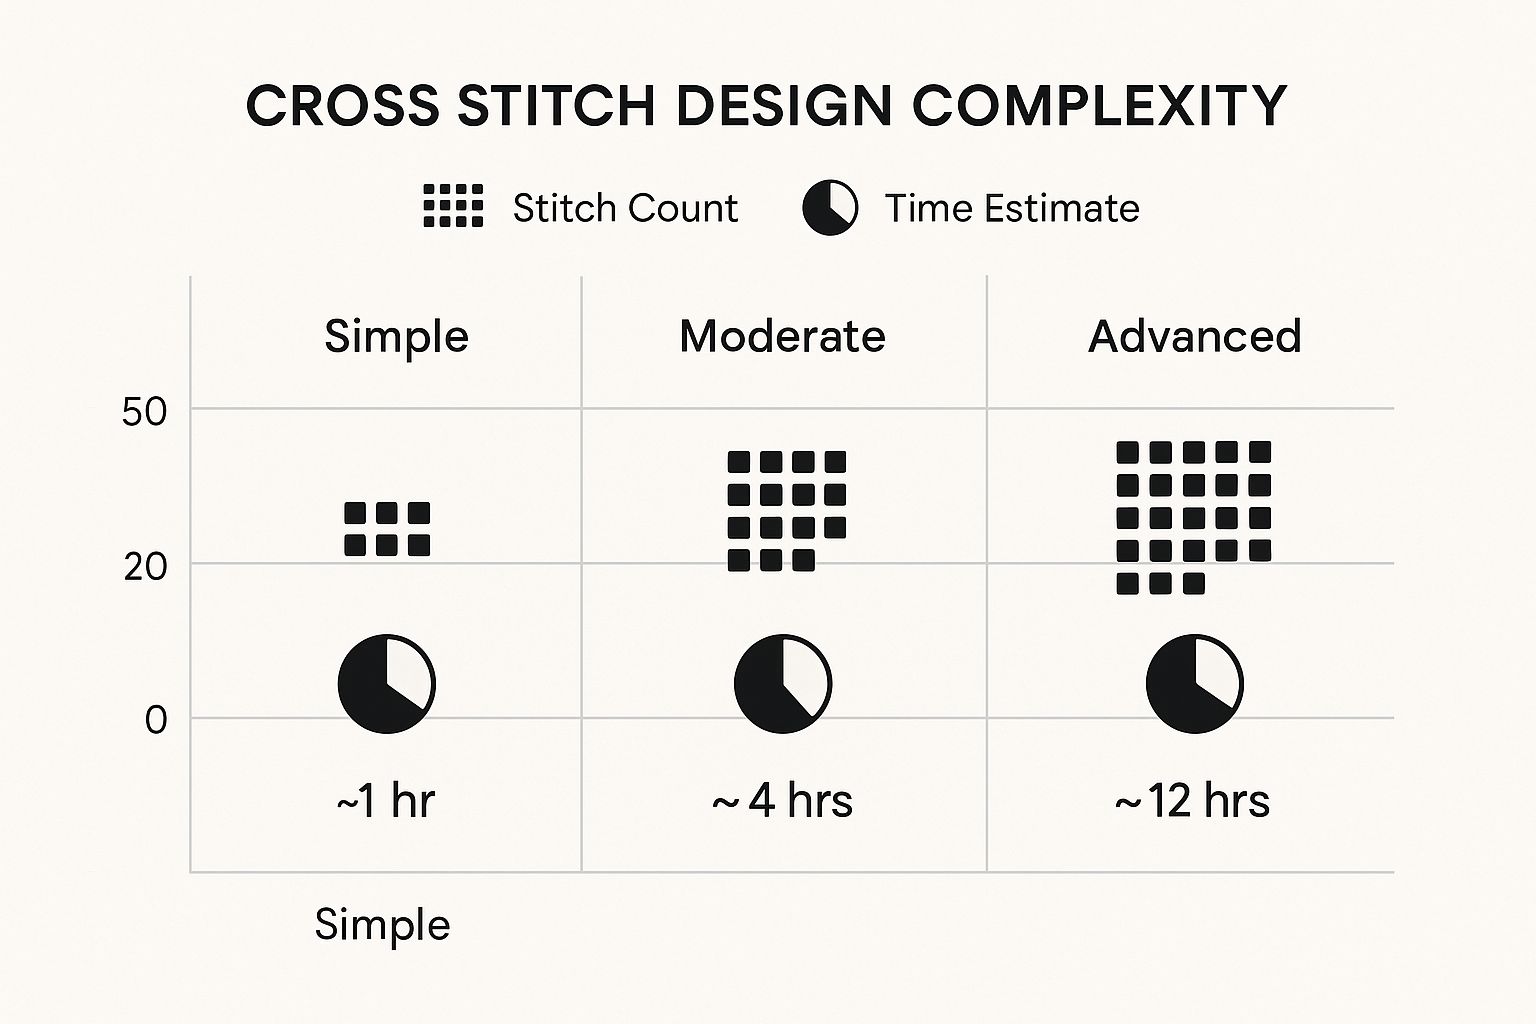
As you can see, even a seemingly small design of just 50 stitches can take about an hour. Starting with a simple pattern is definitely the way to go.
Key Takeaway: Think of the pattern (often called a chart) as your roadmap. It’s a grid filled with symbols, where each symbol corresponds to a square on your Aida cloth and tells you which color to use for that single "X" stitch.
Aida Fabric Count Explained for New Stitchers
One term you'll see a lot is Aida "count." This simply refers to how many stitches fit into one inch of the fabric. The count determines the size of your stitches and how detailed your final piece will look. For beginners, a lower count is much easier to work with.
| Aida Count | Stitches Per Inch | Difficulty Level | Best For |
|---|---|---|---|
| 11-count | 11 | Very Easy | Kids, first-timers, projects with thick yarn |
| 14-count | 14 | Easy | Most beginner kits, clear and easy to see |
| 16-count | 16 | Intermediate | More detailed designs, smaller stitches |
| 18-count | 18 | Advanced | Fine details, full-coverage pieces |
Most beginner kits will stick with 14-count Aida, as it strikes the perfect balance between being easy to see and creating a nice-looking design. It’s the sweet spot for learning. As you get more comfortable, you might want to try a higher count for more intricate patterns. If you're curious, you can find more information about the best fabric choices on Herrschners.com.
Alright, you've got your kit and you're ready to go. This is the exciting part—where a blank piece of fabric starts turning into a piece of art. That first stitch can feel like a big deal, but I'll walk you through it. These are the foundational techniques that will serve you well on every single project you tackle from here on out.
First things first, let's thread that needle. If you look at the embroidery floss in your kit, you'll see it’s made of six smaller strands twisted together. Your pattern instructions will specify how many to use, but the magic number for most beginners is two. Just carefully separate two strands from the main group, thread them through your needle's eye, and you're officially ready to stitch.
English Method vs. Danish Method
There are two main ways to create a cross stitch, and honestly, neither one is "correct." It's all about what feels right for you and the specific section you're working on. Give them both a try!
-
The English Method: Think of this as the one-at-a-time approach. You create a single, complete "X" before moving on to the next square. You make one diagonal stitch (/) and then immediately cross it with the second stitch (). I find this method works best for areas with single, confetti-like stitches of the same color.
-
The Danish Method: This is your best friend for stitching entire rows of one color. You'll work along the row making just the bottom half of each stitch first (/////). Once you reach the end of the row, you come back across, completing all the crosses (\\). Many people, myself included, find this way much faster, and it often results in a tidier back.
No matter which method you choose, the secret to a professional-looking piece is consistency. Make sure every single top stitch on your project lays in the same direction. For instance, if your top stitch goes from bottom-right to top-left, stick with that for the entire design.
My two cents? I'm a fan of a hybrid approach. I use the Danish method for rows because it's so efficient, but I switch to the English method for those stray, individual stitches. This keeps my tension even and gives the final piece that smooth, polished look we're all after.
Keeping Your Stitches Tidy
Sooner or later, you'll hear stitchers talking about having a "neat back." Is it essential for your very first project? Absolutely not. But it's a fantastic habit to start building from day one.
The trick is to banish knots from your process. To start a new thread, just leave a small one-inch tail on the back of your fabric. As you make your first few stitches, simply stitch right over that tail, locking it into place. No bulky knot needed.
When it's time to end a thread, do the same thing in reverse. Weave your needle under the last three or four stitches on the back of your work before snipping the thread close to the fabric. This secures it perfectly flat. Once you get the hang of it, you might even want to turn a favorite picture into a cross stitch pattern, and these tidy habits will make your unique creation look that much more impressive.
Finishing and Displaying Your First Project

There's nothing quite like the feeling of putting in that very last stitch. You did it! Taking a blank piece of Aida cloth and turning it into a little piece of art is a massive accomplishment, and now it's time to show it off. This final step is all about giving your hard work the perfect presentation.
Prepping Your Piece for Display
Before you frame it, I always recommend giving your piece a quick, gentle bath. Over the hours you've spent stitching, oils from your hands and maybe even some dust can settle on the fabric. A wash also helps relax the fabric, magically erasing any stubborn hoop marks and making your stitches look wonderfully plump.
Just fill a basin with cool water and a drop or two of mild soap. Swish your project around gently, rinse it well, and then lay it on a clean towel. Roll it up like a burrito to squeeze out the excess water.
Expert Tip: Whatever you do, never wring out your cross-stitch! To dry, lay it flat on another fresh towel. I like to iron mine while it’s still a tiny bit damp. Place it face down on a fluffy towel and press the back with an iron on low heat. This smooths out wrinkles without squashing your beautiful stitches.
Creative Ways to Show Off Your Work
With your piece all clean and pressed, the real fun begins. The simplest and most popular way to display a first project is right in the hoop you stitched it in. It gives off a lovely, rustic vibe and is incredibly easy to do.
But don't feel like you have to stop there! Your finished stitch can become so much more. Here are a few ideas I've used over the years:
- Frame It Up: For a classic, polished look, pop it into a small, standard-sized picture frame.
- Make a Mini-Pillow: Find some coordinating backing fabric and sew your piece into a tiny decorative pillow. It’s a great accent for a shelf or chair. You could even fill it with dried lavender to make a sachet.
- Create a Functional Coaster: You can find clear acrylic coaster kits that are perfect for showcasing a small stitched design.
After you’ve proudly displayed your first creation, you'll probably feel the itch to start the next one. With the skills you've just learned, you're ready to tackle more intricate designs. You could even try something really special, like one of these gorgeous cross stitch family tree patterns, which make for unforgettable gifts.
Answering Your Top Beginner Questions
As you get settled in with your first beginner cross stitch kits, you’ll naturally have questions. It’s totally normal! Every single one of us has been a beginner, and we’ve all asked these same things. Let's get you some answers so you can stitch with confidence.
What Happens If I Mess Up?
First off, take a deep breath. Mistakes are not just okay; they're a guaranteed part of the process. In the cross-stitch world, we have a quirky term for ripping out stitches: frogging. Why? Because you "rip-it, rip-it!"
- For just a few wrong stitches, you can gently use the eye of your needle to unpick them.
- If it's a bigger section, a pair of small, sharp embroidery scissors or a seam ripper works wonders. Just be careful not to snip your fabric!
Honestly, your first project is all about learning the rhythm of stitching, not creating a flawless masterpiece.
My best advice? Learn to love the little imperfections. They’re a sign that your project was handmade with care. Plus, from a few feet away, no one will ever notice that one stitch that went rogue.
How Do I Keep the Back of My Project from Looking Like a Mess?
Ah, the "neat back" debate! While some stitchers take pride in a pristine reverse side, the main goal is just to keep it from getting bulky. The secret is simple: avoid knots.
To start a new thread, instead of tying a knot, try the loop start method (a game-changer if you're using two strands). If that's not an option, just leave a small tail on the back and catch it under your first few stitches to anchor it down.
When you're ready to end a thread, do the same thing in reverse. Weave the remaining tail under three or four finished stitches on the back, then snip it close. This keeps everything flat and smooth.
Can I Change the Colors in My Kit?
Yes, absolutely! This is where you can really start to make a project your own. While it's a good idea to follow the pattern for your very first piece, don't be afraid to experiment later on.
If you run out of a color or just want to swap one out, you can easily buy individual skeins of thread. Brands like DMC and Anchor are available at almost any craft store. The only thing to watch for is contrast. Make sure your new color stands out enough from the fabric and surrounding threads so all your hard work is visible.
Ready to turn your favorite memories into timeless art? Explore our custom kits at Cross Stitched and start your creative journey today at https://cross-stitched.com.


