
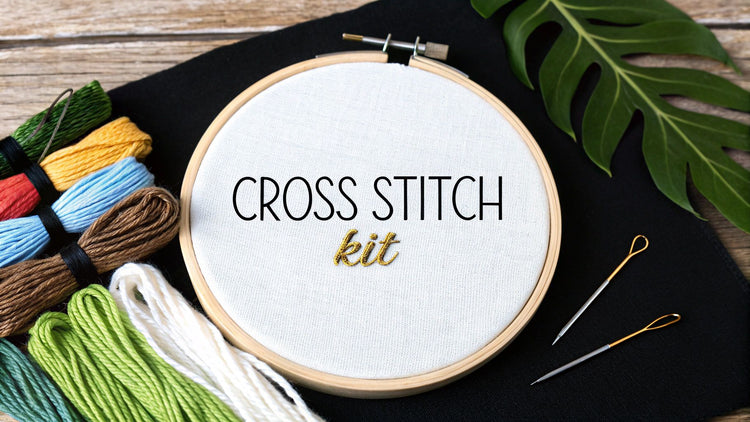
A good cross stitch kit for beginners is your all-in-one ticket to this wonderfully relaxing hobby. Think of it as a creative launchpad—it bundles everything you need, from the fabric and colorful threads to the needle and pattern, so you can start stitching without any of the usual guesswork.
Your First Step into Cross Stitch
Welcome to the delightful world of cross stitch! There's a reason this timeless craft is so popular right now. It's an incredibly satisfying way to unplug, de-stress, and create something beautiful with your own two hands. If you've ever looked at a finished piece and thought, "I wish I could do that," a beginner's kit is designed to show you that you absolutely can.
Jumping in with a kit is, without a doubt, the smartest way to start. It completely sidesteps the overwhelming task of gathering supplies one by one. Forget wandering through a craft store aisle, trying to figure out which fabric count matches which thread type. A kit delivers a perfectly curated package, built from the ground up for success.
The Rise of a Mindful Hobby
You're in good company. People everywhere are flocking to needlecrafts, searching for hands-on, mindful activities to balance out screen time. This trend is huge—the needlecraft market, valued around USD 34 billion in 2025, is expected to nearly double by 2035. According to market trend analysis, beginner kits are a major reason for this boom, making the hobby easy for anyone to pick up.
This isn't just a passing fad; it’s a global shift toward hobbies that feel both creative and genuinely fulfilling. When you buy a kit, you're not just getting supplies—you're joining a massive, worldwide community of makers.
A cross stitch kit for beginners is like "paint-by-numbers" with thread. It gives you the canvas, the colors, and the map. All you have to do is enjoy the simple, repetitive motion of creating art, one 'X' at a time.
What's Inside a Beginner Cross Stitch Kit
So, what exactly do you get in one of these kits? Let's break down the essential components that set you up for a great first experience. Each piece is chosen specifically to make the process smooth and enjoyable for a newcomer.
| Component | Description | Why It's Essential for Beginners |
|---|---|---|
| Aida Fabric | A stiff, woven cotton fabric with a grid-like pattern of holes. Most beginner kits use 11-count or 14-count Aida, meaning there are 11 or 14 squares per inch. | The large, visible holes make it incredibly easy to see where your needle needs to go. You can’t get lost. |
| Embroidery Floss | The colorful cotton thread used for stitching. In a kit, it's pre-cut and sorted by color. | No need to buy dozens of full skeins! You get the exact amount and shades needed for your design, eliminating waste and confusion. |
| Tapestry Needle | A needle with a large eye and a blunt tip. The size corresponds to the fabric count. | The blunt tip prevents you from snagging the fabric threads, and the large eye makes threading the floss much less frustrating. |
| Pattern Chart | A printed grid where each square represents a single cross stitch. Symbols inside the squares correspond to specific floss colors. | This is your roadmap. It tells you exactly where to place each color to bring the design to life, square by square. |
| Instructions | A guide that explains how to read the pattern, start your project, and make the basic cross stitch. | This little booklet is your personal teacher, walking you through the fundamentals so you can start stitching with confidence. |
Essentially, the kit designer has done all the prep work. Your job is just to sit back, follow the chart, and watch your creation come together.
Why a Kit Sets You Up for Success
Your first project is all about learning the ropes and, most importantly, having fun. It’s not about perfection. A kit is designed to ensure that initial experience is a positive one by taking all the common pain points off the table.
With the core materials handled for you, your only focus is mastering that simple, satisfying "X" and finding a creative rhythm that works for you.
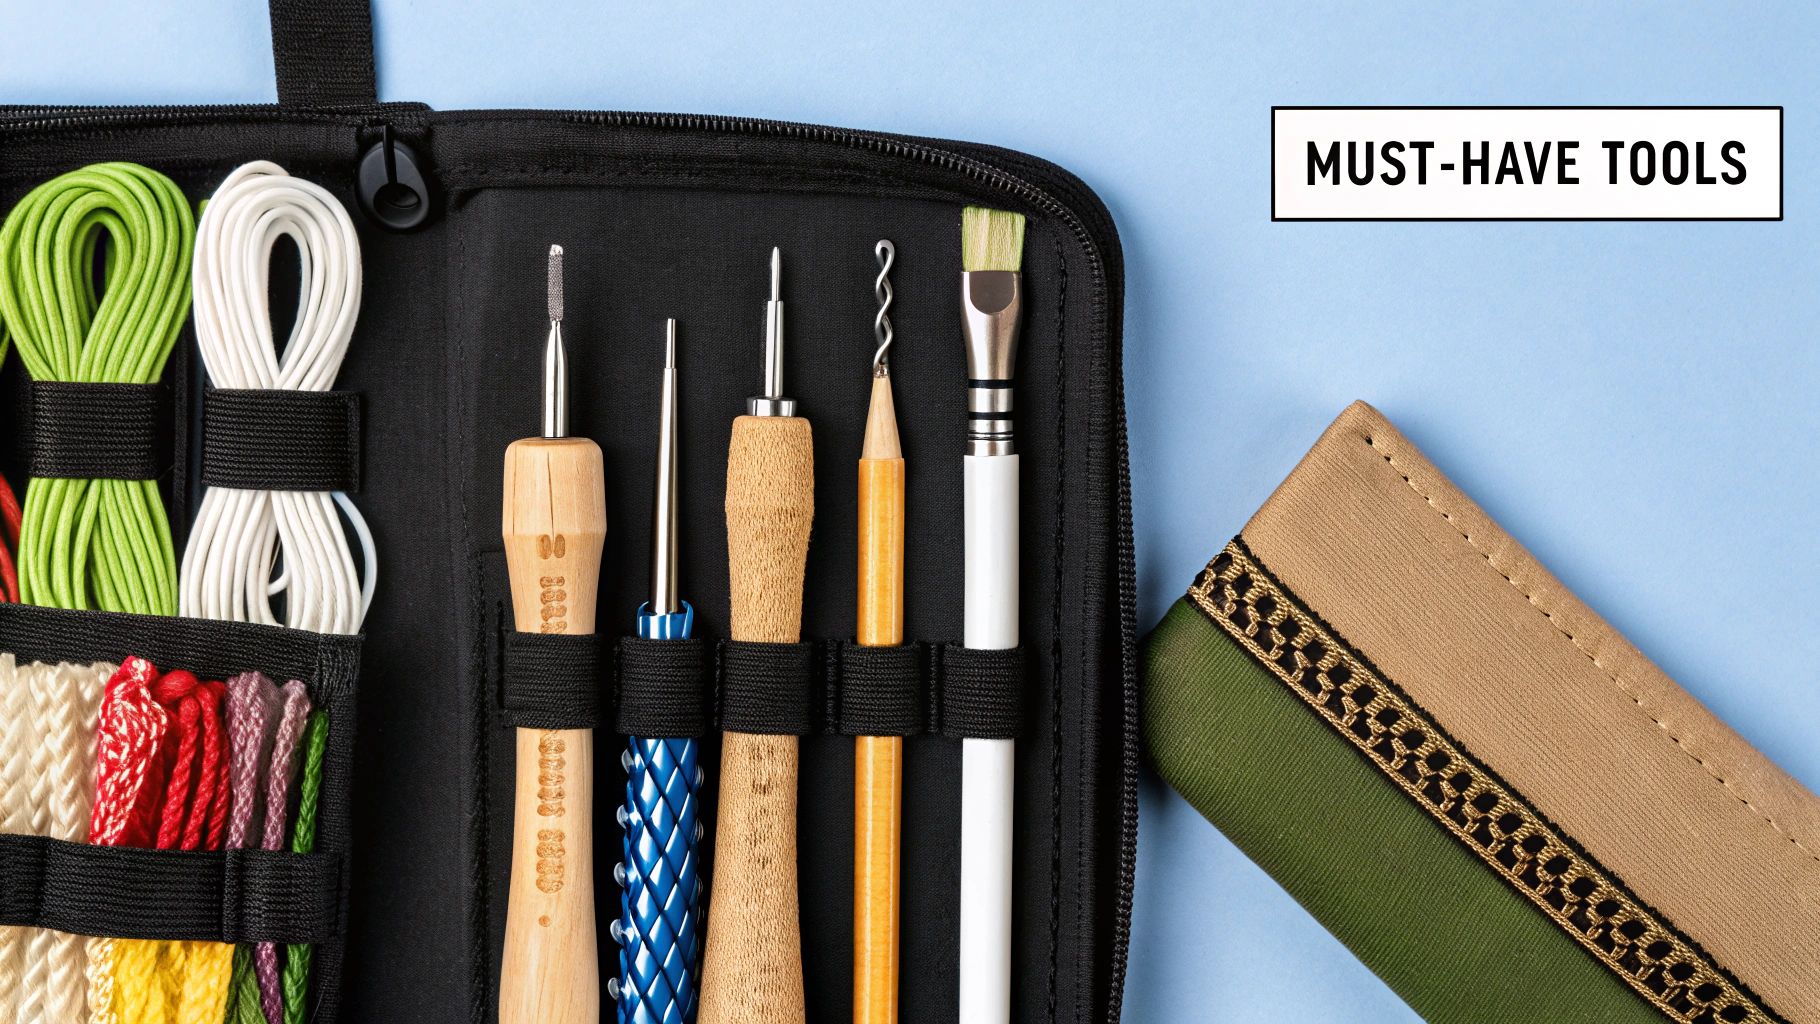
What's Inside? A Look at Your Kit's Tools
Opening your first cross stitch kit for beginners is a bit like getting a special delivery of art supplies. It can seem like a lot of different pieces, but don’t let that intimidate you. Think of it like a simple recipe—every ingredient is there for a reason, and you just need to know what it does. Let's start with the two most important items in there: the fabric and the thread.
Once you get a feel for these two core components, everything else will click into place. Knowing the "why" behind each tool is what builds real confidence and gets you excited to make that very first stitch.
Your Fabric: The Canvas for Your Creation
The fabric included in your kit is almost certainly Aida cloth, and for good reason—it’s the perfect starting point for any new stitcher. What makes it so great is how it's woven. It has a very clear grid-like pattern of squares, with tiny, visible holes at each corner. This built-in grid removes all the guesswork of where your needle should go.
Most beginner kits come with 14-count Aida. The "count" simply tells you how many of those little squares (and thus, stitches) fit into one inch of the fabric.
Think of fabric count like the resolution of a computer screen. A lower number, like 14, means you have bigger "pixels," or squares. These larger squares are much easier to see and work with, making your first project far less intimidating.
As you get more comfortable, you might try fabrics with higher counts for more detailed, intricate designs. But starting with 14-count is the best way to learn the motions without straining your eyes. It’s a game-changer for building good habits.
Your Thread: The Colors of Your Design
Next up, you'll find the embroidery floss. This is the colorful thread you'll use to actually create the picture. A good kit will provide every color you need, often pre-cut and organized on a card. You'll notice each color has a number that matches the symbols on your pattern chart, which makes finding the right shade a breeze.
Here’s the essential info for handling your floss:
- It’s divisible: Standard embroidery floss looks like one thick thread, but it's actually made of six very fine strands twisted together.
- You'll separate it: For most projects, especially on 14-count Aida, you will only use two of these six strands to make your stitches. Don't use the whole thing!
- How to separate: Cut a manageable length of floss—about 18 inches is perfect. Pinch the end, and then gently pull a single strand straight up and out. Pulling them out one by one like this is the secret to avoiding a tangled mess.
Using just two strands keeps your stitches looking neat and tidy, preventing them from bunching up or overcrowding the little squares on your fabric. Your kit gives you the perfect palette to start, but once you're hooked, you can even learn how to turn a favorite picture into a cross stitch pattern and pick your own colors.
Choosing the Right Kit for a Great Start
Picking out your very first cross stitch kit is a pretty big deal! It can be the difference between a fun, relaxing new hobby and a frustrating pile of thread. Think of it like learning to cook. You wouldn't start with a five-course gourmet meal; you'd probably begin with something simple and satisfying, like scrambled eggs, to get the hang of it.
The same idea applies here. The goal isn't just to finish a project, but to actually enjoy the process and feel proud of what you've made. A great first experience builds momentum and makes you excited to start the next one.
Key Factors for Your First Kit
When you're looking at all the options, try to keep it simple. For your first project, focus on three main things: the size of the design, how complicated it looks, and how many different colors of thread it uses. The secret to a happy beginning is to think small and simple.
-
Project Size: I always recommend starting with something that will finish up at less than 5x5 inches. A smaller project means a quicker finish, and that feeling of accomplishment is a huge motivator! Finishing a cute little design in a weekend is way more encouraging than staring at a giant, intimidating project for months.
-
Design Complexity: Go for simple, bold designs that have big blocks of the same color. Try to steer clear of patterns with a lot of "confetti"—that's what we call single, scattered stitches of different colors. They're a pain to deal with because you're constantly stopping and starting with new threads, which can be a real headache when you're just learning.
-
Color Palette: A kit with fewer than 10 colors is perfect for a beginner. This makes it so much easier to follow the pattern and keep your threads organized. You can focus on getting your stitches neat and even instead of getting lost in a sea of colors.
This little guide gives you a good idea of the different stitches you might see and how they stack up in terms of difficulty.
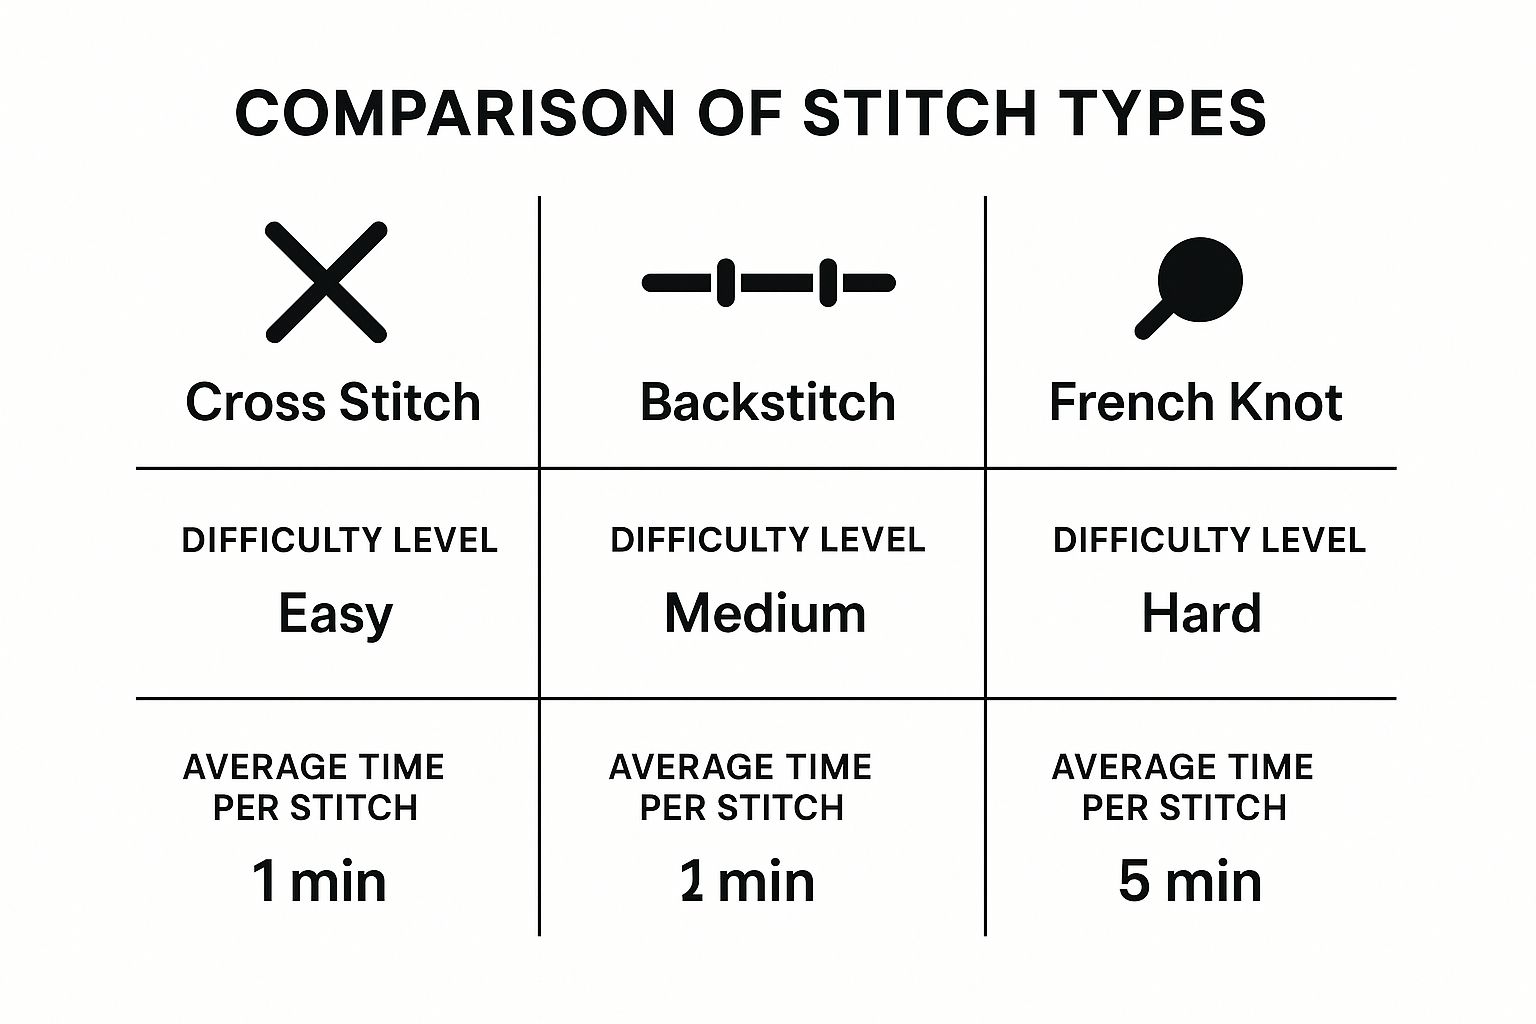
As you can see, sticking with the basic cross stitch is the easiest way to begin. You can build up your skills and confidence before you dive into more advanced stitches like French knots.
Stamped vs. Counted Kits: What’s the Difference?
You'll quickly notice that kits fall into two main categories: stamped and counted. Knowing the difference between them is crucial for picking the one that’s right for you.
Think of it this way: a stamped kit is like a coloring book where the design is printed right on the fabric for you to stitch over. A counted kit is more like a treasure map—you get a blank piece of fabric and a separate chart, and you have to count the squares to figure out where to place each stitch.
Neither one is inherently better than the other, but one will likely be a much better fit for your personality and how you like to learn. Let's break it down.
Stamped vs Counted Cross Stitch Kits for Beginners
This table should help you figure out which path you want to take.
| Feature | Stamped Cross Stitch | Counted Cross Stitch |
|---|---|---|
| Learning Curve | Very low. You just follow the colored blocks printed on the fabric. | A bit steeper. You have to learn to read a chart and count squares on blank fabric. |
| Ease of Use | Super easy to get started. It's almost impossible to lose your place. | Requires more focus. You need to pay attention to where you are on the chart and fabric. |
| Final Appearance | The ink washes out after you're done. Occasionally, a faint line might remain. | Creates a very clean, professional look since the fabric starts and ends completely blank. |
| Skill Building | Fantastic for practicing how to make even, consistent stitches. | Teaches you the foundational skills of reading patterns and counting from your very first project. |
So, what's the verdict? If you just want to relax and stitch without worrying about counting, a stamped kit is a brilliant way to start. But if you're the kind of person who loves a little challenge and wants to learn the "traditional" method right away, a counted kit will feel incredibly rewarding.
Making Your First Stitches with Confidence
Alright, this is the moment we've been waiting for! All that prep work is about to pay off as we bring the tools, thread, and fabric together to start creating some art. Honestly, this is where the real fun begins. Let's walk through those very first stitches and turn all that theory into a beautiful, tangible project.
Starting off on the right foot just takes a tiny bit of prep. Before we can make that satisfying first 'X', we need to get our canvas ready. Taking a moment to do this ensures your design ends up perfectly centered and makes the whole stitching process so much smoother and more enjoyable.
Preparing Your Fabric and Hoop
First up, let's find the dead center of your Aida fabric. It's easy! Gently fold it in half lengthwise and give it a light crease with your fingers. Then, do the same thing widthwise. The spot where those two creases cross is the exact center of your fabric. You can pop a pin in it or use a water-soluble marker to keep track of it.
That center point on your fabric is your anchor. It corresponds directly to the center of your pattern chart, which you'll usually see marked with arrows. Starting in the middle is a classic stitcher's trick that guarantees your beautiful design won't accidentally run off the edge of the fabric.
Next, it’s time to get your fabric into the embroidery hoop. A hoop is your best friend for keeping the fabric taut, which is the key to making neat, even stitches.
- Loosen the Screw: Just unscrew the outer ring of the hoop enough so it separates easily from the inner one.
- Position the Fabric: Set the inner ring on a flat surface. Drape your fabric over it, making sure that center mark you made is right in the middle of the ring.
- Secure the Outer Ring: Press the outer ring down over the fabric and the inner ring. Gently pull the fabric edges so it’s snug—you're looking for a "tight as a drum" feel, but don't stretch it out of shape.
- Tighten It Up: Now, tighten the screw until the fabric is held firmly in place. That's it! You're ready to stitch.
Creating the Fundamental Cross Stitch
The basic cross stitch is beautifully simple. It's just two little diagonal stitches that cross over to form an 'X'. Once you get this down, you can tackle pretty much any design in a cross stitch kit for beginners.
First, thread your needle with two strands of floss. Here’s a pro tip: don't tie a knot at the end! We're going to use a much neater trick to secure it.
Bring your needle up from the back of the fabric through one of the Aida holes, but leave about a one-inch tail of thread at the back. As you make your first few stitches, just hold that tail down with your finger. Your stitches will catch it underneath and lock it in place. This technique leaves the back of your work clean and free of bulky knots.
Now, let's make that 'X':
- The First Leg: Come up from the back at the bottom-left hole of a single Aida square. Go down into the top-right hole. That's your first diagonal stitch: /.
- The Second Leg: Now come up from the back at the bottom-right hole. Go down into the top-left hole, right over your first stitch, to complete the 'X'.
A Key Takeaway: Consistency is everything in cross stitch. Always make your bottom stitches slant in the same direction (like
////) and your top stitches slant in the opposite direction (like\\\\). This simple habit ensures all your 'X's look perfectly uniform and gives your finished piece a truly professional, polished look.
Once you find your rhythm, you'll be amazed at how relaxing this process is. Before you know it, you might even feel inspired to design your own patterns. It’s actually easier than you think to get a custom cross-stitch pattern from a picture and create something completely unique.
How to Read a Cross Stitch Pattern
https://www.youtube.com/embed/c1_ijpQizzs
When you first unfold a cross stitch pattern, it can look a little like a secret code or some kind of complicated blueprint. Don't let it intimidate you! Once you crack the code, you'll see it's just a simple map that guides every single stitch. Think of it as a treasure map where ‘X’ really does mark the spot.
A pattern in a cross stitch kit for beginners is always designed to be easy to follow. The most important thing to understand is that the grid on your paper chart directly matches the grid on your Aida fabric. Every single square on the chart corresponds to one stitchable square on your fabric.
Cracking the Symbol Code
Every pattern has a key, or a legend, which is basically the Rosetta Stone for your project. This key is your guide, listing all the symbols you'll see on the chart and telling you exactly which color of embroidery floss to use for each one.
For example, a square with a tiny black circle might tell you to use DMC thread color 310 (that's black), while a square with a little star might mean you need color 742 (a nice yellow).
The symbol key is your guide to translating the black-and-white chart into a vibrant, colorful image. It removes all the color guesswork, allowing you to focus purely on the placement of your stitches.
This symbol system is what makes "counted" cross stitch work. You just find a symbol on the chart, look at the key to see which color thread to grab, and then make one cross stitch on the matching square of your fabric. It's a beautifully simple process that feels like second nature after just a few stitches.
Tracking Your Progress on the Chart
Honestly, one of the biggest hurdles for new stitchers isn't making the stitches—it's keeping track of where you are on the pattern. It's so easy to lose your place, which can be frustrating. Thankfully, there are some simple tricks to stop that from happening.
My favorite method? A good old-fashioned highlighter. As you finish a stitch on your fabric, just color in the matching square on your paper chart. This creates a clear visual of what's done and what's next. It’s incredibly satisfying to watch that highlighted area grow as your project comes to life.
Here are a few other tried-and-true tips for staying on track:
- Grid Your Fabric: For bigger projects, many stitchers use a special water-soluble fabric pen to draw a light grid on their Aida, usually in 10x10 squares. This makes the fabric grid match the heavier lines on your chart perfectly.
- Use a Magnetic Board: These are fantastic tools. It's a metal board that holds your pattern, and it comes with a magnetic ruler you can slide down the page. You just place the magnet right under the row you're stitching, making it super easy to follow along.
Once you get the hang of reading the chart and tracking your progress, that intimidating page of symbols becomes a simple, friendly guide. This skill is the foundation for everything else and opens the door to a whole world of creativity, from your first simple kit to more detailed heirlooms like the ones in our collection of cross stitch family tree patterns.
Got Questions? We've Got Answers
Jumping into a new hobby like cross stitch is exciting, but it's totally normal to have a few questions pop up. Even with the best cross stitch kit for beginners, you might hit a little snag or just wonder, "Am I doing this right?" Don't sweat it. Every single person who stitches has been right where you are.
Think of this as a friendly chat with an experienced stitcher. We've rounded up the most common head-scratchers from newcomers and laid out simple, practical answers to get you stitching confidently again in no time.
What if I Make a Mistake?
First things first: take a deep breath. Mistakes aren't just okay; they're how you learn! When you spot a stitch that's gone rogue, you basically have two options.
If you just put the stitch in, you can simply "frog" it. It’s a funny name stitchers have for ripping out stitches (because you "rip-it, rip-it"). Just use the tip of your needle to gently unpick the stitch and pull the thread back through. Easy peasy, and no one will ever know.
But what if the mistake is tiny? Maybe a single stitch in a slightly off color, buried in a busy pattern? Honestly, my advice is often to just leave it. The only person who will ever spot it is you. The whole point is to enjoy the process, not chase some impossible standard of perfection.
How Do I Stop My Thread From Tangling All the Time?
Ah, the dreaded knot. It's probably the number one frustration for new stitchers, but thankfully, the fixes are surprisingly simple. A few small tweaks to your routine can make a world of difference.
- Shorter is Better: It’s so tempting to cut a super long piece of floss to save yourself from re-threading the needle. But trust me, anything over 18 inches or so is just asking for a tangled mess. Shorter lengths are much easier to control.
- One Strand at a Time: When your pattern calls for two strands, always separate them completely. Pull out the first strand, set it aside, and then pull out the second. This simple step stops them from twisting around each other from the get-go.
- The Dangle Trick: This is my favorite tip. Every few stitches, just let your needle and thread hang down freely. You'll see it spin as it magically untwists itself, releasing the tension that leads to knots.
How Should I Finish and Clean My Project?
Once that last stitch is in place, it’s time for the big reveal! A quick, gentle bath and a press will make your colors vibrant and your fabric look crisp and professional.
- Give it a Gentle Wash: Fill a clean sink or bowl with lukewarm water and just a drop of mild soap. Let your piece soak and swish it around gently for a few minutes.
- Rinse Well: Drain the soapy water and rinse your project under cool, running water until you can't see any more suds.
- Dry with Care: Lay your wet piece flat on a thick, clean towel. Roll the towel up like a jelly roll and press down to soak up the extra water. Whatever you do, don't wring it out! That can warp your beautiful stitches. Unroll it and lay it flat on a dry towel until it's completely air-dried.
- Press from the Back: To smooth out any wrinkles, place your piece face-down on a clean, fluffy towel and iron it from the back on a medium setting. The towel protects your stitches while the heat makes the fabric perfectly flat.
Do I Really Have to Use an Embroidery Hoop?
Technically, no, you don't have to. But should you? Absolutely. Especially when you're just starting out, a hoop is an inexpensive little tool that makes a huge difference in how your final piece turns out.
Think of a hoop as a tiny, portable frame that holds your fabric perfectly taut. This tension is the secret ingredient for creating neat, uniform stitches. It stops you from pulling your stitches too tight or leaving them too loose—one of the trickiest things to get right as a beginner.
It keeps the Aida cloth from puckering and gives you a much more comfortable grip on your project. Using a hoop is a simple habit that helps guarantee your finished piece looks as polished as the picture on the box.
Ready to turn your favorite memories into timeless art? Cross Stitched makes it easy to create a personalized kit from any photo. Start your creative journey today and craft a beautiful keepsake that will last a lifetime. Explore our custom kits now!


