
A DMC cross stitch pattern is essentially a visual map designed specifically for the world's most popular embroidery thread. Think of it as a detailed recipe for creating art with a needle, where a grid, a bunch of symbols, and a color key all work together to guide every single stitch you make.
Understanding Your First DMC Cross Stitch Pattern
Staring at a cross stitch chart for the first time can feel a little like trying to read a foreign language. It's just a grid packed with weird symbols, numbers, and lines. But once you get the hang of its three core components, the whole thing clicks into place. A DMC cross stitch pattern is simply a blueprint that tells you which color to use and exactly where to put it on the fabric.
Think of it this way: the pattern is the sheet music, the DMC thread is the instrument, and you're the musician. Every element on that page has a specific job, all aimed at bringing the final picture to life, one stitch at a time. Once you learn to read this "music," you'll have the confidence to tackle any design you come across.
The Three Pillars of a DMC Pattern
Every pattern, from a tiny bookmark to a massive, full-coverage piece, is built on the same three foundational elements. Understanding these is the key to unlocking any design you want to stitch.
- The Grid Layout: This is the main chart, and it's a direct representation of the weave of your fabric. Each little square on the grid equals one single cross stitch.
- The Symbol Legend: You'll see a symbol (a letter, number, or shape) inside each square on the grid. The legend is just a form of shorthand, keeping the chart from getting hopelessly cluttered with color names.
- The Color Key: This is your translator. The color key is what links each symbol from the chart to a specific DMC thread number. For example, it will tell you that the symbol '★' means you need to use DMC thread number 310 (which is always black).
This handy infographic shows you exactly how these pieces fit together in a typical DMC pattern.
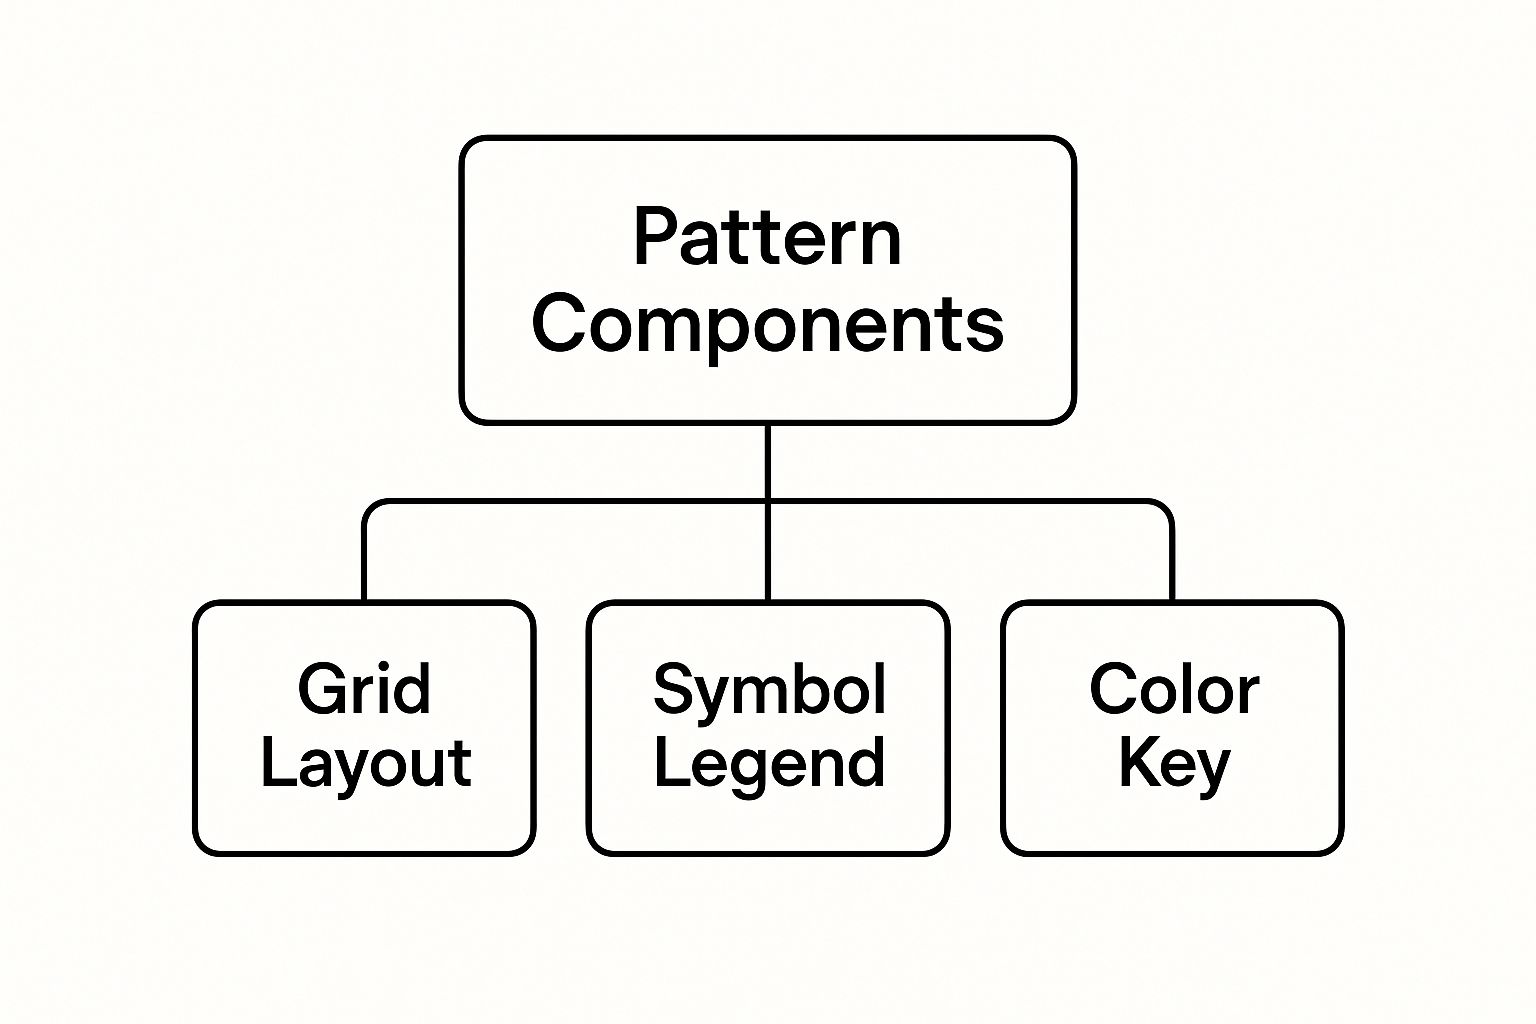
As you can see, the grid, symbols, and key are all part of one interconnected system designed to make stitching as clear and precise as possible.
To help you get started, here's a quick breakdown of what you'll find on a pattern key and what it all means.
| Decoding a DMC Cross Stitch Pattern Key |
| :--- | :--- | :--- |
| Element | What It Represents | Example |
| Symbol | The character on the grid that stands for a color. | ★ |
| DMC Number | The official number for the specific DMC thread color. | 310 |
| Color Name | The common name for the thread color. | Black |
| Strands | How many strands of the six-strand floss to use. | 2 |
| Stitch Count | The total number of stitches for that specific color. | 452 |
This table acts as your quick-reference guide. Once you know these five elements, you can confidently read and start any project.
The Legacy Behind the Numbers
So, why are these patterns so standardized? It all comes down to the long history of the thread company itself. Cross stitch has a rich past, and DMC (Dollfus-Mieg & Compagnie) has been a central player since the mid-19th century. Their game-changing introduction of six-strand cotton floss in the 1890s set a global standard for quality and color consistency that still holds today.
The real genius of the DMC system is its universality. A pattern designed in Japan can be perfectly stitched in Canada using the exact same colors, all thanks to a numbering system that has stayed consistent for decades.
This historical reliability is why countless designers create DMC cross stitch patterns specifically. To learn more about this method, take a look at our complete guide on DMC counted cross stitch. By mastering these basics, you're not just learning a craft; you're becoming part of a long and colorful tradition.
Navigating the DMC Thread Color System
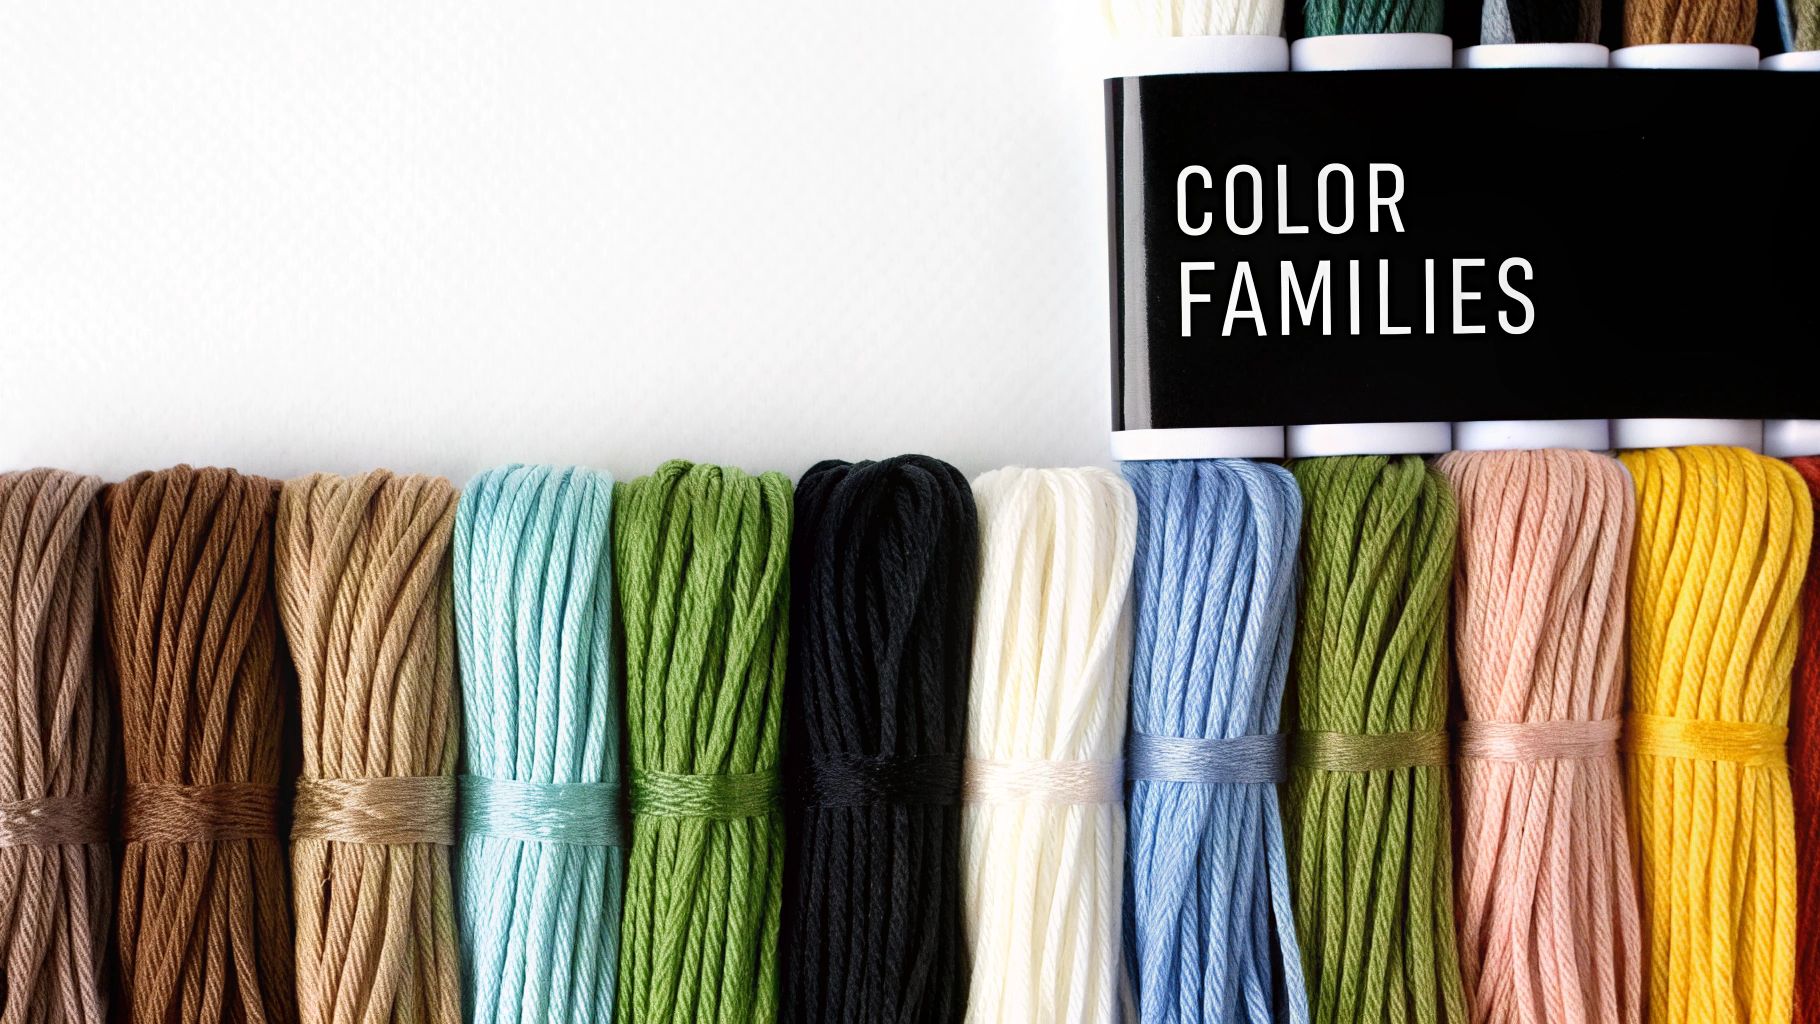
When you first look at the color key on a DMC pattern, it might just seem like a random list of numbers. But it’s actually a brilliant, highly organized system—think of it as a universal language that connects every cross-stitch pattern to that huge wall of colorful floss at the craft store. Once you crack the code, you'll go from simply following a pattern to making your own creative choices.
At its heart, the DMC system groups colors into logical families. It’s surprisingly intuitive. Imagine walking into a paint store where all the blues are in one aisle and all the greens are in another. DMC does the same thing with its numbering. This setup doesn't just make it easier to find the color you need; it empowers you to pick subtle variations for shading and blending, which is where the real artistry begins.
 DMC threads organized by color">
Decoding the Color Families
The standard DMC cotton floss line, with numbers running from 1 to 3866, is where you'll spend most of your time. While the numbers aren't perfectly sequential, they are clustered together by color group. Getting a feel for these clusters is the first real step to mastering your thread collection.
For instance, if a pattern calls for DMC 798, you'll quickly learn that it's a deep delft blue. Need a slightly lighter shade for a highlight? You can instinctively look at nearby numbers like 799 (a medium version) or 800 (a pale version) to find the perfect companion without having to guess. This numerical logic is a total game-changer for adding depth to your work.
Here’s a quick look at some of the common color families:
- 300s: This range is full of rich, earthy browns, rusts, and deep greens—absolutely perfect for stitching landscapes and nature scenes.
- 600s: Here you’ll find all the vibrant pinks and reds. Think florals, hearts, or any design that needs a bold pop of color.
- 800s: This is classic blue territory, home to everything from pale sky blues to deep, moody navy tones.
- 900s: A sunny and warm series packed with a huge variety of oranges, yellows, and golds that bring life to any pattern.
Understanding these groupings transforms your thread stash from a chaotic jumble into an organized palette. It allows you to anticipate what a color will look like just by its number and helps you make smart substitutions when you don't have the exact shade a pattern calls for.
Exploring Specialty Threads for Extra Flair
Beyond the standard cotton, DMC has a whole world of specialty threads that can bring amazing textures and effects to your cross stitch patterns dmc. These threads have their own unique numbering systems that set them apart from the regular cottons. Learning to sprinkle them into your work is a super easy way to elevate a simple design into something truly special.
If you want to dive deeper, we break down every floss number in our detailed overview of DMC embroidery floss numbers. It's a fantastic reference to keep handy.
Three Types of Specialty Threads to Know
Adding a touch of sparkle or a unique color blend is simple with these popular options. Each one offers a different artistic effect, giving you the power to customize your projects with a professional-looking finish.
- Light Effects (E Series): These are your go-to threads for anything that needs to shine. They have an "E" in front of their number (like E3821 for a brilliant gold) and include everything from metallics and pearlescents to glow-in-the-dark options. They’re perfect for adding a little magic to holiday ornaments or a shimmer to fantasy pieces.
- Variegated (4000 Series): These threads are incredible. They subtly change color along a single strand, but all within the same color family. For example, a blue variegated floss might gently shift from light blue to medium blue and back again. This creates a beautifully blended effect that’s amazing for stitching water, skies, or textured backgrounds without having to constantly switch colors.
- Coloris (4500 Series): Think of these as variegated thread's wild cousin. Coloris threads take it a step further by blending four distinct, complementary colors into one strand. A single thread might flow from pink to orange to yellow, creating a vibrant, confetti-like look with every stitch. This is fantastic for filling in letters, borders, or any area where you want a playful burst of color.
How to Choose the Right Cross Stitch Pattern
Finding the perfect cross stitch patterns dmc can feel a bit like searching for a needle in a haystack, especially when you're just starting out. It's easy to fall for a pretty picture, but the real key is learning how to look past the finished design and understand what it will actually be like to stitch. A piece that looks deceptively simple at a glance might hide some surprisingly tricky techniques.
Think of yourself as a detective investigating a case. The pattern's stats—the number of colors, the types of stitches, the fabric it calls for—are your first and most important clues. These details tell a much richer story about the stitching experience than the cover photo ever could. By looking at these elements, you can find a pattern that’s a perfect match for your skill level and your personal style.
Evaluate the True Complexity
Don't let the finished image fool you. A gorgeous, highly detailed design might seem intimidating but be surprisingly straightforward, while a seemingly basic one could be loaded with fussy stitches. To really know what you're getting into, you need to dig into three key factors listed on the pattern’s info page.
-
Total Color Count: This is a big one. A pattern with fewer than 15 colors is usually a great starting point for beginners. Once you get into projects with 50 or more colors, you'll be doing a lot more stopping and starting to change threads, which really ramps up the complexity.
-
Stitch Types: Look beyond the basic "X." Does the pattern call for more than just full cross stitches? The minute you see fractional stitches (like quarter or three-quarter stitches) or backstitching, you know you're dealing with a design that requires more precision for those fine details. They’re not impossible, but they can be a hurdle for newcomers.
-
Fabric Count: The recommended fabric count (you'll see things like 14-count or 18-count Aida) tells you how big or small your stitches will be. A higher count means tinier stitches. While this creates a beautifully detailed result, it can also be a lot tougher on the eyes.
By checking these three things, you get a much more realistic preview of the project's difficulty before you spend a dime.
Before you jump into a new project, a quick check of its core components can tell you everything you need to know. This table gives you a simple way to size up a pattern's difficulty at a glance.
Pattern Complexity at a Glance
| Difficulty Level | Number of Colors | Stitch Types | Fabric Count (Typical) |
|---|---|---|---|
| Beginner | Under 15 | Full cross stitch only | 11-count to 14-count |
| Intermediate | 15-40 | Full stitches, backstitching | 14-count to 16-count |
| Advanced | 40-60 | Full, fractional, backstitch | 16-count to 18-count |
| Expert | 60+ | All stitch types, beading | 18-count and higher |
Think of this as a quick reference guide. It helps you align a pattern's demands with your current comfort level, ensuring you pick a project that’s enjoyably challenging, not frustrating.
Matching Pattern Style to Your Taste
Beyond the technical stuff, the pattern’s style is what will keep you motivated. You're going to spend hours, maybe even weeks or months, with this project, so you have to genuinely love how it looks.
For instance, a full-coverage piece is one where stitches cover the entire fabric, creating a rich, tapestry-like effect that almost looks like a painting. These are serious commitments—often large and complex—but the payoff is a breathtaking piece of art.
On the other end of the spectrum are modern or graphic styles. These often use a limited color palette and leave plenty of unstitched fabric (known as negative space) to create a clean, minimalist vibe. They tend to be much quicker to finish and look fantastic in contemporary home decor. Of course, there are countless other styles too, from traditional samplers to cute characters and intricate mandalas.
Remember, the best pattern for you is one that you're genuinely excited to stitch. Don't choose a project just because it seems "easy" or "impressive"—pick one that speaks to your personal style and brings you joy.
Where to Source Your Patterns
So, you know what you’re looking for. Now, where do you find it? You generally have two paths: all-inclusive kits or digital PDF downloads. Kits are fantastic for beginners because they remove all the guesswork, providing the fabric, pre-sorted DMC floss, needles, and the pattern itself.
Digital patterns, however, offer instant gratification and way more flexibility. The cross stitch world has fully embraced them. In fact, a survey of over 5,000 stitchers found that a whopping 78% prefer buying downloadable PDF patterns. The top reasons? Immediate access after purchase (65%), the ability to use markup apps on a tablet (42%), and the freedom to pick their own materials (38%). You can dive into all the details in the insightful 2021 cross stitch survey results.
Whether you opt for the convenience of a kit or the customizability of a PDF, there are thousands of incredible cross stitch patterns dmc out there from talented designers. Taking a little time to choose wisely is the first step toward a rewarding experience, from the very first stitch to the very last.
Turn Any Photo into a Pattern with Pic2Pat
https://www.youtube.com/embed/tSHI2om0Py0
There are thousands of beautiful, pre-made cross-stitch patterns out there. But sometimes, the most special project is the one that's completely your own. Think about turning a treasured family photo, a breathtaking vacation snapshot, or a picture of your beloved pet into a piece of stitched art. That's exactly where pattern generators come in, and one of the most user-friendly tools for the job is Pic2Pat.
This free online tool is like a digital translator for stitchers. It takes the pixels from your photograph and converts them into a grid of cross-stitch symbols, automatically matching the colors in your image to the closest shades in the massive DMC thread library.
You don't need any fancy design software or artistic skills. You just upload a picture, and Pic2Pat creates the blueprint for a project that is uniquely yours.
How to Use the Pic2Pat Pattern Maker
Turning a photo into a pattern with Pic2Pat is surprisingly simple. The website walks you through a few key decisions that will shape the final look, size, and detail of your project. Each choice is a bit of a creative trade-off, letting you balance photorealism with stitching simplicity.
Here’s a quick look at the straightforward interface on the Pic2Pat website.
As you can see, you only need to provide a few key details to get started.
The entire process boils down to just a few intuitive steps to get your downloadable PDF pattern.
- Upload Your Image: Start with the best photo you have. Clear subjects, good lighting, and sharp contrast will always give you a better result. A blurry, low-resolution picture will probably end up looking a bit "muddy" as a pattern.
- Choose Your Fabric and Stitch Size: Pick the fabric count you want to work with (like 14-count Aida) and the final dimensions. These two settings work together to determine the finished size of your piece.
- Select the Maximum Number of Colors: This is your biggest creative decision. Using fewer colors creates a more stylized, graphic look that's much faster to stitch. A higher color count will give you a more detailed, photorealistic result, but be prepared for more thread changes and a bigger time investment.
The real magic here is in the color mapping. A low color count can create a cool, artistic effect. A high color count, on the other hand, captures all the subtle shading and detail from your original photo.
Understanding the Generated PDF Pattern
After you've made your choices, Pic2Pat generates a PDF file you can download instantly. This document is your complete guide to stitching the project. Inside, you'll find a multi-page chart with symbols, a full DMC color key listing every thread number you need, and even an estimate of how many skeins of each color to buy.
On a technical level, tools like Pic2Pat use something called color quantization algorithms. These smart programs analyze all the colors in your photo and intelligently reduce them to the closest matches within the DMC library of over 500 shades, assigning a specific DMC number to each tiny square on the grid.
If you're interested in diving deeper, we have a complete guide on how to turn a photo into a cross stitch pattern with lots of tips for getting the best possible results. Once you get the hang of it, you’ll unlock a whole new world of creative possibilities, making every stitch deeply personal.
Building Your Project Kit from a Digital Pattern
You've got your digital DMC cross-stitch pattern file—the blueprint for your next masterpiece. But a blueprint is just the start. Now for the fun part: gathering your materials and building your very own kit. Assembling everything yourself from a PDF is incredibly rewarding. It puts you in the driver's seat, giving you total control over the quality of every single component, from the canvas to the last strand of floss.
Think of it like being a chef prepping your ingredients before tackling a new recipe. When you gather your fabric, floss, and tools upfront, you set yourself up for a smooth, uninterrupted stitching session. No more frustrating mid-project dashes to the craft store because you ran out of a key color.
Calculating and Choosing Your Fabric
First things first: you need to pick the right fabric and cut it to the right size. This is probably the most critical decision you'll make, as it affects the project's final dimensions, the clarity of the details, and the overall feel of the finished piece. The big three are Aida, Evenweave, and Linen, and each offers a unique texture and stitching experience.
The most important number to understand here is the fabric’s count. This simply tells you how many stitches you can fit into one inch of fabric. Aida, the go-to for many stitchers, commonly comes in counts like 11, 14, 16, and 18. The higher the count, the smaller your stitches will be.
For example, a design that's 140 stitches wide will measure 10 inches on 14-count Aida (140 stitches ÷ 14 per inch = 10). But stitch that same design on 18-count Aida, and it shrinks to about 7.7 inches (140 ÷ 18 ≈ 7.7). Getting a handle on this simple math is key to making sure your finished piece ends up the size you planned. If you want to dive deeper into how this works, check out this complete guide to Aida cloth.
Here's a golden rule every stitcher lives by: always add a border of at least three inches on all four sides of your design area. This extra fabric is essential for clamping it into a hoop or frame while you work and gives a professional framer enough material to work with later on.
Gathering Your DMC Floss
Okay, fabric is sorted. Now, let's look at your pattern's color key. This is your shopping list for all the DMC floss you’ll need. Every number on that list corresponds to a specific color skein that's waiting for you at the craft store.
Figuring out how much floss to buy can feel like guesswork, but many modern patterns now include a stitch count for each color, which helps a lot. If yours doesn't, here are a few solid rules of thumb:
- For most colors, one skein is plenty. A standard DMC skein will give you around 2,000 stitches if you're using two strands on 14-count Aida.
- Check the stitch count if you have one. If a color's count is over 2,000, you’ll definitely need to grab a second skein.
- Buy extra for backgrounds. If a color is used for a large, solid area like a sky or background, it's always smart to buy an extra skein from the start. Trust me, there's nothing worse than playing "thread chicken" and losing.
Assembling Your Essential Tools
Last but not least, let's pull together the tools that make stitching a joy. These are the basics that will round out your custom kit and get you ready for that satisfying first stitch.
- Needles: Tapestry needles are what you want. A size 24 needle is the perfect partner for 14-count Aida, while a slightly finer size 26 works better for higher-count fabrics like 16 or 18-count.
- Hoop or Frame: Whether you prefer a classic wooden hoop or a Q-Snap frame, you need something to keep your fabric pulled taut. This is the secret to beautifully even stitches and prevents the fabric from puckering.
- Scissors: A small, sharp pair of embroidery scissors is a must-have for snipping threads cleanly and close to the fabric.
And that's it! With your fabric cut, your threads organized, and your tools ready, you’ve officially turned a simple digital file into a complete, personalized project kit. You're all set to get started.
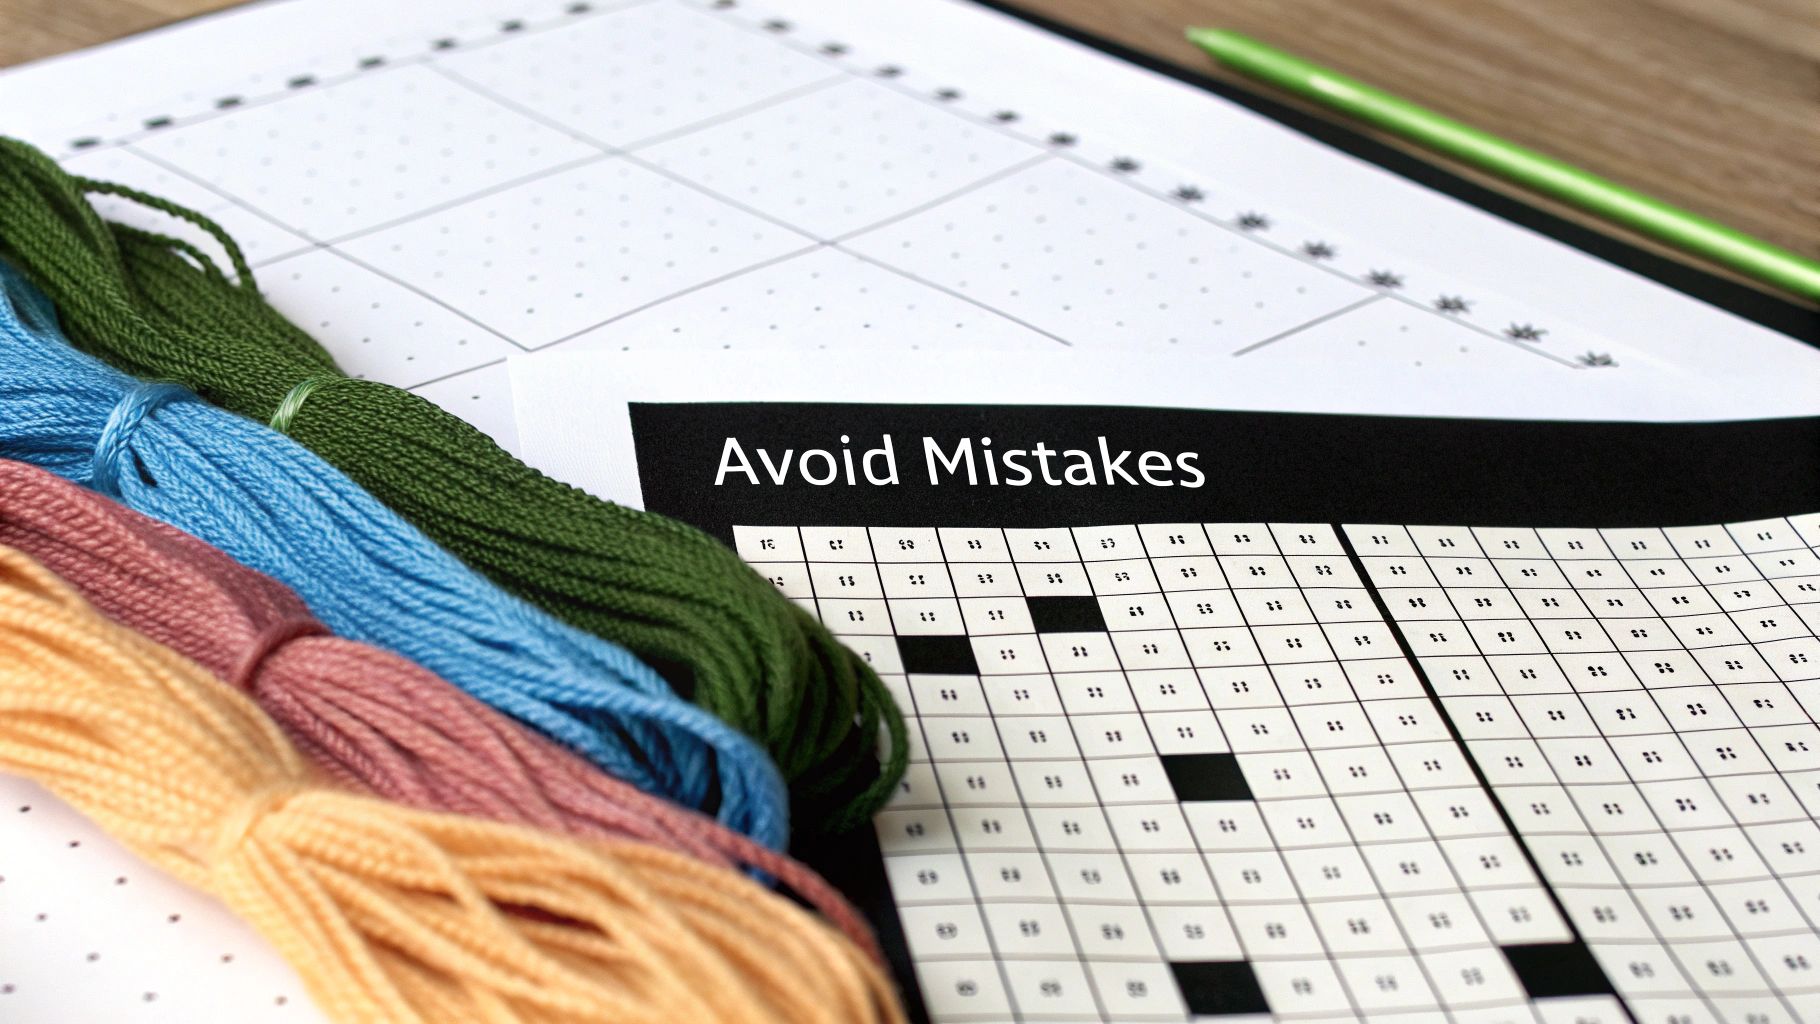
Common Mistakes to Avoid with DMC Patterns
Even the most experienced stitchers hit a snag now and then. While working with detailed DMC cross-stitch patterns is incredibly rewarding, a few common slip-ups can turn a fun project into a frustrating one. The good news? These issues are almost always preventable with a little bit of know-how.
Think of this as learning the craft's unwritten rules. Once you know where the common pitfalls are—from misreading a busy chart to cutting your fabric way too small—you can set yourself up for a much smoother stitching session. Let's walk through those classic "if only I had known" moments so you can avoid them entirely.
Misreading the Pattern Chart
When you're staring at a dense, full-coverage pattern, it's easy for your eyes to play tricks on you. The symbols for similar colors can look almost identical. For example, a black circle might stand for DMC 310, but a filled-in black square could be DMC 3799, a very dark grey. A simple mix-up like that can completely throw off the shading and intricate details of your design.
To get around this, a lot of stitchers print their patterns and use a highlighter to mark off sections as they go. It’s a simple but effective trick that gives you a clear visual of what you've done and where you're headed next.
On bigger, more complex projects, just keeping your place on the chart can be a huge challenge. This is where a technique called 'gridding' becomes a lifesaver. Many stitchers will draw or stitch a 10x10 grid onto their fabric that matches the grid on their pattern. In fact, a survey found that 85% of stitchers use gridding for projects over 50,000 stitches because it slashes counting errors. You can learn all about this game-changing method and see how to grid your cross stitch fabric.
Mastering Your Thread Tension
Another classic hurdle is getting your thread tension just right. Pull your stitches too tight, and the fabric will start to pucker and warp. But if they're too loose, the stitches will look sloppy and might even snag later on. You're looking for that sweet spot where every stitch lies perfectly flat and smooth against the fabric.
The ideal stitch tension is gentle but firm. Your thread should lay smoothly on top of the fabric without distorting the weave. Using an embroidery hoop or frame is the best way to maintain consistent tension across the entire project.
Substituting DMC Colors Incorrectly
We've all been there—you're ready to start a new color and realize you don't have the exact DMC floss on hand. While substituting can work, it's more of an art than a science. A frequent mistake is grabbing a color that seems close but has the wrong undertone, like swapping a warm grey for a cool one.
- Do use a DMC color card or a trusted online conversion chart to find the absolute closest match.
- Don't substitute colors in critical areas, like faces or focal points, unless you're very confident in your choice.
- Do test your substitute floss first. Stitch a small patch on scrap fabric next to the colors it will be touching to see how they look together.
Ignoring Fabric Margins
Finally, maybe the most heartbreaking mistake of all is finishing a project you’ve poured hours into, only to realize you didn't leave enough fabric around the edges for framing. Cutting your fabric just to the size of the stitched area is a recipe for disaster.
The golden rule here is to always add a minimum of three inches of extra fabric on all four sides of your design. This gives you plenty of room to mount the project in a hoop while you work and, more importantly, gives a professional framer enough material to properly stretch and secure your masterpiece. A quick measurement at the beginning saves a massive headache at the end.
Common Questions About DMC Patterns
As you dive into the world of DMC cross-stitch, a few questions are bound to pop up. It happens to everyone, whether you're a beginner trying to make sense of a new pattern or a seasoned stitcher taking on a more ambitious design. Getting those answers quickly means you can get back to what you love: the stitching itself.
Think of this as your go-to guide for those little hiccups that can interrupt your flow. We'll cover everything from cleaning your finished piece to figuring out just how many strands of thread to use.
Can I Wash My Finished DMC Project?
Yes, absolutely! In fact, giving your finished piece a gentle wash is a crucial final step. Hand washing in cool water with a mild soap will wash away any oils from your hands, dust, or marks left by your hoop. It really makes the final product look crisp and professional.
And don't worry about the colors running. DMC's cotton embroidery floss is 100% colorfast, so all those beautiful, vibrant shades will stay right where they're supposed to.
Once it's clean, gently roll your project in a towel to soak up most of the water, then lay it flat to dry. If you see any wrinkles, you can press it with an iron on a low setting—just be sure to do it from the back with a towel in between to protect your stitches. Then, it's ready for framing!
Washing is that final, professional touch. It cleans the fabric and helps all your stitches settle in perfectly, giving your artwork the polished look it deserves.
How Many Strands of DMC Floss Should I Use?
This is a classic question, and the answer almost always comes down to your fabric count. What you're aiming for is nice, full stitches that cover the fabric underneath, but not so thick that they look bulky or are a struggle to pull through the holes.
Here’s a quick-and-easy guide that most stitchers rely on:
- 11-Count Aida: Use 3 strands.
- 14-Count Aida: Use 2 strands.
- 16-Count Aida: Use 2 strands.
- 18-Count Aida: Use 1 or 2 strands. Two gives you fuller coverage, while one creates a more delicate, detailed look.
Of course, always peek at your pattern's instructions first. The designer might have a specific recommendation to create a unique texture or effect.
Ready to turn a cherished photo into a stitched masterpiece? At Cross Stitched, we transform your favorite pictures into custom cross-stitch kits. You bring the memory, and we’ll handle the rest—from premium DMC floss to high-quality fabric. Start designing your personalized kit today at cross-stitched.com.


