

Welcome to the wonderfully relaxing world of cross stitch! If you're an adult looking for a creative escape, you've found the perfect craft. The absolute best way to get started is with a high-quality kit. A good cross stitch kit for beginners adults includes everything you need, turning what could feel like an intimidating first step into a genuinely joyful experience.
Your Guide to Starting a New Creative Hobby
Jumping into a new hobby should be all about the fun, not the stress. Cross stitch is this amazing blend of art and mindfulness, where you get to create something beautiful and tangible, one simple stitch at a time. It’s a fantastic way to unplug, de-stress, and quiet your mind.
The repetitive, rhythmic motion of stitching is incredibly calming—almost like a form of meditation. Plus, the satisfaction you get from watching your design slowly appear on the blank canvas is just so rewarding.
But let's be real: where do you even begin? Staring at walls of different threads, fabrics, and patterns can feel overwhelming. That’s exactly why a curated kit is your best friend. It takes all the guesswork out of the equation.
Think of a beginner's kit as a "creative recipe box." It gives you all the pre-measured ingredients (floss, fabric, needle) and a clear set of instructions (the pattern) so your first project is a guaranteed success.
Why a Kit Is the Best Starting Point
Opting for a kit makes getting into this wonderful craft so much easier. Instead of spending hours hunting down individual supplies, you can get right to the fun part: stitching! Just like knowing a good photography starter kit for beginners has everything you need provides confidence for a new photographer, a cross stitch kit does the same for a new stitcher.
Think of this guide as your personal roadmap. We’ll walk through:
- What all the different components inside your first kit are.
- How to pick a design that excites you but won't be too tricky.
- Mastering the basic stitches you need to bring your design to life.
By the time you're done reading, you'll know exactly how to choose the perfect kit and start your journey. For a closer look at the fundamentals, check out our guide on learning to cross stitch for more foundational tips.
What’s Inside Your First Cross Stitch Kit?
Opening your first cross stitch kit for beginners adults is a little like unboxing a creative puzzle. You’ll see a collection of materials that might seem a bit random at first, but trust me, every single item has a purpose. Getting to know your tools is the first real step in turning that blank fabric into a piece of art.
Think of it as a complete "recipe" for your project. The kit gives you all the ingredients and a set of instructions, so you can focus on the fun part: the stitching. Let's walk through what you'll find inside so you can feel ready to go from the moment you open the box.
The Foundation: Aida Fabric
The most important piece you'll pull out is the Aida fabric. This is a special cotton fabric cleverly woven into a grid of tiny squares, which makes it the ideal canvas for cross stitch. That grid is your best friend—it shows you exactly where each stitch goes.
Aida fabric comes in different "counts," which is just a simple way of saying how many squares, or stitches, you can fit into one inch of fabric.
This image shows how all the different materials and design choices come together in one convenient package when you buy a cross stitch kit.
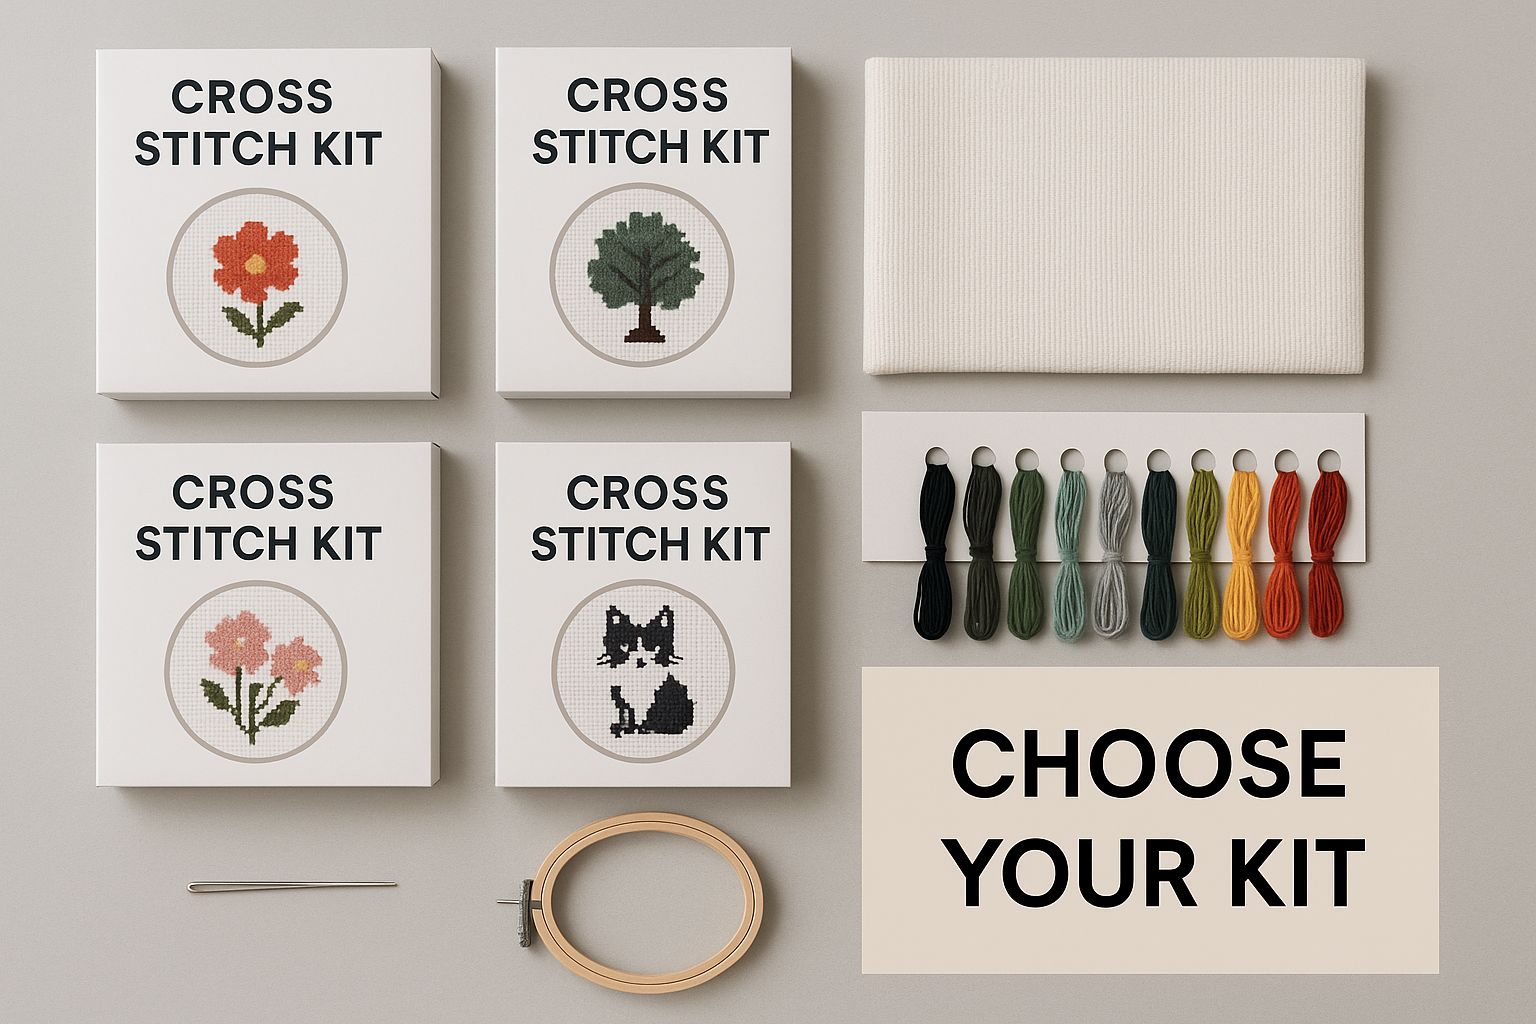
As the visual points out, a good beginner kit bundles everything together, taking the guesswork out of getting started.
Most kits made for beginners will come with 14-count Aida. It’s the go-to for a reason. With 14 stitches per inch, the holes are big enough to see easily and the stitches are large enough to handle without feeling clumsy. It’s the perfect balance. If you're curious about different fabric types, you can find a great overview of Aida counts that explains why 14-count is such a popular choice.
Your Color Palette: Embroidery Floss
Next, you’ll find a vibrant collection of threads. This is your embroidery floss, and it’s what you’ll use to actually make the stitches that create the image. The colors in your kit are all pre-selected and measured out to perfectly match the design.
Typically, each color is numbered and linked to a symbol on your pattern. High-quality kits often include floss from brands like DMC, which is famous for its brilliant, non-fading colors and smooth texture.
Having the floss sorted and ready is a massive perk for beginners. It saves you from standing in a craft store aisle feeling overwhelmed by a wall of hundreds of colors. The kit gives you exactly what you need, no more, no less.
Your Stitching Toolkit
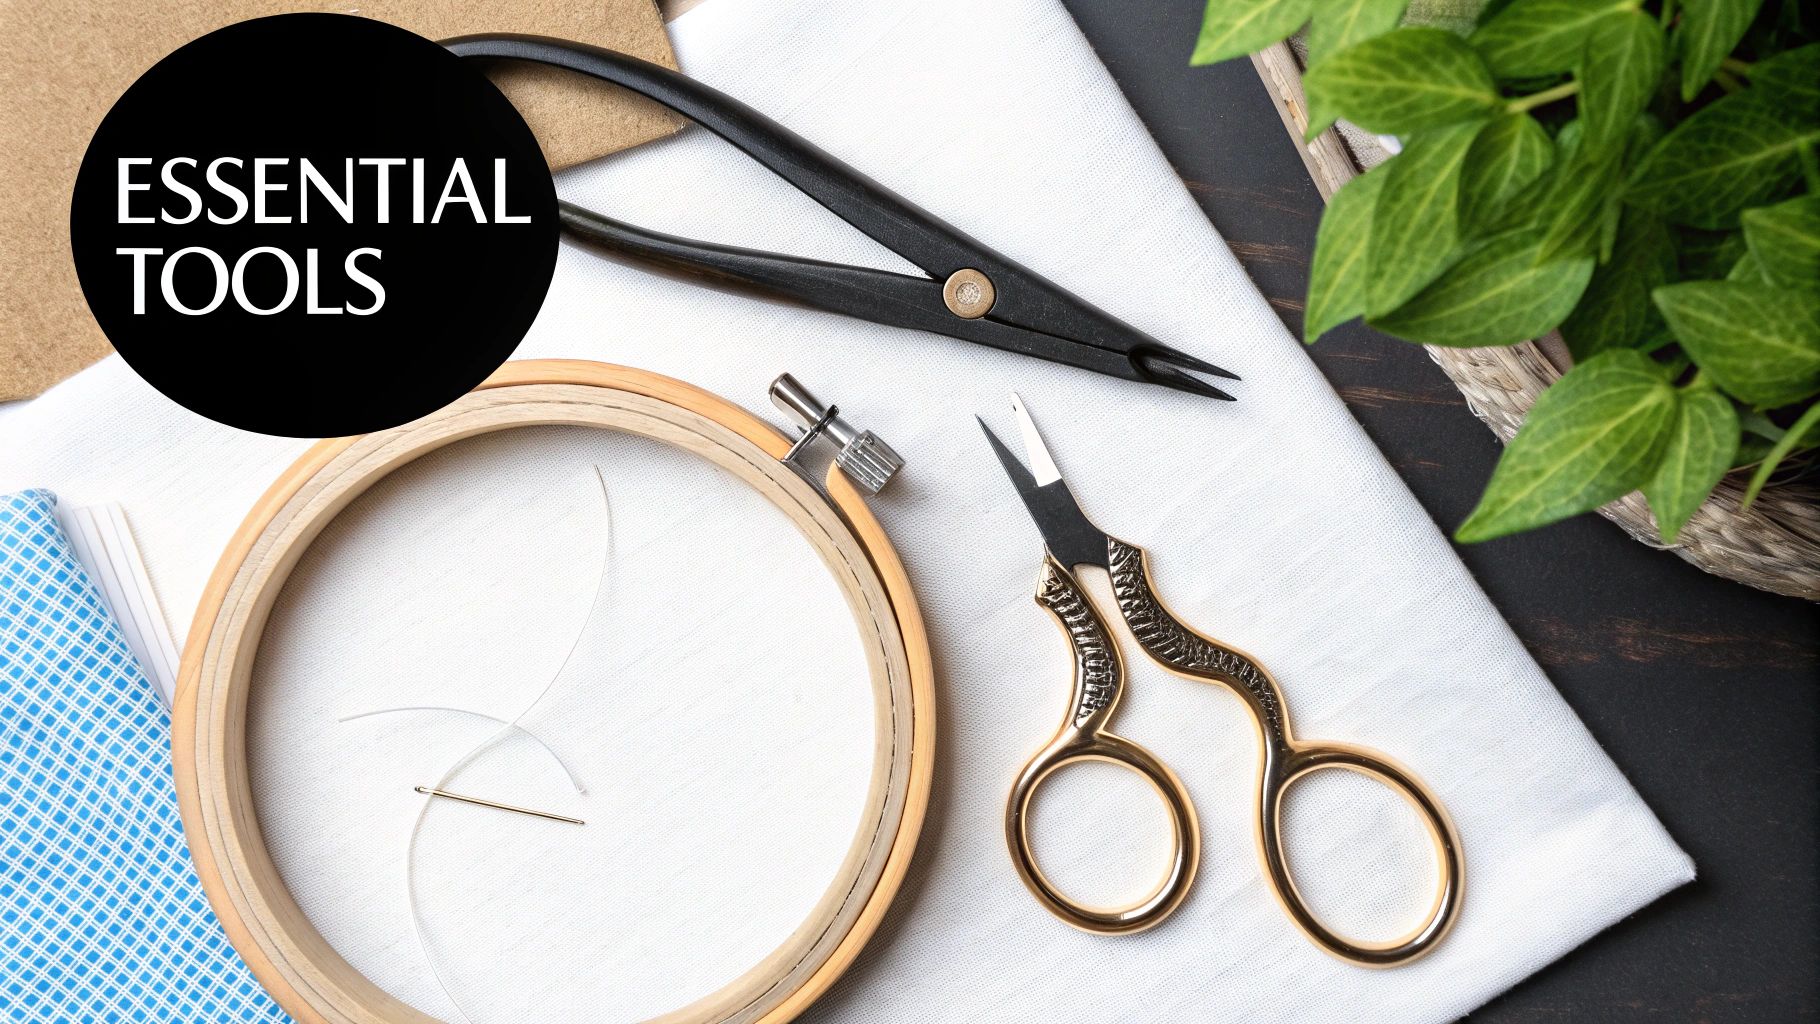
Of course, you can't stitch without a few key tools. Your kit will almost always include these essentials.
To make things even clearer, here’s a quick breakdown of what each component is and why it's so helpful when you're just starting out.
Beginner Cross Stitch Kit Components Explained
| Component | What It Is | Why It's Important for Beginners |
|---|---|---|
| Aida Fabric | A cotton fabric woven in a grid-like pattern. | The grid makes it easy to see where to place your stitches, ensuring they are uniform and neat. |
| Embroidery Floss | Colorful six-strand cotton thread used for stitching. | Kits provide the exact pre-sorted colors and amounts needed, removing the guesswork. |
| Tapestry Needles | Needles with a large eye and a blunt tip. | The large eye makes threading simple, and the blunt tip helps you glide through fabric holes without splitting them. |
| Pattern Chart | A printed grid with symbols representing different floss colors. | This is your map! It tells you exactly which color to use and where to stitch it. |
| Embroidery Hoop | A ring (often wood or plastic) that holds the fabric tight. | It keeps your fabric taut, which helps you make more even stitches and prevents hand cramps. |
With these core components demystified, you're more than halfway there. You now know what each piece does and how it contributes to the finished project. It’s time to turn that box of supplies into your very first masterpiece.
How to Choose the Right Beginner Kit for You
With so many gorgeous patterns out there, just picking your first project can feel like the biggest hurdle. Finding the perfect cross stitch kit for beginners adults is really just about matching the project to your own style and, most importantly, ensuring it’s not too overwhelming. Let's walk through what to look for so your first stitching experience is a joy, not a headache.
Think of it like choosing your first hiking trail. You want a path with beautiful views that’s easy to navigate, not a treacherous mountain climb that leaves you wanting to quit.
Assess the Design Complexity
The most critical element is the design itself. A simple, charming pattern will build your confidence like nothing else, while a massive, intricate one might just leave you tangled in thread and frustration. As you browse, keep an eye out for these beginner-friendly signs.
- Limited Color Palette: Look for kits with fewer than 15 colors. This means you’ll spend more time getting into the relaxing rhythm of stitching and less time fumbling to switch threads.
- Blocky Shapes: Designs with large, solid blocks of color are much easier to follow than patterns with tons of tiny, scattered "confetti" stitches.
- Minimal Backstitching: This is an outlining stitch that adds detail, but it can be a bit fiddly when you're just starting. A design that uses it sparingly (or not at all) is a great choice.
This isn’t about dumbing it down; it’s about setting yourself up for success. You wouldn’t try to bake a five-tiered wedding cake for your first-ever baking project, right? Same idea here.
Consider Project Size and Scope
Smaller is definitely better when you're new. A project that fits neatly into a 4- or 5-inch embroidery hoop is perfect. Why? Because you’ll actually finish it!
That feeling of completing your first piece, even a small one, is a huge motivator. Finishing a little design in a week or two feels so much better than staring at a giant, half-finished canvas for months on end.
A quick win is powerful. Finishing your first project quickly builds momentum and proves that you can do this, inspiring you to take on bigger challenges next time.
Understanding Your Budget
The good news is that cross stitch is a wonderfully affordable hobby. While you can find elaborate, high-end kits, the average beginner's cross-stitch kit is incredibly budget-friendly, usually falling somewhere between $15 and $40.
These all-in-one packages are designed for newcomers, giving you all the essentials—fabric, floss, a needle, and the pattern—to get started right away. You can explore the huge variety and accessibility of modern craft kits available online to see just how much is out there.
Time to Get Stitching: Your First 'X'
You've got your kit, everything's laid out, and now it's time for the best part—making that very first stitch. Don't worry if it feels a little awkward at first; think of it like learning to write your name. You start by carefully forming each letter, but before you know it, it becomes second nature.
That's exactly what cross stitching is like. It's a simple, two-part move that you'll get the hang of in no time. This is where the real magic happens.
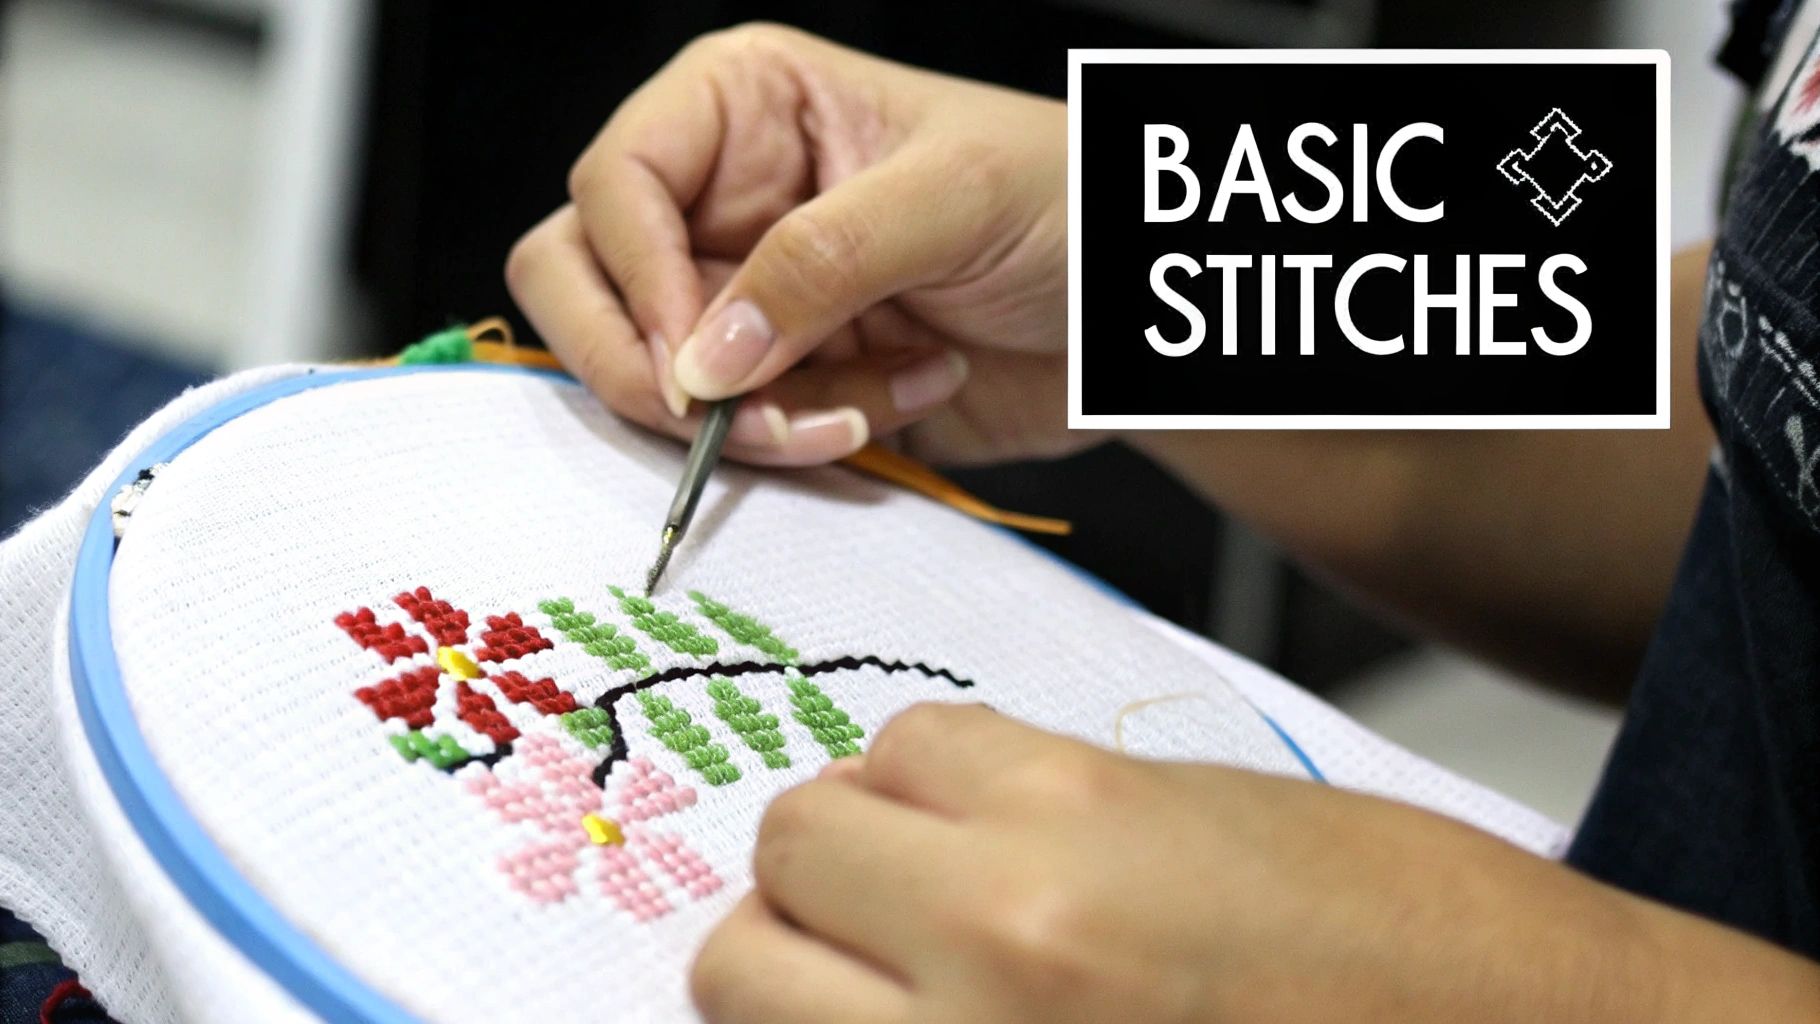
Making the Perfect 'X' Stitch
At its heart, a cross stitch is just two tiny diagonal stitches crossing over each other. That’s it! The real secret to a project that looks polished and professional is just consistency. You want all your top stitches to lie in the same direction.
Here’s the easiest way to jump in:
- Prep Your Floss: Most embroidery floss is made of six individual strands. Your pattern instructions will specify how many to use, but two strands is the standard for 14-count Aida cloth. Gently separate two strands from the main thread.
- Thread Your Needle: Guide your two strands through the eye of the needle. A little trick is to avoid knotting the end—we'll use a much cleaner method to start.
- Make the First Leg: Bring the needle up from the back of the fabric through a hole in the bottom-left corner of one square. Next, guide it down through the hole in the top-right corner. You've just made a diagonal stitch: /
- Complete the 'X': Now, bring the needle back up through the bottom-right hole and finally down through the top-left hole. And there you have it—your first 'X'!
Congratulations, you're officially a cross stitcher! For rows with the same color, a great time-saver is to complete all the bottom stitches first (like this: ////) and then work your way back across the row to complete the top stitches (\\). This uses less thread and keeps things moving smoothly.
Starting and Ending Your Thread Without Knots
How you begin and end a thread is just as important as the stitches themselves. A messy back can create bumps that show through on the front. While tying a knot seems like the obvious choice, it actually adds bulk and can come undone over time.
A clean back is a hallmark of skilled stitching. Securing your threads without knots ensures your finished piece lays flat and looks polished when framed.
A fantastic, beginner-friendly trick is the loop start. This only works when you're using an even number of strands (like two!). Take one long strand, fold it in half, and thread the two cut ends through your needle, leaving a loop at the other end.
Bring your needle up from the back of the fabric, but don't pull the thread all the way through; leave the small loop on the back. Once you make your first half-stitch, just pass your needle through that loop on the back and pull it snug. It’s a secure, knot-free start!
When you're ready to end your thread, just weave the needle under three or four finished stitches on the back of your work before snipping the extra thread. If you're looking for more great habits to build, check out these cross stitch tips for beginners.
Common Beginner Mistakes and How to Fix Them
Every new stitcher hits a few snags along the way—it's all part of the learning process! Don't get discouraged if your work isn't perfect right away. Here’s a quick guide to some of the most common issues and how to easily solve them.
| Common Mistake | What It Looks Like | Simple Solution |
|---|---|---|
| Uneven Tension | Some stitches are tight and pucker the fabric; others are loose and loopy. | Aim for stitches that lay flat on the fabric without pulling it. Let the needle and thread do the work without yanking them tight. |
| Inconsistent Stitch Direction | The 'X's look jumbled because the top legs of your stitches go in different directions. | Pick one direction for your top stitch (e.g., bottom-right to top-left) and stick with it for the entire project. |
| Knotted Floss (aka "Thread Nests") | The thread tangles into a frustrating knot on the back of your fabric as you pull it through. | Let your needle dangle every few stitches to allow the thread to unwind. Using shorter lengths of floss (about 18 inches) also helps. |
| Losing Your Place on the Chart | You realize you've stitched a section in the wrong spot or used the wrong color. | Use a highlighter or pencil to mark off sections of the pattern as you complete them. If you do make a mistake, carefully snip the stitches with small scissors and remove them. |
Remember, practice is the key. Every stitch you make builds your muscle memory and confidence. Before you know it, these little fixes will become second nature
Making the Project Uniquely Yours
Once you've finished that first project, you get it. A cross stitch kit for beginners adults isn't just a box of supplies with instructions—it's a starting point. The pattern is your road map, but you're the one driving. This is where the real creativity kicks in, where you can start injecting your own personality into every stitch.
Think of it like learning the basic chords on a guitar. Once you know them, you can start playing your own tunes. The easiest way to start is by simply changing the floss colors. If the pattern shows a blue flower but you're more of a purple person, go for it! That one tiny swap makes the design feel like it’s truly yours.
Another simple trick is to weave in small, personal details. Stitched a cute little landscape? Why not hide your initials or a special date in the tree trunks? If you've just finished an animal pattern, maybe add a tiny bow or give it different colored eyes. It’s these little touches that turn a standard pattern into a treasured keepsake.
Experimenting with Your Materials
Don't let your creativity stop with the thread, though. The fabric itself is a blank canvas just waiting for your ideas. Most beginner kits come with standard white or off-white Aida cloth, but swapping that for a colored fabric can totally transform the vibe of your piece. A starry night scene stitched on deep navy blue Aida, for instance, just pops in a way it never could on plain white.
You can even take it a step further and customize the fabric yourself. A really fun trend right now is dyeing your own Aida cloth to create totally unique, one-of-a-kind backgrounds. This approach treats the standard 14-count Aida not as a boring necessity but as part of the art itself. Seeing the fabric as another creative opportunity is what makes cross-stitch such a fantastic hobby for adults. You can discover more about custom dyeing techniques and see just how easy it is to try.
Your kit provides the blueprint, but you are the architect. Don't be afraid to change the colors, add a personal touch, or even alter the background fabric. This is your art, and making it your own is the most rewarding part of the process.
Simple Ideas for Your Next Project
Ready to get a little more adventurous? Here are a few easy ways to put your own spin on your next project without getting in over your head:
- Create a Color Gradient: Instead of using one solid color for something like the sky or a lake, try blending a few similar shades together. Use a dark, medium, and light blue to create a beautiful ombré effect.
- Add Metallic or Variegated Threads: Swap out one of the suggested floss colors for a shiny metallic thread or a variegated one that changes color as you stitch. It’s an instant way to add a little sparkle and texture.
- Personalize with Text: Add a name, an important date, or a short quote to a pattern. This is a perfect way to turn a simple design into a custom gift for a wedding, birthday, or anniversary.
These are all simple changes that don’t require a ton of experience, but they make a world of difference. You're building on the skills you learned from that first kit and starting the journey from following instructions to becoming a true creator.
How to Finish and Display Your New Artwork
You’ve tied off the last thread and your first piece is done—what a feeling! After all those hours you’ve poured into your project, the final step is to give it a little polish before you show it off.
First, let's get it clean. Even with the cleanest hands, natural oils and a bit of dust can find their way onto your fabric as you stitch. A gentle hand wash is all it takes to freshen it up.
Just grab a basin of lukewarm water with a tiny bit of mild soap, swish your project around gently, and then rinse it well with cool, clean water.
To dry it, lay your piece flat on a clean, fluffy towel. Roll it up like a burrito and give it a good squeeze to soak up the extra water. Whatever you do, don't wring it out! That’s a surefire way to warp your perfect stitches.
Preparing for Display
While your piece is still a little damp, it's time to iron out any stubborn wrinkles or hoop marks. Place your cross stitch face down on a clean, thick towel and press it from the back with your iron on a low to medium heat setting.
The towel acts as a cushion, protecting your stitches from getting squashed flat while the iron works its magic. This simple wash-and-press routine makes a world of difference, giving your project a crisp, professional look. For more advanced methods, like mounting your work, check out our in-depth guide to cross stitch finishing techniques.
Finishing your cross stitch is like adding the final coat of varnish to a painting. It protects your work and enhances its beauty, ensuring all your time and effort is properly showcased.
Creative Display Ideas
Now for the fun part: deciding how to display your masterpiece! How you choose to present your work can completely transform its vibe.
Here are a few popular options that are perfect for beginners:
- Classic Framing: This is the timeless choice for a reason—it protects your work behind glass and gives it a gallery-worthy feel. You can go for professional framing or find a standard-sized frame at a craft store for an easy DIY option.
- Modern Hoop Display: Why not leave it right in the hoop? This creates a charming, modern look that’s incredibly simple to do. Just trim the extra fabric from the back and glue it down for a tidy finish.
- Functional Crafts: Think beyond the wall! You can turn your stitching into something you can actually use. Consider sewing it onto a throw pillow, making it the centerpiece of a quilt, or even mounting it on a blank greeting card for a truly personal gift.
Have Questions? We Have Answers.
Jumping into a new hobby always brings up a few questions. It’s completely normal! Here are some quick answers to the things most people wonder about when starting their first cross stitch kit for beginners adults.
What Fabric Count Is Easiest for Beginners?
When you're just starting out, 14-count Aida fabric is your best friend. It’s pretty much the go-to for a reason. The woven squares are big enough to see clearly, making it much easier to count and place your stitches without straining your eyes. Once you've got the hang of it, you can explore higher counts, but 14 is the perfect place to build your confidence.
Can I Wash My Cross Stitch Project When I'm Done?
You sure can, and you absolutely should! A gentle hand wash in lukewarm water with a mild soap will do the trick. Washing gets rid of any natural oils from your hands and helps the threads relax and settle into the fabric, giving your finished piece a much smoother, more polished look.
Think of that final wash and iron as the "glow up" for your artwork. It’s the last little touch that gets it ready for its grand debut on your wall.
How Long Will It Take to Finish a Beginner Kit?
There's no single answer, but most people can finish a small beginner kit (something around 4-5 inches) over a weekend or in a few relaxed evenings. The real goal isn't to race to the finish line, though. It's about enjoying the process. Still, that feeling of finishing your very first project is a fantastic motivator to keep going!
Ready to turn a cherished memory into a timeless piece of art? At Cross Stitched, our custom kits make it easy. Upload your favorite photo today and receive a complete, personalized cross stitch kit delivered right to your door.


