
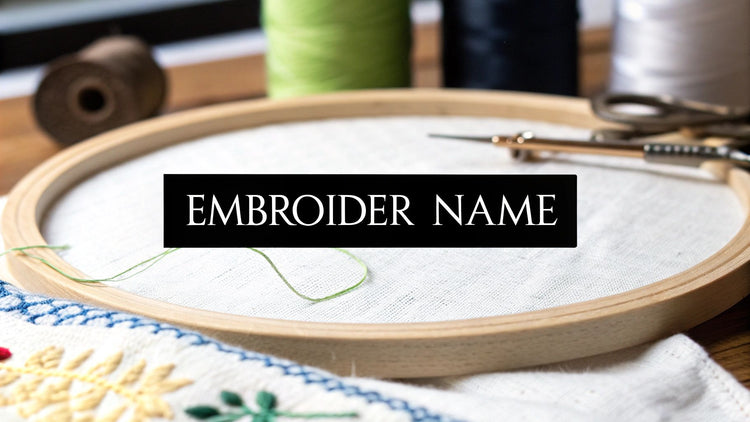
Getting started with hand-embroidering a name is probably easier than you think. You really only need a handful of core supplies to pull it off: a good piece of non-stretchy fabric, an embroidery hoop, a needle, some embroidery floss, and a way to get your design onto the fabric. Nailing these basics is the secret to creating a beautifully personalized piece you'll be proud of.
Gathering Your Essential Embroidery Tools
Before you even think about threading a needle, let's get your toolkit sorted. This is like prepping your ingredients before you start cooking—it makes the whole process smoother and more enjoyable. The quality of your supplies directly affects how your lettering turns out, helping you avoid common headaches like puckered fabric or wonky stitches. It’s what separates a quick homemade craft from a polished, handmade treasure.
The fabric is your foundation. When it comes to lettering, you absolutely want a stable, non-stretch woven material.
- Cotton or Linen: These are my go-to recommendations, especially for beginners. Their tight weave is perfect for supporting stitches and they hold their shape beautifully inside a hoop.
- Avoid Stretchy Knits (for now): Fabrics like t-shirt jersey are a whole different ballgame. They tend to stretch and warp as you stitch, so you'd need to use a stabilizer to keep your design from looking distorted. It's an extra step that can be frustrating when you're just starting out.
After you've picked your fabric, the next essential is a good embroidery hoop. Its one job is to hold your fabric taut—like the head of a drum. This is non-negotiable for creating even, neat stitches. If your fabric is loose, you'll almost certainly get puckering, which is when the material bunches up unattractively around your letters. A simple wooden or plastic hoop, maybe 5-7 inches in diameter, is perfect for most name projects.
Choosing Your Needles and Thread
It's easy to think all needles and threads are the same, but for detailed lettering, the right combo makes a huge difference. You're looking for an embroidery needle with a sharp point and an eye that's large enough for your floss to pass through without a struggle. Grabbing a pack with assorted sizes is a smart move.
The industry standard for thread is the six-strand cotton embroidery floss. The real magic here is that you can control the thickness of your lines by changing how many strands you use.
- For a fine, delicate script, you might only use two strands.
- For a bold, chunky name, you could use all six.
Pro Tip: When you need to separate your floss, don't just try to pull a few strands out of the bunch at once—that’s a recipe for a tangled mess. Instead, gently pull one single strand out at a time from the main skein. It’s a tiny bit of patience that saves you a mountain of frustration later.
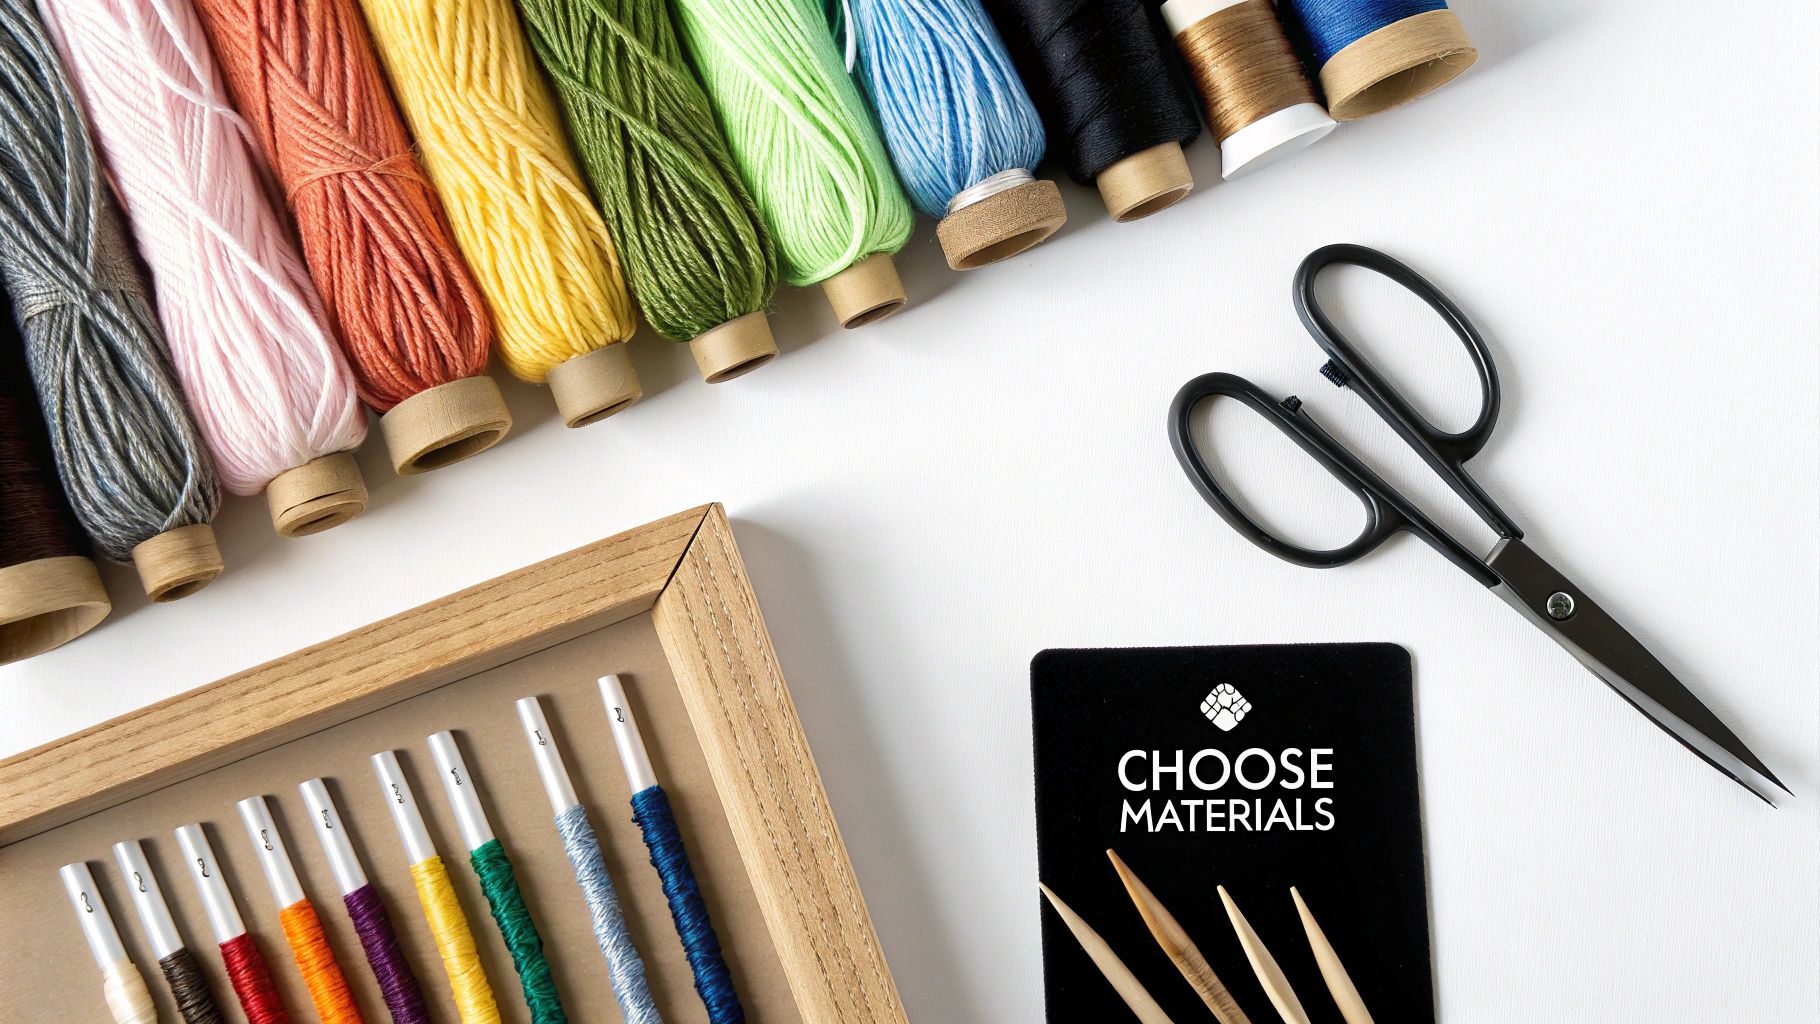
To round out your toolkit, you'll need a reliable way to transfer your design. A water-soluble or heat-erasable pen works wonders. And don't forget a small, sharp pair of scissors for snipping threads cleanly. With these items in hand, you’re ready to go.
Before we dive in, here’s a quick-reference table to help you gather everything you need.
Essential Embroidery Supplies for Lettering
| Tool | What to Look For | Pro Tip |
|---|---|---|
| Fabric | Tightly woven, non-stretch materials like cotton, linen, or canvas. | Pre-wash and iron your fabric to prevent any shrinking or distortion after you've finished stitching. |
| Embroidery Hoop | A 5-7 inch wooden or plastic hoop with a secure screw-top closure. | Wrap the inner ring with cotton twill tape or fabric strips for an extra-grippy, non-slip hold on your fabric. |
| Needles | A pack of "embroidery" or "crewel" needles in assorted sizes (typically 1-10). | Match your needle size to your thread thickness. A thicker thread needs a needle with a larger eye. |
| Embroidery Floss | Six-strand cotton floss from a reputable brand like DMC or Anchor for consistent color and quality. | Buy a little more than you think you’ll need for a project, especially if you’re using a custom-dyed floss. |
| Transfer Method | Water-soluble or heat-erasable pens, carbon paper, or a light source for tracing. | Always test your transfer pen on a scrap piece of the same fabric to make sure the marks remove completely. |
| Scissors | A small, sharp pair of embroidery scissors with a fine point. | Keep this pair dedicated to just cutting thread to maintain their sharpness. Don't use them for paper or fabric. |
With these tools in your kit, you're not just ready to start; you're set up for success.
The demand for personalized goods has absolutely exploded, which is great news for us because it means these supplies are easy to find. The global embroidery market was valued at over USD 2.5 billion back in 2021, with North America making up nearly USD 890 million of that. And those numbers are only expected to climb. If you're curious, you can find more insights about this growing market on Cognitive Market Research. This growth really shows how many people are falling in love with the art of personalizing things, and embroidering names is a perfect way to do just that.
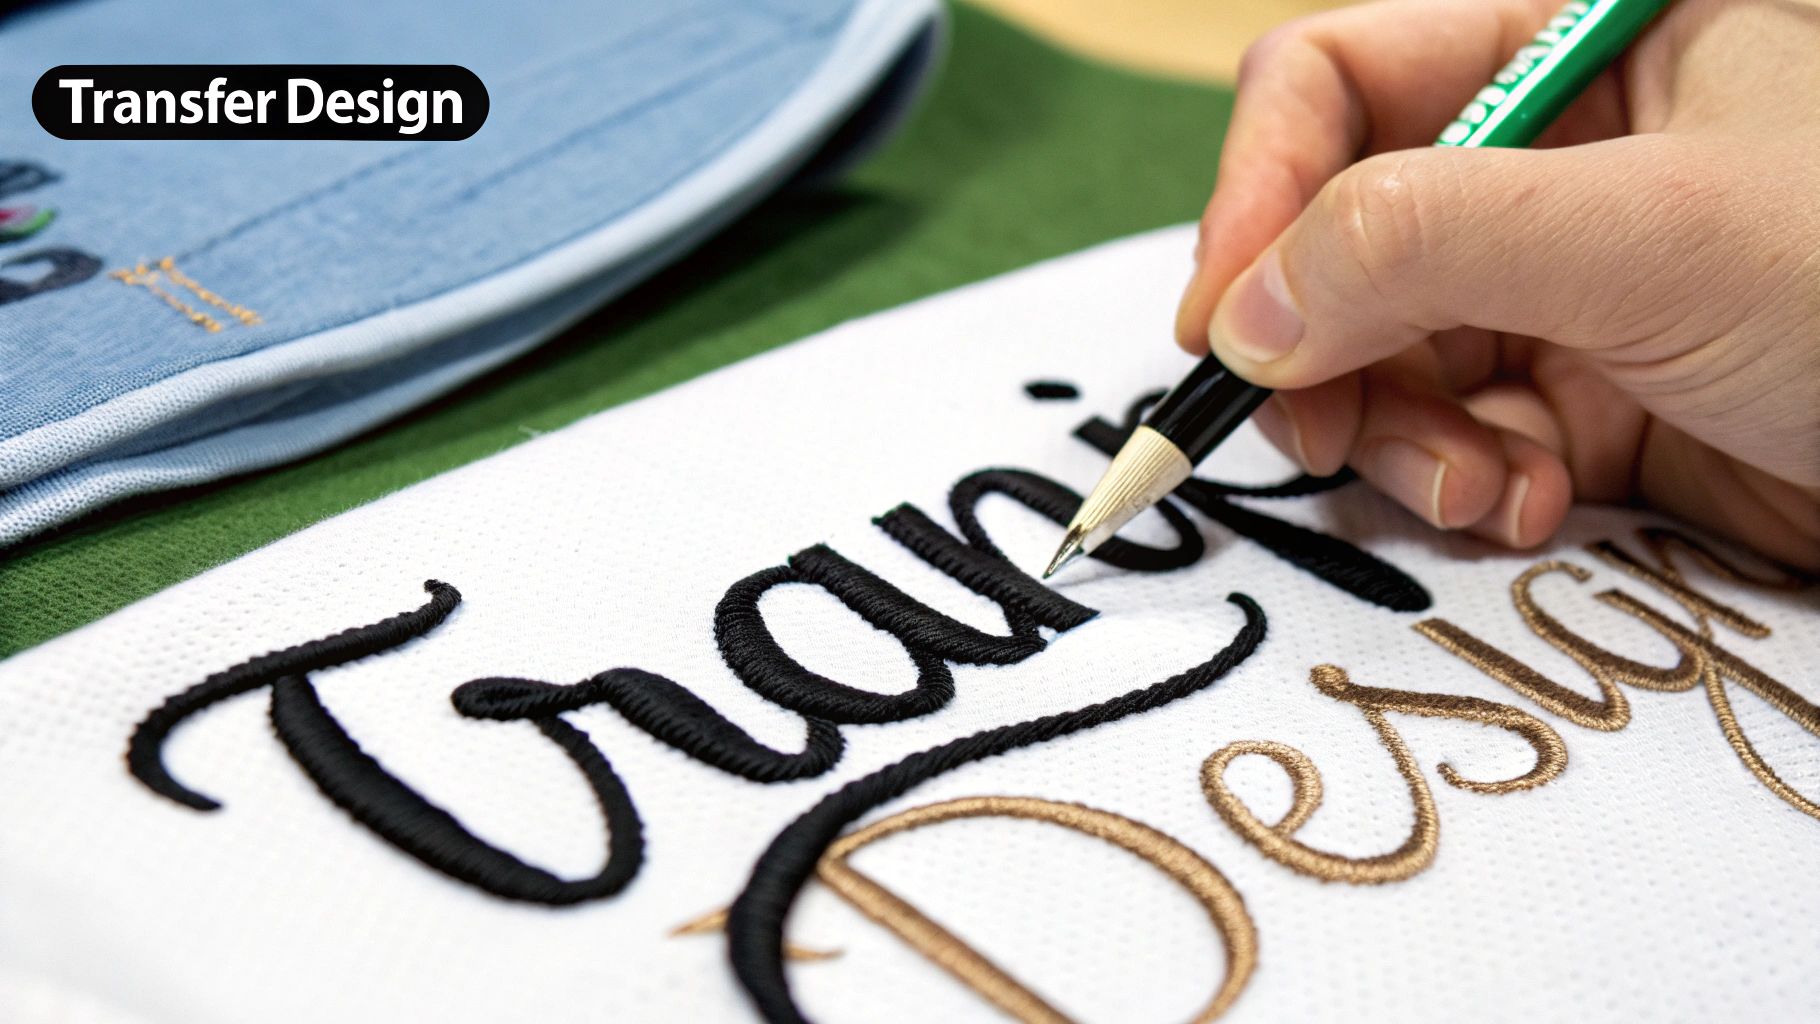
Getting Your Lettering Onto the Fabric
Even the most beautiful stitches can't save a wobbly or poorly placed design. This is the moment where you create the blueprint for your stitching, and a little extra care here makes all the difference in crafting a piece that looks professional and clean.
There are a few solid ways to get your design onto the fabric. The best method really depends on the material you're working with—its color, its thickness, and its texture. Your main goal is to get crisp, clear lines that are easy to see as you stitch but will disappear completely when you're done.
Nailing the Placement
First things first: where is this name going to live? Before you even think about tracing, you need to decide on the perfect spot. For a baby blanket, maybe it's tucked into a corner. On the back of a denim jacket, you might want it centered and bold.
A simple trick to find the center is to fold your fabric in half lengthwise and then crosswise. You can give the creases a light press with an iron or just mark the center point with a pin. From there, you can use these guides and a small ruler to line up your printed name and make sure everything is perfectly straight.
The Window Method (For Light Fabrics)
If you're working with light-colored, thinner fabrics like a basic cotton or linen, the easiest way to transfer your design is good old-fashioned tracing. All you need is a bright window and the right kind of pen.
- Print It Out: Get your name printed to the exact size you plan to embroider.
- Make a Lightbox: Tape the paper with your design onto a sunny window. The daylight shining through makes it easy to see the lines.
- Position Your Fabric: Lay your fabric over the paper, smoothing it out and getting the placement just right. A little tape will hold it securely in place while you work.
- Trace Away: Now, carefully trace the letters onto your fabric using a water-soluble or heat-erasable pen. These are my go-to tools because the ink vanishes easily with a spritz of water or a quick pass with an iron.
I can't stress this enough: always test your transfer pen on a scrap of your project fabric first! This little five-second check ensures the ink comes out completely and doesn't leave any frustrating ghost marks behind.
Transferring to Dark or Thick Fabrics
But what about when the fabric is too dark or thick to see through? Your sunny window won't do you any good with dark denim, thick felt, or a fluffy sweatshirt. This is where transfer aids become your best friend.
My absolute favorite solution for tricky fabrics is a water-soluble stick-and-stitch stabilizer. This stuff is a game-changer. It's a thin sheet with a sticker-like backing. You can print your design right onto the papery side, cut it out, peel off the backing, and stick it firmly onto your fabric.
You then just stitch directly through both the stabilizer and your fabric, following the printed lines perfectly. When all your stitching is done, you soak the piece in warm water, and the stabilizer just melts away, leaving nothing but your gorgeous stitches. It’s a foolproof way to get a perfect design transfer on any material.
Mastering the Best Stitches for Lettering
You don’t need to know dozens of complicated stitches to embroider beautiful names. Honestly, you can create almost any font or style you can imagine with just a handful of the right ones. The real trick is knowing which stitch to use and when—that’s what turns simple text into a little piece of art.
Let's walk through the absolute essentials. These are the workhorse stitches I turn to again and again for lettering because they deliver clean, elegant results every time. Each one has its own personality, making it a perfect match for certain types of fonts.
The Backstitch for Clean Lines
Think of the backstitch as your go-to for crisp, clear lettering. It’s incredibly easy to master and creates a solid, continuous line that looks almost like it was drawn with a pen. This makes it a fantastic choice for simple print fonts or basic scripts where you want every letter to be perfectly legible.
To work a backstitch, you bring the needle up from the back of the fabric, make one stitch forward, then bring your needle up again a stitch-length ahead. From there, you go back down into the very same hole where your first stitch ended. This simple method closes any potential gaps, giving you a beautiful, unbroken line. For anyone just learning how to embroider a name, getting the backstitch down is a huge confidence booster. It's reliable, neat, and very forgiving.
The global demand for personalized items has really brought crafts like embroidery back into the spotlight. In 2024, the Asia-Pacific region is leading the embroidery market with a 45% market share, which isn't surprising given the rich hand-embroidery traditions in countries like China and India. North America follows with about 30%, driven by a huge demand for custom apparel. This just goes to show how much people value that unique, handmade touch.
The Split Stitch for a Braided Look
When you want a line with a bit more texture and presence, the split stitch is perfect. It creates a gorgeous, slightly raised line that looks like a tiny braid. I love using this stitch for names that need to stand out or for fonts that are a little bolder.
The motion is a lot like a backstitch, but with one key difference. Instead of going back down into the hole at the end of the previous stitch, you bring your needle up through the middle of that stitch, literally splitting the floss.
I find this technique is especially useful because it:
- Adds Dimension: The braided effect gives lettering a lovely, tactile quality.
- Strengthens Curves: It’s my secret weapon for creating smooth, solid curves in tricky letters like 'S' or 'O'.
The Stem Stitch for Flowing Cursive
For elegant, flowing cursive, nothing beats the stem stitch. This stitch is designed to create a smooth, rope-like line that’s absolutely ideal for script fonts. The way the stitches slightly overlap gives curves a graceful, uninterrupted flow that other stitches just can't match.
The key to a beautiful stem stitch is consistency. You always bring your needle up just to the side of the previous stitch, making sure your loop of thread stays on the same side of the needle with every single stitch. Whether you keep the loop above or below the needle will create a slightly different look, so experiment to see what you prefer!
My best advice for smooth cursive is to keep your stitch length short and consistent, especially as you navigate tight curves. If your stitches are too long, the curves can end up looking a bit jagged and angular.
The fabric you choose also makes a huge difference in how your stitches turn out. Here’s a quick look at the two most common choices for name embroidery.
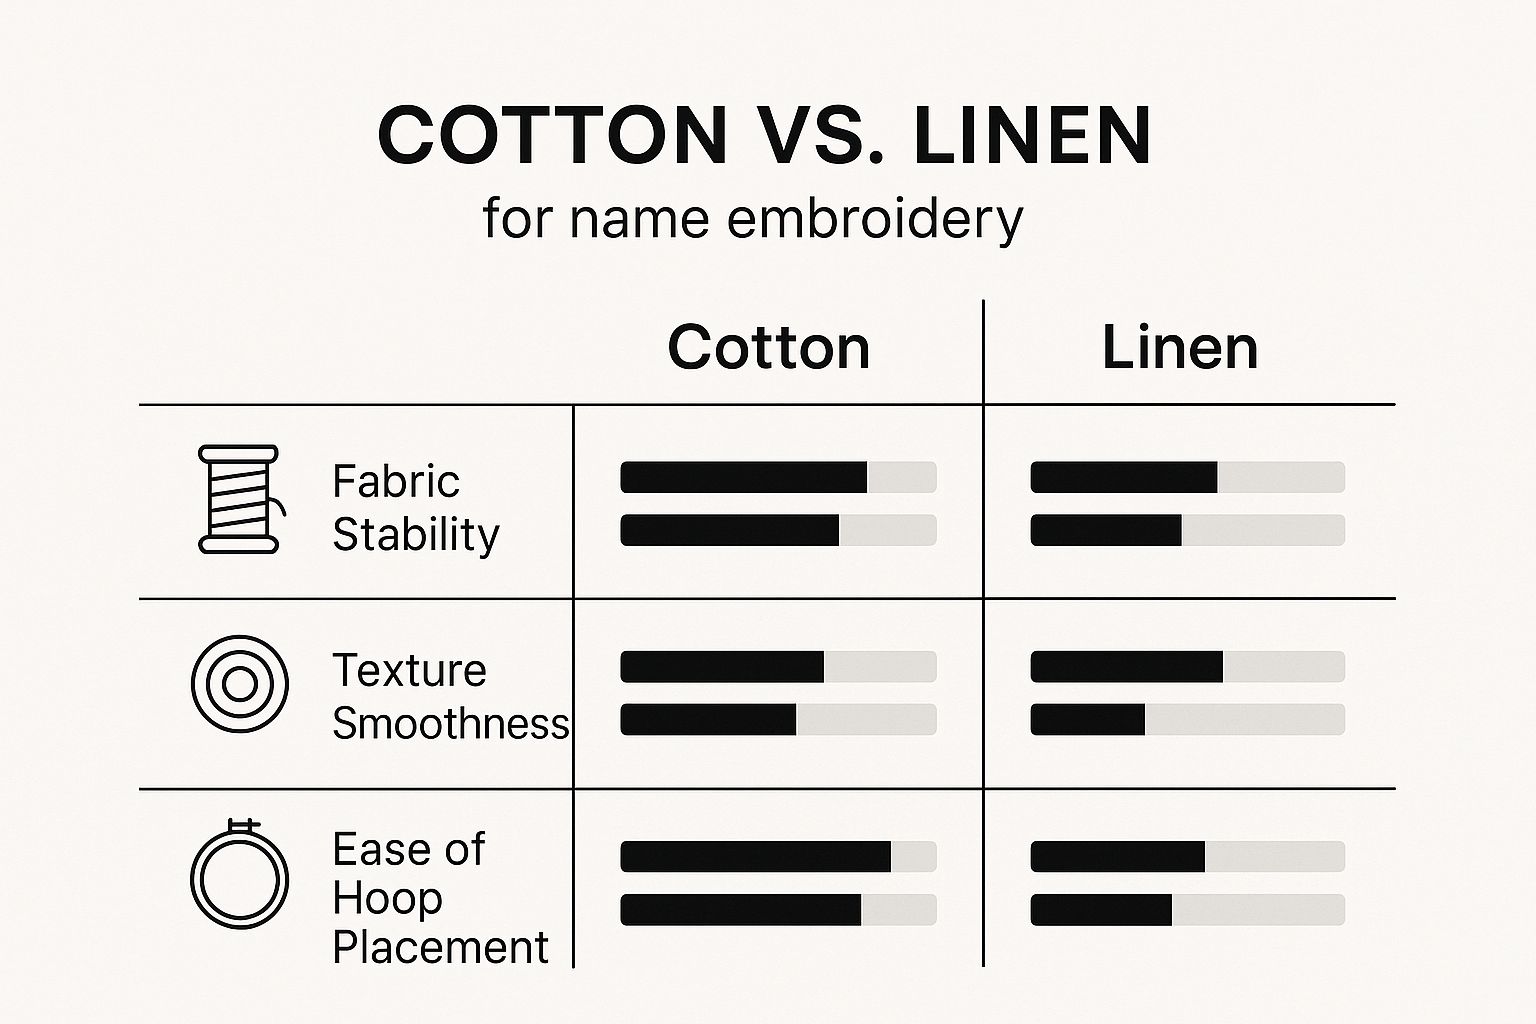
As you can see, cotton is a great starting point because its stability helps you create crisp letters. Linen, on the other hand, gives you that wonderful, textured look for a more organic feel.
The Satin Stitch for Filling Letters
So, what about bold, blocky fonts? For those, you'll need a fill stitch, and the satin stitch is the classic choice. It involves laying a series of straight stitches right next to each other to cover an entire shape with smooth, solid color.
While it looks simple, getting that perfectly smooth, "satin" finish takes a bit of practice. The secret is to maintain even tension and keep all your stitches perfectly parallel. Don't pull too tight!
Comparing Lettering Stitches
Choosing the right stitch can feel overwhelming at first, but it really comes down to the style you're aiming for. This table breaks down my top recommendations to help you decide which one is best for your project.
| Stitch Type | Best For | Difficulty Level |
|---|---|---|
| Backstitch | Simple print fonts and clean, thin lines | Beginner |
| Split Stitch | Textured lines and strong, smooth curves | Beginner |
| Stem Stitch | Flowing cursive and elegant script fonts | Intermediate |
| Satin Stitch | Filling in bold, block, or bubble letters | Intermediate |
These four stitches provide a powerful foundation for almost any lettering project you can dream up. Once you're comfortable with them, you'll be amazed at what you can create. To explore even more creative options, check out our full guide on the different types of embroidery stitches.
Stitching Smooth Curves and Sharp Corners
Okay, so you've got the basic stitches down. But letters are rarely just straight lines, are they? The real artistry in embroidering a name comes down to navigating those tricky shapes—the graceful arc of a 'C' or the sharp point of a 'Z'. Getting these details right is what elevates your work from looking homemade to looking professional.
The secret here isn't some complex new stitch you have to learn. It’s all about adapting the stitches you already know by making one simple adjustment: your stitch length. Mastering this little tweak will give you the control to tackle any font with confidence.
Creating Graceful, Smooth Curves
When you approach a curved letter like an 'S' or an 'O', the temptation is to use long stitches to cover the line quickly. Resist that urge! Long stitches are the enemy of smooth curves; they pull the floss into a straight line between two points, creating a jagged, almost polygonal look instead of a fluid arc.
The solution is to shorten your stitches. A lot.
- For gentle curves: Halve your normal stitch length. This simple change helps the thread hug the guideline much more closely.
- For tight curves: Go even smaller. Think tiny, deliberate stitches. These give you the ultimate control, ensuring the line stays perfectly round.
I like to think of it as drawing with a series of tiny dots instead of a few long dashes. Each small stitch acts as a new anchor point, guiding the thread exactly where it needs to go and building a beautifully consistent curve.
A Real-World Example: Let's say you're stitching the name "Sophie." The straight stem of the 'p' is easy—your normal stitch length is perfect. But the moment you start on that tight, round loop, you'll want to switch to much smaller stitches. If you don't, it'll look clunky. The same goes for the flowing curves of the 'S'.
Achieving Crisp, Sharp Corners
Just as curves demand short stitches, sharp corners need their own technique to look crisp and defined. This is essential for letters like 'L', 'E', 'N', and 'V'. If you just try to stitch around the corner, you'll get a rounded, soft edge with a noticeable buildup of thread. It just looks messy.
The key to a perfect corner is a clean pivot. Here’s my go-to method:
- Stitch directly into the corner point. Make sure the very last stitch of the first line ends precisely at the tip of the corner. Don't go past it.
- Bring your needle up for the new line. Start the next stitch by bringing your needle up right beside that same corner point, ready to head off in the new direction.
This technique forces both lines to meet at a single, clean point. By ending one line completely before starting the next, you avoid pulling the thread across the corner, which is what causes that sloppy, rounded look. It’s a small detail, but it makes a massive professional difference, especially when you're working with sharp, modern fonts.
Putting the Final Polish on Your Embroidery

There’s nothing quite like that last stitch. It’s a great feeling, but your work isn’t quite done yet. A few simple finishing steps are what really separate a nice project from a stunning, professional-looking piece.
Before you do anything else, flip your hoop over to the back. Making sure your threads are secure is crucial; it’s the only way to guarantee your beautiful work won't unravel over time. My go-to method is to weave the thread tail under at least three or four stitches on the back. Once it's woven through, you can snip it close to the fabric. This is so much cleaner and more secure than tying a knot, which can create ugly bumps on the front.
Cleaning and Pressing for a Crisp Finish
After hours of handling, your fabric is bound to have some oils from your hands, maybe a bit of dust, or even some leftover transfer marks. A gentle hand wash is all it takes to bring it back to pristine condition.
First, fill a basin with lukewarm water and add a tiny drop of a mild, clear soap. Let your embroidery soak for about 15 minutes, swishing it around gently. Whatever you do, don't scrub or wring it out! That’s a surefire way to distort your stitches.
To dry the piece, lay it flat on a thick, clean towel. Roll up the towel with your embroidery inside and press down firmly to soak up most of the water. Then, unroll it and let it air dry the rest of the way on a flat surface.
While it’s still just a little damp, it's time to iron. Place your embroidery face-down on another clean, fluffy towel and press it from the back using a medium heat setting. The towel acts as a cushion, preventing your stitches from getting squashed and preserving their beautiful texture. This final press works wonders for getting rid of any lingering hoop marks, leaving you with a perfectly crisp piece.
The desire for personalized gifts has caused the embroidery market to explode. Valued at USD 11.27 billion in 2024, it's expected to jump to nearly USD 19.95 billion by 2033. This just goes to show how much people treasure a custom touch like an embroidered name. You can dig into the numbers on the growth of the global embroidery market on datahorizzonresearch.com.
Framing and Displaying Your Work
How you present your finished name embroidery really depends on what it's for.
If you’re creating a piece of wall art, the simplest solution is often the best: frame it right in the hoop you stitched it in. All you have to do is trim the excess fabric around the back, gather the edge with a running stitch, and cover the back with a neat circle of felt.
For a name that's going onto a piece of clothing, a quilt, or a bag, you'll want to carefully trim the fabric, leaving about a one-inch border all around. You can then fold the raw edges under and stitch it down onto the final item. There are tons of creative ways to display your work, and our guide to cross-stitch finishing techniques has plenty of ideas that work just as well for embroidery.
Common Questions About Embroidering Names
https://www.youtube.com/embed/BDALFHY8VEA
Even with a perfect plan, you're going to hit a few snags when you first start embroidering names. It's totally normal! Let's walk through some of the most common questions I hear from beginners and get you the clear answers you need to keep your project on track.
Think of this section as your personal troubleshooting guide. We'll cover those little details—from thread thickness to keeping your fabric from wrinkling—that really elevate your work and build your confidence stitch by stitch.
How Many Strands of Floss Should I Use?
This is easily the question I get asked the most, and the honest answer is, it really depends on the look you're going for. That standard six-strand cotton floss is made to be split, which gives you incredible control over the thickness of your lines.
Here’s a quick guide I use:
- For delicate script or tiny letters: I always go with 1-2 strands. This gives you a super fine, crisp line that’s perfect for those more intricate fonts.
- For standard, everyday lettering: 3 strands is my go-to. It’s a fantastic all-rounder that provides solid coverage without looking too bulky.
- For bold, chunky names or filling in letters: Using 4-6 strands will give you that thick, prominent line that makes a real statement.
My best advice? Always do a little test run on a scrap of your project fabric. Seeing how the different strand counts look with your chosen font before you start the real thing can save you a ton of guesswork.
Why Is My Fabric Puckering?
Oh, the dreaded fabric pucker. It’s the number one frustration for so many stitchers, new and experienced alike. It’s that bunching and wrinkling around your stitches that can make a piece look a little messy. The good news is that it’s almost always a tension issue.
The most common culprit for puckering is simply pulling your stitches too tight. Your stitches should lie flat against the fabric, not tug on it. The other major cause is not having your fabric pulled taut enough in the hoop to begin with. You want it to be tight like a drum.
Remember, the thread should feel like it's becoming one with the fabric, not fighting against it. Just focus on a gentle, even pull for every single stitch.
What Is the Best Fabric for Embroidering Names?
When you’re learning how to embroider a name, your fabric choice makes a huge difference. For the cleanest, sharpest results, you'll want to stick with a stable woven material that doesn't have any stretch.
- My Top Choices: Tightly woven cotton, linen, or a good canvas are fantastic. They provide a sturdy, reliable foundation that won't warp or stretch while you're working.
- Fabrics to Avoid (for now): Stretchy knits, like t-shirt material, are much more challenging. They absolutely require a stabilizer to keep your beautiful lettering from getting distorted.
Starting with the right fabric truly sets you up for a much more enjoyable process. If you’re itching for some ideas to practice on, we've put together a great collection of free embroidery patterns for beginners that are perfect for honing your lettering skills. They're a great way to get comfortable with different stitches and fabrics.
At Cross Stitched, we turn your favorite memories into beautiful, timeless art. Transform any photo into a custom cross-stitch kit, complete with everything you need to create a personalized masterpiece. Start stitching your story today at https://cross-stitched.com.


