

So, you've decided to dive into the beautiful world of embroidery? Welcome! It's a wonderfully relaxing craft, and you've picked a great time to start. Getting going is easier than you think, and it really just comes down to four basic embroidery supplies for beginners: a needle, some thread, a piece of fabric, and a hoop to hold it all steady.
This guide is here to walk you through those essentials, taking all the guesswork out of starting your first project.
Your Journey into the World of Embroidery
Embroidery is one of those hobbies that's both meditative and incredibly rewarding. You're essentially painting with thread, creating everything from one-of-a-kind gifts to stunning art for your walls with just a few simple tools. It's a craft that's all about slowing down, letting your creativity flow, and making something real and tangible.
The best thing about embroidery is how little you need to get started. There's no expensive machinery or complicated setup. We'll go through the absolute must-haves, explaining not just what they are, but why they're important and how to pick the right ones for that first masterpiece you're itching to create.
Embroidery is more than just making pretty things. It's about stitching a story, capturing a memory, or adding a little piece of yourself to the world.
What You Will Learn
My goal here is to help you feel completely confident picking up a needle and thread for the first time. We're going to build your knowledge one simple step at a time.
Here's what we'll cover:
- The Core Four: A deep dive into the absolute must-have supplies.
- Helpful Extras: Some handy tools that can make your stitching life much easier.
- Kits vs. DIY: We'll weigh the pros and cons of starting with a pre-made kit versus gathering your own supplies.
- First Projects: Fun, simple ideas that are perfect for getting the hang of things.
By understanding your tools, you're not just learning a new skill—you're joining a huge, welcoming community of creators. Let's get you set up so you can start stitching. You'll be amazed at what you can create.
The Four Essential Embroidery Supplies You Need
Jumping into embroidery feels a bit like learning to cook a new recipe. You wouldn't tackle a fancy meal without a decent knife, a cutting board, and a pan. It's the same with stitching—there are four foundational tools that you'll use for every single project.
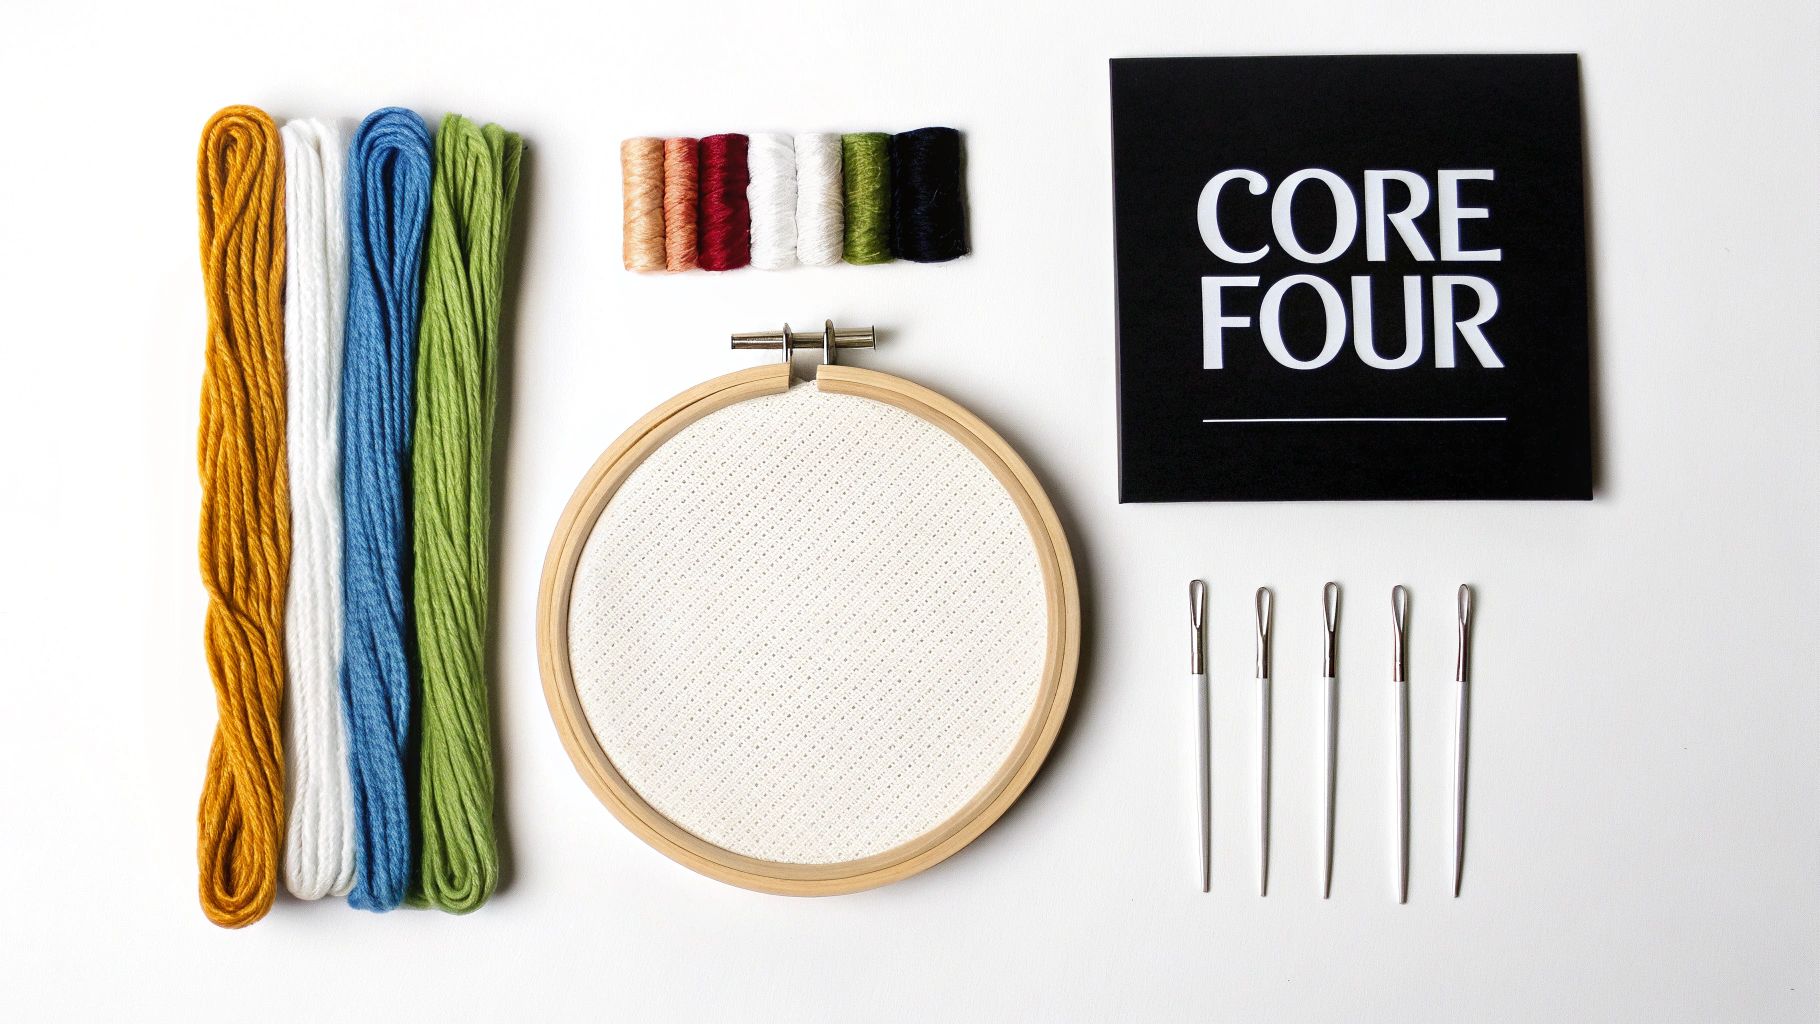
Think of these as your "Core Four." Getting to know them is the first step toward making your first stitching experience a joy, not a headache. Let's walk through each one so you can gear up with confidence.
Before we dive deep, here's a quick look at the absolute must-haves for your toolkit.
Quick Guide to Your Core Embroidery Tools
| Supply Item | Its Purpose in a Nutshell | Why It's a Must-Have | Best Option for Beginners |
|---|---|---|---|
| Needles | The tool that carries the thread through the fabric. | The right needle makes piercing fabric smooth and easy. | A variety pack of sizes 1-5. |
| Thread (Floss) | The "paint" you use to create your design. | This is what brings all the color and life to your art. | Six-strand cotton floss (DMC is a great brand). |
| Fabric | The canvas where your masterpiece comes to life. | A stable fabric prevents puckering and warped stitches. | 14-count Aida cloth or a plain-weave cotton. |
| Hoop | A frame that holds your fabric tight while you work. | It keeps fabric tension even for perfectly neat stitches. | A 5 to 7-inch wooden or bamboo hoop. |
With that overview, let's explore why each of these items is so important for getting started on the right foot.
H3: Needles: The Stitching MVP
First things first: embroidery needles are not the same as the ones in your basic sewing kit. They’re built differently, with a larger eye to handle thicker embroidery floss and a super sharp point to slide through fabric without a fight.
When you're just starting, the most important factor is the size. It's a bit counterintuitive, but with needles, the higher the number, the finer the needle. A variety pack with sizes 1-5 is the perfect way to begin. It gives you a chance to see what feels best in your hand and works for different thread thicknesses.
H3: Thread: The Colors of Your Creation
Embroidery thread, which you'll usually hear called floss, is where the magic happens. It’s the color and texture that makes your design pop. While there are tons of specialty threads out there, the go-to choice for nearly everyone, especially beginners, is six-strand cotton floss. The brand DMC is basically the gold standard.
The genius of this floss is right in its name—each little bundle (called a skein) is made of six individual strands that are loosely twisted together. This means you can customize the thickness of your lines with total control.
- For delicate details: Just use one or two strands.
- For most outlines and standard stitches: Two or three strands is the sweet spot.
- For bold, chunky fills: Go with four, five, or all six strands.
A basic multi-color pack of DMC floss is a fantastic starting point. It gives you a whole palette to play with. You can dive deeper into the world of thread in our guide to hand embroidery floss types.
And you've picked a great time to start! The global embroidery market has been growing steadily, expanding from $2,572.16 million in 2021 to a projected $3,712.1 million by 2025. This boom means there's an amazing variety of affordable supplies out there, making it easier than ever to find great starter kits.
H3: Fabric: Your Blank Canvas
The fabric you choose is quite literally your canvas. While seasoned stitchers embroider on everything from denim jackets to baseball caps, beginners will have a much easier time starting with the right material. You're looking for something stable, not stretchy, with a weave you can actually see.
Pro Tip: The best fabric for a beginner is a medium-weight, woven material. This helps prevent the fabric from bunching up or puckering as you stitch—a common frustration when you're just learning the ropes.
Here are your two best bets for a first project:
- Aida Cloth: This fabric was made for stitching. Its blocky, even weave creates a natural grid, making it incredibly simple to form neat, uniform stitches. A 14-count Aida is the perfect place to start.
- Cotton or Linen: A simple, plain-weave cotton or a linen blend is another fantastic choice. It’s sturdy, easy to find, and won’t fight you as you learn.
Save stretchy fabrics like t-shirt jersey for later. They require extra steps and materials to stabilize and can be tricky to handle at first.
H3: Hoops: The Key to Perfect Tension
An embroidery hoop is your secret weapon for crisp, clean stitches. It’s a simple tool made of two rings—one fits snugly inside the other—that clamp your fabric in place. Its job is to maintain even tension across your work area.
Without a hoop, fabric tends to pucker and pull, which can distort your design and make stitching much harder. By keeping the fabric taut like a tiny drumhead, a hoop gives you a beautifully smooth surface to work on. For beginners, a 5 to 7-inch wooden or bamboo hoop is the ideal size. It’s big enough for most starter patterns but still comfortable to hold.
Helpful Tools to Make Stitching Easier
Once you have your fabric, floss, hoop, and needle, you can absolutely start stitching. But just like a good cook collects tools that make life in the kitchen easier, a few extra embroidery gadgets can solve common frustrations and make the whole process a lot more fun.
These aren't strictly necessary, but I think of them as my secret weapons. They help me work faster, keep my projects looking neat, and cut down on the stress. They handle the little annoyances so I can focus on the creative part.
Keep Your Tools and Threads Tidy
One of the first little hurdles you'll run into is just keeping everything straight. A needle that vanishes into the sofa cushions or a tangled clump of floss can stop a fun project dead in its tracks. Thankfully, there are some simple, brilliant solutions.
- Embroidery Scissors: These are not your everyday craft scissors. They’re small, with incredibly sharp, fine-tipped blades made for one thing: snipping thread cleanly and close to the fabric without accidentally cutting your stitches. A clean cut makes all the difference.
- Needle Minder: This is probably my favorite little gadget. It’s a tiny magnetic pin that you attach to your fabric, giving you a safe place to park your needle when you switch colors or take a break. To see how these clever tools work, check out our guide on what a needle minder is and why you need one.
- Thread Bobbins: These simple plastic or cardboard cards are lifesavers for preventing the dreaded floss knot. You just wind your skeins of thread onto them. It's a bit of prep work upfront, but future you will be so grateful when all your colors are tidy and easy to find.
Improve Your Stitching Precision and Comfort
After you get your supplies organized, the next step is making sure you can actually see what you're doing and stitch comfortably. Bad lighting and awkward angles can lead to mistakes and even a sore neck. A little investment in your comfort goes a long way.
A good task light or a magnifier lamp, for instance, is a total game-changer, especially if you’re working on dark fabric or with a really detailed pattern. It lights up your work area beautifully, which helps you see every single stitch and cuts down on eye strain.
The good news is that helpful accessories are becoming more common. The embroidery equipment market is actually expected to grow by USD 172 million between 2024 and 2029. For stitchers like us, this means more affordable and accessible tools, from simple hoops and stands to digital pattern keepers. It’s a great time to be starting this hobby. For a deeper dive, you can explore the full embroidery equipment market trends in this industry analysis.
A well-lit and organized workspace is the foundation for beautiful stitching. Small upgrades in your setup can lead to big improvements in your finished projects.
At the end of the day, these extra embroidery supplies for beginners are all about making the hobby more relaxing. They smooth out the little bumps in the road so you can just enjoy the simple, satisfying process of creating something beautiful with your own hands.
Choosing Your Path: Kits vs. Buying Supplies Separately
https://www.youtube.com/embed/UiZ8S8T45Y4
When you're first gathering your embroidery supplies for beginners, you'll hit a fork in the road right away. Do you grab an all-in-one kit, or do you pick out every single item yourself? It’s a bit like deciding between a pre-packaged meal kit and cooking a recipe from scratch—both lead to a delicious result, but the process is totally different.
An embroidery kit is your meal kit. It comes with everything you need neatly bundled together: the pattern, the right fabric, pre-selected floss colors, a needle, and a hoop. This is a fantastic way to dive in without getting bogged down by choices, ensuring you can just open the box and start stitching.
Buying your supplies separately, on the other hand, is like being the chef with full control of the kitchen. You get total creative freedom. You can hunt for that perfect shade of sky blue, choose a luxe linen fabric, and pair it all with a pattern you fell in love with online. This approach lets you build a truly personal toolkit from the get-go.
Why Kits Are the Best Starting Point for Most Beginners
For the vast majority of people just starting out, a kit is the smoothest and most encouraging entry point. It completely sidesteps that initial wave of overwhelm you might feel staring at a wall of a hundred different floss colors or wondering which needle goes with which fabric. A good kit is designed to work, setting you up for a rewarding first go.
An embroidery kit is more than just a pile of supplies; it's a curated experience built to help you fall in love with the craft. It takes care of the technical details so you can focus on the pure joy of making stitches.
After you’ve finished a kit or two, you’ll have a much better feel for how everything works. You'll start to develop preferences and get ideas for what you want to try next. That’s the perfect moment to begin building your own custom collection of supplies, one beautiful skein of floss at a time. To see some great options, take a look at our guide on the best embroidery kits for beginners.
The recent explosion in all things needlecraft has made getting started easier than ever. With the embroidery machine market alone valued at $5.71 billion in 2024, it's clear that home-based crafting is booming. This incredible growth means there are more high-quality and innovative kits available than ever before. You can read more about the thriving embroidery market here.
To help you decide, here’s a quick comparison of the two approaches.
Embroidery Kits vs. A La Carte Supplies
| Factor | All-in-One Kits | Buying Supplies Separately |
|---|---|---|
| Convenience | Excellent. Everything you need is in one box, ready to go. | Lower. Requires visiting multiple stores or websites. |
| Cost-Effectiveness | Often cheaper for a single project. Great value upfront. | Can be more expensive initially to build a basic stash. |
| Learning Curve | Gentle. Removes guesswork and potential frustration. | Steeper. You need to research and choose compatible items. |
| Creative Freedom | Limited. You're working with the designer's chosen materials. | Unlimited. You have complete control over every element. |
| Best For | Absolute beginners or anyone wanting a quick, relaxing project. | Stitchers with some experience or ambitious beginners. |
Ultimately, both paths lead to beautiful embroidery. A kit just gives you a more structured starting line.
This flowchart can also help you map out your decision on what tools to get and when.
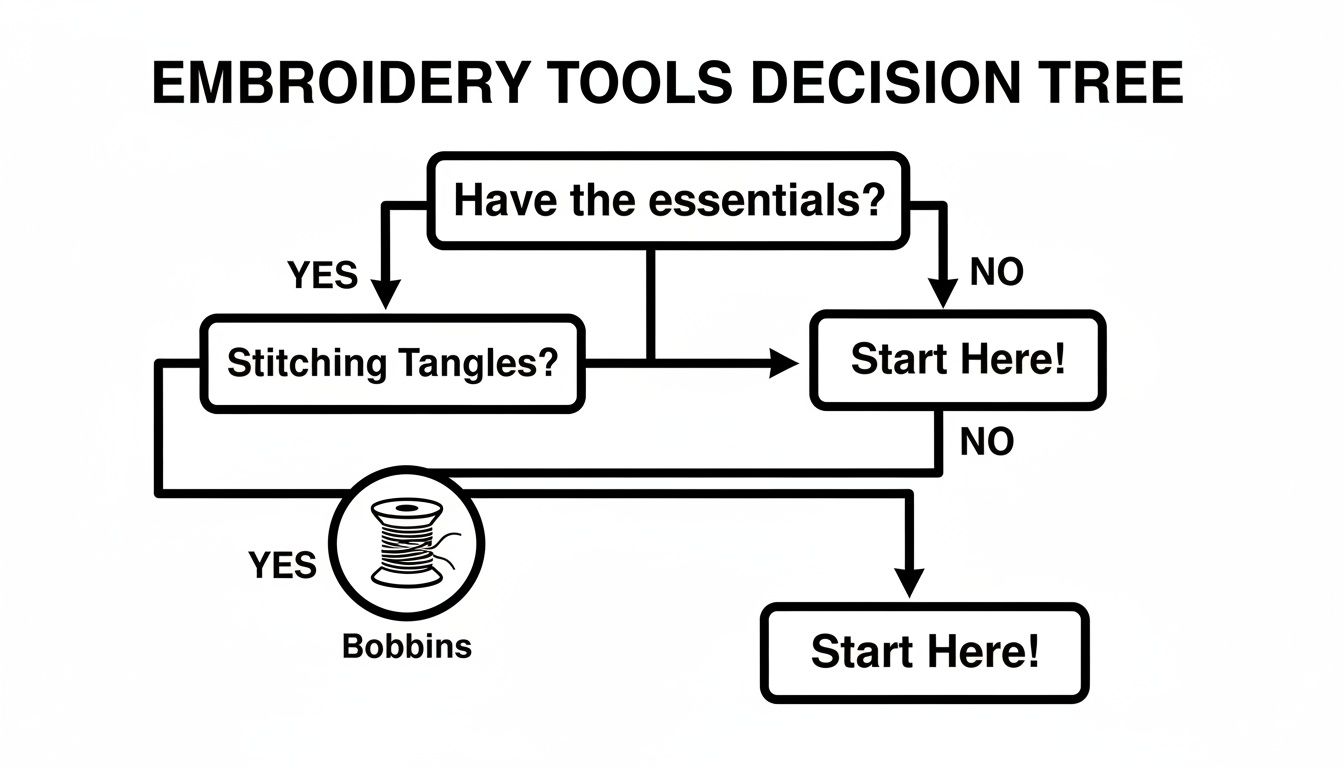
As you can see, the key is to start with the essentials. You can always add helpful little tools, like thread bobbins, to solve common frustrations as you get more comfortable with the craft.
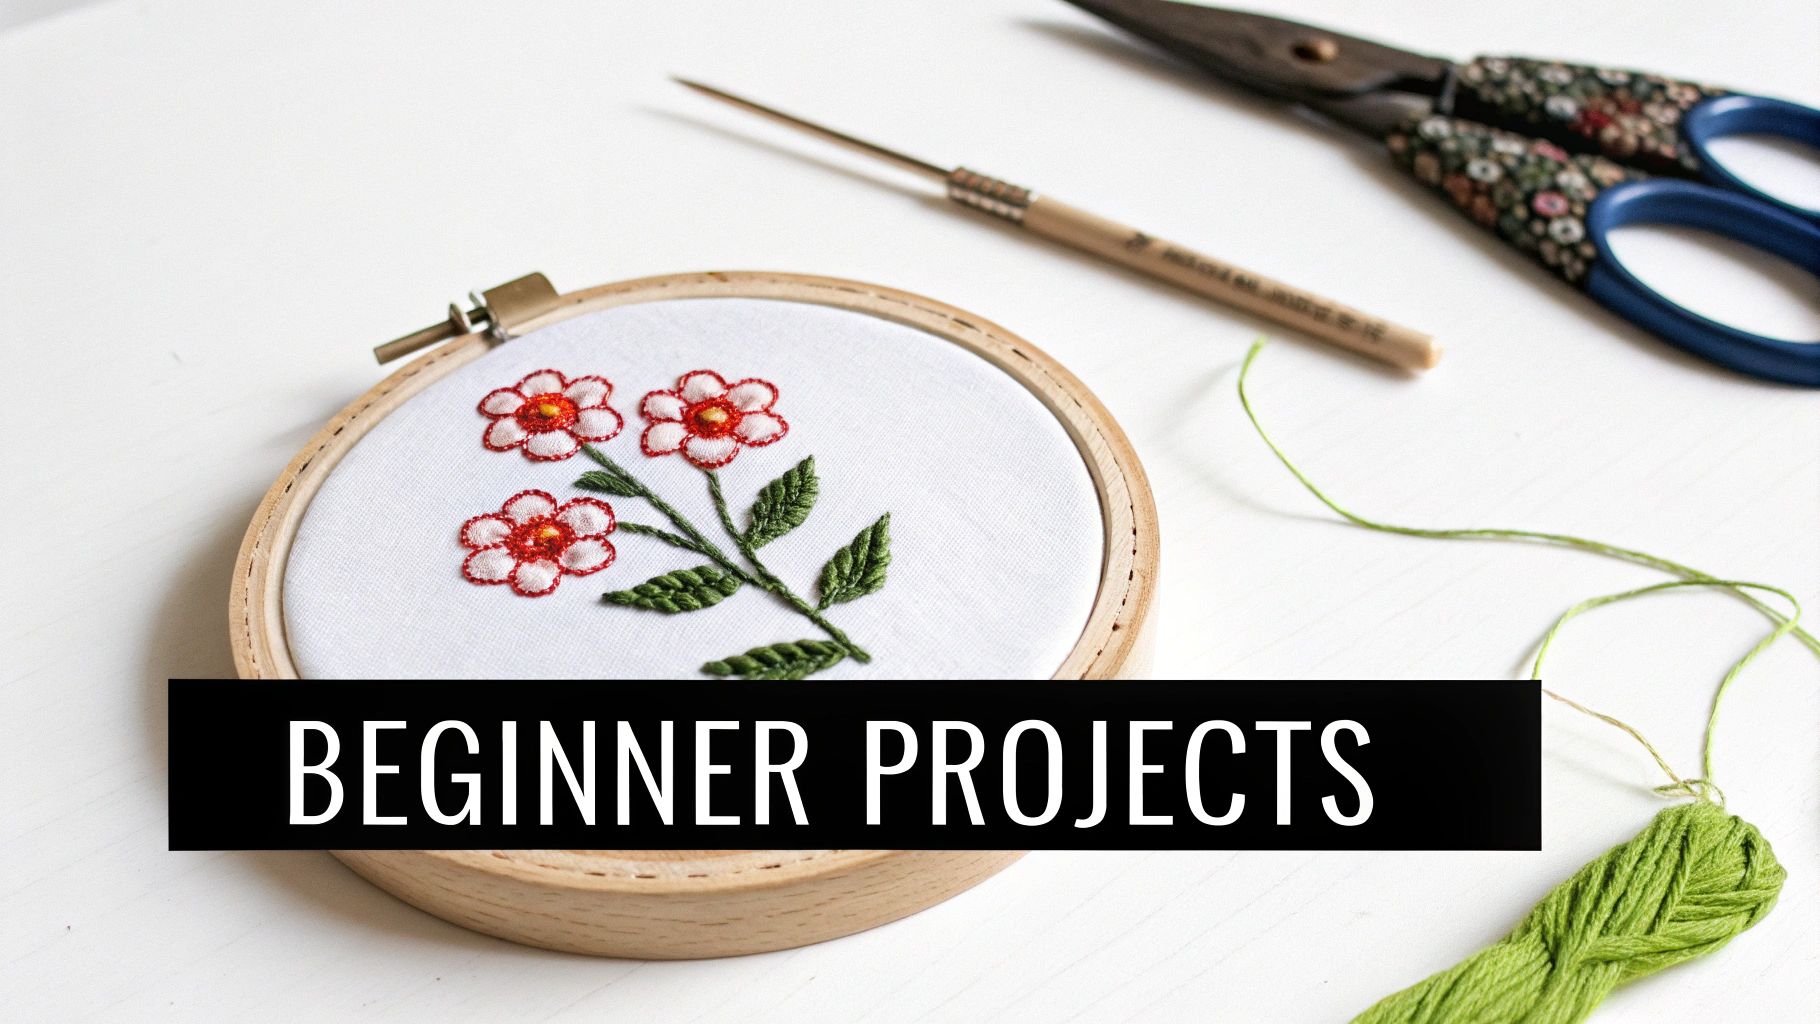
Simple First Projects to Build Your Confidence
 Embroidery hoop with floral design, punch needle, scissors, and green thread with 'BEGINNER PROJECTS' text.">
Okay, you’ve got your embroidery supplies for beginners all laid out. Now for the fun part—actually making something! The secret to a great start is picking a first project that’s simple, quick, and makes you feel good. Right now, it’s not about perfection. It’s about building a little momentum and getting that "I made this!" buzz.
Think small. A little design you can knock out in an afternoon or a weekend is ideal. That quick win gives you an immediate sense of accomplishment, which is the best motivation to keep going.
Perfect Starter Project Ideas
The best beginner projects let you practice one or two basic stitches without getting bogged down in complexity. You’re just trying to get a feel for how the floss moves through the fabric, building that muscle memory one stitch at a time.
Here are a few classic ideas that are perfect for your first dive into embroidery:
- Simple Floral Hoop Art: There's a reason you see these everywhere! A small design with a few leaves and simple flowers is perfect for practicing the backstitch (for stems) and the satin stitch (for filling petals).
- A Monogrammed Napkin: Stitching a single initial onto a tea towel or napkin is a brilliant way to work on your precision. You end up with something both personal and practical while getting the hang of clean lines.
- Geometric Shapes: A cool, modern pattern of triangles, circles, or repeating lines is a fantastic exercise in controlling your thread tension and keeping your stitches consistent.
Your first project is your playground. It’s a low-pressure space to learn how the thread feels, how to guide your needle, and how incredibly rewarding it is to see a design come to life.
Stitches to Master First
Don't feel like you need to learn all 200+ embroidery stitches at once. Just focus on a few workhorse stitches first. They’ll give you a solid foundation that you can use to create a surprising variety of designs.
Think of these as your "must-learn" stitches for your first project:
- The Backstitch: This is your go-to for outlines. If you can draw a line, you can do a backstitch. It's clean, strong, and super versatile.
- The Satin Stitch: This is how you fill in shapes with smooth, solid color. It’s what gives leaves and flower petals that lush, full look.
- The French Knot: It has a bit of a reputation for being tricky, but don't be intimidated! Once you get the hang of it, this little knot adds amazing texture and detail. It’s perfect for the center of flowers or tiny decorative dots.
By starting with a project you can actually finish, you're setting yourself up for a fun, encouraging introduction to embroidery. You’ll end up with a piece you’re proud of and, more importantly, the confidence to start your next one.
Caring for Your Tools and Finished Artwork
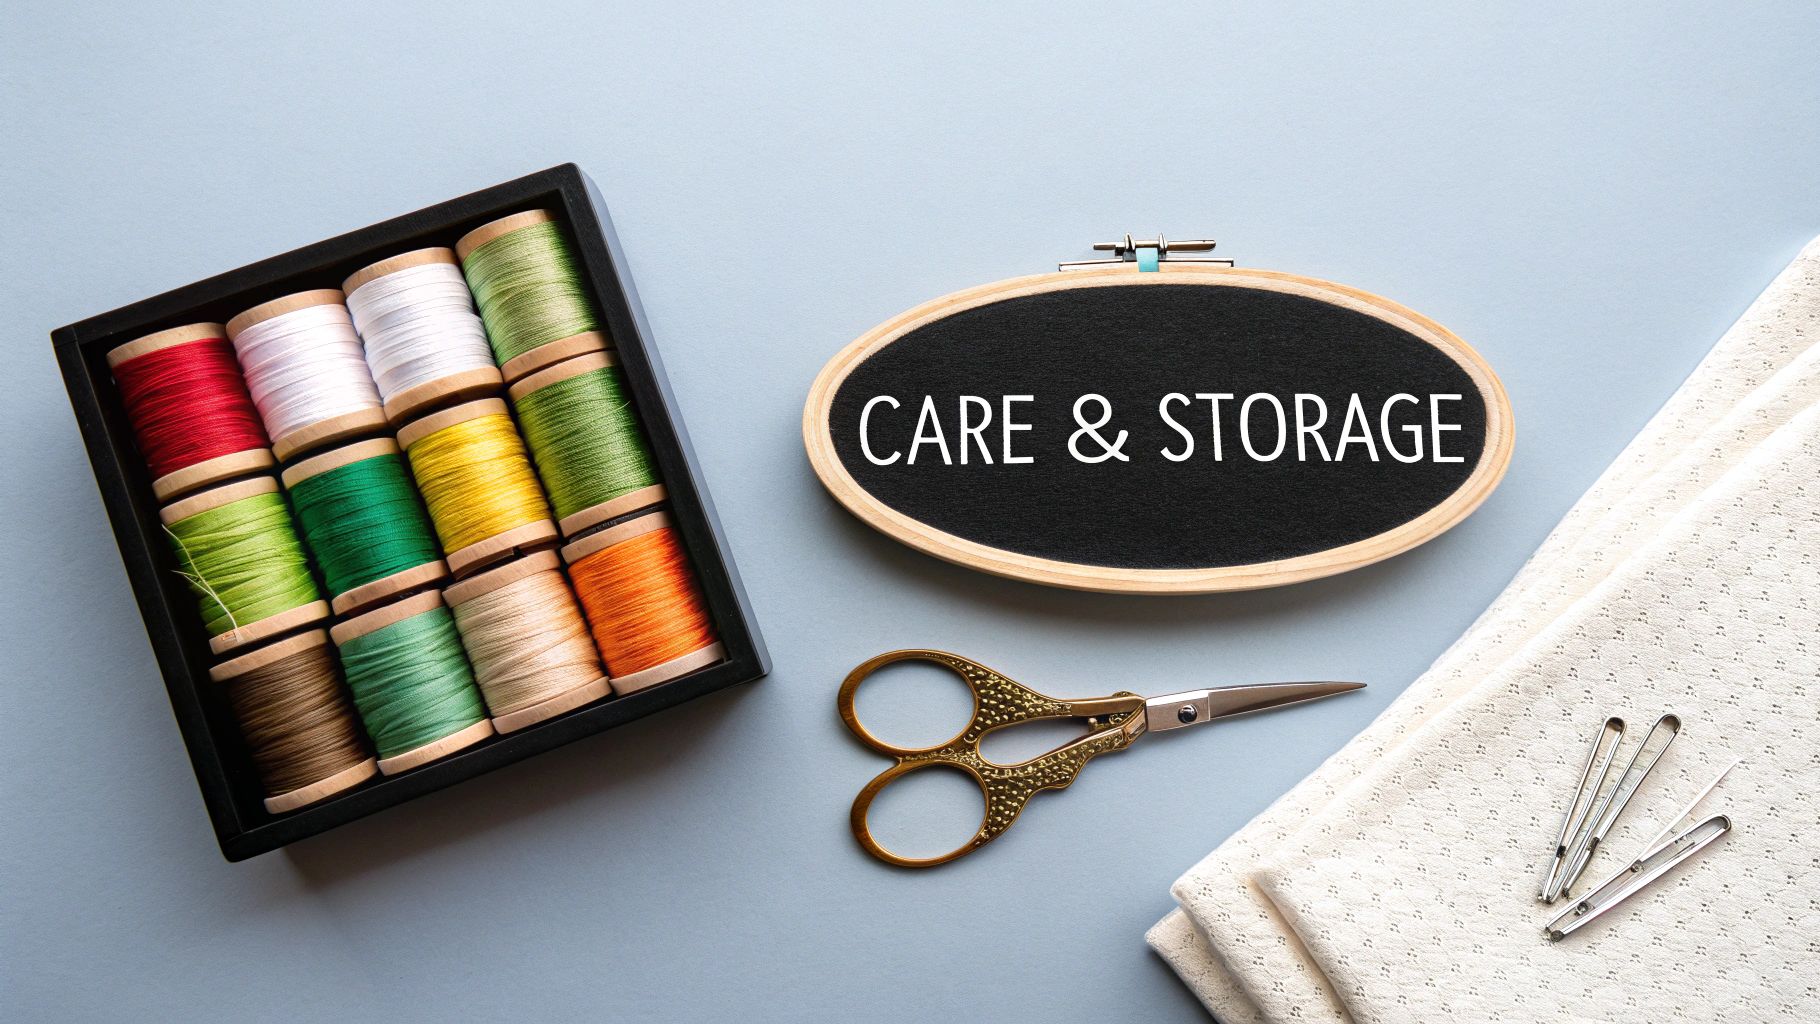 Once you start gathering your embroidery supplies for beginners, you'll want to make sure they last. Taking good care of your tools isn't just about protecting your investment; it makes the whole process so much more enjoyable.
A few simple habits go a long way. Storing your needles in a pincushion or magnetic case keeps them sharp and rust-free. Winding your floss onto bobbins prevents those infamous tangled messes. Think of it as setting your future self up for a peaceful, frustration-free stitching session.
Preserving Your Finished Art
After you’ve placed that final, satisfying stitch, a little bit of finishing work will make your artwork look its best and last for decades. The first step is to gently hand-wash your piece. Use cool water and a tiny drop of mild soap to lift any oils from your hands or marks left by the hoop.
Never, ever wring it out! That can distort the fabric and your stitches. Instead, gently roll the damp embroidery in a clean towel to blot out the extra water.
When it's time to iron, place your piece face-down on a thick, fluffy towel and press from the back. This simple trick prevents your beautiful, textured stitches from getting squashed flat.
Proper finishing is what transforms a completed project into a lasting piece of art. It’s the final act of care that honors the time and creativity you’ve invested.
Just like with other delicate crafts, a little bit of thoughtful care ensures your creations can be cherished for a lifetime. For a good comparison on maintaining crafted items, this guide on how to care for gold plated jewelry shares a similar philosophy of gentle preservation.
Got Questions? Let's Talk Supplies
Jumping into a new craft always brings up a few questions. Don't worry, everyone starts somewhere! Here are the answers to some of the most common things beginners wonder about embroidery supplies.
How Many Strands of Floss Should I Use?
If you look closely at a piece of embroidery floss, you'll see it's actually made of six smaller strands twisted together. For almost every project, you'll need to separate these out before you start stitching.
So, how many do you use? For most general work, like outlining and filling in shapes, two or three strands is the sweet spot. It gives you a nice, solid line without being too bulky.
If you're working on tiny details, you might drop down to just one strand for a really delicate look. On the other hand, using four, five, or even all six strands will give you a thick, bold stitch that covers the fabric quickly. Your pattern guide should tell you exactly what to use, but don't be afraid to experiment to see what you like!
What’s the Difference Between Embroidery and Cross-Stitch?
This is a great question! Think of embroidery as drawing with thread. You have a whole toolbox of different stitches (like the backstitch, satin stitch, and French knot) to create flowing lines, textures, and shapes on your fabric. It's very freeform.
Cross-stitch, on the other hand, is actually a type of embroidery. It’s built entirely from tiny, X-shaped stitches worked on a special gridded fabric. It’s a bit like creating a pixelated image with thread. Because it's so structured and easy to count, a lot of people find cross-stitch is a super accessible way to get started with a needle and thread.
Can I Wash My Finished Embroidery Project?
Yes, you absolutely can, and it's a good idea to clean off any oils or hoop marks before you display your work. The key is to be gentle.
I always recommend hand-washing your finished piece in cool water with a tiny bit of mild soap. Let it soak for a bit, but don't scrub the stitches.
Rinse it well, then gently squeeze out the water—don't wring it! The best way to dry it is to roll it up in a clean, thick towel to absorb most of the moisture, then lay it flat on another dry towel to air dry the rest of the way. If it needs ironing, flip it over so it's face-down on a fluffy towel and press from the back. This little trick keeps your stitches from getting flattened and squashed.


