
You’ve poured so much of yourself into every last stitch. Now, it's time for the final, crucial steps that will transform your hard work into a treasured piece of art. Getting the finish right really comes down to three main phases: preparation, mounting, and display.
Before you even glance at a frame, your fabric needs a little TLC. It needs to be washed to remove any oils from your hands, blocked to get the fabric perfectly square again, and ironed so it’s completely flat.
Preparing Your Stitching for a Flawless Finish
After spending countless hours on a project, the last thing you want to do is rush the finish. I've seen it happen too many times—a hasty prep job leads to a piece that's crooked, puckered, or even discolored down the road. Honestly, this prep work is the foundation for everything that comes next.
Taking the time to prepare your work properly ensures it's clean, perfectly square, and ready for whatever you have planned, whether that's a classic frame, a cozy pillow, or a cute little ornament. This is what separates a project that looks "handmade" from one that looks truly professional and handcrafted.
The Essential Cleaning and Washing Process
First things first, let's talk about cleaning. No matter how clean you think your hands are, the natural oils from your skin, plus dust and the tension from your hoop or Q-snap, will leave their mark. A gentle hand-wash isn't just a suggestion; it’s a must-do for a truly pristine finish.
Grab a clean sink or basin and fill it with lukewarm water. Add just a tiny bit of a mild, pH-neutral soap. I personally love the specialized soaps made for needlework, but in a pinch, a gentle, dye-free dish soap will get the job done. Let your project soak for 15-20 minutes, giving it a gentle swish every now and then. Whatever you do, don't scrub or wring it out! That’s a surefire way to distort your beautiful stitches or fray the threads.
Pro Tip: If you've used hand-dyed floss or you're just a bit nervous about the colors running, do a quick spot test on a scrap piece of the same fabric first. It’s a tiny step that can save you from a huge headache.
Once it's done soaking, rinse your piece under cool, running water until you can't feel any more soap. Gently squeeze out the extra water—again, never twist it. Lay it flat between two clean, thick towels. Now, roll the towels up like a jelly roll and press down firmly. This will soak up a ton of the moisture without damaging your work.
Blocking for a Perfectly Square Project
Blocking is the secret weapon for getting that perfectly square, professional look. This step is absolutely critical because it coaxes the weave of your fabric back into alignment after being pulled and stretched during the stitching process.
While your cross stitch is still damp, lay it face down on a fresh, dry towel or, even better, a dedicated blocking mat. Gently pat and pull the fabric until the grid of the weave looks straight and the whole piece is a perfect square or rectangle. I always use a ruler to double-check the corners and make sure everything is lined up just right.
If you have a blocking mat, you can pin the edges to hold the shape while it dries. Then, just let it air dry completely. This might take up to 24 hours, but be patient. Resisting the temptation to use a hairdryer will be worth it for a perfectly flat and square finish.
To make this prep work even clearer, I've created a quick checklist to run through before you start the final mounting or framing.
Finishing Prep Checklist
This simple table is your go-to reference to make sure you've covered all the bases for a professional-quality finish.
| Preparation Step | Why It's Critical | Pro Tip |
|---|---|---|
| Hand-Washing | Removes oils, dust, and hoop grime for a pristine look. | Use lukewarm water and a pH-neutral soap. Never wring or twist the fabric! |
| Blocking | Realigns the fabric weave, correcting distortion from stitching. | Pin the damp piece to a blocking mat to ensure it dries perfectly square. |
| Pressing | Creates a smooth, flat surface for easy mounting and a crisp look. | Iron from the back on top of a fluffy towel to protect your stitch texture. |
Running through these steps might seem tedious, but they are the bedrock of any successful finishing method.
This simple infographic breaks down the core workflow of any finishing project.
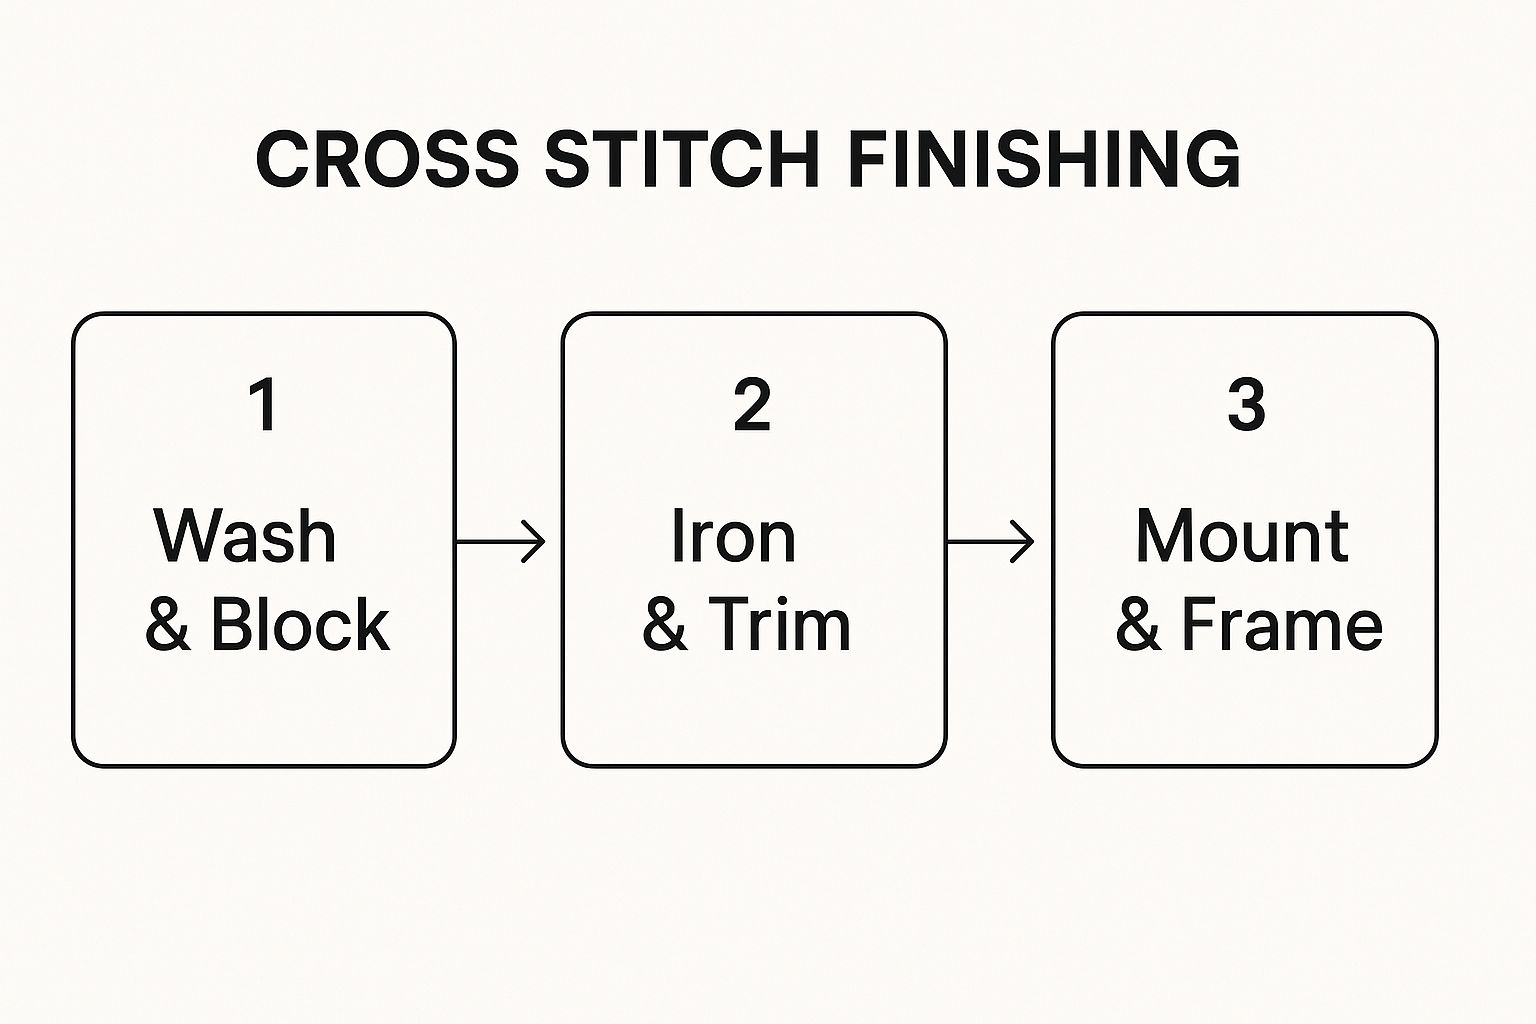
As you can see, no matter how you decide to display your piece, the foundational steps of preparing and trimming are always the same. Once your project is washed, blocked, and pressed, you're ready to dive into the exciting world of mounting and framing. Even the most complex designs rely on these simple preparations. And if you're just getting started and want to get some practice, there are tons of fantastic easy cross stitch patterns for beginners to try out.
The Art of Classic Framing for Your Cross Stitch
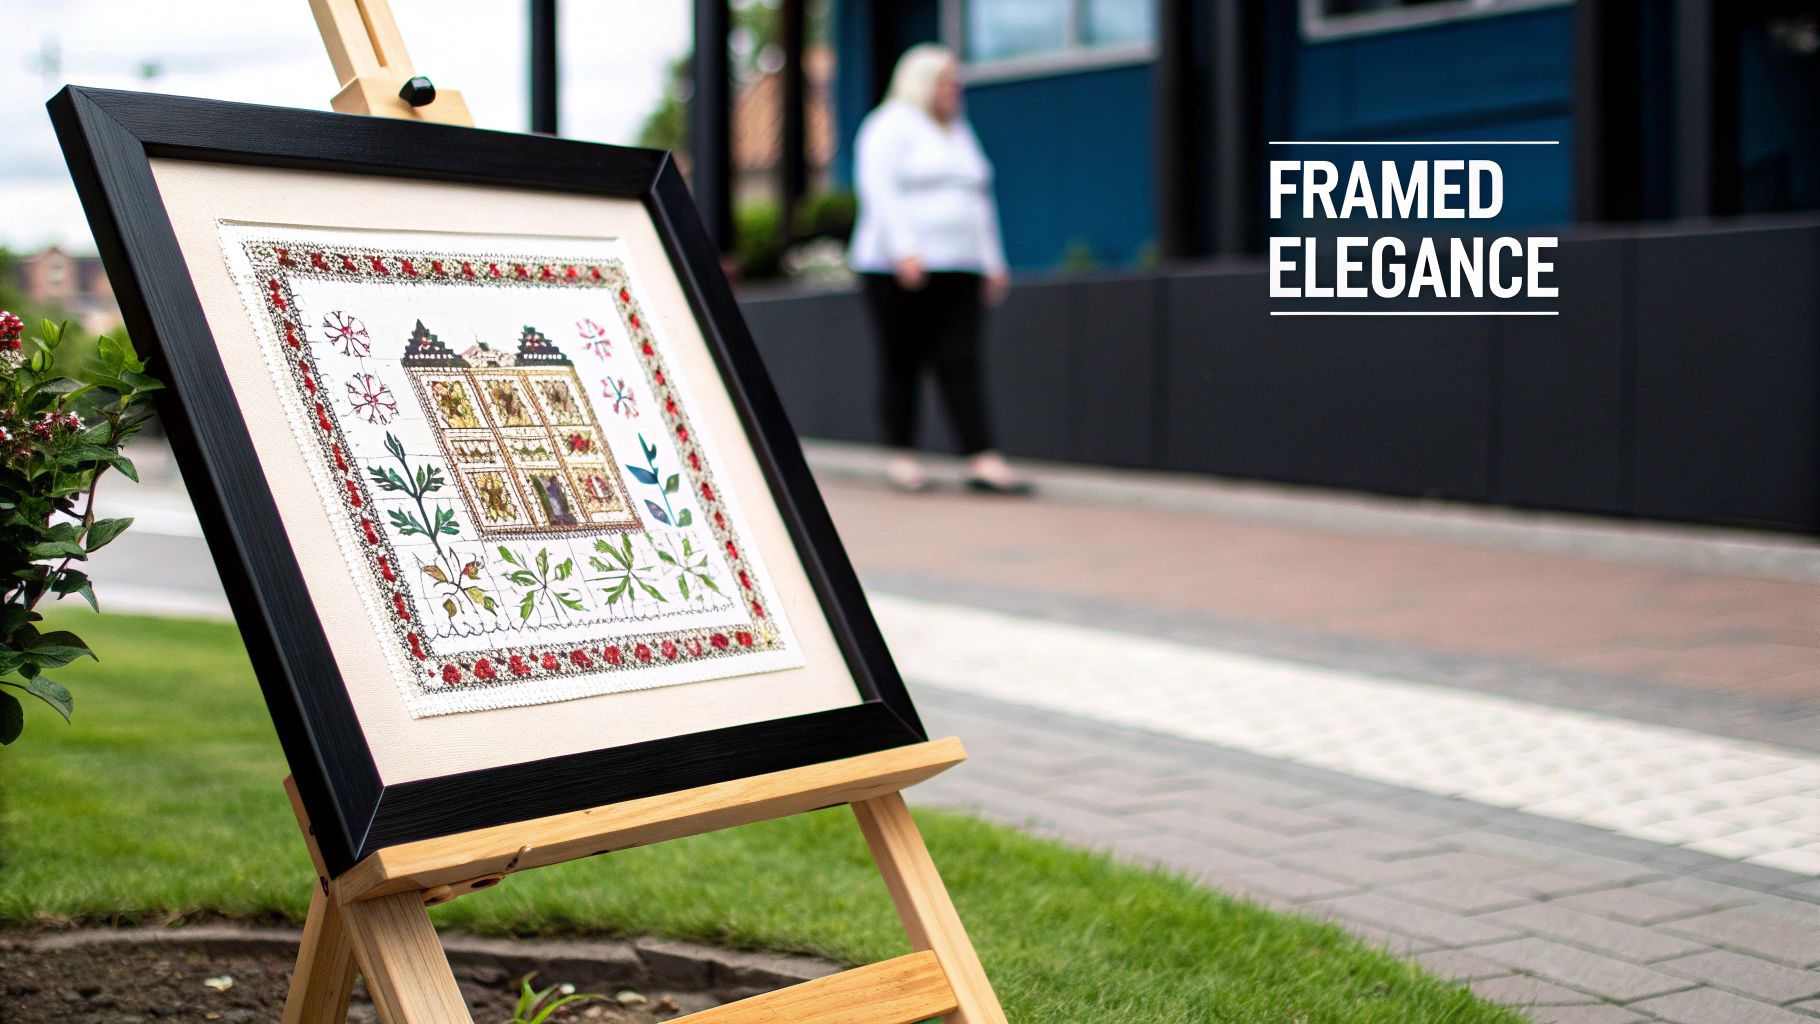
When you're ready to show off a finished piece, nothing beats a classic frame. It's the go-to method for a reason: a good frame protects your hard work from dust, sun, and everyday life, turning your stitchery into a true piece of art. This is easily one of the most popular cross stitch finishing techniques because it honors all those hours you poured into every single stitch.
Framing your work is also a nod to the incredible history behind this craft. You’re taking part in a tradition that's been around for over 2,500 years, with roots stretching from ancient Egyptian tombs to Tang Dynasty China. It's a craft that traveled the Silk Road and was embraced by royalty. To see just how deep these roots go, you can explore the fascinating historical journey of cross stitch on egausa.org.
Choosing the Perfect Frame and Matting
Think of the frame and mat as the supporting actors—their job is to make your stitching shine, not steal the show. The right combination pulls the whole look together.
So, where do you start? Look at the style of your cross stitch. A clean, modern piece might feel right at home in a simple black or light wood frame. On the other hand, if you've stitched a detailed, traditional sampler, a more ornate, vintage-looking frame could be the perfect match. Don't be afraid to play with color, either. You can pick up a subtle color from your floss for a cohesive feel or go bold with a contrasting frame to make your design really pop.
Matting is just as important. It does two critical jobs: it gives your piece some visual breathing room and, more importantly, keeps the fabric from touching the glass.
A Stitcher's Pro Tip: Never let the glass press directly on your stitches. Without a mat or spacers to create an air gap, you risk flattening your beautiful, plump stitches. Even worse, moisture can get trapped, leading to mildew—every stitcher's nightmare.
When it comes to the mat color, you can rarely go wrong with a neutral like cream, off-white, or a pale gray. These shades let your handiwork remain the star.
Mounting Your Fabric for a Drum-Tight Finish
To get that truly professional, polished look, you have to mount your fabric on a sturdy backing board. This is the secret to a smooth, taut finish with no sagging or wrinkles. It’s a non-negotiable step. The two best methods I’ve relied on for years are pinning and lacing.
The Pinning Method
This is a great, straightforward technique that uses rust-proof stainless steel pins and an acid-free foam core board.
- First, cut your foam core board to the exact size of the frame's opening.
- Lay your clean, blocked cross stitch piece face-up and center it on the board.
- Fold one edge of the extra fabric around to the back and stick a pin right into the edge of the board to hold it.
- Gently pull the fabric on the opposite side until it's taut, then pin that side in the middle, too.
- Do the same for the top and bottom. You should now have four pins forming a "+" shape.
- Keep adding pins, working your way out from the center on all four sides. I place them about a half-inch apart until the fabric is perfectly smooth.
The Lacing Method
Lacing is the gold standard for archivists and anyone framing an heirloom. You're literally using a strong thread to lace the fabric edges together on the back, like a corset. This creates incredible, even tension that lasts. It takes more time, but the results are second to none.
You start by centering your piece on the board, then fold two opposite sides over the back. With a long, sturdy thread (quilting or buttonhole thread works great), you stitch back and forth in a zigzag pattern between the fabric edges, pulling tight as you go. Once that’s done, you repeat the whole process for the other two sides.
Comparing Pinning and Lacing
| Feature | Pinning Method | Lacing Method |
|---|---|---|
| Speed | Quick and easy. You don't need much beyond pins and board. | Definitely a slower, more patient process. |
| Tension | Gives you a good, tight surface, but might loosen over years. | Creates a drum-tight, even tension that will last a lifetime. |
| Best For | Smaller projects or when you want a beautiful finish without the extra time. | Heirloom pieces, large or heavy projects, and anything you want to preserve perfectly. |
| Reversibility | Super easy. Just pull the pins out to adjust or re-frame. | A bit more work to unlace, but it's still completely reversible. |
Both of these classic cross stitch finishing techniques give you a gorgeous result. The one you choose really just comes down to the project itself, its size, and how much time you want to spend on the finishing touches.
Creative Finishing Ideas Beyond the Frame
A beautiful frame is a classic for a reason, but let's be honest—some projects are just begging for a more imaginative finish. Stepping outside the frame opens up a whole new world, turning your needlework into something you can use, wear, or gift. These alternative cross stitch finishing techniques are my favorite way to give a project a personal, modern spin.
Think about it: that floral piece you just stitched could become a gorgeous throw pillow. That quirky, graphic design? A perfect, sturdy tote bag. The possibilities are really only limited by your creativity, and it’s a fantastic way to make your craft both beautiful and practical.
Finishing in an Embroidery Hoop
One of the most popular and charmingly rustic ways to show off your work is right in the hoop you stitched it in. It's a method I turn to all the time because it's fast, affordable, and gives the finished piece a clean, modern-boho feel.
You'll want to use a nice-looking wooden hoop for the final display. Once your fabric is washed and pressed, pop it back in the hoop. Take your time getting the design perfectly centered and pulling the fabric taut—you want it tight as a drum. Then, trim the extra fabric around the back, leaving about a one to two-inch border to work with.
To get a tidy finish on the back, you've got a few great options:
- Running Stitch: My go-to method. Just use a needle and thread to sew a simple running stitch around the fabric edge. Pull the thread, and it gathers everything neatly toward the center. Simple and effective.
- Felt Backing: For a truly professional look, cut a piece of felt just a bit smaller than the hoop. After trimming your Aida, you can either glue the felt over the gathered fabric or directly to the inner ring for a clean cover-up.
- Hot Glue Tuck: In a pinch, this works wonders. Run a thin line of hot glue on the inside rim of the hoop (on the back) and carefully press the fabric edge into it.
This hoop-art style looks amazing on a gallery wall, in a nursery, or just as a sweet standalone piece.
Creating Practical and Usable Items
Why keep all your beautiful work on the wall? With just some basic sewing skills, you can integrate your cross stitch into things you use every day. This is where the hobby becomes truly functional art.
Custom Pillows and Cushions
A stitched panel makes a stunning focal point for a pillow. Just trim your finished piece to the right size, making sure to leave a generous seam allowance. I recommend picking a sturdy backing fabric like canvas or denim. Sew the two pieces together, leave a small opening, stuff it with a pillow form, and stitch it closed. Voila!
Key Takeaway: When turning your stitch into a functional item like a pillow or bag, always consider reinforcing the back. Fusing a lightweight interfacing to the back of your Aida or linen before you sew adds durability and prevents the fabric from stretching out of shape with use.
Wall Banners and Hangings
For a softer, more modern look than a frame, try a wall banner. Stitch your design on a rectangle of fabric, leaving extra room at the top. Fold that top edge over a small wooden dowel and sew a channel to hold it. You can finish the bottom with a simple hem, cut it into a point, or get fancy with some tassels or fringe.
The Rise of Modern Finishing
Using cross stitch for more than just samplers isn't a new idea, but it really took off in the second half of the 20th century. A craft revival between about 1960 and 1980 set the stage, thanks to people having more leisure time and better access to materials.
Then came the commercial boom of the 80s and 90s, which introduced things like plastic canvas and saw stitcher communities flourish. This is when the doors for alternative cross stitch finishing techniques were truly blown wide open. It solidified cross stitch as a major hobby and fueled a global industry, completely changing how we finish and share our work. You can find a great deep dive into the modern history of cross stitch on lordlibidan.com.
Small Projects with Big Impact
Not every project needs to be a masterpiece that takes months. Smaller stitched pieces are perfect for creating handmade gifts and accessories that pack a personal punch.
- Bookmarks: A small, rectangular design is perfect for a bookmark. I like to finish them by backing the piece with stiff felt or another piece of fabric, using an iron-on adhesive for a no-sew bond.
- Coasters: Stitch small motifs on a durable fabric. To make them truly functional, mount the finished stitch onto a cork or ceramic tile base with a strong craft glue.
- Greeting Cards: A tiny stitched design can be mounted on blank cardstock to create a one-of-a-kind greeting card that feels more like a gift.
These smaller projects are an excellent way to use up leftover floss and fabric scraps. It’s a win-win: nothing goes to waste, and you get to practice different finishing skills on a small, manageable scale.
To help you decide what to tackle next, here's a quick look at some popular creative finishes and what they typically involve.
Alternative Finishes and Skill Level
This table breaks down some creative finishing projects to help you match your idea with your skill level and desired outcome.
| Finishing Project | Ideal For | Estimated Difficulty | Essential Materials |
|---|---|---|---|
| Pillows & Cushions | Making functional home decor; gifting | Intermediate | Backing fabric, pillow form, sewing machine/needle & thread |
| Tote Bags | Creating a personalized, usable accessory | Intermediate | Heavy-duty fabric (canvas), interfacing, webbing for straps |
| Bookmarks | Quick gifts; using up scraps | Beginner | Stiff felt or cardstock, iron-on adhesive or craft glue |
| Ornaments | Holiday decor; small, quick finishes | Beginner | Felt for backing, ribbon for hanging, stuffing (optional) |
| Needle Books | Gifts for fellow crafters | Beginner to Intermediate | Felt for pages, backing fabric, button/snap for closure |
| Coasters | Practical, small gifts; protecting furniture | Beginner | Cork or ceramic tiles, strong craft adhesive, waterproof sealer |
Choosing one of these projects can be a rewarding way to see your cross stitch come to life off the wall. Don't be afraid to experiment and find what you enjoy making the most
Creating 3D Items Like Ornaments and Biscornu
Ready to take your work off the wall? Moving beyond flat finishes and creating three-dimensional objects is an incredibly satisfying way to show off your stitching. These small projects, from holiday ornaments to pincushions, are perfect for gifting and push your skills into new territory.
Transforming a flat stitched piece into something you can hold in your hand involves a bit more construction, but the results are so worth it. We’ll walk through how to assemble these charming pieces, focusing on the techniques you need to create sturdy, beautifully shaped items that will last.
The Magic of Making a Biscornu
A biscornu is a classic for a reason. This quirky little pincushion gets its unique, multi-pointed shape not from a complicated pattern, but from a clever twist in how two simple squares are joined. It's a surprisingly straightforward process and a fantastic introduction to dimensional finishing.
You’ll start with two stitched squares of the exact same size. The key here is to have a backstitched border that defines the edge of each square—this isn't just for looks, it's your sewing guide.
After you've stitched, washed, and ironed your pieces, trim the fabric, leaving about a one-inch margin around that backstitched line. Now for the magic. Place one square on top of the other, but offset them so the corner of the top piece lines up perfectly with the middle of one side of the bottom piece. This is what creates the biscornu's signature shape.
Crucial Insight: The entire construction hinges on a whip stitch or ladder stitch that joins only the backstitched borders. You aren't sewing through the Aida or linen itself; you're catching the backstitches, which pulls the two pieces together almost invisibly.
You’ll sew from that center point of one square to the corner of the other, working your way around the edges. As you go, you’ll see the puffy pillow take shape. Before you sew it all the way up, leave a small gap for stuffing. Gently add polyester fiberfill until it's firm but not bursting at the seams, then stitch the opening closed. For a classic finishing touch, pull a thread through the very center from top to bottom and add a decorative button or bead to create a deep dimple.
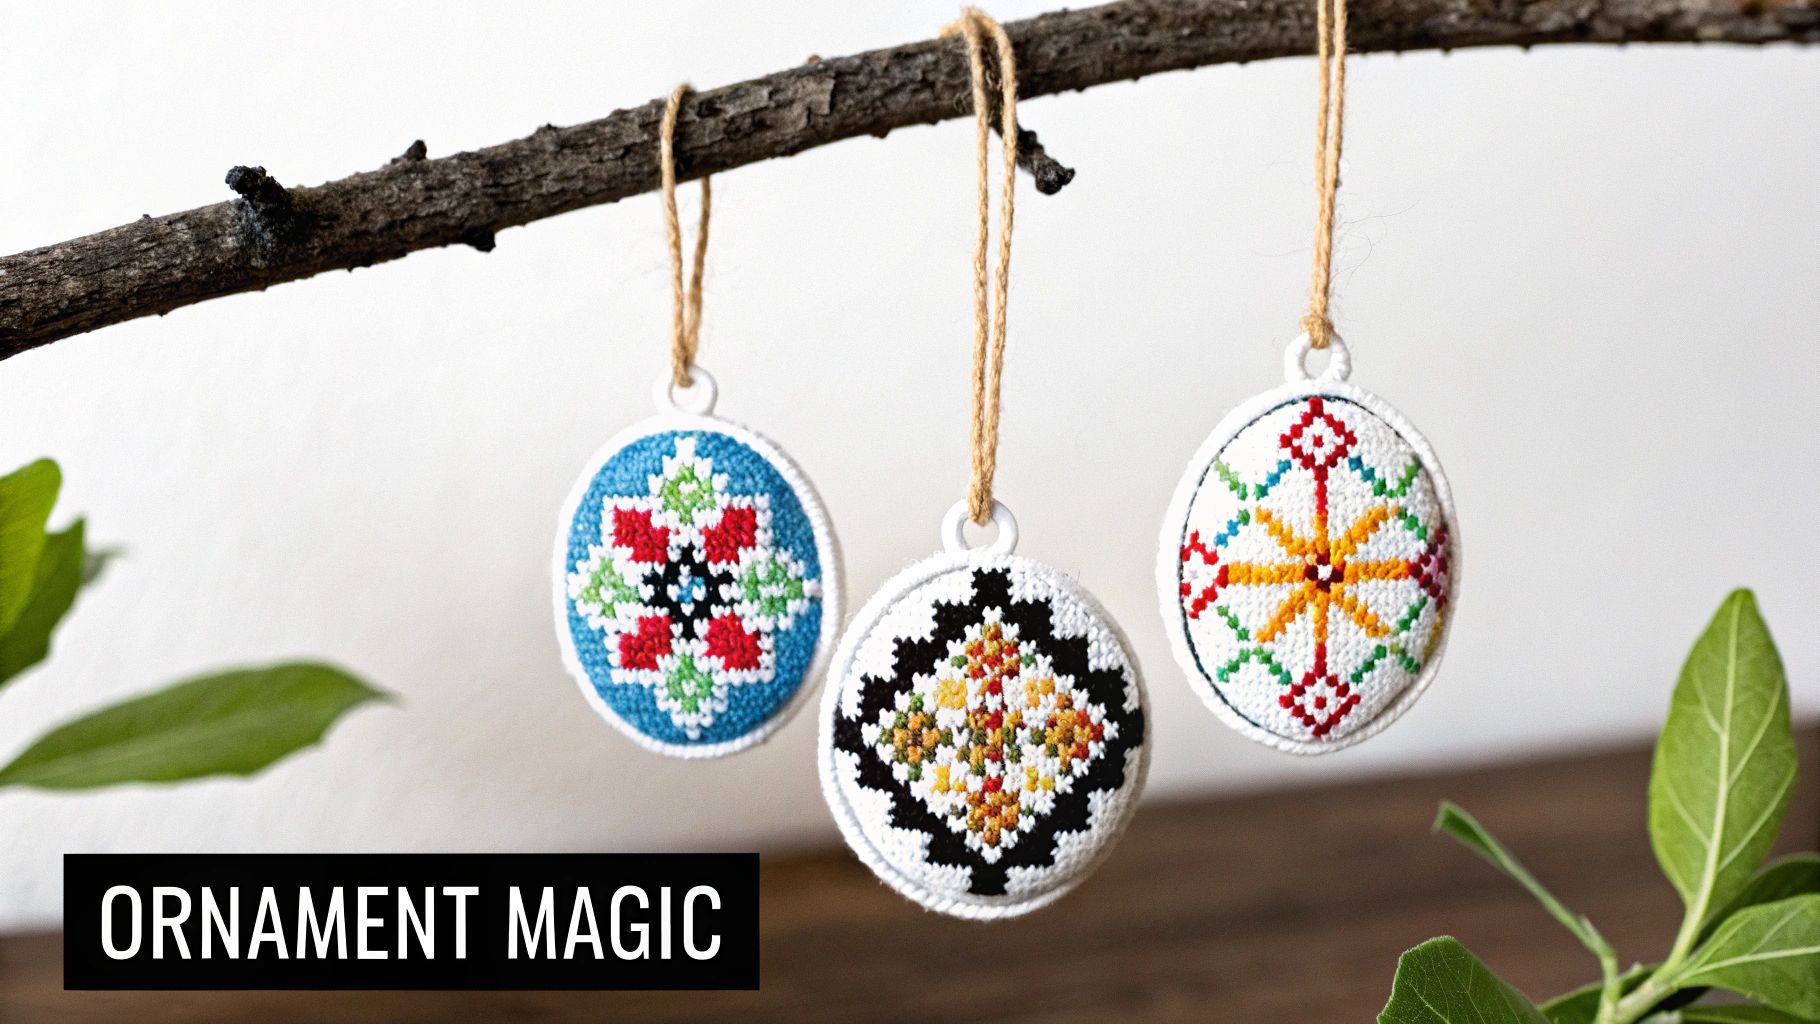
How to Finish a Cross Stitch Ornament
Holiday ornaments are probably the most popular 3D cross stitch project out there. They make such heartfelt gifts and look beautiful on the tree. While you can make a simple pillow-style ornament, using a mounting board gives it a sturdier, more professional look that really holds up over the years.
Here’s what you’ll need to pull this off:
- Your finished cross stitch piece
- A piece of backing fabric (like felt or cotton) cut to the same size
- Lightweight but stiff cardboard (many stitchers swear by acid-free comic book boards)
- A thin layer of cotton batting
- Strong thread for lacing and a fine, clear thread for assembly
First, cut two identical shapes from your cardboard—a circle is traditional, but you can do a star, a square, anything. Next, cut two pieces of batting just a tiny bit smaller than your cardboard shapes. Glue one piece of batting to each cardboard cutout; this gives your ornament a lovely, soft, rounded front and prevents sharp cardboard edges from showing.
Now, center your stitched design over one of the padded forms. Flip it over and lace the back tightly, just like you would for framing. You want the fabric to be taut and perfectly smooth. Do the exact same thing with your backing fabric on the second padded form.
You should now have two neat little discs—one with your stitching and one with the backing fabric. Place them with the wrong sides together. Using a clear thread and a small whip stitch, neatly join the two halves around the edge. The final flourish is to glue or sew on a decorative cording around the seam and add a ribbon loop for hanging. This method creates a durable, high-quality ornament that will look stunning for years to come.
If you want to create a truly one-of-a-kind piece, you can even turn a picture into a cross stitch pattern and capture a special memory on the tree.
Troubleshooting Common Finishing Problems
You’ve poured hours into every stitch, and now it’s time for the final push. But sometimes, even with the most careful planning, things go sideways right at the finish line. It's a frustrating moment every stitcher has experienced, but don't panic. Most of these common finishing hiccups are surprisingly fixable with a bit of patience and a few tricks of the trade.
Whether you’ve just spotted a mysterious stain, you're fighting with puckered fabric, or you just can’t seem to get your piece to lie perfectly flat, there's almost always a way to fix it. These troubleshooting tips for common cross stitch finishing techniques can help you rescue a project you thought was a lost cause.
Handling Last-Minute Stains and Blemishes
Picture this: you're halfway through lacing your beautiful project onto its mounting board when your heart sinks. You’ve found a small, faint stain that you somehow missed during the initial wash. Before you undo all your work, take a breath. You don't have to start over.
For minor, non-greasy spots, a careful spot treatment is your best bet. Mix a single drop of gentle, clear soap with some water. Using a cotton swab, dab the solution only on the affected area. Then, "rinse" it by dabbing gently with another swab dipped in plain water. Blot it dry with a clean, white cloth. This method is far safer than re-washing a piece that's already been stretched or mounted.
Managing Puckered or Uneven Fabric
Fabric puckering is one of the most common headaches for a stitcher, especially when making pillows or other soft finishes. This usually happens when the fabric tension isn't perfectly even as you assemble the final piece.
If you’re framing and see puckers, the best approach is to unpin or unlace your work and simply start over. This time, work slowly from the center outward, carefully smoothing the fabric as you go. For a pillow, if the puckering is bad, you might need to rip the seam and re-sew that section, making sure you don't stretch one layer of fabric more than the other.
A Practical Fix: Sometimes, puckering is minimal but just won't go away. A little steam can work wonders. Hold your iron a few inches above the fabric—never let it touch—and the steam will help relax the fibers just enough for you to smooth out those tiny wrinkles before they set.
Imagine the challenges faced on a monumental scale. The record for the largest cross stitch ever made, a re-creation of 'The Battle of Grunewald,' measured over 9 by 4 meters! It required 29 stitchers to complete its 7,897,840 stitches. Assembling the 50 separate panels into one seamless piece was a masterclass in problem-solving puckers and alignment. You can read more about this incredible feat of stitching on caterpillarcrossstitch.com.
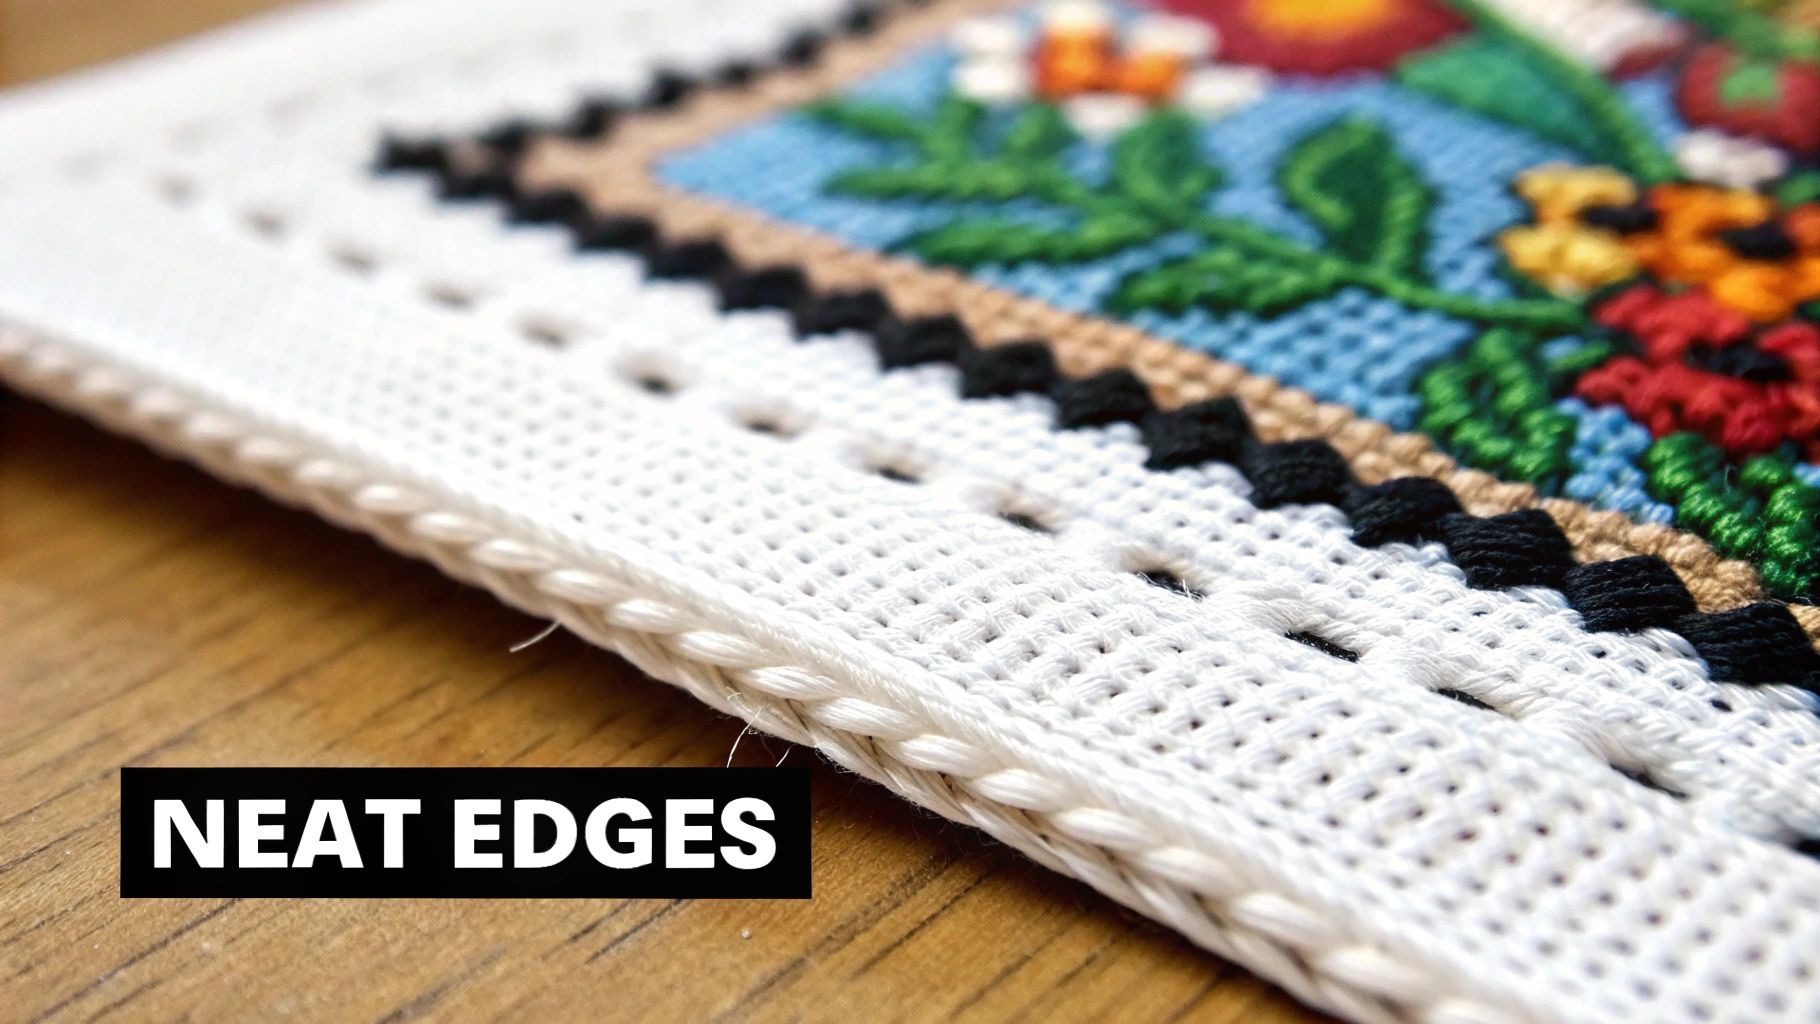
Fixing Frayed Edges and Loose Threads
Did you get a little too happy with the scissors and trim your fabric too close? We've all been there. If your edges are fraying and are too short to tuck away, you have a couple of great options to stop the unraveling in its tracks.
- Fray-Stopping Liquid: A product like Fray Check is an absolute lifesaver. Just a tiny dab of this clear liquid along the raw fabric edge will seal the fibers and prevent them from coming undone.
- Fusible Interfacing: If you still have a bit of an edge to work with, you can fuse a strip of lightweight interfacing along the back. This not only secures the threads but also adds a bit of welcome stability.
These little fixes are perfect for projects that will be handled a lot, like family heirlooms. If you're creating a detailed family history piece, looking at different cross stitch family tree patterns can give you great layout ideas, and applying these finishing tips will ensure your work lasts for generations. With these solutions in your back pocket, you can face any finishing challenge with confidence.
Your Cross Stitch Finishing Questions Answered
Once you’ve placed that final stitch, a whole new set of questions tends to surface. Don't worry, that's completely normal! Moving from stitching to finishing can feel like uncharted territory. Let's walk through some of the most common questions I hear from fellow stitchers and get you the clear, practical answers you need.
How Can I Wash My Piece Without Colors Bleeding?
This is the big one, isn't it? The fear of a rogue red or a hand-dyed floss running all over your beautiful work is real. The secret to avoiding a disaster is to be gentle and, when in doubt, do a quick pre-test.
Before you dunk your whole project, snip off a tiny piece of the floss you're worried about. Get it wet and press it firmly between a folded white paper towel for about a minute. If you see any color on the towel, that floss isn't completely colorfast. But don't panic! Just toss a commercial color catcher sheet into your wash water; it's designed to soak up any loose dye. Always stick to cool or lukewarm water—hot water is notorious for making colors run.
My Two Cents: If you're nervous about bleeding, keep the wash short and sweet. A quick, 15-minute dip and swish is almost always enough to clean a piece without giving the dyes a chance to migrate. Avoid long soaks.
Is Pinning or Lacing Better for Framing?
Ah, the great framing debate! The honest answer is that both methods can give you a fantastic, tight finish. The right choice really boils down to your project and what you feel most comfortable with.
- Pinning: This is your quick and easy option. It's perfect for smaller or medium-sized projects and is incredibly simple to adjust if you don't get it perfectly centered on the first try.
- Lacing: This is the archival gold standard. It creates wonderfully even tension that lasts for decades, making it the go-to for heirlooms, oversized pieces, or anything you want to preserve for future generations.
I tend to think of it this way: pinning is my reliable, everyday method, while lacing is what I pull out for those truly special, "forever" pieces.
Can I Use a Regular Clothing Iron on My Aida?
Yes, absolutely! In fact, you should use an iron. Pressing your fabric is the key to getting that flawlessly smooth, professional look. The trick is to do it a little differently than you'd iron a shirt.
Always iron your cross stitch from the back. Lay it face down on a clean, fluffy towel. This is crucial—the towel cushions your stitches, so the iron doesn't flatten them and erase all that beautiful texture you worked so hard to create. Use a medium-hot setting with a bit of steam (or a light spritz from a water bottle) to chase away every last crease. This one small step makes a massive difference.
What Is the Best Backing for a Pillow?
When you’re turning a stitched piece into a pillow, the fabric you choose for the back is just as important as the front. You need something with enough structure to support the Aida and keep the stuffing from peeking through.
Look for a medium-weight cotton canvas, denim, or even a sturdy twill. These fabrics have a tight weave and are built to last. For a truly top-tier finish, I highly recommend fusing a lightweight interfacing to the back of your Aida cloth before you start sewing. This adds an extra layer of stability, reinforces your stitches, and gives the pillow a much more polished, structured feel.
Ready to turn your favorite memories into a work of art? At Cross Stitched, we make it easy to create a personalized cross stitch kit from any photo. Discover our custom kits and extensive collection of patterns today. Start your next project with Cross Stitched.


