
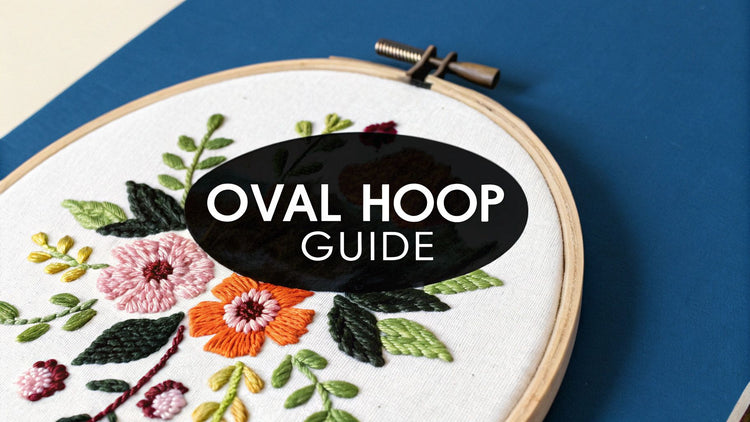
If you’ve ever found yourself struggling with a design that’s longer than it is wide—think lettering, portraits, or long floral stems—an oval embroidery hoop might just be the tool you’re missing. Their unique shape lets you capture a whole linear pattern in one go, which means less time spent repositioning your fabric and better tension across your entire work area.
Why an Oval Hoop Belongs in Your Kit
We all have a collection of classic round hoops, and they’re staples for a reason. But it’s best to think of the oval embroidery hoop not as a replacement, but as a specialist. It’s the tool you pull out when the job calls for something a little different, excelling where a round hoop might just fall short.
The magic is all in its shape. By matching the hoop's dimensions to your design's layout, you can seriously cut down on how many times you have to re-hoop your project. Every time you move a standard hoop on a long design, you risk squashing finished stitches or struggling to get that perfect, drum-tight tension back. An oval hoop often solves that problem before it starts.
Practical Advantages Over Round Hoops
The real "aha!" moment with an oval hoop comes when you're working on something like a custom name banner or a delicate border along a tea towel. Instead of clamping down a small circle and constantly shifting it along the pattern, you can frame a much larger section of the design at once. This gives you a more stable and continuous stitching surface, which is absolutely critical for keeping your stitch quality consistent.
An oval hoop really proves its worth in these kinds of projects:
- Lettering and Calligraphy: Stitching a name or a favorite quote is a classic example. An oval hoop frames that long, horizontal shape perfectly, keeping the entire word or phrase taut.
- Elongated Portraits: Whether you’re embroidering a full figure or a beloved pet, the vertical orientation of an oval hoop is ideal. You can capture the whole subject without any awkward cropping.
- Border Designs: For tablecloths, clothing, or linens that need an intricate border, an oval hoop lets you work on much longer sections of the pattern at a time, making the whole process smoother.
The biggest benefit is simple: using an oval hoop means you re-hoop less often. This not only saves you time and frustration but also protects your fabric and stitches from the stress of being repeatedly clamped and unclamped.
A Niche with a Purpose
Oval hoops might seem like a modern novelty, but they’ve carved out a solid spot in the craft world for good reason. The entire needlework supply market is huge—valued at several hundred million USD in the early 2020s and still growing. Craft retailers often report that adjustable oval embroidery hoops make up a surprisingly significant 10-15% of all their hoop sales. This shows just how many stitchers rely on them for specific design challenges. You can read more about the history of these tools on Wikipedia.
In the end, adding an oval hoop to your collection isn’t about having another gadget. It’s about having the right tool for the job. It can make your stitching process smoother and more enjoyable, and it opens up possibilities for larger, more ambitious designs that might feel too cumbersome with a standard round hoop.
Choosing the Right Oval Hoop for Your Fabric
Picking the right oval hoop goes way beyond just grabbing a size that looks about right. It’s really about creating a perfect partnership between your tool, your fabric, and your project. A great hoop feels like a natural extension of your hands, but the wrong one can turn a relaxing hobby into a constant battle with slack fabric and uneven stitches.
The trick is to find that sweet spot between a rock-solid grip and a gentle touch. What you choose will depend heavily on the weight and weave of your fabric. Think about it: a sturdy wooden hoop that’s a dream on stiff Aida cloth could be a nightmare on delicate silk, potentially leaving marks or even causing damage.
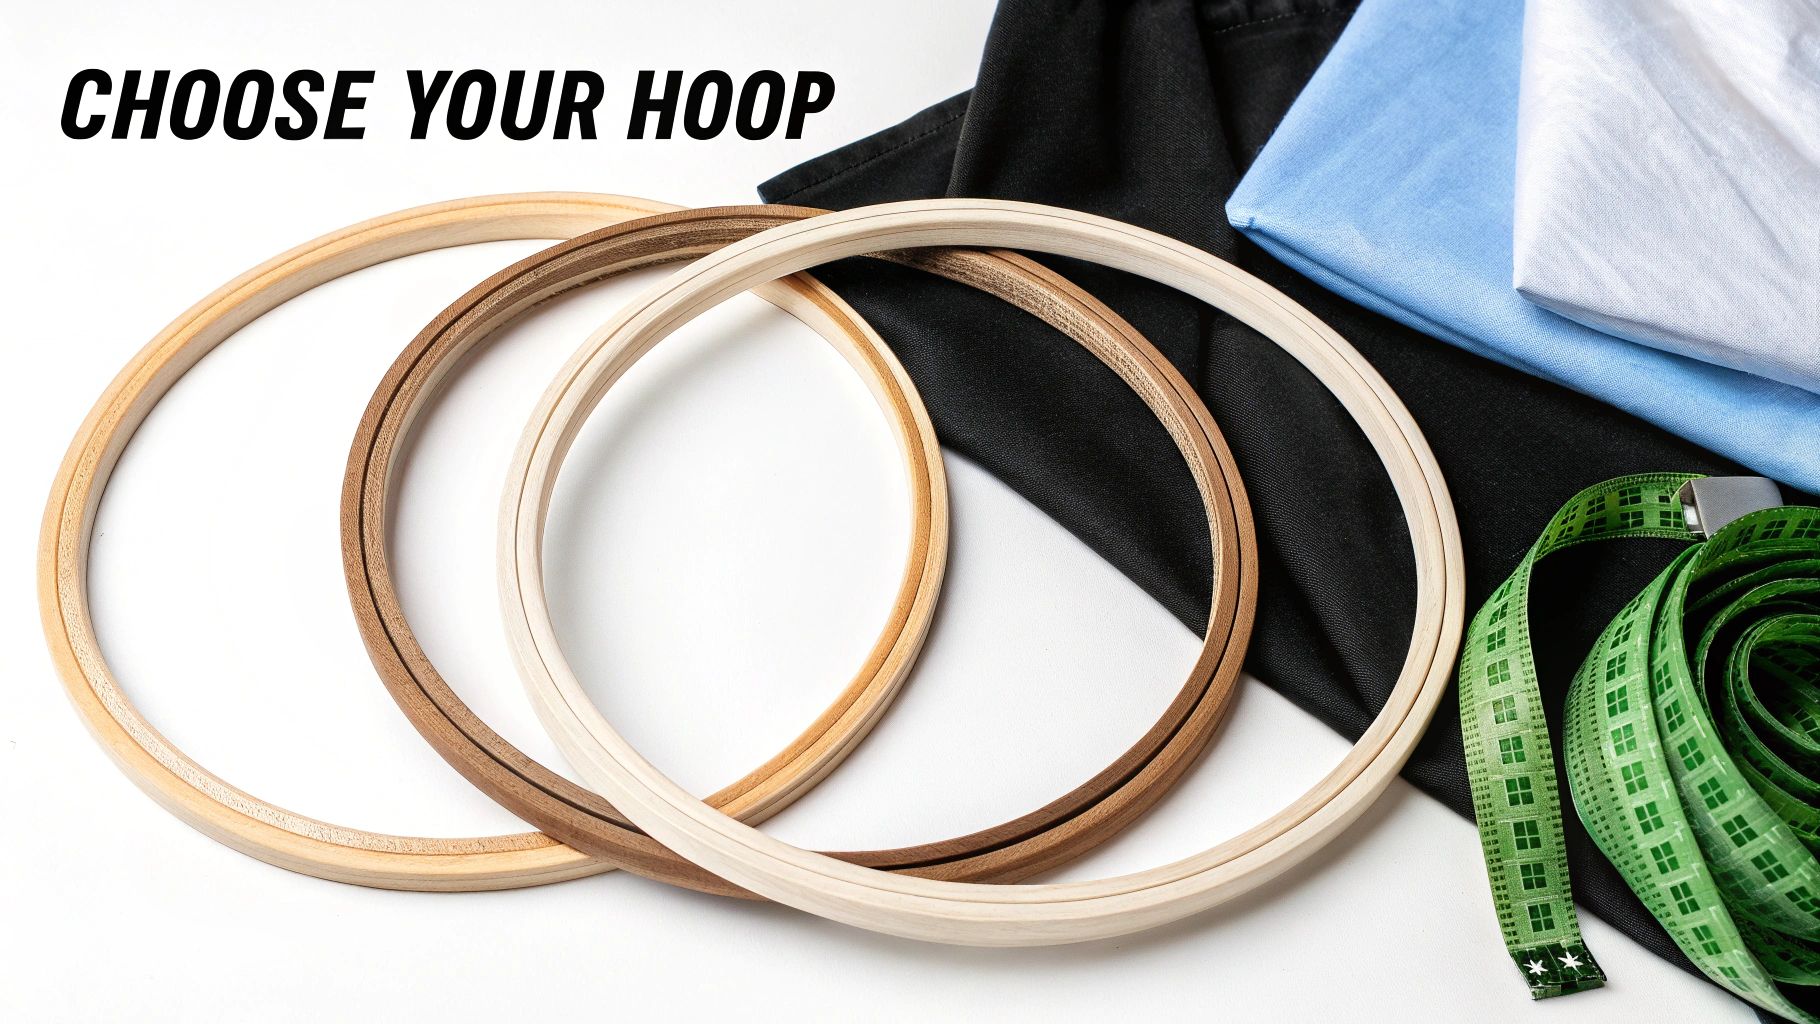
Hoop Materials: What's the Difference?
Your first big decision is the material of your oval embroidery hoops. Each type—wood, plastic, even rubber—feels and functions differently, and some are definitely better suited for certain fabrics.
Comparing Oval Hoop Materials
Choosing between wood, plastic, or a flexible hoop often comes down to the project at hand and your personal stitching style. Each has its own distinct advantages and quirks.
| Material | Pros | Cons | Best For |
|---|---|---|---|
| Wood (Beechwood/Bamboo) | - Natural texture provides excellent grip - Sturdy and long-lasting - Aesthetically pleasing for photos and display |
- Quality varies; cheaper wood can splinter - Can lose grip over time if the screw wears out |
General hand embroidery, natural fibers like cotton and linen, and display-worthy framing. |
| Plastic | - "Ridge and groove" systems lock fabric tight - Lightweight and easy to clean - Great for achieving drum-tight tension |
- Can be slippery with some fabrics - The locking mechanism can be too harsh for delicates |
Machine embroidery, punch needle, and stitchers who prefer extremely high tension. |
| Flexible (Silicone/Rubber) | - No screw to tighten, easy to pop on - Doubles as a decorative frame for finished work - Gentle on fabric |
- Tension can loosen during long stitching sessions - Not ideal for heavy or thick fabrics |
Quick projects, lightweight fabrics, and framing finished pieces. |
Ultimately, a well-made wooden hoop is often the most versatile tool in a hand embroiderer's kit. It’s a reliable workhorse for everything from simple samplers to complex thread paintings.
Getting the Size Just Right
Once you’ve landed on a material, it’s time to pick a size. You want an oval hoop that can comfortably frame the entire design, or at least the largest section you plan to stitch at one time. A classic beginner mistake is using a hoop that's too small, which means you’re constantly having to move it around. That gets old, fast.
Here’s a simple rule of thumb I always follow: leave at least a one-inch margin between the edge of your design and the inner ring of the hoop. This buffer zone gives you plenty of fabric to grip and pull taut without messing up your stitching area. It also stops your needle from constantly clanking against the inside of the frame, which can be surprisingly distracting.
Of course, the hoop is only half the equation. Pairing it with the right fabric is essential for getting that smooth, effortless stitching experience. If you're still figuring out which canvas is right for you, our guide on the best fabric for cross-stitch is a great place to start. Getting that perfect hoop-and-fabric combo is what will really set you up for success.
Getting the Tension Just Right in an Oval Hoop
Nailing that perfect, drum-tight tension is the key to beautiful, even stitches, but it definitely feels a little different with an oval hoop. Because of its shape, you can't just pull the fabric evenly all the way around like you would with a round hoop. This is where we get into the nitty-gritty of a setup that will make your stitching feel smooth and effortless.
The goal here is simple: get the fabric taut, but not stretched. A really common mistake is pulling so hard that you warp the fabric's grid. This can totally distort your final design, which is a disaster for cross-stitch where everything relies on a perfect square grid. It all starts with paying attention to the fabric's grain.
First, Align Your Fabric's Grain
Before you even think about putting the two rings together, drape your fabric over the inner hoop. Take a second to really look at the weave. You want to line it up so the vertical threads of your fabric run parallel to the long sides of the oval, and the horizontal threads run parallel to the short sides.
This little step is your best defense against distortion. When you work with the fabric's natural structure, the tension you create later will be distributed much more evenly. It takes maybe ten seconds, but it can save you from finishing a project that just looks a little... off.
Once it's lined up, gently press the outer hoop over the inner one. Don't tighten the screw just yet—the magic happens in the next few adjustments.
The Art of the Strategic Tug
With your fabric loosely in the hoop, it's time to build that perfect tension. Instead of yanking from just one or two spots, the trick is to work your way around the hoop with a series of small, gentle tugs. I always think of it like tuning a drum.
- Start by gently pulling the fabric along the long sides of the oval.
- Next, move to the short sides to create some opposing tension.
- Finally, work on the four curved corners, pulling gently outwards on a diagonal.
I repeat this little sequence a few times, tightening the screw a bit more with each pass. You're aiming for a firm, even surface that has a nice little bounce to it. The fabric should be taut enough that your needle pops through cleanly without pushing the material down, but not so tight that you're straining the fibers. For some great visuals of this process, check out our guide on how to mount cross-stitch projects.
A Quick Tip from Experience: Please, don't use pliers or a wrench to crank the screw on your hoop. Hand-tightening is really all you need. Going overboard can damage the hoop's hardware, and worse, it can warp or even tear your fabric.
Why Binding Your Hoop Is a Game-Changer
Ever worked with a fabric that just refuses to stay put? I'm looking at you, silk and linen. No matter how perfect your tension is, some materials will slowly but surely slip and loosen. This is where binding your inner hoop with twill tape becomes your absolute best friend.
Wrapping that inner ring creates a soft, slightly grippy surface that holds onto the fabric without snagging it. This bit of extra friction gives you a much more secure hold, which means your tension will last for an entire stitching session, not just ten minutes. It’s a cheap, quick prep step that makes a massive difference, especially when you're using pricier materials you can't risk damaging. It just ensures your foundation is rock-solid before you make that first stitch.
Troubleshooting Common Oval Hoop Frustrations
Even the most experienced stitchers run into annoying problems. We’ve all been there: your fabric goes slack after just a few minutes, or you finally un-hoop your project only to find those stubborn creases we call "hoop burn." These issues are part of the process, but the good news is, they're almost always fixable, especially when you're working with oval embroidery hoops.
Because of their shape, oval hoops spread pressure out differently than round ones. This can sometimes create its own unique set of headaches, like the fabric slipping more easily at the corners. The trick is knowing what to look for and having a few go-to solutions up your sleeve.
Stopping Fabric Slippage
Probably the biggest complaint I hear, particularly with slick fabrics or plastic hoops, is that slow creep of lost tension. You start with your fabric tight as a drum, and an hour later, it’s got a disappointing bounce to it. This usually happens because the fabric is too smooth for the hoop to get a good, solid grip.
Here's my favorite fix: wrap the inner ring of your hoop. It’s incredibly simple. Just take some thin strips of cotton fabric, bias tape, or even first-aid tape and wrap it around the inner ring. This creates a slightly padded, grippy surface that adds just enough friction to lock slippery fabrics like satin or fine linen in place for hours.
Another little trick is to sandwich a thin piece of scrap fabric or some acid-free tissue paper between your project and the hoop. This not only protects delicate threads but also gives the hoop something extra to bite into.
Getting the foundation right from the start is half the battle. This quick visual guide breaks down the core process.
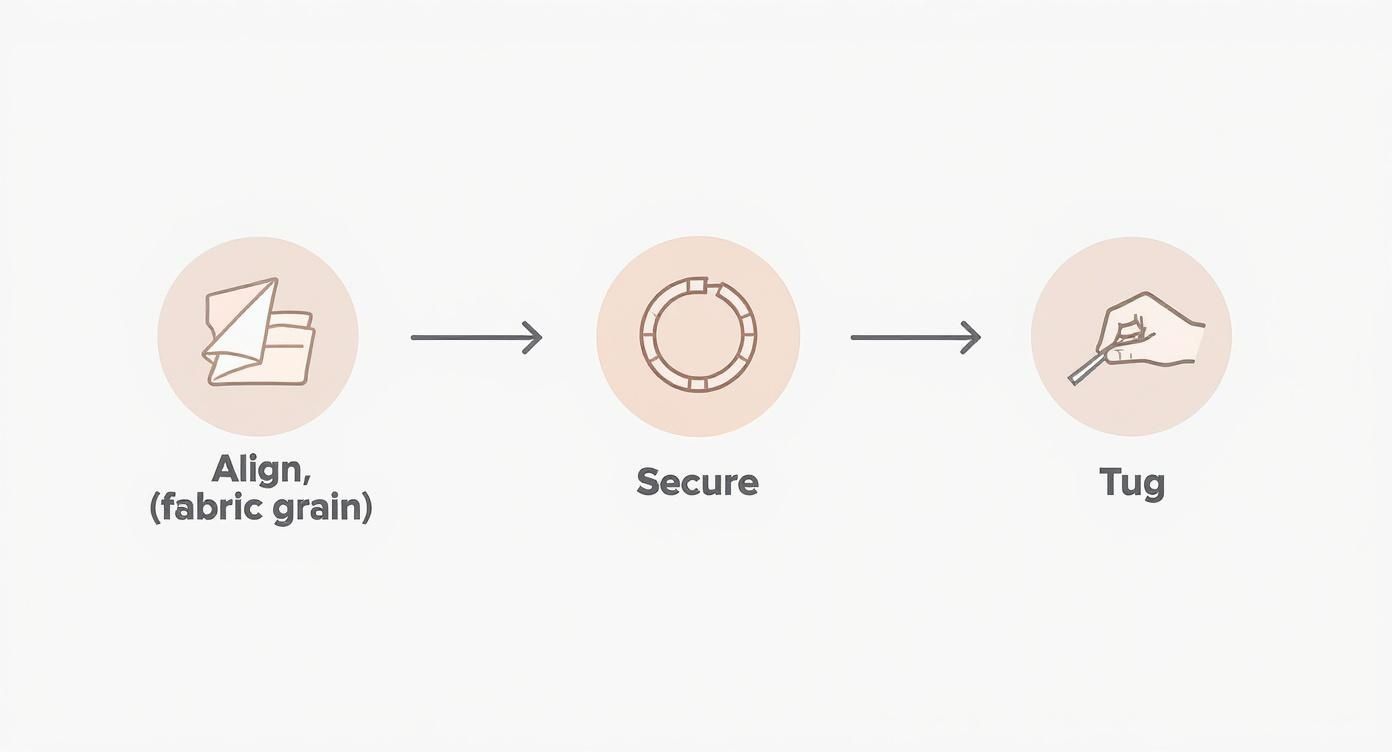
As you can see, it's all about careful alignment, securing the frame, and then making those final tension adjustments. Nailing this process is your best defense against fabric creep.
Dealing with Stubborn Hoop Marks
It’s a gut-wrenching moment: you’ve poured hours into a piece, and when you take it out of the hoop, you see deep, ugly creases. This "hoop burn" happens when the fabric fibers are crushed under pressure for too long. Ideally, you shouldn't leave your project hooped overnight, but let's be real—sometimes it happens.
The safest and most effective way to get rid of those marks is with a bit of steam. Hold a steam iron a few inches above the fabric—never touch it directly!—or use a handheld garment steamer. The warm moisture gently relaxes the fibers, and the creases just melt away.
If you have some really set-in marks on a sturdy fabric like cotton Aida, you can lightly mist the area with water and press it from the back with a warm iron. Always use a pressing cloth between the iron and your project to be safe. These are just a couple of the tools in our arsenal; for a complete look at other helpful gear, check out our guide to essential accessories for cross-stitch. A little post-stitching care makes all the difference in getting that flawless finish you worked so hard for.
Creative Projects Perfect for Oval Hoops
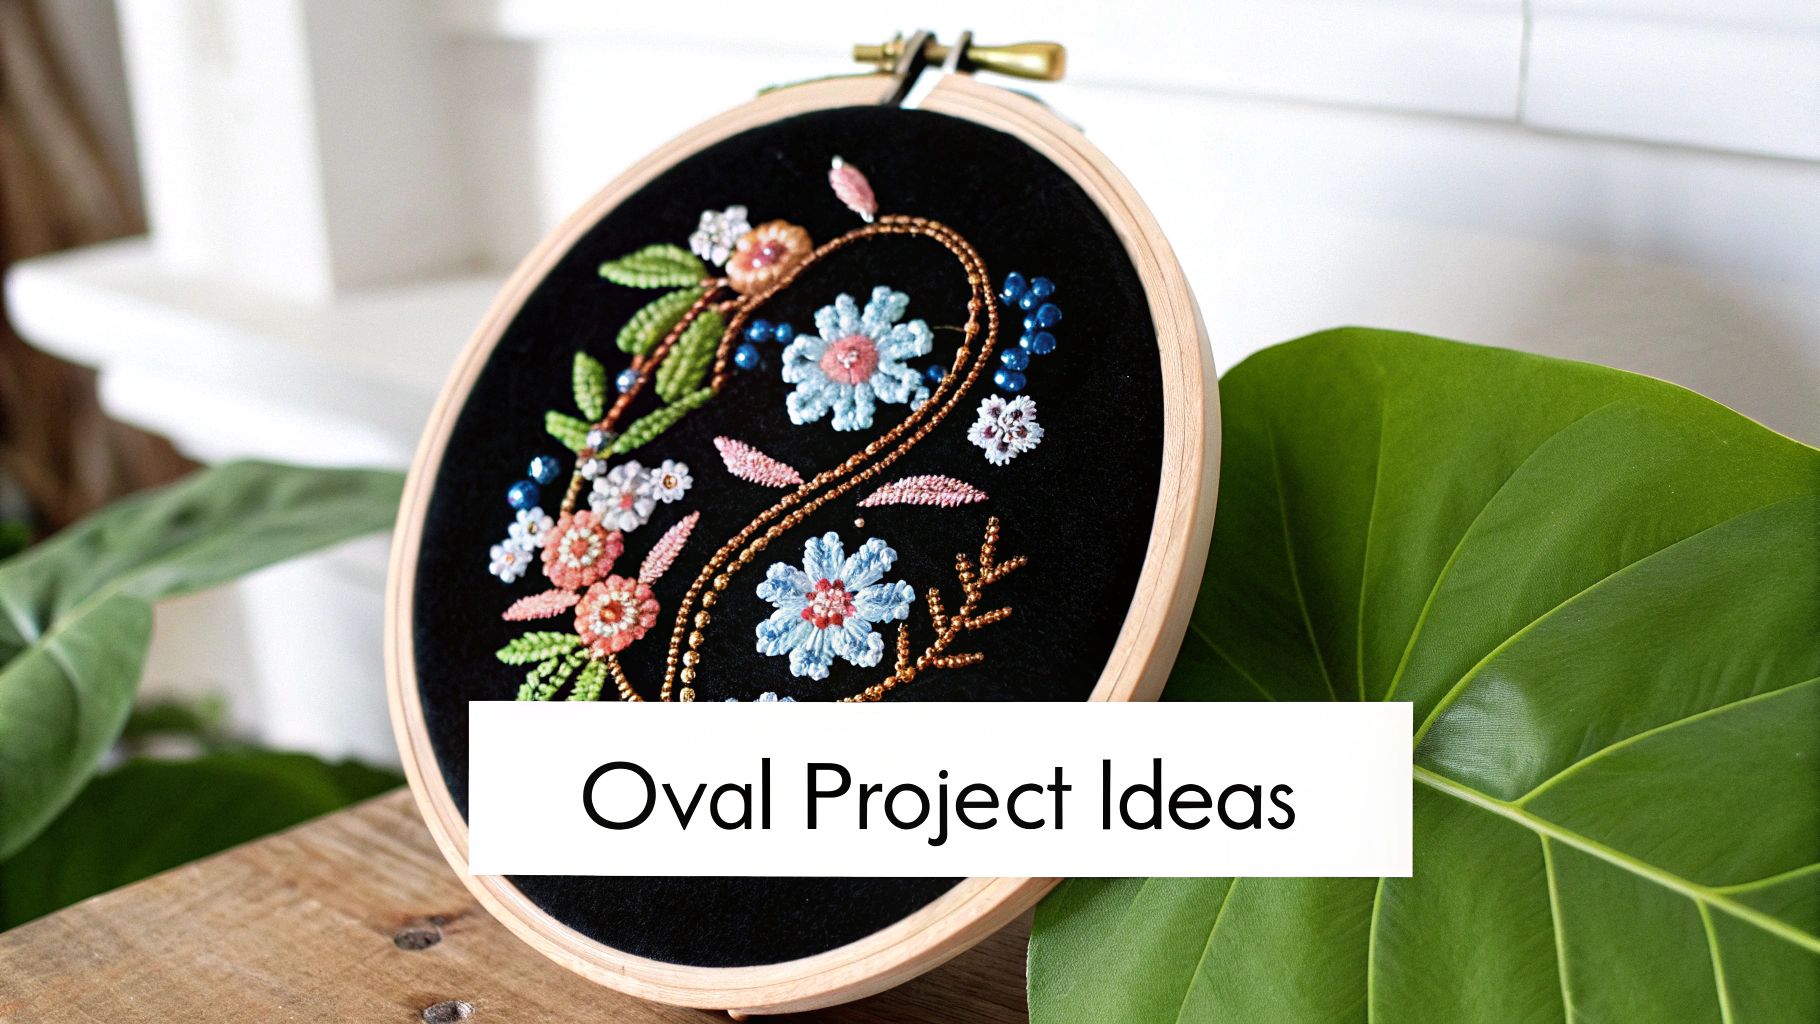
Once you get a feel for tensioning your fabric, you can really start having fun with the projects where oval embroidery hoops excel. Their unique shape isn't just for show; it gives you a serious advantage for designs that can feel cramped or awkward in a standard round hoop.
Imagine a delicate floral spray trailing down the side of a tote bag or a beautifully stitched name for a nursery. These longer, more linear patterns are a perfect match for an oval frame. You can fit more of the design in one go, which means less re-hooping and a much more consistent flow to your work.
Projects That Thrive in an Oval Frame
The elongated shape is more than just practical—it has a history. While fabric-stretching frames have been around since at least the 15th century, the oval hoop became incredibly useful for specific patterns and clothing embellishments. It was a go-to for the tambour embroidery popular in the 17th and 18th centuries, where the shape was ideal for laying down intricate beadwork. You can find more cool tidbits about the evolution of embroidery tools on PieceWork Magazine.
That same benefit carries over to so many modern projects today.
- Character Portraits and Figures: An oval hoop’s vertical orientation is fantastic for capturing the full length of a person or animal without having to crop them at an awkward spot.
- Calligraphy and Lettering: Stitching a quote or a name is so much easier when you can see the whole phrase at once. It really helps you nail the spacing and keep your letter height consistent.
- Botanical Sprays and Vines: For any design with long stems, branches, or flowing vines, an oval hoop lets you work on a much larger section of the pattern before you even have to think about moving it.
The real game-changer is how an oval hoop simplifies projects that involve beadwork or ribbon embroidery. These embellishments demand a super stable, taut surface. The elongated working area means you can often avoid re-hooping over delicate, three-dimensional stitches.
The Art of "Jumping the Hoop"
For really ambitious projects, like a full table runner or a detailed border on a piece of clothing, you’ll eventually have to move your hoop. This is often called "jumping the hoop," and it just takes a little care to make sure you don't mess up the work you've already done.
Always loosen the screw quite a bit before trying to move the hoop. Be sure to gently lift it off the fabric instead of sliding it across your stitches.
When you reposition the hoop over a section that's already stitched, lay a thin piece of soft scrap fabric—like flannel or a bit of cotton batting—over your work first. This acts as a cushion, stopping the outer ring from crushing or snagging your beautiful threadwork when you clamp it back down. Once you get the hang of this simple trick, you'll be able to tackle projects of any size with confidence.
Oval Hoop FAQs: Your Questions Answered
When you're deep in the world of needlecraft, you're bound to have questions about your tools. Oval hoops, in particular, seem to bring up a lot of the same queries in stitching groups and forums. Let's tackle some of the most common ones I hear all the time.
Think of this as a quick chat with a fellow stitcher. My goal is to clear up any confusion so you can get the most out of your hoops and stitch with confidence.
Can I Really Use an Oval Hoop for Any Project?
You can, but the real question is, should you? While it's technically possible to pop a small, square design into a big oval hoop, you'll probably struggle to get that perfectly even tension you're after. The magic of an oval hoop really shines when you use it for designs that are longer than they are wide.
If your project is round or basically square, stick with a traditional round hoop. It’s almost always going to give you better, more uniform tension and a much less frustrating experience. Keep your oval hoops for projects where their shape is a game-changer, like:
- Long banners or text art, where you can fit the whole phrase in the hoop at once.
- Vertical designs, like full-body portraits or tall, elegant flowers.
- Border work on tablecloths or runners, letting you stitch a long section without constantly moving the hoop.
The Great Debate: Wood or Plastic Hoops?
Ah, the classic question! Honestly, there’s no single right answer—it really comes down to your fabric and what you prefer to work with. A good-quality wooden hoop, usually made from smooth beechwood, has a natural grip that's just fantastic for fabrics like cotton and linen. It feels solid in your hands and is my go-to when I plan to frame the finished piece right in the hoop.
Plastic hoops, on the other hand, often have that "ridge and groove" system that locks your fabric in place. This gives you an unbelievably tight, no-slip grip, which is why they're popular for machine embroidery or for getting canvas drum-tight for punch needle. But be warned: that same super-tight grip can be a bit much for delicate fabrics like silk, and you risk leaving marks behind.
My Two Cents: I have both in my stitching bag. I probably grab my wooden oval hoop for about 80% of my hand embroidery, but I absolutely swear by my plastic one for slippery fabrics or any project where I need rock-solid tension.
How Can I Avoid Those Dreaded Hoop Creases?
"Hoop burn" is every stitcher's nightmare, but it's easier to prevent than you might think. The single best habit you can develop is to take your project out of the hoop when you're done stitching for the day. It takes just a few seconds, but it saves your fabric fibers from being crushed under constant pressure.
If you do find creases later, don't panic! A little bit of gentle steam usually does the trick. Never, ever press a hot iron directly onto your embroidery. Instead, use a handheld steamer or just the steam function on your iron, holding it a few inches away from the fabric. This will relax the fibers without squashing your beautiful stitches.
Feeling ready to take on that elegant calligraphy piece or stunning portrait? Find the perfect oval hoop for your next creation over at Cross Stitched and unlock new possibilities. You can browse the whole collection at https://cross-stitched.com.


