
Making a cross stitch baby announcement is one of those projects that's about so much more than just the craft itself. You're not just putting thread to fabric; you're stitching love, excitement, and a piece of your family’s story into a keepsake that will last a lifetime. This guide is here to walk you through turning a simple idea into a cherished heirloom, celebrating a new life one stitch at a time.
 embroidery hoop.">
Why a Stitched Announcement Is a Timeless Choice
In a world full of digital pings and fleeting social media posts, a handmade cross stitch announcement really stands out. It's a deeply personal and heartfelt way to share your joy, creating something that tells a story long after the likes have faded. And don't worry, this craft isn't just for experts—it's a wonderfully accessible project for anyone who wants to create something meaningful.
A custom cross stitch is a beautiful way to mark this milestone. For more inspiration, check out these other unforgettable newborn memory ideas to find creative ways to complement your handmade gift.
My goal here is to give you all the skills and confidence you need to create a piece you’ll be proud of. We'll cover everything, from that first spark of an idea all the way to putting on the final framing touches.
The Lasting Impact of a Handmade Gift
Think about it: a stitched announcement becomes a part of the family’s history. It’s not just a card or a post, but a physical reminder of the love and effort poured into welcoming a new baby. You can almost see it as the very first chapter in the little one's story, lovingly written by hand.
This project is about more than just decoration. It’s about creating a tangible piece of your family’s legacy that can be passed down and treasured for generations.
The process itself is a gift. It forces you to slow down and thoughtfully prepare for the new arrival. It's a quiet, meditative craft that lets you channel all your hopes and dreams into each tiny cross. The end result is a gift that truly keeps on giving.
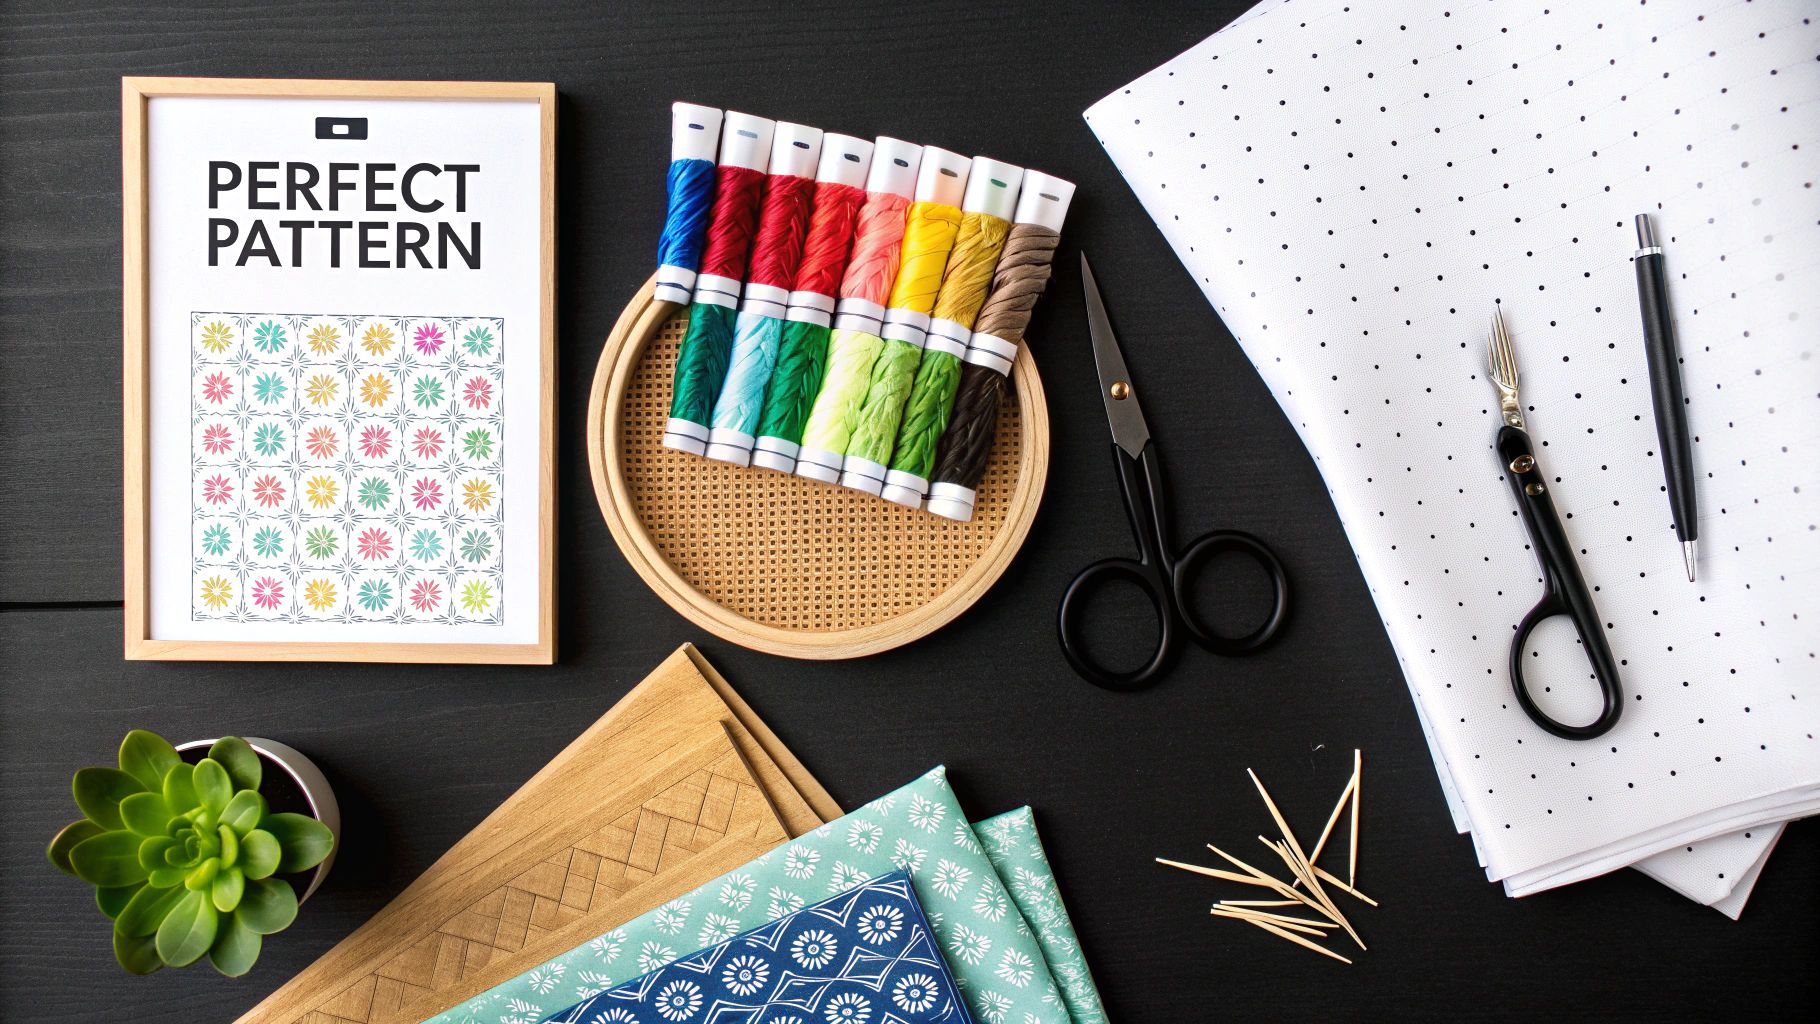
Finding the Perfect Pattern and Supplies
The real magic of a handmade gift begins with the right foundation. It’s about finding a pattern that just feels right and gathering supplies that make the process a joy, not a chore. When it comes to a cross stitch baby announcement, the options are endless, but don’t let that overwhelm you.
 Aida cloth, and a wooden embroidery hoop arranged on a table.">
First, think about the family’s style. Are they modern and minimalist, with a love for clean lines and simple text? Or do they lean toward whimsical themes, like little woodland creatures or sweet floral wreaths? Nailing this down first will make all your other choices so much easier.
Creating stitched birth records is a beautiful tradition with a long history, dating back to educational samplers in the 18th century. Today, you can find convenient kits, which usually run between $10 and $60, that bundle everything you need to create a family heirloom. You can explore a huge variety of these beautiful birth announcement crafts on 123stitch.com to get a feel for what’s out there.
Choosing Your Fabric and Floss
With a pattern in hand, it's time to gather your materials. The fabric you select—usually Aida cloth—is a big deal, as it determines the final size and overall look of your project.
- 14-Count Aida: This is my recommendation for most stitchers, especially if you're just starting out. The grid is larger and easier on the eyes, which makes for a more relaxing stitching experience.
- 18-Count Aida: If you're aiming for a more refined, detailed look, this is a great choice. The smaller squares create a tighter weave that makes your stitches look incredibly neat and almost pixel-perfect.
When it comes to floss, I always stick with a trusted brand like DMC. The colors are consistent from batch to batch, and the thread is strong. A classic beginner mistake is underestimating how much thread you'll need. Trust me, it’s always worth buying an extra skein of each color to avoid that mid-project panic.
Pro Tip: Do yourself a huge favor and organize your floss before you make a single stitch. Winding your threads onto bobbins and labeling them with the pattern symbols will save you so much time and frustration later. No one likes untangling a knot of thread!
If you’ve searched everywhere and still can’t find the perfect pre-made pattern, why not design your own? There are some fantastic guides on how to create cross stitch patterns that walk you through turning your vision into a chart. This is the best way to incorporate truly personal touches, like a specific flower or a font that matches the nursery decor.
Getting Your Project Ready for That First Stitch
Ask any seasoned stitcher, and they'll tell you the secret to a beautiful finish isn't just about the stitching itself—it's all in the prep work. Taking a little time to set up your project properly can save you a world of headaches later on and is the real key to getting that professional, polished look.
First things first, let's find the heart of your fabric. The absolute best way to ensure your design doesn't end up lopsided is to start from the exact center of your Aida cloth. Just fold the fabric in half one way, make a gentle crease, and then fold it in half the other way. That little point where the two creases meet? That's your starting point. I like to mark it with a water-soluble pen or just pop a pin in it so I don't lose my spot.
The Tools That Make All the Difference
Once you know where to begin, you'll want to get your fabric nice and taut. This is where an embroidery hoop or a Q-snap frame becomes your best friend. Seriously, don't skip this. Stitching on loose, floppy fabric is a recipe for puckered cloth and uneven stitches. You're aiming for a surface that's tight like a little drum; this tension is what allows you to create beautifully uniform stitches.
I've seen so many beginners get frustrated by distorted stitches, and the culprit is almost always loose fabric. Make it a habit to tighten your hoop before you sit down to stitch and give it a quick check every so often as you work.
Here’s another little trick I swear by: tame those fraying edges. Aida cloth loves to unravel as you handle it, which can get messy. A quick and easy fix is to run a border of painter's tape or masking tape around all four sides. It takes maybe 30 seconds and keeps your project clean and your threads from snagging.
While there are more complex methods like gridding your fabric, which you can learn about in guides on how to transfer designs onto fabric, simply taping the edges is a fantastic first step for any project.
Before you get too far, let's double-check that you have everything you need right at your fingertips. There's nothing worse than getting settled in only to realize you're missing a crucial tool.
Essential Cross Stitch Supply Checklist
| Item | What It's For | Beginner's Tip |
|---|---|---|
| Aida Cloth | The woven fabric you'll stitch on. 14-count is a great starting point. | The count number refers to stitches per inch. A lower number means larger squares, which are easier to see. |
| Embroidery Floss | The colored thread used to create the design. DMC is a popular brand. | Separate the 6 strands of floss before stitching. Most patterns call for using only 2 or 3 strands at a time. |
| Tapestry Needle | A blunt-tipped needle that passes easily through Aida cloth holes. | Use a size 24 or 26 needle for 14-count Aida. A needle minder is a great accessory to keep it safe! |
| Embroidery Hoop | A tool to hold your fabric taut while you stitch, ensuring even tension. | A 5-inch or 6-inch wooden or plastic hoop is a versatile size for most small to medium projects. |
| Scissors | A small, sharp pair for snipping floss cleanly. | Embroidery scissors are ideal because their fine tips let you snip threads close to the fabric without damaging stitches. |
| Pattern | Your guide! This chart shows you where to place each stitch and what color to use. | Read through the pattern key first to understand the symbols for each floss color. |
Having this simple kit ready to go makes the whole process smoother and much more enjoyable. Now, you're truly ready to start stitching
Bringing Your Design to Life with Needle and Thread
Now for the best part—the moment your needle first meets the fabric. After all the planning and prep, this is where the magic really happens, turning a blank canvas into a beautiful keepsake, one tiny "x" at a time.
The secret to a project that looks polished and professional? It all comes down to the humble cross stitch. Consistency is everything. Pick a direction for your stitches and stick with it. I always do my bottom stitch from bottom-left to top-right (/) and my top stitch from bottom-right to top-left (). This one simple habit creates a huge difference in the final piece, giving the floss a uniform sheen as it catches the light.
This infographic is a great visual refresher of the setup steps we just covered. It's a handy little cheat sheet before you get started.
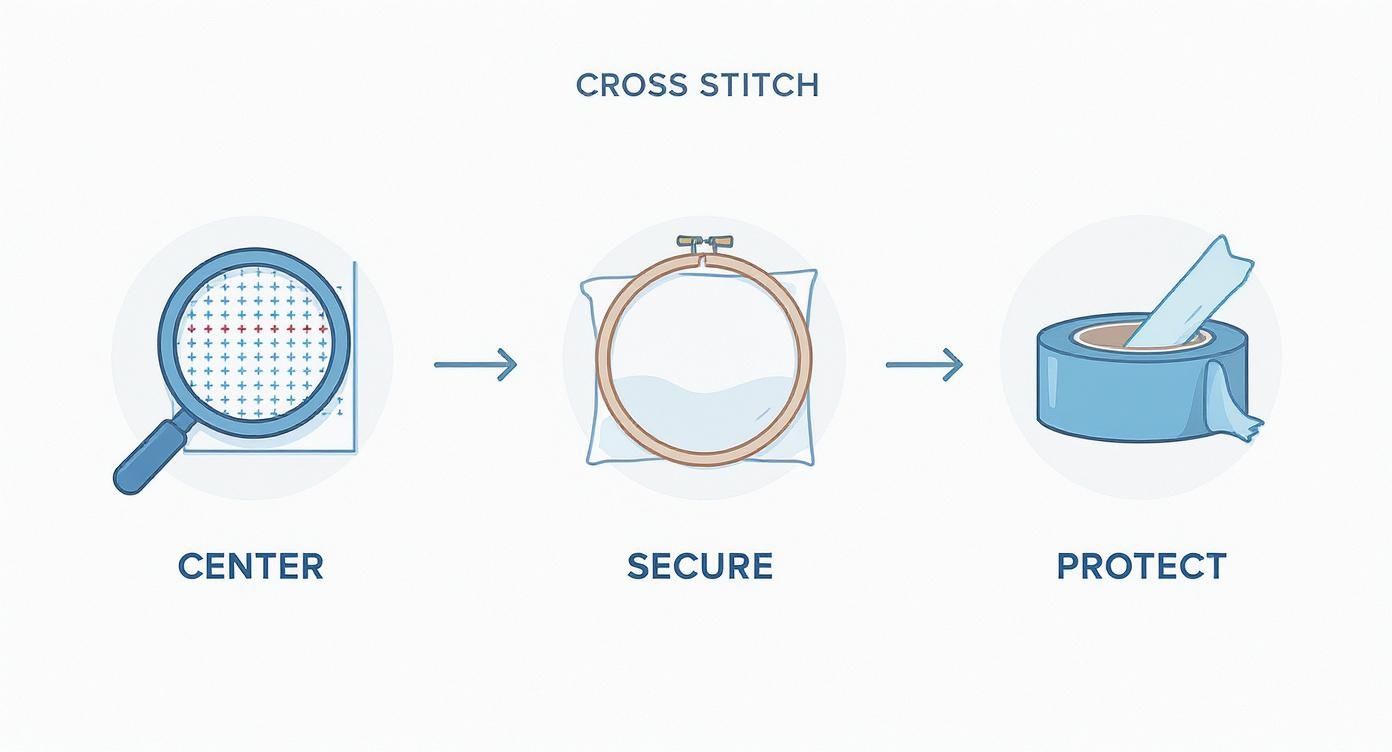
Remembering to center, secure, and protect your fabric will save you from so many common headaches and set you up for success right from the start.
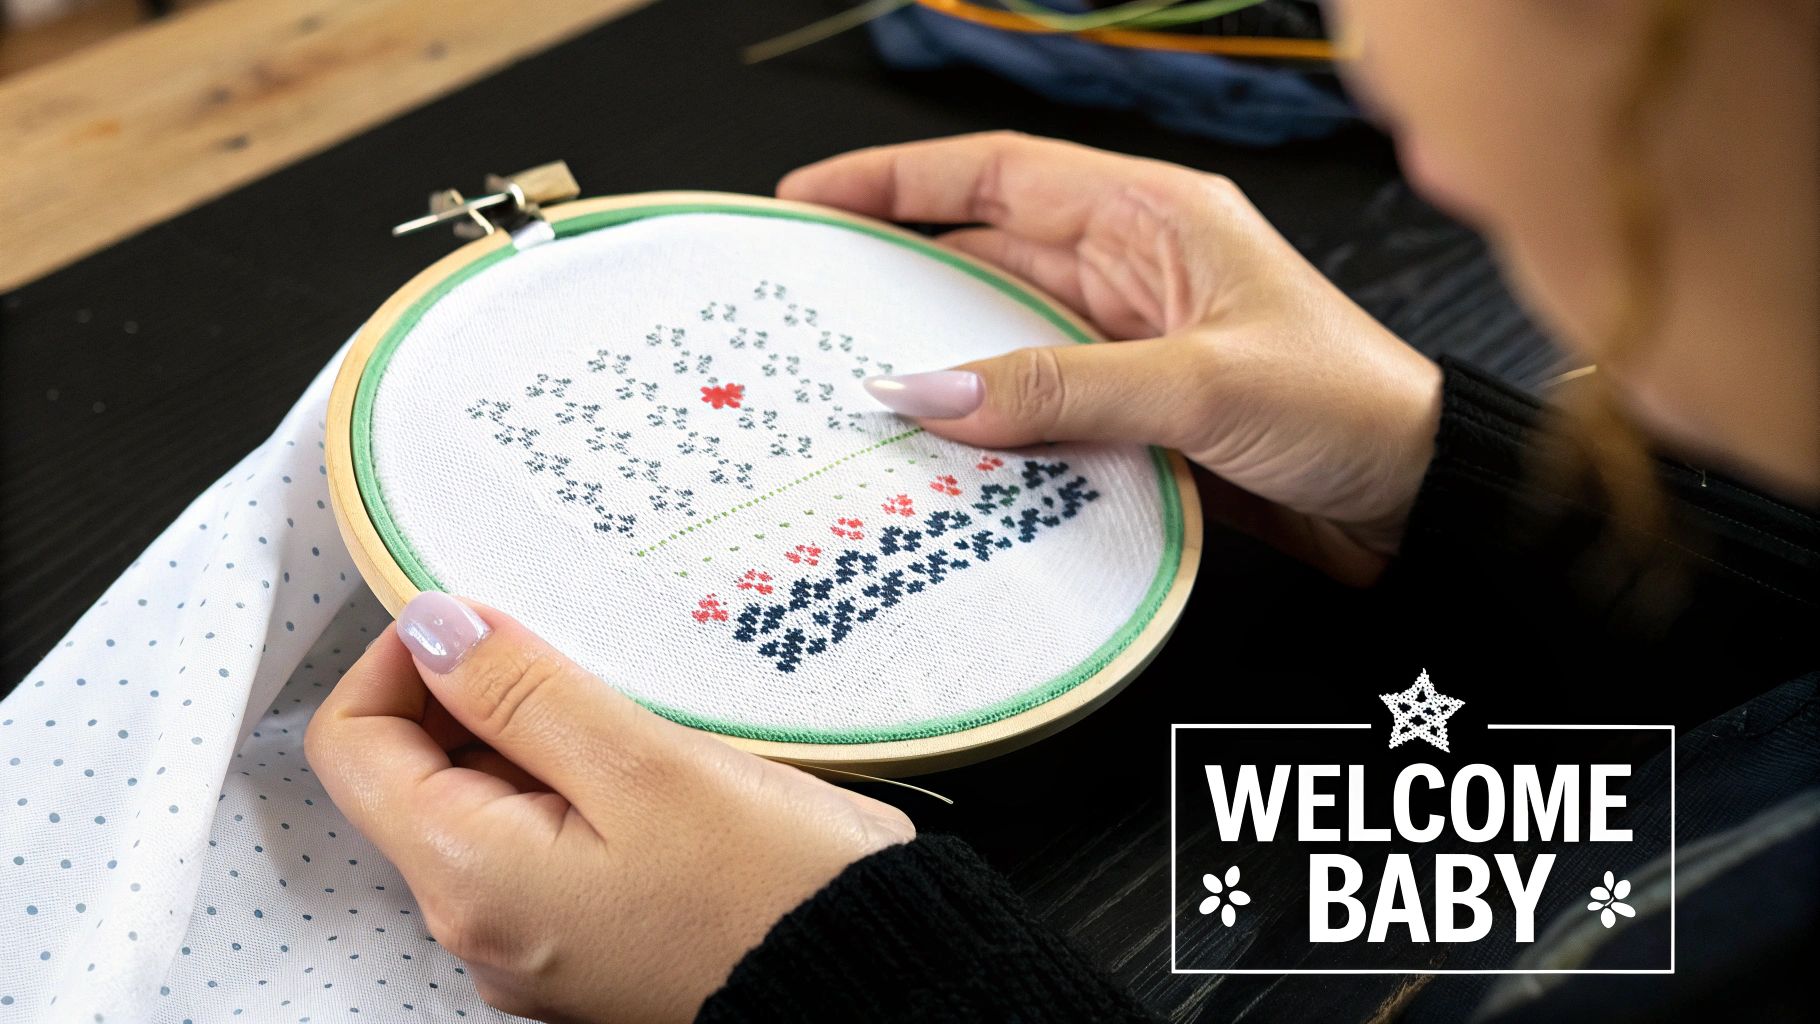
Adding the Personal Details
The real soul of a baby announcement is, of course, the personalization. Stitching the baby's name, birth date, and weight is what transforms your project from a cute design into a treasured family heirloom.
Alphabets can be a bit fiddly, so my advice is to slow down and count your stitches twice. It's all about getting that alignment and spacing just right. For lettering on 14-count Aida, I find that using just a single strand of floss creates beautifully crisp, readable characters.
My Personal Tip: When stitching letters and numbers, I always finish one character completely before starting the next. It helps me avoid spacing mistakes that are a real pain to unpick later on. Plus, it gives each letter a clean, distinct look.
Those little decorative motifs—the tiny animals, stars, or flowers—are where you can really let your creativity shine. They’re also fantastic for practicing your stitch consistency in short, satisfying bursts. Feel free to play with the colors here; matching them to the baby's nursery is always a thoughtful touch.
Making Your Design Pop with Backstitching
Finally, let's talk about the finishing touch that truly makes a design sing: backstitching. This simple outline stitch, usually done with a single strand of a dark, contrasting color, is what gives your work incredible definition. It’s like inking a drawing; it makes all your motifs stand out sharply from the fabric.
- When to Use It: Backstitching is your go-to for defining letters, outlining shapes, and adding delicate details like an animal's whiskers or the veins on a leaf.
- How to Do It: Just follow the lines on your pattern chart with a simple running stitch. The trick is to keep your stitches small and even to create a smooth, unbroken line.
This final step is what elevates your project from a series of "X's" into a clear, vibrant picture. It’s the detail that breathes life into your cross stitch baby announcement, making sure it’s a piece that will be cherished for years to come.
Getting Your Piece Ready for Its Grand Debut
Putting in that last stitch feels amazing, but don't hang it up just yet! A little bit of finishing work is what takes your project from a lovely piece of stitching to a true heirloom that will look incredible for years. The first thing you'll want to do is give it a gentle wash to get rid of any oils from your hands or those pesky hoop marks.
A Quick and Gentle Wash
Fill a small basin with cool water and add just a couple of drops of a mild, clear soap. Let your cross stitch soak for about 15 minutes, then rinse it really well under cool, running water until you don't see any more suds.
The key here is to be gentle. Never, ever wring it out! Instead, carefully roll your piece up in a clean, fluffy towel to soak up most of the water.
While it’s still damp, place the fabric face down on another clean towel and press it with a warm iron. Pressing from the back like this keeps you from squashing your stitches, so they stay looking plump and perfect.
Mounting Your Masterpiece
Once your project is clean, dry, and perfectly pressed, it's time to get it ready for its frame. If you want that professional, gallery-quality look, lacing your fabric onto an acid-free backing board is the way to go. This method holds the fabric completely taut, so you never have to worry about it sagging or wrinkling down the road.
Taking the time to mount your work correctly is the best thing you can do to protect it. A properly secured cross stitch baby announcement is safe from dust, distortion, and the elements, preserving all your hard work for decades to come.
This step is critical for a lasting piece. It really makes all the difference.
For a more detailed look at stretching and securing your fabric, we've got an entire article dedicated to framing cross stitch pictures that walks you through a few different techniques for getting that flawless finish.
Finally, the fun part: picking a frame! Think about the nursery's style. A classic wooden frame might be just right for a traditional sampler, while a minimalist design could look fantastic in a sleek, modern frame. For more great tips on choosing frames and mats, this guide on how to frame your finished cross stitch is a fantastic resource.
Navigating Common Questions for Your Baby Announcement
No matter how many times you've done this, a few questions always seem to pop up when you're starting a new project. It’s completely normal! Getting these details sorted out from the get-go will make the whole process smoother and much more fun.
Let's walk through some of the most common things people ask when stitching a cross-stitch baby announcement.
What’s the Best Fabric Count to Start With?
If you're just dipping your toes into cross-stitch, 14-count Aida cloth is your best friend. The grid is open and easy to see, which means you can count your stitches without straining your eyes. It’s the go-to for a reason—it makes learning a joy.
For those with a few projects under their belt, you might want to try a 16 or 18-count fabric for a more refined look. Just keep in mind that the fabric count changes the finished size of your piece, so always double-check what your pattern suggests.
A quick tip to remember: A lower count number means larger stitches (like 14-count), while a higher count means smaller, more delicate stitches (like 18-count). This single choice really shapes the final look and feel of your announcement.
How Many Strands of Floss Do I Need?
For standard 14-count Aida, using two strands of floss for your cross stitches is the sweet spot. It gives you nice, plump stitches that cover the fabric beautifully without looking bulky.
When it comes to the finer details—like backstitching the baby's name or the birth date—switching to a single strand will give you much crisper, cleaner lines. Most patterns will specify this, but the two-strand/one-strand combination is a tried-and-true method for almost any design.
Can I Change the Colors in the Pattern?
Of course! This is one of the best parts of creating a custom piece. Feel free to swap out the suggested colors to match the baby's nursery theme, the family's favorite shades, or just a palette you find beautiful.
The one rule you absolutely want to follow is to check for visual contrast. Before you thread your needle, lay your chosen floss colors out on your fabric. Make sure the colors for the name and date stand out clearly against the background and any nearby motifs. A quick contrast check ensures your finished announcement will be both stunning and easy to read.
Ready to turn a cherished photo into a cross-stitch masterpiece? At Cross Stitched, we transform your memories into beautiful, all-in-one kits. Start creating your personalized pattern today!


