

It’s easy to think of embroidery hand needles as simple, interchangeable tools, but the truth is, the success of your project often comes down to this tiny piece of metal. The shape of its eye, the thickness of its shaft, and the type of point it has are all designed for very specific threads and fabrics.
Getting this choice right from the start is the secret to creating those smooth, clean stitches you’re aiming for. It makes for a much more professional finish and, just as importantly, a far more enjoyable stitching experience.
Why Your Needle Choice Matters
Honestly, every single embroidery project lives or dies by the needle. It's so easy to grab any old needle from a pincushion and just start, but this little instrument is far more specialized than most people realize. Think of it like a set of artist’s brushes—you wouldn't try to paint a miniature portrait with a wide house-painting brush, right? The same logic applies here.
Using the right embroidery hand needles is what separates beautiful, even stitches from a frustrating mess. The wrong needle will fight you every step of the way, creating problems that can really take away from your finished piece.
The Consequences of a Poor Match
So what happens when you use the wrong needle? If it's too big for your fabric, it will leave behind noticeable, gaping holes. Too small, and you'll find your thread shredding and breaking as you pull it through. Using a sharp-tipped needle on aida cloth, for example, is a classic mistake—it can easily split the woven fibers, ruining the perfect grid you need for neat cross stitches.
A good needle should feel like it's gliding through the fabric, gently parting the threads rather than punching a hole. This is the difference between a project that flows smoothly and one that feels like a constant battle.
To really get why the needle is so important, it helps to remember what embroidery is at its heart: the art of decorating fabric with a needle and thread. Every single stitch is a dance between these three elements, and they all need to work together.
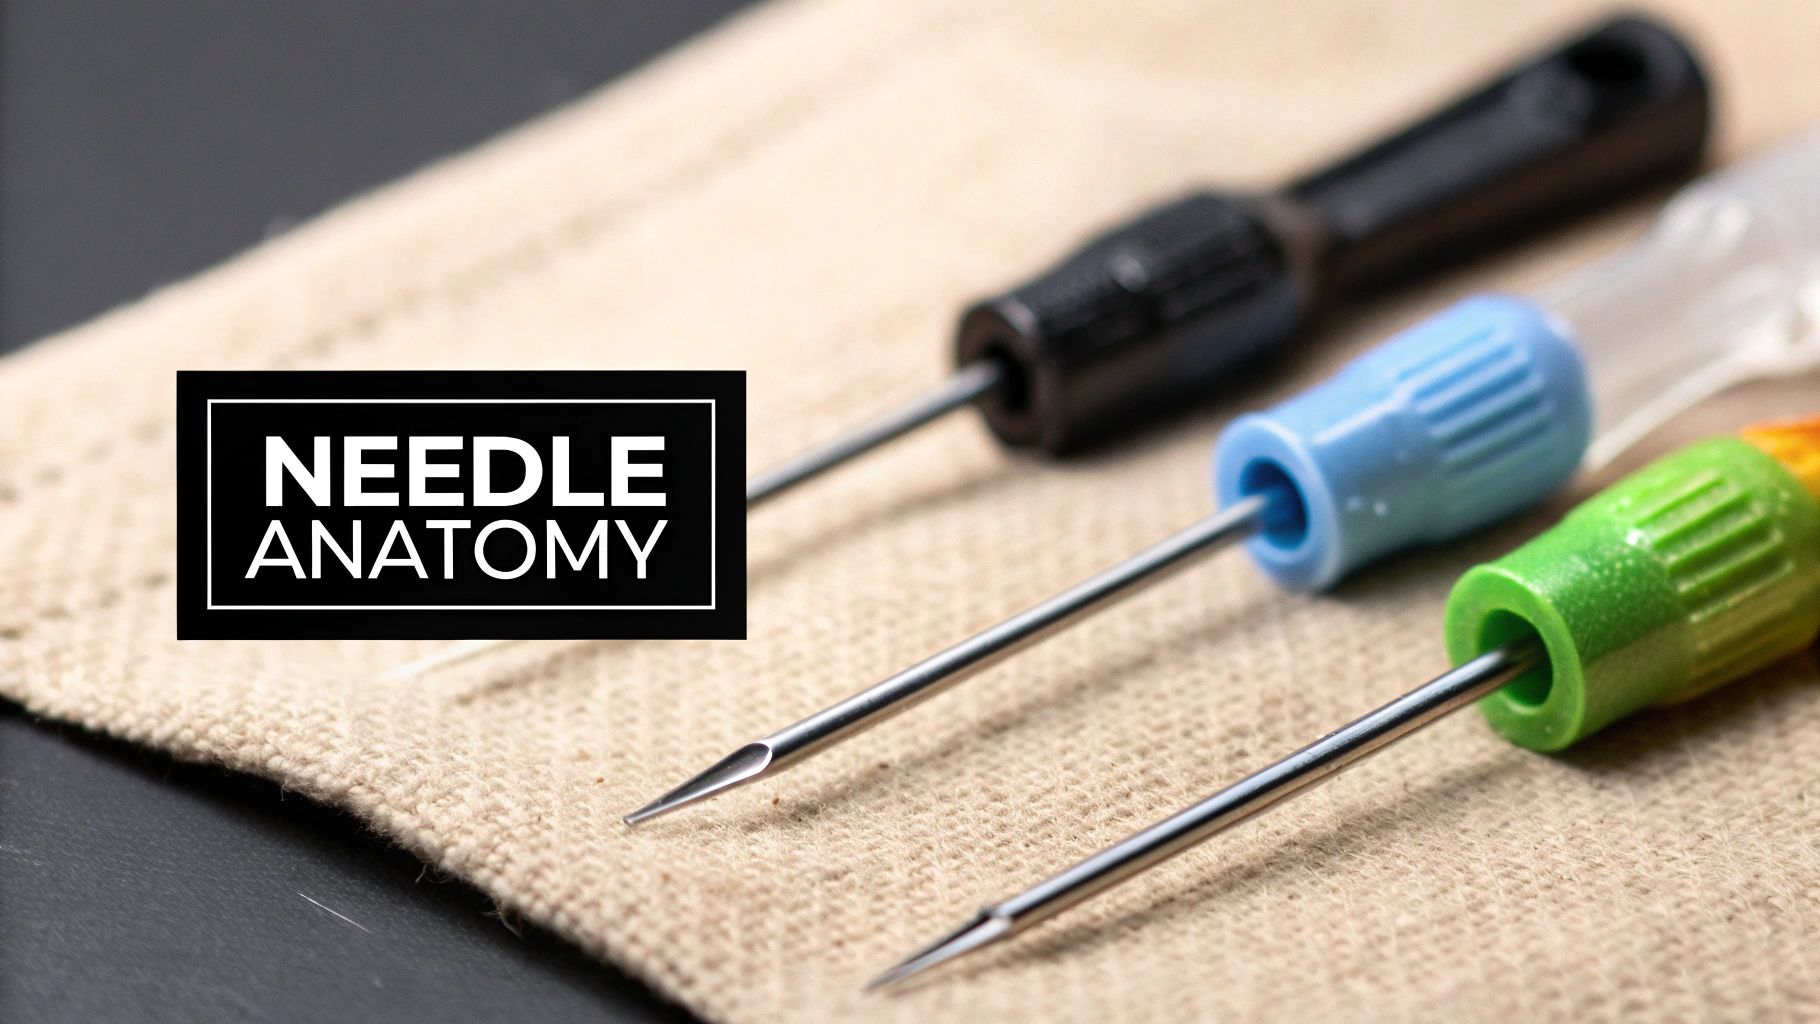
The Anatomy of a Needle
Every needle, no matter the type, has three main parts. Once you understand what they do, choosing the right one becomes so much easier.
- The Eye: This is the hole you thread. The size and shape of the eye dictate what kind of thread (and how much of it) you can use.
- The Shaft: This is the main body of the needle. Its thickness should be just right for the weave of your fabric—not too big, not too small.
- The Point: The tip of the needle can be sharp, blunt, or rounded. This depends on whether you need to pierce through a tightly woven fabric or slide neatly between the threads of an open-weave one.
The Five Essential Types of Embroidery Needles
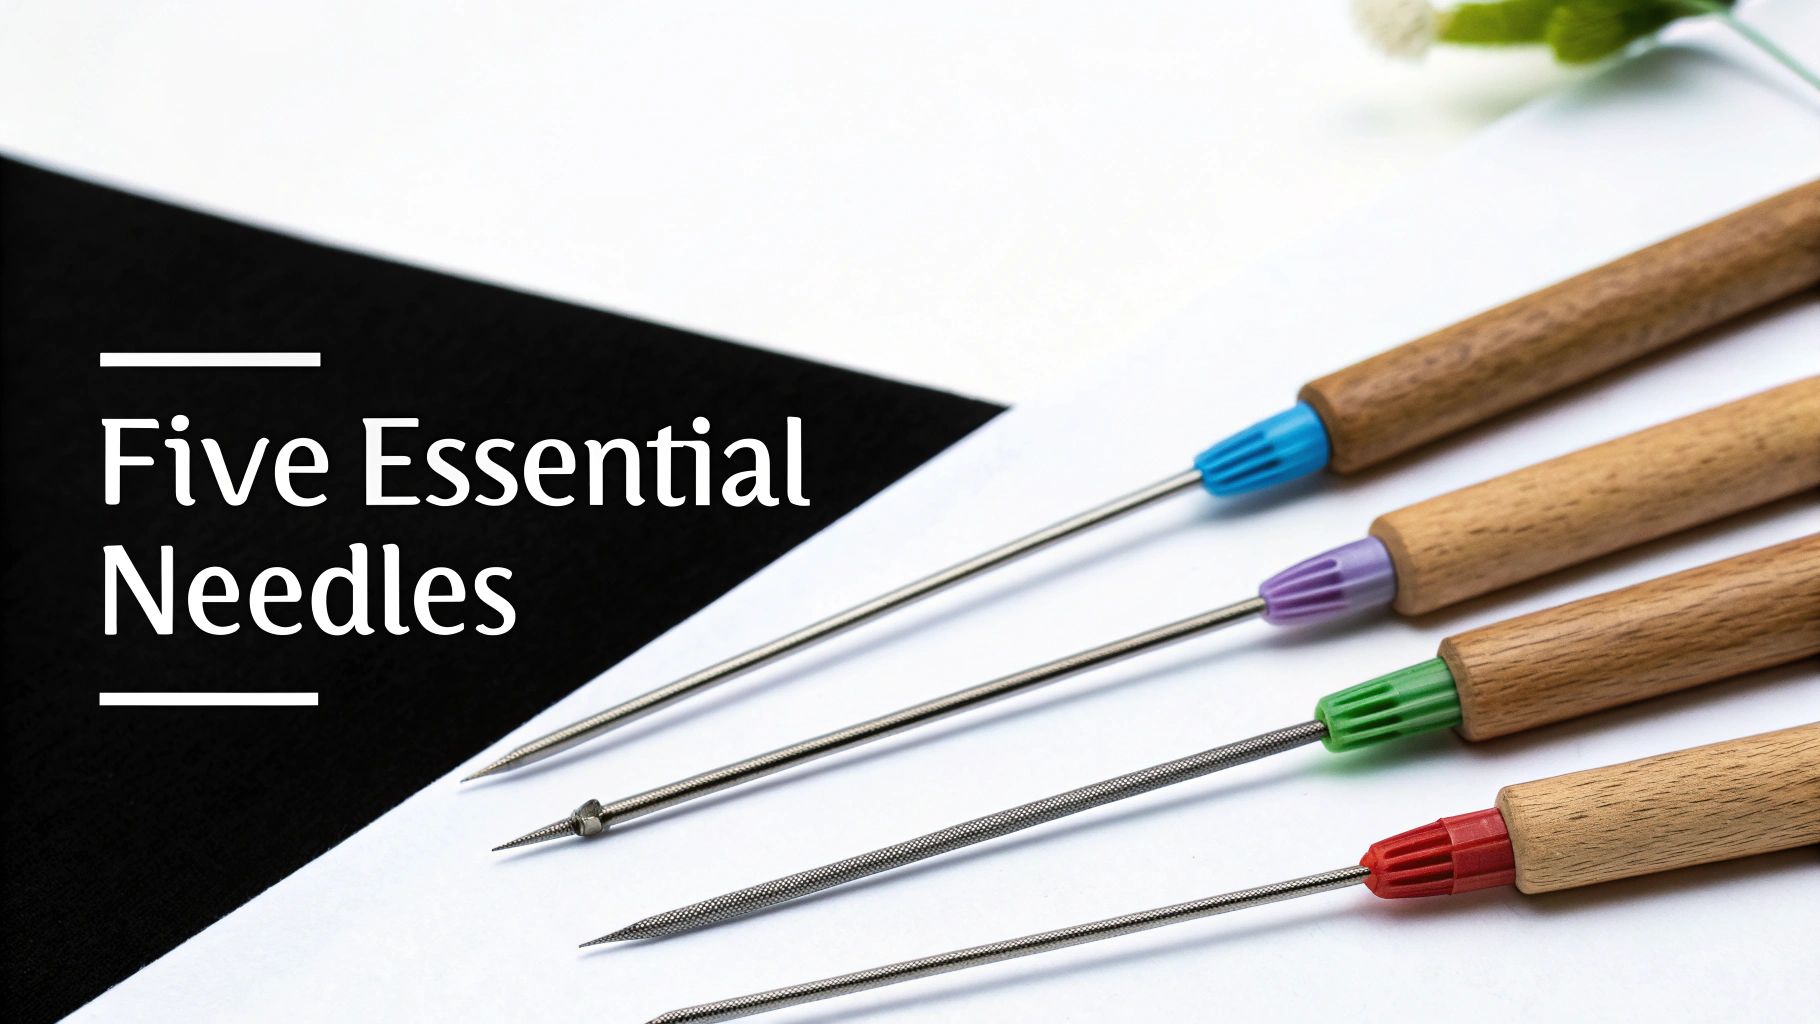
Just like a chef has specific knives for different cuts, an embroiderer needs a collection of needles. You might be surprised to learn that not all needles are created equal. While dozens of specialty types exist, you really only need to master the five most common embroidery hand needles to tackle almost any project.
Each needle is engineered with a specific point, eye, and shaft length to work best with certain threads and fabrics. Knowing which one to grab is the first step toward making your work look polished and professional. Let's dig into the essential needles that belong in every stitcher's toolkit.
A Quick Look at Common Needle Types
Before we dive into the details, here’s a quick overview of the needles we'll be covering. This table breaks down the main types, their standout features, and what they're best used for.
| Needle Type | Key Features | Best For |
|---|---|---|
| Crewel | Sharp point, medium-long eye | General surface embroidery, all-purpose stitching on woven fabrics |
| Tapestry | Blunt tip, large elongated eye | Cross-stitch, needlepoint, and working on evenweave or Aida fabric |
| Milliner | Long, even shaft, sharp point | French knots, bullion knots, and other wrapped stitches |
| Sharps | Very fine and short, sharp point | Delicate hand sewing, smocking, and fine detail embroidery |
| Beading | Extra long and flexible, tiny eye | Attaching beads, sequins, and pearls to fabric |
This chart is a great starting point, but understanding why each needle works the way it does is where the real magic happens. Let's explore each one more closely.
The Crewel Needle: Your All-Purpose Workhorse
The Crewel needle, often just called an embroidery needle, is the one you’ll probably reach for most often. It’s a fantastic all-rounder, featuring a sharp point and a medium-long eye that’s a bit bigger than what you'd find on a standard sewing needle.
Think of this as your go-to for any surface embroidery on tightly woven fabrics like cotton, linen, or even denim. That sharp tip pierces the fabric cleanly, and the generous eye easily handles multiple strands of floss or thicker threads like wool without a fight.
The Tapestry Needle: The Cross-Stitcher's Best Friend
If you’re doing any kind of counted-thread work like cross-stitch or needlepoint, a Tapestry needle is an absolute must-have. Its design is brilliant for this kind of work: it has a large, elongated eye and a blunt, rounded tip.
Instead of piercing the fabric, that blunt point is designed to slip right between the woven threads of Aida or evenweave cloth. This prevents you from splitting the fibers, which is crucial for keeping your grid perfect and your stitches uniform. The big eye also makes it a breeze to thread the thicker bundles of floss used in cross-stitch.
Using a Tapestry needle is about working with the fabric, not against it. It gently separates the threads to place your stitch perfectly, which is essential for creating those neat, uniform squares that define cross-stitch.
The Milliner Needle: The Secret to Perfect Knots
You might also hear these called Straw needles. Milliner needles are easy to spot because they have a long shaft that stays the same thickness from the sharp point all the way up to the eye. This uniform diameter is their superpower.
This design makes them ideal for any stitch that involves wrapping thread around the needle, like French knots, colonial knots, and bullion knots. Because the eye isn't any wider than the shaft, the needle glides smoothly through all those wraps without snagging or making your beautiful knot look distorted.
The Specialists: Sharps and Beading Needles
Finally, we have a couple of specialists for more specific, delicate jobs. You might not use them every day, but when you need them, nothing else will do.
- Sharps: These are very fine, short needles with a sharp point and a small, round eye. They’re perfect for incredibly detailed embroidery, smocking, and delicate hand sewing where precision is everything.
- Beading Needles: You’ll know a beading needle when you see one. They are incredibly long and flexible, with a tiny eye just big enough for a single strand of thread. Their whole purpose is to be thin enough to pass through the minuscule holes in seed beads, sequins, and pearls.
Stocking your kit with these five types of embroidery hand needles is a game-changer. With this small collection, you'll be well-equipped to handle any creative challenge that comes your way with confidence and skill.
Understanding the Language of Needle Sizes
Walking into the world of embroidery needles can feel a bit like learning a new language, especially when you start looking at sizes. The whole system seems backward at first, but there's a simple, if counterintuitive, rule that makes it all click.
Here’s the secret: the higher the number, the smaller and finer the needle. Think of it like sandpaper grit. A high number like 220-grit is for super-fine sanding, while a coarse 60-grit is for heavy-duty work. It’s the same logic with needles. A delicate little size 10 needle is much, much smaller than a sturdy size 3.
Getting this concept down is your key to flawless stitching. When you match the right needle to your fabric and thread, you sidestep a ton of frustrating problems, from distorted stitches and puckered fabric to shredded, fuzzy floss.
The Logic Behind the Numbers
So, why the reverse-numbering system? A finer needle (with a higher number) is specifically designed to glide through the tight weave of high-count fabrics without making a scene. It parts the fibers just enough, leaving a tiny hole that disappears once your stitch is in place—crucial for delicate work where you don't want your needle's entry points to be obvious.
On the other hand, a thicker needle (with a lower number) is what you need for lower-count fabrics with a more open weave. Its larger shaft is robust enough for heavier materials, and the bigger eye can handle thicker threads or multiple strands of floss without a fight.
Think of it this way: the needle's job is to create the perfect path for your thread. It should open the fabric fibers just enough for the thread to slide through smoothly, and then let them relax right back into place around the stitch.
For instance, a tiny size 28 Tapestry needle is the perfect companion for 18-count Aida cloth. But if you were working on a rustic 6-count Binca fabric, you'd want something much bigger, like a size 18 Tapestry needle. We dive deeper into this in our guide to cross-stitch needle sizes.
Why Size Directly Impacts Your Project
Choosing the right needle size isn't just a casual suggestion; it's fundamental to the quality of your finished piece. This kind of precision has been at the heart of the craft for centuries. In fact, historical innovations in hand needles directly fueled what is now a USD 1,591.39 million global embroidery market.
Hand tools still enable 80% of all non-machine embroidery, and counted thread techniques—the foundation of Cross Stitched’s custom photo kits—depend on precise needles piercing fabric thousands of times per square inch. For serious stitchers, pairing delicate silk threads with gold-plated needles can even reduce eye friction by 30%, making massive projects feel much smoother. You can read more about these embroidery market insights on globalgrowthinsights.com.
When you know how to choose your needle with confidence, you can stitch with ease, protecting both your materials and your enjoyment of the craft. Once you grasp the sizing system, what seemed confusing becomes a simple, logical step toward a beautiful result, every single time.
How To Pair Needles With Fabric And Thread
Choosing the right needle is where the magic really happens. This is the moment all the technical details come together to help you create beautiful, effortless stitches. I like to think of it as a perfect partnership: the needle, the thread, and the fabric must all work in harmony.
When you get this trio right, you sidestep a ton of common frustrations like shredded floss, puckered fabric, and stitches that just don't look quite right. The goal is pretty simple: your needle needs to part the fabric threads, creating a hole just big enough for your floss to glide through without a fight.
If the needle is too small for the thread, it’s like trying to pull a rope through a keyhole—you'll end up with a frayed, fuzzy mess. On the other hand, a needle that's too big will leave behind noticeable gaps around your stitches, almost like little craters in your fabric.
Matching Needles To Fabric Count
In the world of cross-stitch, the most critical relationship is between your needle and your fabric count. Fabric count, which is just the number of stitches per inch, is what tells you how large your needle should be. It’s a simple inverse relationship: the higher the fabric count, the tighter the weave, which means you need a smaller, finer needle to work with it.
Let's take Aida cloth, the go-to fabric for most cross-stitchers. You'll always want to use a blunt-tipped Tapestry needle with it. Here's a quick cheat sheet I always keep in mind:
- 14-count Aida: A size 24 Tapestry needle is your workhorse. It’s got enough heft to part the fibers easily without distorting them.
- 16-count Aida: For this slightly tighter weave, you’ll want to size down to a size 26 Tapestry needle. It’s a bit finer and will glide through the fabric much more smoothly.
- 18-count and higher Aida: Once you get into these finer fabrics, you'll need a delicate touch. A size 28 Tapestry needle is your best friend here. It's the smallest of the common sizes and is perfect for high-detail projects.
A great rule of thumb is to make sure the needle's shaft is roughly the same thickness as the thread you're using. When you pull the threaded needle through the fabric, it should feel smooth—never forced.
This simple decision tree is a fantastic visual for how to match your needle to your fabric's weave.
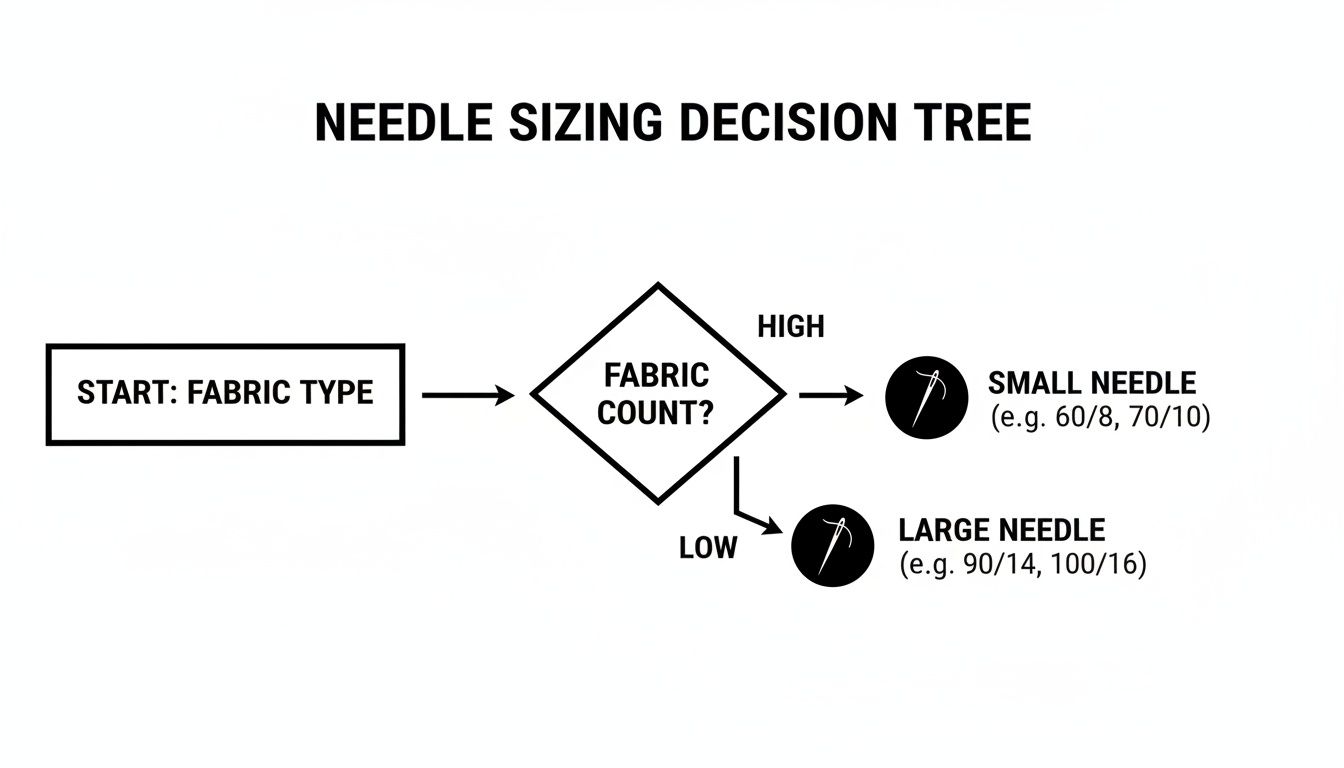
As you can see, the denser your fabric's weave (that's the high-count stuff), the smaller and finer your needle needs to be to slip through those tiny holes.
Considering Your Thread Thickness
The second piece of the puzzle is the thickness of your thread, which all comes down to how many strands of floss you're using. More strands mean a thicker bundle of thread, and that thicker bundle needs a needle with a bigger eye to pass through without getting snagged or frayed.
Standard DMC embroidery floss comes with six individual strands that you separate. If you want a deep dive, we have a whole guide on working with hand embroidery floss. Most patterns will tell you exactly how many strands to use, but here are the combinations I see most often:
- 2-3 strands: This is the standard for 14-count Aida and pairs perfectly with a size 24 Tapestry needle. The eye is generous enough to make threading easy but not so huge that it wears down your floss.
- 1-2 strands: On finer fabrics like 18-count Aida, you’ll usually use fewer strands so your stitches don't look crowded or bulky. A size 26 or 28 needle has a smaller, more suitable eye for this delicate work.
If you find your thread is constantly fraying or snapping while you stitch, that’s a huge red flag. It’s almost always a sign that your needle's eye is too small for the number of strands you're using. Don't hesitate to bump up a needle size to see if it solves the problem. Getting this balance right is what turns stitching from a chore into a joy.
Cross Stitch Needle And Fabric Pairing Chart
Here's a handy little reference chart I put together. It’s perfect for quickly picking the right Tapestry needle size based on your Aida fabric count. I recommend bookmarking this page or printing it out for your project bag!
| Aida Fabric Count | Recommended Tapestry Needle Size | Typical Number of Floss Strands |
|---|---|---|
| 6-count | Size 18 | 6 strands |
| 8-count | Size 20 | 4-5 strands |
| 11-count | Size 22 | 3 strands |
| 14-count | Size 24 | 2 strands |
| 16-count | Size 26 | 2 strands |
| 18-count | Size 28 | 1-2 strands |
| 28-count | Size 28 | 1 strand |
| 32-count | Size 28 | 1 strand |
Remember, these are just guidelines. The best way to know for sure is to test it out on a scrap piece of your fabric. Sometimes a slight adjustment is all it takes to find that perfect, smooth stitching rhythm.
Tips for Needle Care and Maintenance
A good needle is a small but mighty part of your stitching toolkit. It’s a tiny investment that makes a world of difference in how enjoyable your stitching is, but like any good tool, it needs a little upkeep. Taking proper care of your embroidery needles not only makes them last longer but also keeps your projects safe from snags, rust, and wonky stitches.
A few simple habits are all it takes. From how you thread it to where you store it, looking after your needle ensures it glides through your fabric smoothly every single time. This makes your craft more fun and your finished work look that much more polished.
Simple Threading and Handling Techniques
Trying to thread a tiny needle eye, especially with a few strands of floss, can sometimes feel like the first big challenge of any project. The pinch-and-loop technique is a game-changer here. Just fold your floss over the needle, pinch that little loop firmly between your thumb and forefinger, and slip the needle out. You're left with a stiff, flat loop that's much easier to push right through the eye.
It's also a great idea to keep your needles clean while you work. The natural oils from your hands and even tiny bits of residue from fabric can build up on the needle, causing it to drag. Every so often, just give your needle a quick wipe on a scrap of fabric to keep it moving effortlessly.
Proper Storage to Prevent Damage
Where you keep your needles matters more than you might think. Tossing them loose in a tin or leaving one parked in your work-in-progress is a sure way to end up with a bent, rusty, or lost needle.
The best way to store embroidery hand needles is in a dry, secure container. A magnetic case or a classic pincushion stuffed with steel wool are fantastic options—they keep needles organized and the steel wool even helps clean them and ward off rust.
You might also love using a needle minder. It’s a small magnetic gadget that sits on your fabric, giving you a safe place to rest your needle when you take a break. No more lost needles in the couch cushions! You can learn more about what a needle minder is and how to use one in our guide.
Knowing When to Say Goodbye
Even the best-cared-for needle won’t last forever. A dull, bent, or rusty needle is your enemy; it will snag your thread, damage your fabric, and make stitching a chore. Give your needles a quick once-over now and then. If you feel it dragging or have to pull harder than usual to get it through the fabric, it’s time to retire it.
It’s amazing to think that these little tools have come so far—from ancient bone implements to the precision-made steel we use today. They’re the engine of a huge craft industry, with the global embroidery market valued at USD 4.06 billion in 2024 and expected to grow to USD 7.41 billion by 2033. All that growth is powered by stitchers like us who rely on quality tools. For the best results, nothing beats starting a new project with a fresh, sharp needle. You can discover more market insights on cognitivemarketresearch.com.
Beyond the Kit Needle: Building Your Collection
That little needle that comes with your cross-stitch or embroidery kit? It’s a great starting point. The manufacturers pick one that’s a solid all-rounder for the specific fabric and thread included, getting you up and stitching without any guesswork. It's perfectly reliable.
But as you get more comfortable and start to venture into new projects, you'll quickly realize that one needle doesn't fit all. Building a small, curated collection of needles is one of the simplest and most affordable ways to upgrade your stitching experience. It’s not about tossing that trusty kit needle, but about giving yourself options.
So, Why Bother Buying More Needles?
I get it. The needle in the kit works, so why spend money on more? Well, as any seasoned stitcher will tell you, having the right tool for the job can be a game-changer. It can make the difference between a frustrating session and one that feels effortless.
Here are a few reasons you’ll want to branch out:
- Finding "The One": Stitching is personal. You might find you love the feel of a shorter needle, or that a gold-plated one glides through your fabric like butter. It's all about what feels right in your hand.
- The Inevitable Disappearing Act: Let's be honest, needles are tiny. They have a magical ability to vanish into the carpet or the depths of a sofa cushion. Having a few spares means a lost needle is just a minor inconvenience, not a full-stop to your project.
- Trying New Things: Ready to tackle delicate beadwork or fluffy French knots? You’ll need a specialty needle for that. A standard tapestry needle just won't cut it for adding beads, and a milliner's needle makes wrapping those knots a breeze.
Think of it like a set of kitchen knives. Sure, you can do almost everything with a single chef's knife, but a paring knife for small, detailed cuts or a bread knife for a crusty loaf makes the work so much easier and more precise.
Growing your needle collection is just a natural step in your stitching journey. It’s a tiny investment that pays off big time, making sure you’re always ready for whatever creative idea pops into your head.
Your Top Questions About Embroidery Needles, Answered
Once you start stitching, you'll naturally run into a few questions about your most important tool: the needle. It's totally normal! Getting these details sorted out is a key part of becoming a more confident and skilled stitcher.
Let's dive into some of the questions I hear all the time from fellow crafters.
How Do I Know When It’s Time for a New Needle?
Your needle will tell you when it’s ready to retire. If you suddenly find yourself having to pull harder to get it through the fabric, or you notice your thread is starting to look a little fuzzy and frayed, it’s probably time for a swap.
Take a close look at the needle itself. Is it looking a bit dull? Is it bent? Any signs of rust? Any of these are clear signals to grab a fresh one. A new needle can make a world of difference, and for bigger projects, it's not unusual to go through more than one.
Can I Just Use a Regular Sewing Needle for Cross-Stitch?
I really wouldn't recommend it. Your standard sewing needle—often called a "Sharp"—is designed to do one thing: pierce tightly woven fabric. But for cross-stitch on Aida or evenweave, that's the last thing you want.
You need a blunt-tipped Tapestry needle. Its rounded point is made to glide smoothly through the existing holes in the fabric's grid, not create new ones. This protects the weave and keeps your stitches looking even and tidy.
Think of it this way: a sewing needle punctures, but a Tapestry needle parts. Using the right tool for cross-stitch respects the fabric's structure, which is the foundation of those perfect little 'X's.
What's the Real Difference Between a Tapestry and a Chenille Needle?
This one is a classic! They both have that nice, big eye for thicker threads, but the business end is completely different.
- A Tapestry needle has a blunt, rounded tip. It’s your go-to for any counted-thread work where you’re following the weave of the fabric.
- A Chenille needle has a very sharp point. You’d grab this for surface embroidery on dense fabrics like denim or felt, especially when using chunkier threads like wool or silk ribbon that need a sharp entry point.
Are Those Fancy, Expensive Needles Actually Worth the Money?
For most people, a quality steel needle from a trusted brand will do the job beautifully. But in some cases, upgrading can be a game-changer.
Needles plated with gold or platinum are a great option for stitchers who have a nickel allergy. Beyond that, the super-smooth coating also reduces friction as you stitch, which can mean less wear and tear on your thread. If you find your floss is fraying a lot on a large project, a plated needle might be worth a try.
Ready to turn a cherished photo into a work of art? Cross Stitched creates custom kits with everything you need to start, including the right needles for the job. Explore our personalized photo-to-pattern kits and bring your memories to life.


