
Quick answer: To create a cross stitch pattern from scratch, sketch the design on graph paper or open a cross stitch design application, then map each element to a coloured grid square representing one stitch. Limit the colour palette to manageable DMC thread numbers, add backstitching for outlines, and export or print the finished chart.
Frequently asked questions
How do you make your own cross stitch pattern?
Start by sketching the design on paper, then transfer it to graph paper or cross stitch design software such as Stitch Fiddle or PC Stitch. Assign DMC thread colours to each symbol on the chart. Each square on the grid represents one cross stitch.
What software is best for designing cross stitch patterns?
Stitch Fiddle (browser-based, free tier) and PC Stitch (Windows desktop, paid) are the most widely used. MacStitch is the leading option for Mac users. All allow colour palette management and DMC colour matching.
Can you design a cross stitch pattern on graph paper?
Yes. Printed cross stitch grid paper (with equal squares) is a low-tech alternative to software. Use coloured pencils to fill each square with the intended thread colour and create a key of DMC numbers to match.
How many stitches wide should a beginner's first original pattern be?
A design of 30–50 stitches wide and tall is a manageable first original project. This produces a finished size of roughly 5–9cm on 14-count Aida and can be completed in a few sessions.
Have you ever dreamed of stitching a portrait of your beloved pet or immortalizing a favorite family photo in thread? You absolutely can. Creating your own cross-stitch pattern involves using specialized software or an online tool to convert your image into a stitchable chart. From there, you can tweak the color palette and fine-tune the details to make the design perfectly yours.
This is how you turn a simple idea into a real, tangible project you can be proud of.
Your Journey to Custom Cross Stitch Designs
Moving beyond pre-made kits is a huge—and hugely rewarding—step in any stitcher's adventure. The best part? You don't need to be a professional designer to transform a meaningful image into a beautiful piece of art. The process is more straightforward than you might think, opening up a world of possibilities for creating something truly one-of-a-kind.
This guide will walk you through the entire process, from picking the perfect photo to making those final tweaks that give your pattern a polished, professional look. We'll cover the tools, techniques, and little tricks I've learned over the years to help bring your vision to life, stitch by stitch.
The Growing Appeal of Customization
Let's be honest, the desire for personalization is a huge part of why so many of us are drawn to making our own patterns. This isn't just a feeling; the numbers back it up. The global cross-stitch market was valued at around USD 0.15 billion and is projected to hit USD 0.22 billion by 2033. That growth points to a real, rising interest in DIY crafts for home décor and personal projects. You can read more about the cross stitch market trends on businessresearchinsights.com.
A custom pattern isn't just another project. It's a way to capture a cherished memory, celebrate a milestone, or create the perfect personalized gift. It turns a hobby into a unique form of storytelling.
What You Will Learn
By the end of this guide, you'll have the skills and confidence to tackle any custom design idea that pops into your head. We're going to dive into:
- Choosing the Right Photo: We'll look at what makes an image a great candidate for a pattern.
- Software and Tools: I'll introduce you to some of my favorite free and paid options.
- Cleaning Up Your Chart: This is the manual part—refining the digital output for a more artistic touch.
- Getting Ready to Stitch: How to prep your fabric and floss so you can dive right in.
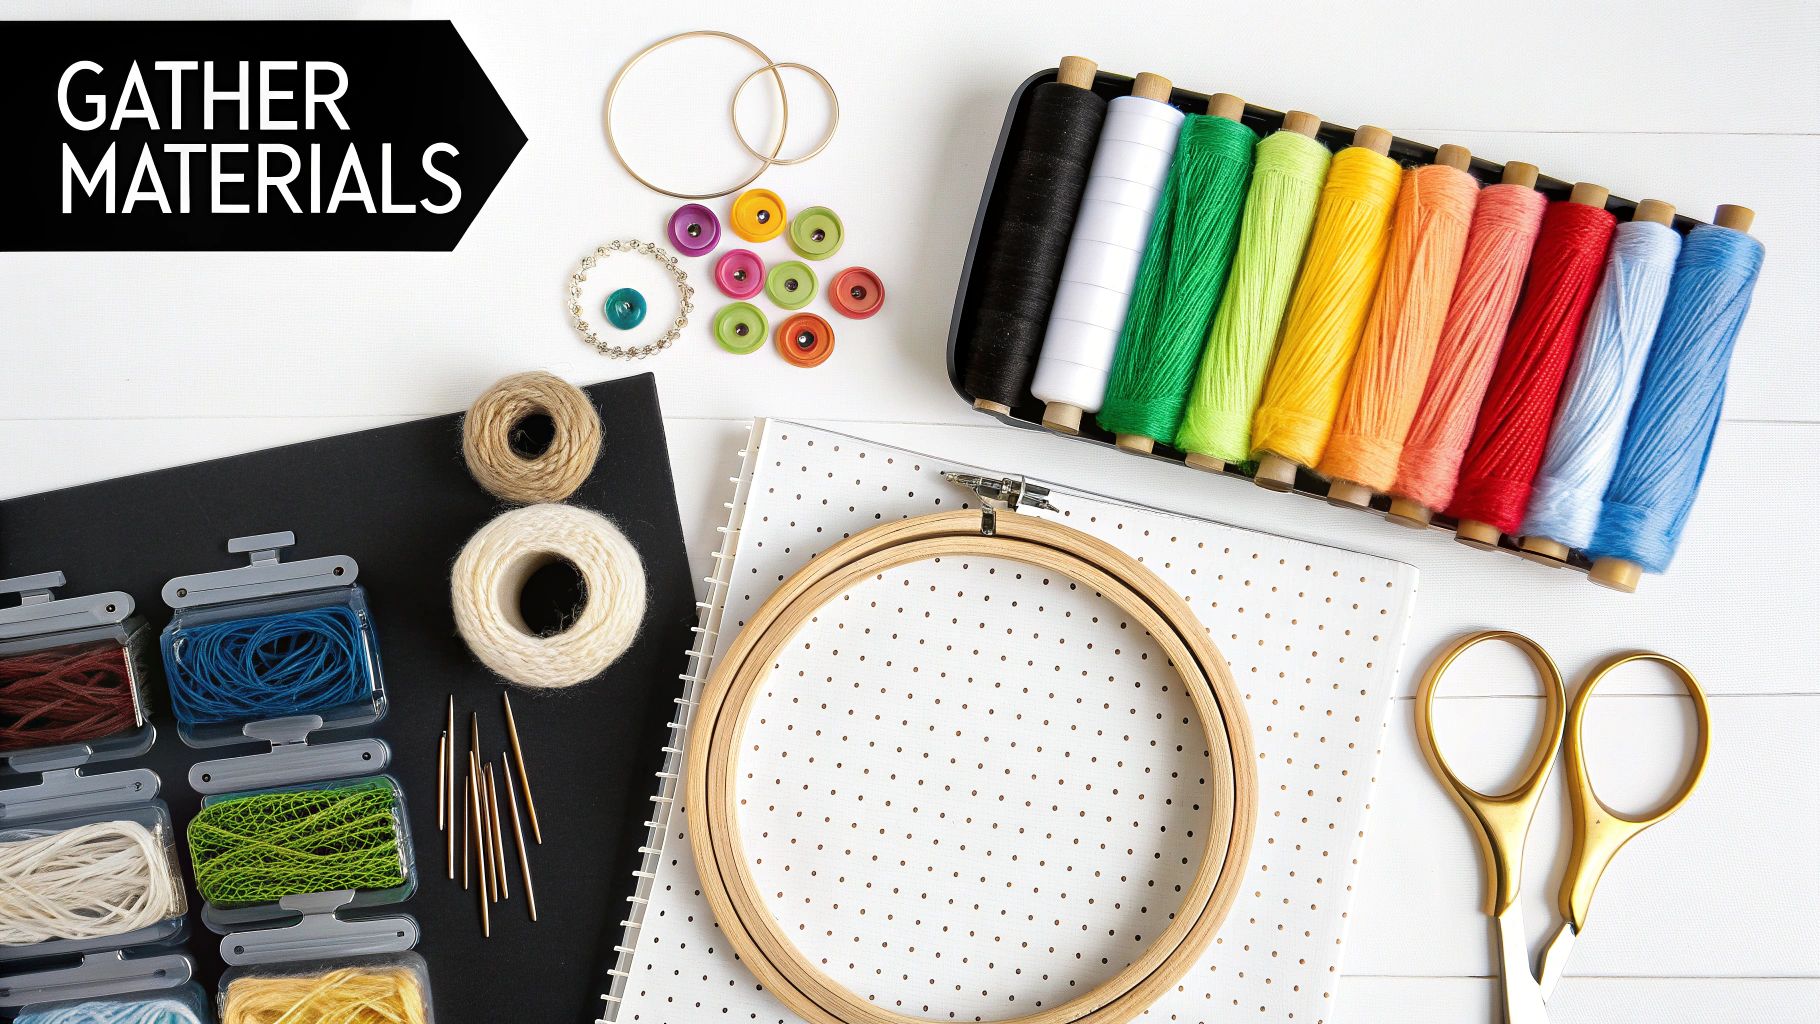
Once your design is finalized, having all your materials ready to go makes all the difference. For some great tips on getting set up, check out our guide on how to organize craft supplies to keep your project flowing smoothly from the very first stitch.
Picking Your Photo and Finding the Right Software
Before you ever pick up a needle, the most important decision you'll make is choosing the perfect picture. The quality of your source image sets the stage for everything that follows. Think of it this way: a great photo makes for a great pattern, while a poor one will cause headaches from start to finish.
Not every photo is destined to become a cross-stitch masterpiece. A busy, sprawling landscape with tons of subtle color shifts will turn into a muddy mess of confetti stitches. But a simple, well-lit portrait? That’s something you can work with. It translates cleanly into a grid of squares, giving you a clear and recognizable final piece.
What to Look For in a Source Photo
To make your life easier and ensure a beautiful result, you'll want to find a photo with a few key characteristics. Getting this right from the beginning saves you hours of frustrating digital cleanup later.
- Good Contrast: You need a clear difference between your subject and whatever is behind it. A black cat sitting on a light-colored blanket is a much better choice than a brown dog in a pile of autumn leaves.
- Simple Backgrounds: Cluttered backgrounds just create noise and a bunch of random, single stitches that are a pain to deal with. The simpler the background, the more your subject will pop.
- A Clear Subject: Your main focus should be sharp and in focus. A blurry photo is only going to look more distorted once it's broken down into a grid of stitches.
- A Limited Color Palette: Photos with fewer distinct colors are much easier for conversion software to handle. That gorgeous sunset with a million shades of orange and pink is a nightmare to chart, but a portrait with clear skin tones, hair color, and clothing is perfect.
The goal isn't to find a perfect photo, but the right photo. Simple, clear, and high-contrast images will almost always produce a cleaner, more recognizable cross stitch chart with less effort.
Finding the Best Pattern-Making Software
Once you’ve got your image, it’s time to pick your digital toolkit. This is where the real magic happens, as software turns your photo’s pixels into a stitchable chart. With the needlecraft patterns market projected to hit around $776 million by 2033, it's clear that more people are discovering the joy of creating their own designs, and there are plenty of tools out there to help.
There are a few different types of pattern makers, and the one you choose will depend on your project and your budget.
Comparison of Cross Stitch Pattern Makers
Choosing the right software can feel overwhelming, but it really comes down to what you need. Are you just testing the waters with a quick photo conversion, or are you looking to create intricate, detailed designs from scratch? This table breaks down some of the most popular options to help you decide.
| Tool Type | Best For | Key Features | Cost |
|---|---|---|---|
| Free Online Converters | Beginners, quick projects, and testing out different photos. | Instant conversion, easy-to-use interface, no downloads required. | Free |
| PC-Based Software | Serious hobbyists and designers who want maximum control. | Advanced color blending, backstitch/French knot tools, text integration, manual editing. | One-time purchase ($50-$100) |
| Mobile Apps | Stitchers who want to design and track progress on the go. | Photo import, basic editing, PDF export, digital markup tools. | Freemium or one-time fee ($10-$20) |
| Mac-Specific Software | Apple users looking for a dedicated, native design program. | Similar to PC software but optimized for macOS, often with a sleek UI. | One-time purchase ($50+) |
Ultimately, free tools are perfect for getting started, but if you find yourself wanting more control over the final pattern, investing in a paid program is absolutely worth it.
Free vs. Paid: What’s the Difference?
Your two main options are free, browser-based tools or dedicated software you install on your computer.
Free Online Converters
These are a fantastic starting point. They're perfect if you're curious and just want to see how a photo might look as a pattern without spending any money. You upload your picture, tweak a few settings, and get a chart in minutes.
The downside? You get what you pay for. Free tools often offer limited editing capabilities, less control over the final color palette, and might restrict the size or download format of your pattern.
Paid Software Programs
If you're serious about designing or know you'll be making more than one pattern, dedicated software is the way to go. These programs give you total control to clean up stray pixels, fine-tune colors, add backstitching for detail, and even incorporate text.
While they come with a price tag and a bit of a learning curve, the power they give you is unmatched. They are an investment in your craft.
If your design includes text, remember that the font you choose can completely change the feel of the piece. For some great ideas on how to pair fonts with your art, check out resources like Unlocking Creativity with Fonts for Art and Design. Your final choice of software really boils down to how complex your project is and just how deep you want to dive into the design process.
Turning Your Image Into a Stitchable Chart
Alright, this is where the magic happens. You’ve got your image, and now it’s time to translate that into a grid of squares and symbols that you can actually stitch. When you upload your photo into a pattern-making program, you'll be faced with a few technical-looking settings. Don't be intimidated! Getting a handle on these is the key to creating a pattern that’s not just beautiful but also a joy to work on.
The first thing you’ll tackle is the size of your project. The software will ask for the final dimensions, usually in inches or in the total number of stitches (e.g., 150 stitches wide by 200 stitches high). This decision is completely intertwined with the fabric count you want to use, and it makes a huge difference in the final piece.
Getting the Size and Fabric Count Right
Your choice of fabric—specifically, its "count," or the number of stitches per inch—is one of the most critical decisions you'll make. It dictates not only the finished size but also the level of detail.
For example, a design that's 140 stitches wide will finish at 10 inches on 14-count Aida cloth. But stitch that same design on 18-count Aida, and it shrinks to about 7.8 inches wide. It’s the same amount of stitching, but a totally different outcome.
- Lower-Count Fabric (like 14-count): This gives you a larger project where the individual 'X's are more distinct. It’s much easier on the eyes, making it a fantastic choice for beginners or for pieces that will hang on a wall and be viewed from a distance.
- Higher-Count Fabric (like 18-count or 22-count): This results in a smaller, denser piece. The stitches blend together for an almost photorealistic or pixel-art look. It’s perfect for detailed portraits but definitely requires a bit more focus.
Think of it like screen resolution. Higher-count fabric is like a 4K display, packing more information into a smaller space. For your first go, you really can't go wrong with 14-count Aida. It’s popular for a reason—it’s the perfect balance of detail and stitchability.
This is a great little visual of how the software takes you from A to B, turning your image into a workable chart by setting the grid and assigning symbols to your colors.
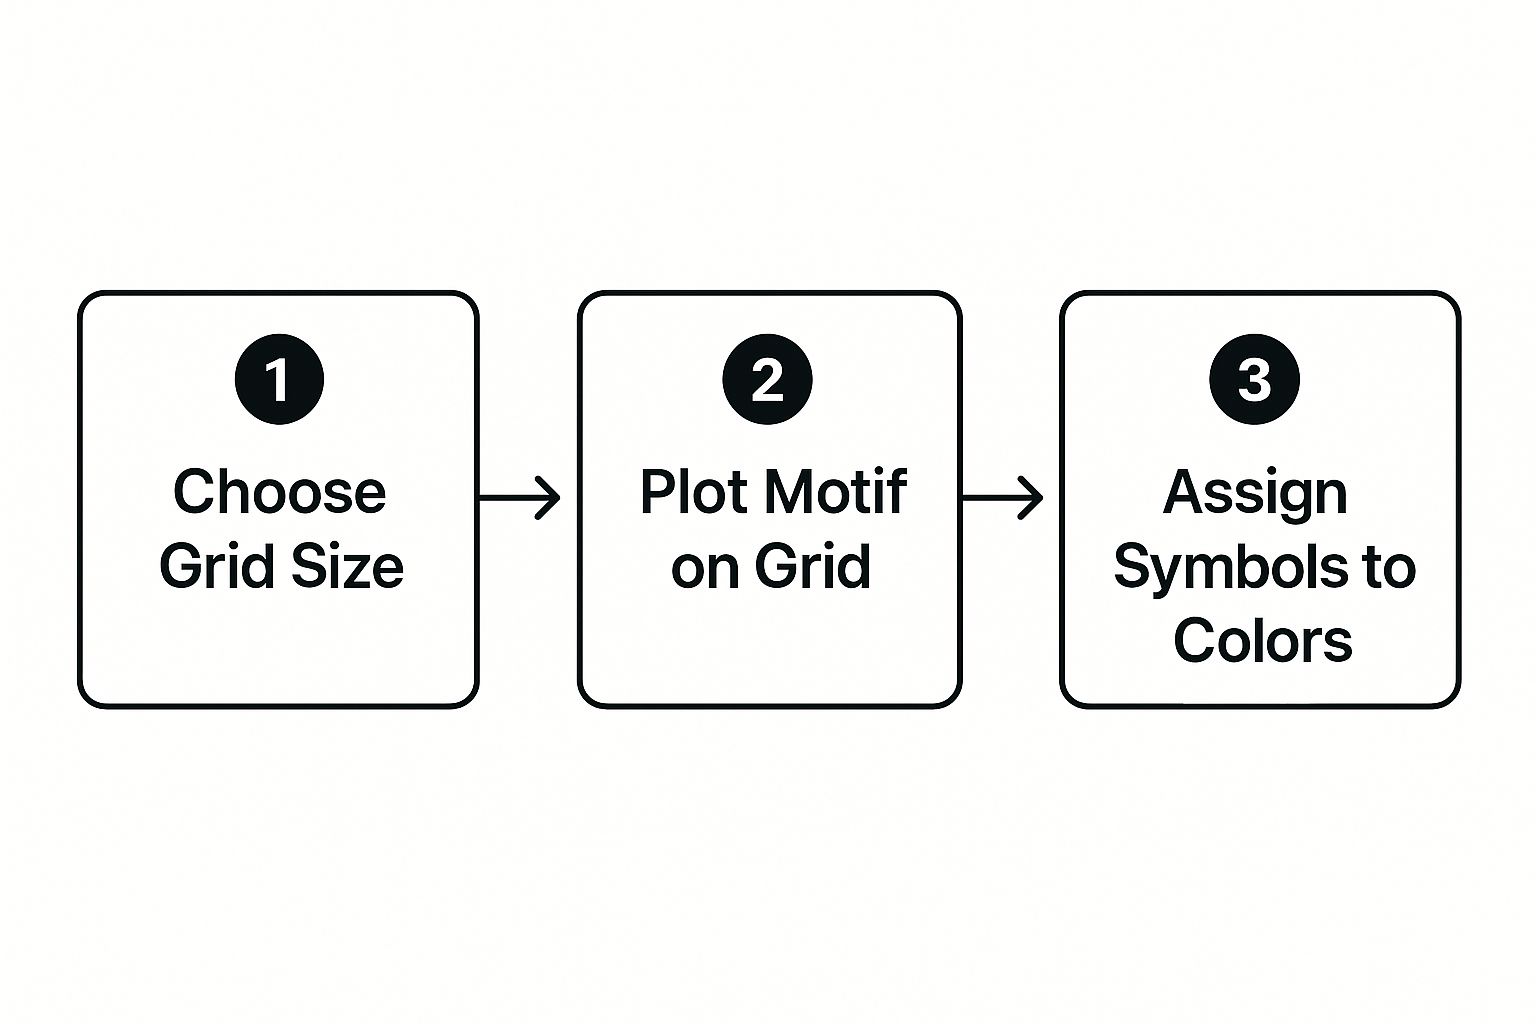
Seeing it laid out like this really clarifies how each setting builds on the last to get you from a simple photo to a ready-to-stitch pattern.
Wrangling the Color Palette
Once your dimensions are set, you have to tackle the colors. Be warned: pattern generators can get a little carried away here, sometimes suggesting 50 or more different floss colors for a single photo. While that might create a super-accurate image, it also creates an incredibly complex and expensive project. No one wants to buy 50 skeins of floss for one portrait.
Your job is to find the sweet spot between detail and sanity. Look for a slider or a box in your software that lets you manually set the maximum number of colors. For something like a portrait, I find that 20-30 colors is usually plenty to capture good shading and highlights without making you want to pull your hair out. Reducing the number of colors forces the program to combine similar shades, which often gives you a cleaner, more stylized look anyway.
The biggest rookie mistake is just accepting the software’s default color count. You have to take control. Actively cutting down the number of floss colors is probably the single best thing you can do to make your pattern simpler and more fun to stitch.
Cleaning Up "Confetti" and Tidying the Chart
Limiting your colors has another huge benefit: it dramatically cuts down on "confetti stitches." That’s what we stitchers call those random, single stitches of one color completely surrounded by another. They’re a pain. They force you to start and stop your thread for just one tiny 'X', which slows you down and can make the back of your project look like a tangled mess.
Most pattern programs have tools to help with this. Poke around for settings that control "dithering" or color blending. Dithering is a technique programs use to create the illusion of more colors by mixing pixels of existing colors. It's a neat trick, but it's also the number one cause of confetti.
Here are a few things you can do to get a cleaner chart:
- Drop the Color Count: This is always your first line of defense. Less is more.
- Play with Dithering: Try turning the dithering setting off entirely, or switch between different types (you might see options like "Pattern" or "Floyd-Steinberg"). See which one gives you cleaner, more solid blocks of color.
- Clean Up by Hand: After the chart is generated, zoom in and hunt for those lonely, isolated stitches. Don't be afraid to just change them to match a neighboring color. A single "wrong" stitch will be completely invisible in the finished piece, but it will save you a ton of frustration.
By thoughtfully managing your project's size, palette, and cleanup, you take a raw computer-generated image and turn it into a well-crafted, intentional design. Doing this prep work upfront makes the entire stitching process smoother and ensures you end up with a piece you’re truly proud of.
Fine-Tuning Your Pattern by Hand
A pattern straight from the software is a fantastic starting point, but I've never seen one that's perfect right out of the box. Think of it as a rough draft. The real artistry comes in now, as you step in to make the smart, intuitive choices that a computer just can't. This is your opportunity to turn a simple conversion into a real piece of art.
This cleanup process is all about tackling those stray stitches, smoothing out jagged lines, and just generally making sure the final piece will be a joy to stitch. It's less about a technical skill and more about stepping back and looking at the design with a stitcher’s eye.
Cleaning Up the Digital Noise
Pattern generators are notorious for creating what I call digital "noise." This usually shows up as "confetti"—those annoying, isolated single stitches of a random color—or as blocky, unnatural lines. Your first job is to do a little digital housekeeping.
Zoom right in on your chart and hunt for those single squares of color that look completely out of place. You might spot one random dark grey stitch in the middle of a person's cheek, for example. Just change it to match one of the surrounding colors. It’s a tiny edit that won’t be noticeable in the finished project, but it will absolutely save you the headache of starting and stopping your thread for one single stitch.
- Smooth Out Curves: Look at any lines that should be fluid and graceful, like the curve of a smile or the edge of a flower petal. If the software made it look like a clunky staircase, don't hesitate to manually adjust the stitches to create a much more natural-looking arc.
- Consolidate Tiny Patches: See a small area with three or four shades of blue that are barely different from one another? This is a perfect chance to simplify. Pick one or two of those colors and consolidate the whole patch. It makes the stitching process so much faster.
The goal here isn't to completely change the design. It's all about making small, strategic edits that improve the stitching experience and create a more polished, cohesive look. Trust me, every confetti stitch you eliminate is a win.
Adding Definition with Backstitching
Sometimes, a pattern just needs a little extra pop to really come to life. That's where backstitching comes in. It's a simple straight stitch that's perfect for outlining shapes, adding fine details, or creating text. A computer-generated pattern will almost never include backstitching on its own, so this is a key artistic touch you can add yourself.
Think about a portrait of a person or a pet. The cross stitches create the blocks of color for the face and fur, but it's the backstitching that can truly define the eyes, outline the nose, or add delicate little whiskers. It’s what turns a blurry shape into a sharp, recognizable feature. You don't need to overdo it—just a few well-placed lines can make a world of difference.
Making Smart Color Swaps
The floss list your software spits out is a suggestion, not a set of rules. You're the artist, and you have the final say. One of the most important finishing touches is to review the suggested threads and make some thoughtful swaps.
If you can, lay out the suggested floss colors in person. You'll often find that two shades of brown the software chose are almost identical in real life. When that happens, just merge them! Pick the one you like better and use it for both symbols on your chart. It's such an easy way to lower your total color count.
You can also make creative swaps to better capture the spirit of the original photo. Maybe the software picked a standard green for a plant's leaves, but you remember they had a much more unique olive tone. Swap it out! For comparing shades, having a guide to DMC embroidery floss numbers on hand is an invaluable tool. This is the part of the process where your project goes from being a technical copy to your own personal interpretation.
Time to Print Your Chart and Prep Your Fabric
Alright, your digital masterpiece is complete! Now comes the really exciting part: getting it off the screen and ready for that first stitch. Taking a few moments to properly prepare your fabric and pattern now will save you a world of headaches later on.
Before you hit "print," the very first thing you need to figure out is how much fabric you'll need. Trust me, there’s nothing worse than getting halfway through a project only to realize you’re about to stitch right off the edge.
Calculating Your Fabric Size
First things first, you need the final dimensions of your stitched piece. This depends entirely on your pattern's stitch count (how many stitches wide and high it is) and the fabric count you've chosen, like 14-count or 18-count Aida.
To get this number spot-on without fumbling with a calculator, I highly recommend using a dedicated tool. This handy cross-stitch calculator will do the math for you in seconds.
Once you have those dimensions, it's time to add a border. I can't stress this enough: always add at least three inches of extra fabric on all four sides. This gives you plenty of space to secure your fabric in a hoop or Q-snap frame and leaves enough of a margin for framing when you're done.
Pro-Tip: Don't skimp on your fabric border! A generous margin makes the whole stitching process more comfortable and gives you way more finishing options once your masterpiece is complete. It’s a non-negotiable for me.
Getting Your Fabric Ready to Go
With your fabric cut to size, the next step is to stop the edges from fraying. Aida cloth loves to unravel, and those loose threads can become a real nuisance as you handle your project.
You have a few solid options for taming those edges:
- Serging or Zig-Zag Stitch: If you have a sewing machine, running a quick zig-zag stitch around the border is a durable, long-term fix.
- Masking Tape: No sewing machine? No problem. Just fold a strip of masking tape over the edges. It’s simple, cheap, and surprisingly effective.
- Fray Check: This liquid seam sealant is a go-to for many stitchers. A quick application creates a clear, permanent edge that won't budge.
As more people design their own patterns, we're seeing a lot of creative fabric choices. While 14-count Aida remains a classic, fabrics like 20-count Aida are becoming more popular for detailed projects. You can see more about these evolving trends on YouTube.
Printing Your Custom Pattern
Finally, let's get that chart on paper. Most pattern-making programs will let you export your design as a PDF, which is perfect for printing across multiple pages.
Think about how you prefer to read your charts. Some people love a full-color printout, while others find a simple black-and-white symbols chart easier on the eyes. My personal sweet spot is a symbols-on-color chart—it gives you the best of both worlds.
Make sure to print your floss key, too. You might even want to enlarge the chart pages to make them easier to read. And just like that, you're ready to organize your threads and start stitching your one-of-a-kind creation
Your Top Pattern-Making Questions, Answered
Diving into creating your own patterns is exciting, but it’s natural to have a few questions pop up right away. Getting a handle on these common queries from the get-go can make the whole process feel less intimidating and a lot more fun. Let's clear up some of the most frequent sticking points.
How Many Colors Should I Start With?
One of the first things people ask is about the color count. When you upload a photo to a pattern generator, it might spit out a list of 50+ colors. Don't panic! That’s usually way more than you need, especially for a first project.
My advice? Aim for a palette of 15-25 colors for your first custom pattern. This is the sweet spot—it’s enough to create beautiful shading and detail without becoming a logistical nightmare of endless floss skeins.
Starting with a manageable number of colors keeps the project affordable and lets you focus on learning the design process itself, not just managing a massive thread collection.
What Makes a Good Photo for Cross-Stitch?
So, what kind of picture should you choose? The best photos for cross-stitch patterns have a few things in common: a clear, well-defined subject and strong contrast. Think of a simple portrait where the person stands out from the background, a single vibrant flower, or a clean, graphic logo.
Steer clear of images with super busy backgrounds or extremely subtle gradients (like a hazy sunset). Those fine details just don't translate well into a grid of little 'X's and can end up looking muddy.
Do I Really Need Software to Make a Pattern?
This is a big one. And the answer is no, you don't have to use software. You can absolutely go old-school with graph paper.
- The Traditional Method: This is all about mapping out your design by hand. You literally draw or trace your idea onto a grid and color in the squares, with each square representing a single stitch.
- When It Works Best: This hands-on approach is fantastic for simpler, graphic-style designs. It gives you total creative control and has a wonderfully tactile feel.
- The Big Limitation: But if you're trying to convert a detailed photograph? Doing it by hand would be an incredibly slow, painstaking process. For photos, using a dedicated pattern-making tool is really the only practical way to get a great-looking result without spending months on the charting alone.
Ready to turn that perfect photo into a treasured keepsake? Cross Stitched takes the guesswork out of it. Just upload your image, and we’ll send you a complete, custom kit with everything you need to bring your vision to life.
Create your personalized kit now at https://cross-stitched.com.


