

So, you have an idea for a cross-stitch project that you can't find in any kit. Maybe it's a photo of your dog, a funny quote, or a cool graphic you dreamed up. The good news is you don't have to wait for someone else to design it—you can create your own pattern!
Learning to translate your vision into a stitchable chart is one of the most rewarding skills in cross-stitching. It gives you complete creative freedom to make something that's 100% you.
The Two Roads to a Custom Pattern
When it comes to making your own pattern, you have two main options. You can go the modern route and use digital software, which is fantastic for quickly converting photos and complex images into charts. Or, you can stick with the traditional manual grid method, drawing your design by hand on graph paper for total artistic control.
Think of it this way: the digital path is like using a high-tech camera, capturing all the details for you. The manual path is like sketching with a pencil, where every line is a deliberate choice.
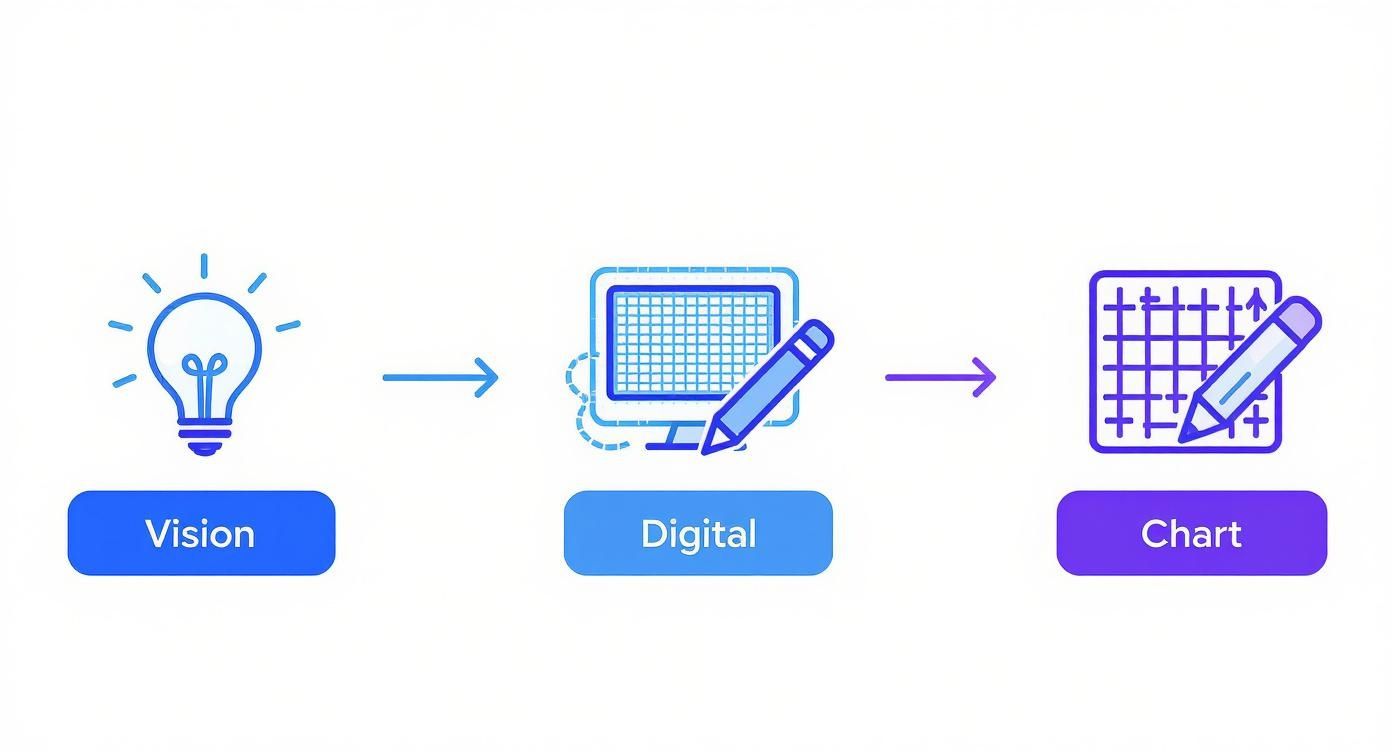
As you can see, both routes get you to a finished chart, but the creative process is quite different.
Why Bother Making Your Own?
The desire for unique, personalized crafts is huge right now. In fact, the global cross-stitch market was valued at approximately USD 0.15 billion in 2024 and is expected to keep growing. A big part of that growth comes from stitchers like us who want to move beyond kits and create something truly personal, fueled by the accessibility of new design tools. You can get more insights into the growing craft market and see what’s behind this trend.
The real magic of creating your own pattern is the personal connection. Whether it's a portrait of a beloved pet or an inside joke stitched for a friend, a custom design transforms a simple hobby into a deeply meaningful act of creation.
Pattern Creation Methods At a Glance
To help you decide which path is right for your next project, here’s a quick comparison of the two main methods.
| Feature | Digital Software Method | Manual Grid Method |
|---|---|---|
| Best For | Photos, complex images, detailed art | Text, pixel art, simple graphics, logos |
| Speed | Fast conversion (minutes to hours) | Slower, more deliberate (hours to days) |
| Control | Good, but often requires tweaking | Complete control over every single stitch |
| Tools Needed | Computer or mobile device, software/app | Graph paper, pencils, colored markers |
| Learning Curve | Varies by software, but generally easy | Simple concept, but requires patience |
Ultimately, there's no "wrong" choice. If you want to turn a family portrait into an heirloom, digital software is your friend. But if you want to design a quirky, stylized sampler from scratch, grabbing some graph paper is the way to go.
Understanding these two approaches is the first step. Now, let's dive into how to actually do it.
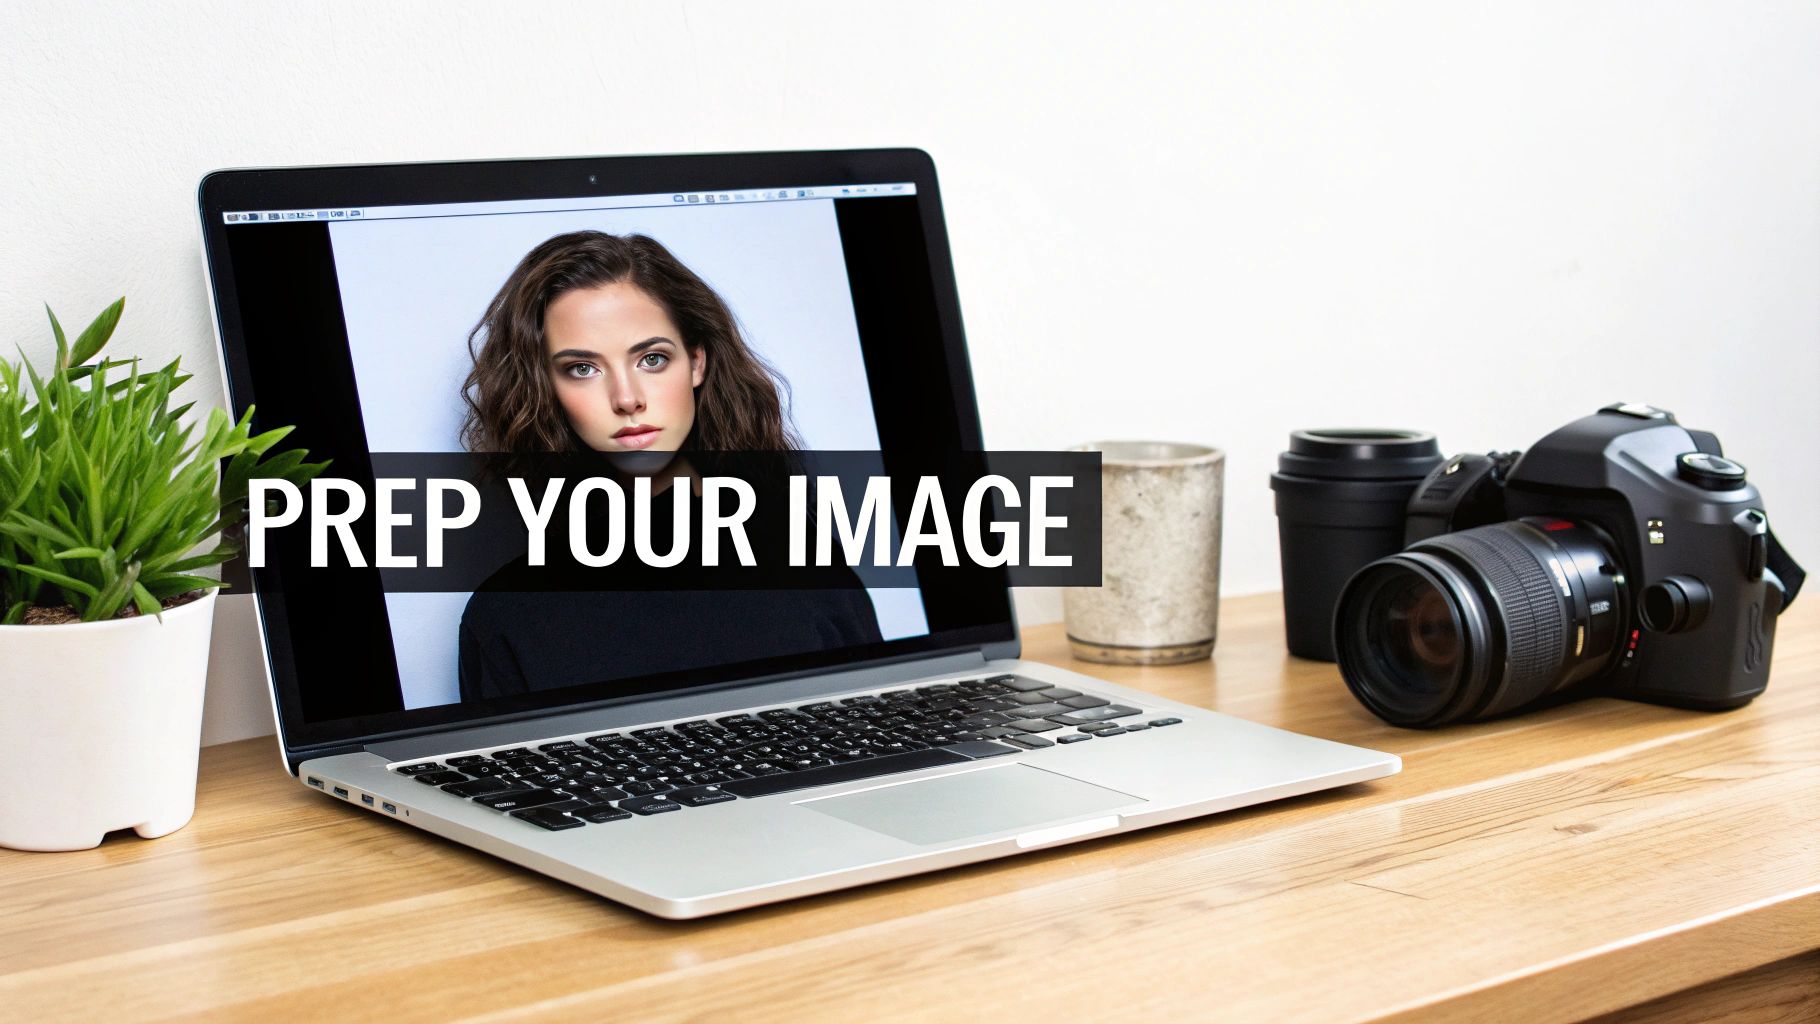
Finding and Prepping the Perfect Image
The secret to a breathtaking cross-stitch pattern? It all starts with the image you choose. I've learned this the hard way: a photo that looks gorgeous on your phone can quickly turn into a confusing, pixelated mess when you try to turn it into a stitchable chart.
Think of it like cooking. You can have the best recipe in the world, but if you start with subpar ingredients, the final dish will fall flat. A well-chosen and carefully prepped image is your foundation, and getting it right makes the entire process smoother and far more enjoyable.
What Makes an Image "Stitchable"?
When you're sifting through photos, you need to start thinking like a stitcher, not just a photographer. Some images are just naturally better suited for translating into a grid of Xs.
Here’s what I always look for:
- A Clear Star of the Show: Patterns work best when there’s an obvious focal point. A portrait, a close-up of a flower, your snoozing cat—these are perfect. Busy, cluttered scenes, like a wide shot of a crowded beach, tend to lose their magic.
- Good, Strong Lighting: Contrast is your absolute best friend here. You want clear, defined shadows and highlights. An image with flat, even lighting often results in a "muddy" pattern where all the shapes just blend together.
- A Simple Backdrop: A chaotic background is the enemy of a good pattern. It competes with your main subject for attention. Look for photos with plain, out-of-focus, or single-color backgrounds. This translates beautifully into clean, stitchable blocks of color.
On the flip side, I steer clear of blurry, low-resolution photos or images packed with tons of tiny, fiddly details. A photo of a dense forest with a million little leaves is a classic rookie mistake—it’s a surefire recipe for a frustrating project.
Getting Your Image Ready for Conversion
Once you’ve landed on a winner, don't just throw it into a pattern maker! A few minutes of simple photo editing can dramatically improve your final chart. This isn’t about pro-level photo manipulation; it’s about giving the software a clean, easy-to-read map.
For an even better starting point, you might want to explore how AI photo enhancement techniques can sharpen up your source image. These tools can clarify details and boost overall quality, giving your pattern a much more professional-looking base.
Here are the three tweaks I make to almost every photo before converting it:
- Crop It Ruthlessly: Get right to the good stuff. Crop out all the distracting background noise so the focus is squarely on what you want to stitch. If it’s a pattern of your dog, I want to see that adorable face, not the couch and TV in the background. Be bold!
- Pump Up the Contrast: This is a big one. Bumping up the contrast makes the lines between different colors and shades pop. It helps the software clearly see the difference between the shadow on a petal and the petal itself, which means you get a cleaner chart with less color confetti.
- Use the Posterize Filter: This is my secret weapon. The posterize filter is a function in most photo editors that reduces the number of colors in an image. By simplifying the color palette before you even upload the photo, you’re basically pre-sorting the colors for the software. This almost always leads to a pattern with a more reasonable number of floss colors.
The goal here isn't to make a perfect photograph. It's to create a simplified version that a machine can easily translate into distinct blocks of color for stitching. You're giving it a cheat sheet.
Trust me, spending five minutes on these prep steps will save you hours of frustration later. A clean input leads to a clean output, and that’s what we’re all after.
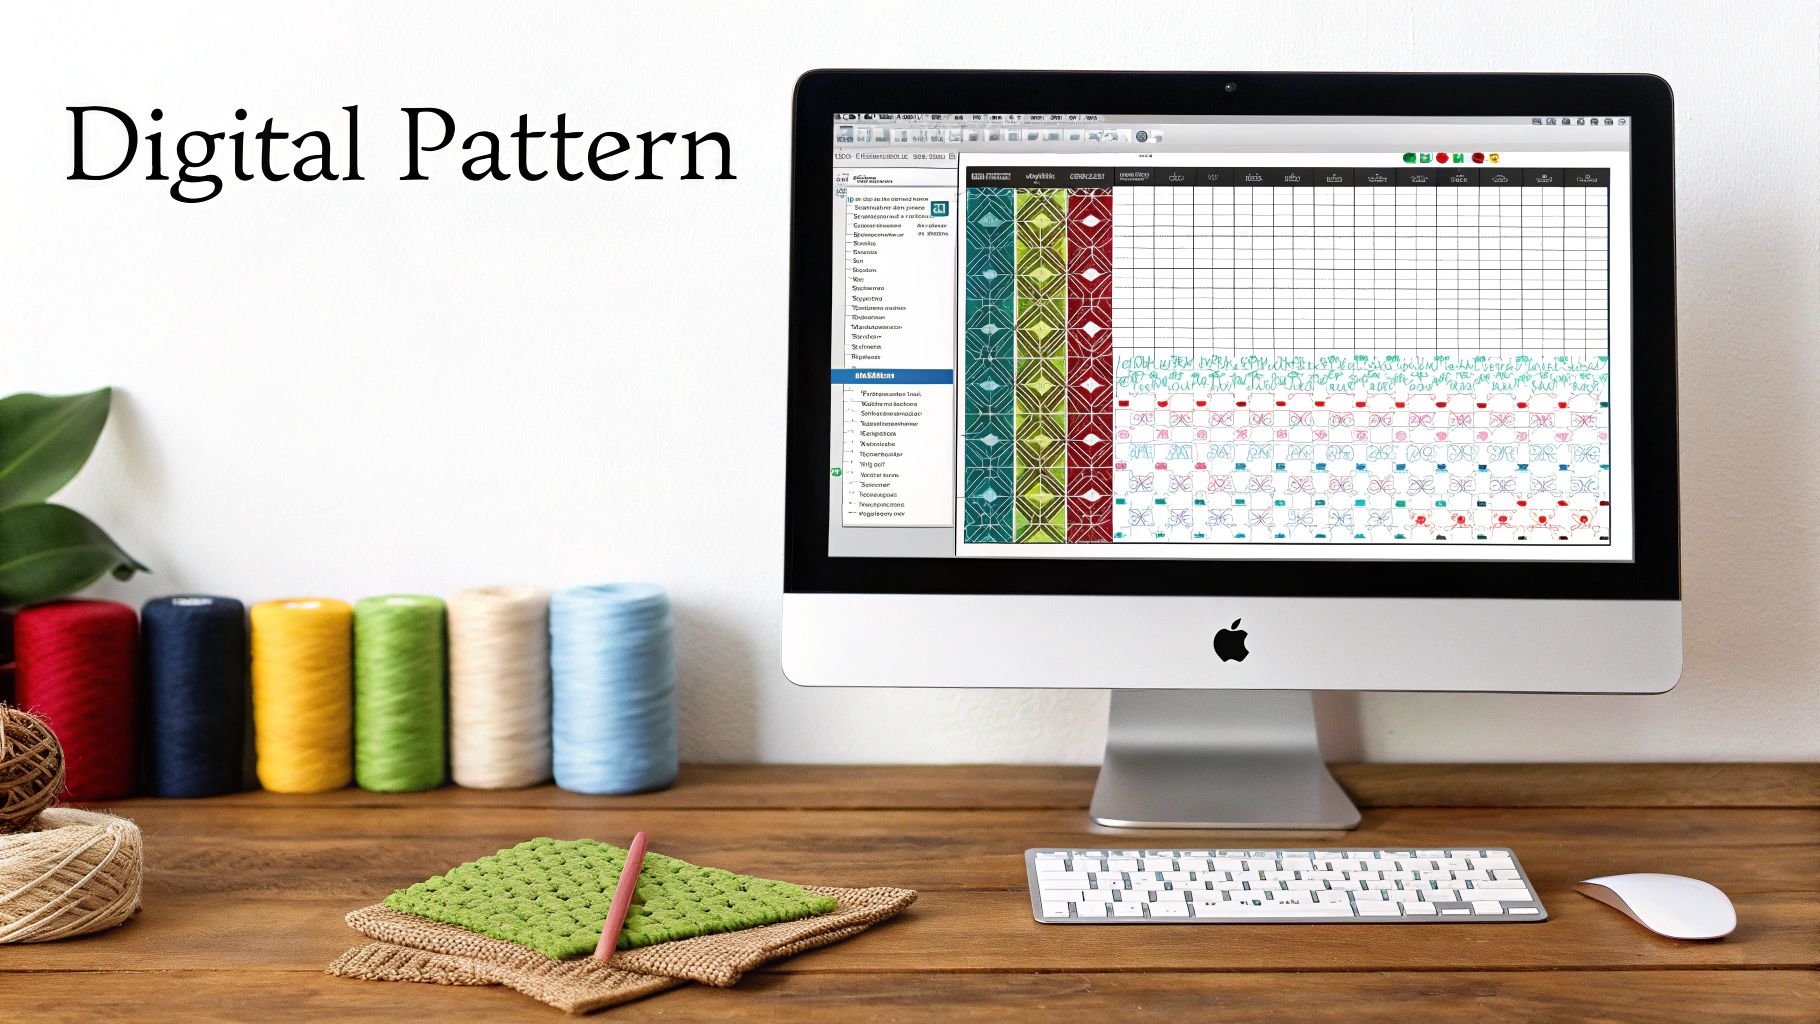
Making Your Pattern With Digital Tools
Okay, this is where the real fun begins. Taking that photo you’ve prepped and turning it into an actual, stitchable chart is so much easier with today's software. Honestly, it's the fastest and most reliable way to design a pattern from a photo, especially for something with a lot of detail, like a portrait of your favorite pet.
Let's stick with our example: a great photo of a golden retriever lounging in the sun. We've already cropped it and tweaked the contrast, so it's ready to go. The moment you upload it into your pattern software, you start making the key decisions that will define the final project.
Laying the Foundation for Your Project
The very first thing you’ll need to tell the software is how big you want your finished piece to be and what kind of fabric you plan to use. These two things are completely linked and set the stage for everything else.
- Fabric Count: This is simply the number of stitches per inch your fabric has (like 14-count, 16-count, or 18-count Aida). This choice makes a huge difference. For instance, if our dog portrait is 100 stitches wide on 14-count fabric, it'll come out to about 7 inches wide. Pop that same 100-stitch pattern onto 18-count fabric, and it shrinks to around 5.5 inches, giving it a much more detailed, high-resolution look.
- Final Dimensions: You can approach this two ways. Either tell the software you want the final piece to be 8 inches wide and let it calculate the stitch count, or you can specify the stitch count yourself (say, 150 stitches wide) and see what the final dimensions will be.
The best part about using software is that you see these changes happen in real time. You can flip between fabric counts and sizes instantly to get a feel for the project's scale before you've even touched a needle.
The big takeaway here is that fabric count and stitch count work together. A higher fabric count (like 18ct or 22ct) means a smaller, more detailed final piece for the exact same number of stitches.
Taming the Color Palette
Once you’ve set the size, the software does its thing, analyzing your photo and assigning a thread color to every single square on the grid. The first pass is usually a bit wild—it might spit out a photorealistic pattern with 80-100+ colors. While it looks just like the photo, stitching that many colors would be a nightmare. Your next task is to bring that number down to something manageable.
This is a great example of how distinct blocks of color come together to create a detailed image in cross-stitch.
The software is essentially doing this on a huge scale, but you're in control of the final color choices.
Back to our golden retriever. The initial conversion probably gave you 15 different shades of yellow and gold for its fur. Your job is to find that perfect balance between detail and simplicity.
- For a Photorealistic Look (40-60 Colors): This will capture all the subtle highlights and shadows, making the portrait look incredibly lifelike. It’s a lot of work with frequent thread changes, but the result can be stunning.
- For a Stylized Look (20-35 Colors): This is often the better route. It simplifies the image into larger, cleaner blocks of color. The finished piece looks less like a photograph and more like a beautiful illustration, which is generally more enjoyable and faster to stitch.
Most programs give you a slider or a simple input box to set the maximum number of colors. As you dial it down, the software intelligently merges similar shades. Keep an eye on the preview—you want to make sure you don't lose important details, like that little sparkle in the dog's eye. If you want to dive deeper into which program is right for you, we've reviewed the https://cross-stitched.com/blogs/what-is-cross-stitch/best-cross-stitch-pattern-maker options out there.
Cleaning Up the Digital "Confetti"
Even after you've wrangled the color count, computer-generated patterns almost always have one annoying quirk: "confetti" stitches. These are the lone, single stitches of one color stuck in the middle of a different-colored area—that one random dark brown stitch in a sea of gold fur. They’re a pain to stitch and rarely add anything valuable to the design.
This is where a little manual cleanup goes a long way. Zoom right into your digital pattern and hunt for these rogue stitches. Most software lets you click on any square and change its color. Go ahead and change that lonely dark brown stitch to one of the surrounding gold shades. It will look much cleaner.
You can do the same for small, awkward patches. If you see two tiny blotches of very similar yellows side-by-side, just pick one shade and make them both the same. This final polish is what turns a clunky computer conversion into a professional-looking, genuinely fun-to-stitch pattern.
Technology's role here just keeps growing. For those who want to get really creative, learning how to generate images with AI can give you a completely unique starting point before you even begin the conversion process. Looking ahead, experts believe digital tools will only get smarter, making it even easier for stitchers to bring their unique ideas to life.
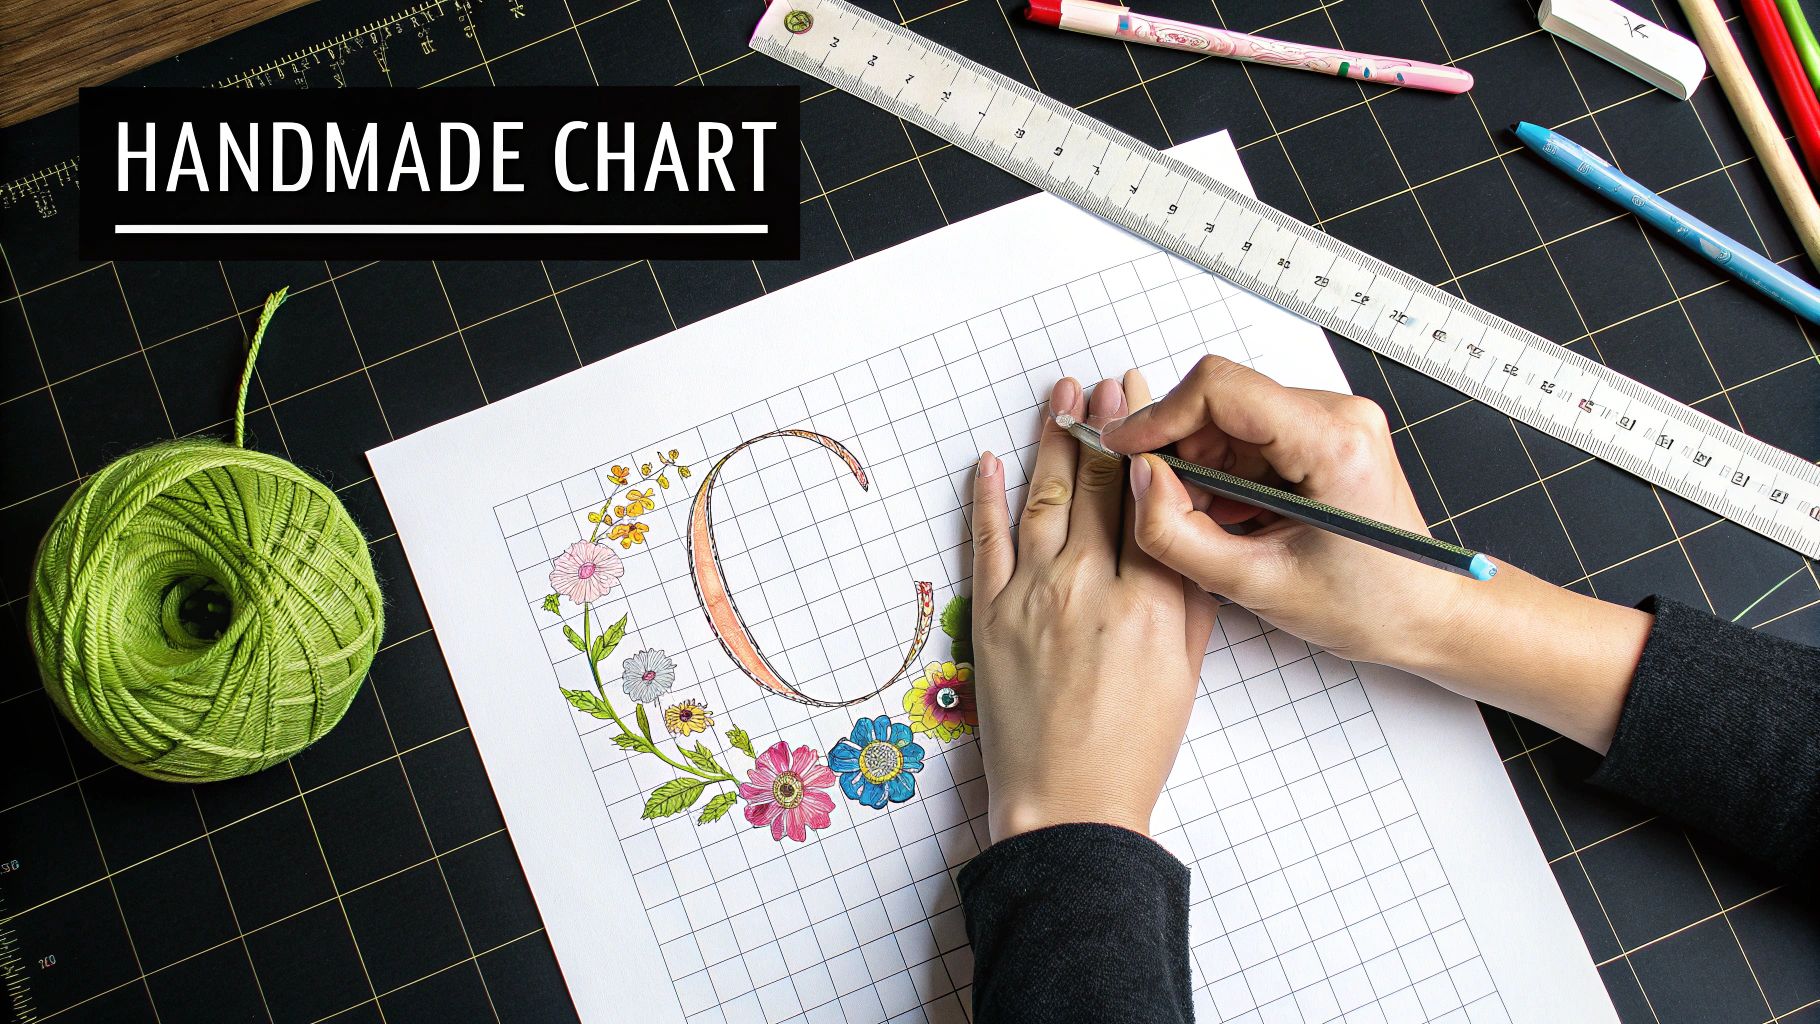
Crafting a Custom Chart by Hand
While software is fantastic for speed and detail, there's a special kind of magic in creating a cross-stitch pattern completely by hand. It connects you to the craft's roots and gives you total, unfiltered control over every single stitch. This old-school method is perfect for stylized text, cool geometric designs, or any project where you want your own artistic flair to be the star.
Think of it as the difference between taking a photo and sketching. A program converts a picture, but drawing by hand lets you interpret it. You’re not aiming for a perfect copy; you're creating a piece of art, simplifying complex shapes into the charming, blocky forms that look so good in thread.
And don't think this is just for seasoned designers. Anyone with an idea and a few basic supplies can absolutely learn to chart their own patterns this way.
Setting Up Your Workspace
Before you can start charting, you need to gather the right tools. The good news is, you don’t need anything fancy. The whole goal is to make the jump from paper to fabric as seamless as possible.
Here's what I recommend having on hand:
- Graph Paper: This is your canvas, and it’s the most important supply. Here's the key: find graph paper that matches your fabric count. If you’re stitching on 14-count Aida, grab graph paper with 14 squares per inch. This simple trick ensures your paper design is a true 1:1 scale of your finished project.
- A Good Pencil and Eraser: You’ll use these for your initial sketch, so you can easily tweak things as you go.
- Colored Pencils or Markers: These bring your grid to life and help you create the color key. Try to pick colors that are reasonably close to the floss shades you want to use.
- Your Inspiration: Keep your reference photo, doodle, or idea close by to guide you.
Getting your setup right from the start makes the whole process feel less like a technical drawing exercise and more like a fun, creative session. If you want to dive deeper into how grids translate to fabric, check out our guide on understanding cross stitch graphs.
From Vision to Grid
Let’s walk through a real-world example: designing a custom floral monogram, maybe the letter "S" with a simple rose winding through it. The challenge is to translate the smooth curves of the letter and the flower petals into a series of pixel-like squares.
First, lightly sketch the outline of the "S" onto your graph paper. Don't press hard and don’t worry about making it perfect—you're just blocking out the general shape. Next, draw the basic form of the rose.
Now, take a step back and look at it. Does the composition feel balanced? Is the rose too big for the letter? This is your moment to erase and resize until it just feels right.
Once you’re happy with the basic layout, it’s time to "pixelate" it. Go back over your light sketch and start filling in the squares that best represent the shapes. You’ll quickly see that creating the illusion of a curve is all about making strategic "stair-steps" with your blocks.
My best tip for charting by hand? Embrace the blockiness, don't fight it. The unique charm of a hand-drawn pattern comes from its stylized, pixel-art vibe. You’re suggesting a shape, not recreating a photograph.
Making Your Symbol Legend and Color Key
With your shapes finalized, it's time to map out your colors. This is where you create the legend, or key, that will be your roadmap when you start stitching.
Carefully erase your initial pencil lines, leaving only the colored-in squares. In the margin of your graph paper (or on a separate sheet), it's time to build your legend.
Draw a small box for each color you used in your design. Next to that box, write down the corresponding DMC (or whichever brand you prefer) floss number you plan to stitch with.
What if you have two very similar colors, like two shades of pink for the rose? To avoid mix-ups, add a unique symbol—like a dot, a star, or a slash—inside one of the squares on your chart and add that same symbol to your legend. This simple step makes your drawing a truly functional, easy-to-read chart, ready to be brought to life.
Finalizing Your Chart and Selecting Threads
Just because the grid is filled doesn't mean your pattern is done. Now comes the crucial final step: turning that grid into a professional, easy-to-follow blueprint that any stitcher can pick up and enjoy. This is where you add the polish that transforms a good design into a great one.
Whether you used software or sketched your chart out by hand, the objective is the same. You need a clean, complete package with a clear symbol key, an accurate thread list, and some helpful info like stitch counts. Think of it as the instruction manual for your creative vision.
This kind of thoughtful design is more important than ever. The needlecraft pattern market was valued at nearly USD 1.2 billion in 2023 and is expected to double by 2032. Much of that growth comes from digital tools making it easier for hobbyists to create and share their own work. You can get more insights on this thriving market and its future.
Building a Professional and Clear Legend
If you designed your pattern with software, this part is often as simple as hitting "Export to PDF." Most modern programs are fantastic at generating polished, multi-page documents that look ready to go.
A good exported chart should give you:
- A cover page with a full-color preview of the finished piece.
- The pattern chart itself, often in multiple formats like color blocks, black and white symbols, or a combination of both. Offering options is a huge plus for stitchers.
- A floss legend, which is the most critical component. This key lists every symbol, its corresponding DMC thread number, the color name, and an estimate of how many stitches are needed for that color.
Did you create your chart manually on graph paper? No problem. Your job is to build this legend yourself. It doesn't need to be digitally designed to look professional—a neatly handwritten key on a separate sheet works perfectly well. The key is to make sure your symbols are distinct and your writing is easy to read.
Auditing Your Thread Palette
This is where your artist's eye comes back into play. Software is a brilliant tool, but it lacks the nuanced experience of a seasoned stitcher. It will often generate a list of thread colors that can be fine-tuned for a much better result and a shorter shopping list.
My favorite trick is to lay out all the suggested floss colors in numerical order. You’ll almost immediately spot little groups of colors that are incredibly similar. For instance, the software might have picked three slightly different shades of light grey for a subtle shadow, but in reality, one or two would do the job just fine.
Don't be afraid to overrule the machine. Combining nearly identical shades is one of the best ways to reduce your color count. It makes the project less expensive and much faster to stitch, often without sacrificing any of the design's quality.
When you're making these calls, having a solid color reference is a lifesaver. You can see the shades side-by-side with our guide on the complete DMC threads chart with color information. It really helps you make confident decisions about which colors can be safely merged.
The Art of Blending and Substitution
Sometimes, it's not about cutting colors, but about making the transitions between them smoother. This is especially true for photorealistic patterns with delicate gradients, like skin tones or sunsets. Instead of using five distinct shades of peach, you might get a more natural look by using just three and blending the threads.
Blending is a simple but powerful technique where you take one strand from two different colors and stitch with them together in the needle. This creates a new, in-between color that softens the jump from one solid block to another, adding incredible depth to your work.
Finally, take a look at your fabric color. If your pattern has a massive, single-color background, why stitch it at all? Choosing a fabric in that background color from the get-go can save you dozens of hours and a whole lot of thread. This final once-over is what elevates your design from a simple grid to a thoughtful, well-crafted project plan.
Common Questions About Pattern Making
https://www.youtube.com/embed/IrtPSkMu9io
As you start designing your own cross-stitch patterns, you're bound to run into a few questions. Trust me, every single designer has asked these at some point, whether they're just starting out or have been at it for years. Let's walk through some of the most common hurdles you'll face.
Getting these things straight from the get-go will give you the confidence to bring your unique ideas to life.
What’s the Best Software for Creating Patterns?
This is the big one, and the honest answer is: it really depends on what you want to achieve and what you're willing to spend. There’s no single "best" program out there—it's all about finding the right tool for the job you have in mind.
If you're just dipping your toes in or making a one-off gift, a free online tool is a fantastic starting point. They give you the basics of image conversion without being overwhelming, and you can learn the ropes without spending a dime.
But if you find yourself wanting more control, that's when paid desktop software becomes your best friend. These programs are packed with features for fine-tuning your pattern, cleaning up stray stitches, building custom color palettes, and exporting professional-looking charts. Most serious designers eventually make the leap for that extra layer of precision.
My Advice: Start with a free tool. Make a pattern or two to get a feel for the process. You'll quickly figure out which advanced features, if any, are worth paying for.
How Do I Reduce Colors Without Losing All the Detail?
Ah, the great balancing act of pattern design! You need a manageable number of thread colors, but you don’t want the finished piece to look flat or blocky. The trick here is to be strategic.
Go ahead and use your software's automatic color reduction feature, but don't just accept the first version it spits out. Look at the preview after each reduction. Are there five shades of blue in the sky that could easily be three? Merge them.
Focus your detail where it matters most—the subject. If you’re designing a portrait, keep the subtle color shifts in the eyes and face, but feel free to simplify the colors in the background or their shirt.
Don't be afraid to get in there and edit the chart by hand. Hunt down those random, isolated stitches—what stitchers call "confetti"—and change them to a nearby, dominant color. It’s a game of finding that perfect sweet spot between a realistic look and a pattern that’s actually enjoyable to stitch.
Can I Really Use Any Image?
Technically, yes, you can upload just about any image into a pattern converter. But the quality of your final chart depends almost entirely on the quality of your starting image. The best photos for cross-stitch have a few things in common:
- A clear, easy-to-see focal point.
- Good contrast between the main subject and the background.
- A relatively simple color palette to begin with.
Images that are blurry, poorly lit, or just too "busy" (like a wide-angle shot of a crowded city street) are incredibly tough to convert well. They often turn into a muddy, confusing mess. On the other hand, portraits, simple logos, cartoons, and clean shots of flowers almost always produce great results.
Always, always edit your photo before you upload it. Crop it tightly, bump up the contrast, and get rid of any distracting elements. A little prep work makes a world of difference.
Personal Use vs. Selling: What’s the Difference?
This all comes down to one crucial word: copyright. If you ever plan to sell or even share the patterns you design, you absolutely have to understand this.
If you use a photo you took, a drawing you made, or an image from the public domain, you own the rights to the pattern you create from it. It's all yours. You can sell it, give it away for free, or post it online—no problem.
However, if you use a copyrighted image—like a Disney character, a famous painting, or a photo you found on Google Images—the pattern you make is legally considered a "derivative work." You cannot sell or distribute that pattern without getting permission from the person who owns the original copyright.
Stitching a pattern of your favorite movie character for your own wall? That generally falls under fair use. But selling that pattern on Etsy? That's a copyright violation. Always be sure you have the right to use an image before you turn it into a pattern for anyone but yourself.
Ready to turn your favorite memories into a work of art? At Cross Stitched, we make it simple to create a custom cross-stitch kit from your very own photos. You provide the picture, and we provide everything else you need to get stitching. Start designing your personalized kit today!


