
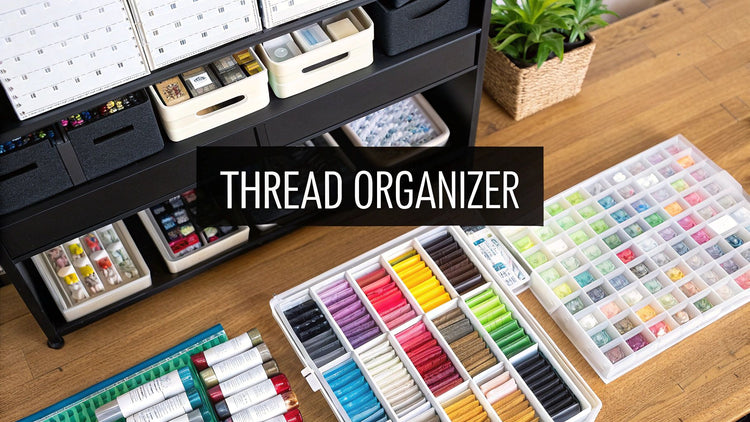
We've all been there: that dreaded, tangled bird's nest of floss that brings a project to a screeching halt. But the right cross stitch thread organizer can turn that chaos into a beautifully curated palette, ready for your next masterpiece. A good system does more than just tidy up your craft corner—it makes the entire stitching process smoother, letting you focus on the art, not the admin.
From Tangled Mess to Tidy Stash
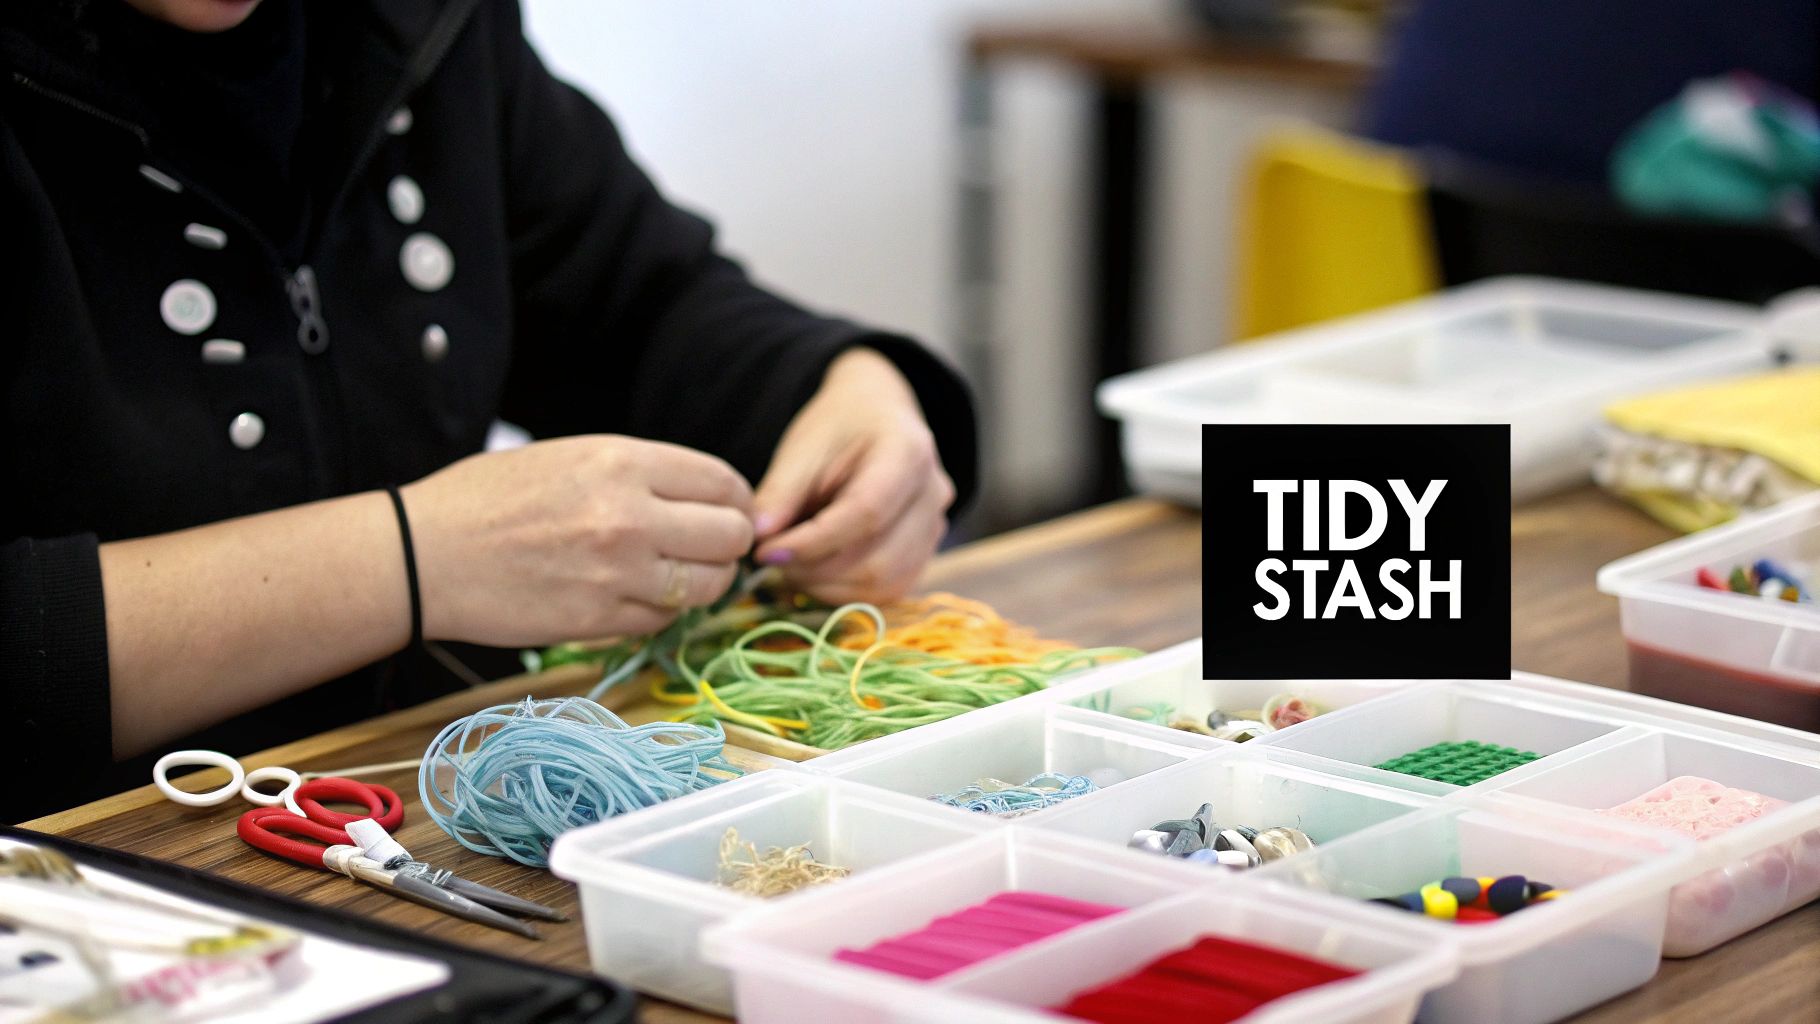
If you’ve ever felt a surge of frustration rummaging through a bag of floss for that one specific shade, you know how quickly it can kill your creative buzz. It’s a universal stitcher problem. Taking the time to set up a real storage solution is probably one of the best things you can do for your hobby.
Why It’s Worth the Effort
Getting your thread collection in order pays off in more ways than just a clean workspace. When every color is sorted, labeled, and easy to grab, you can switch between shades without breaking your rhythm. It completely changes the flow of your stitching sessions.
A neat stash helps you:
- Find colours in a flash: Forget digging for DMC 310. With a proper system, you can pull the exact number you need in seconds.
- Protect your threads: Floss is vulnerable to sunlight, dust, and dampness. Good storage keeps your colours bright and your threads strong for years to come.
- Stop buying duplicates: When you can see your entire inventory at once, you’ll know exactly what you have and avoid accidentally buying the same skein three times for a new pattern.
This isn’t just about being tidy; it’s a key part of a huge crafting movement. The needlecraft industry, which includes all these essential organizers, was valued at a whopping USD 34,026.8 million in 2025 and is only expected to get bigger. It shows just how much people value tools that make their hobbies more efficient and enjoyable. You can read more about needlecraft market growth and see where the trend is heading.
The goal isn’t just to store your thread. It’s to create a personal color library that inspires you. When your supplies are beautifully arranged, you’re far more likely to feel motivated to pick them up and start that next project.
Finding Your Perfect Thread Organizer System
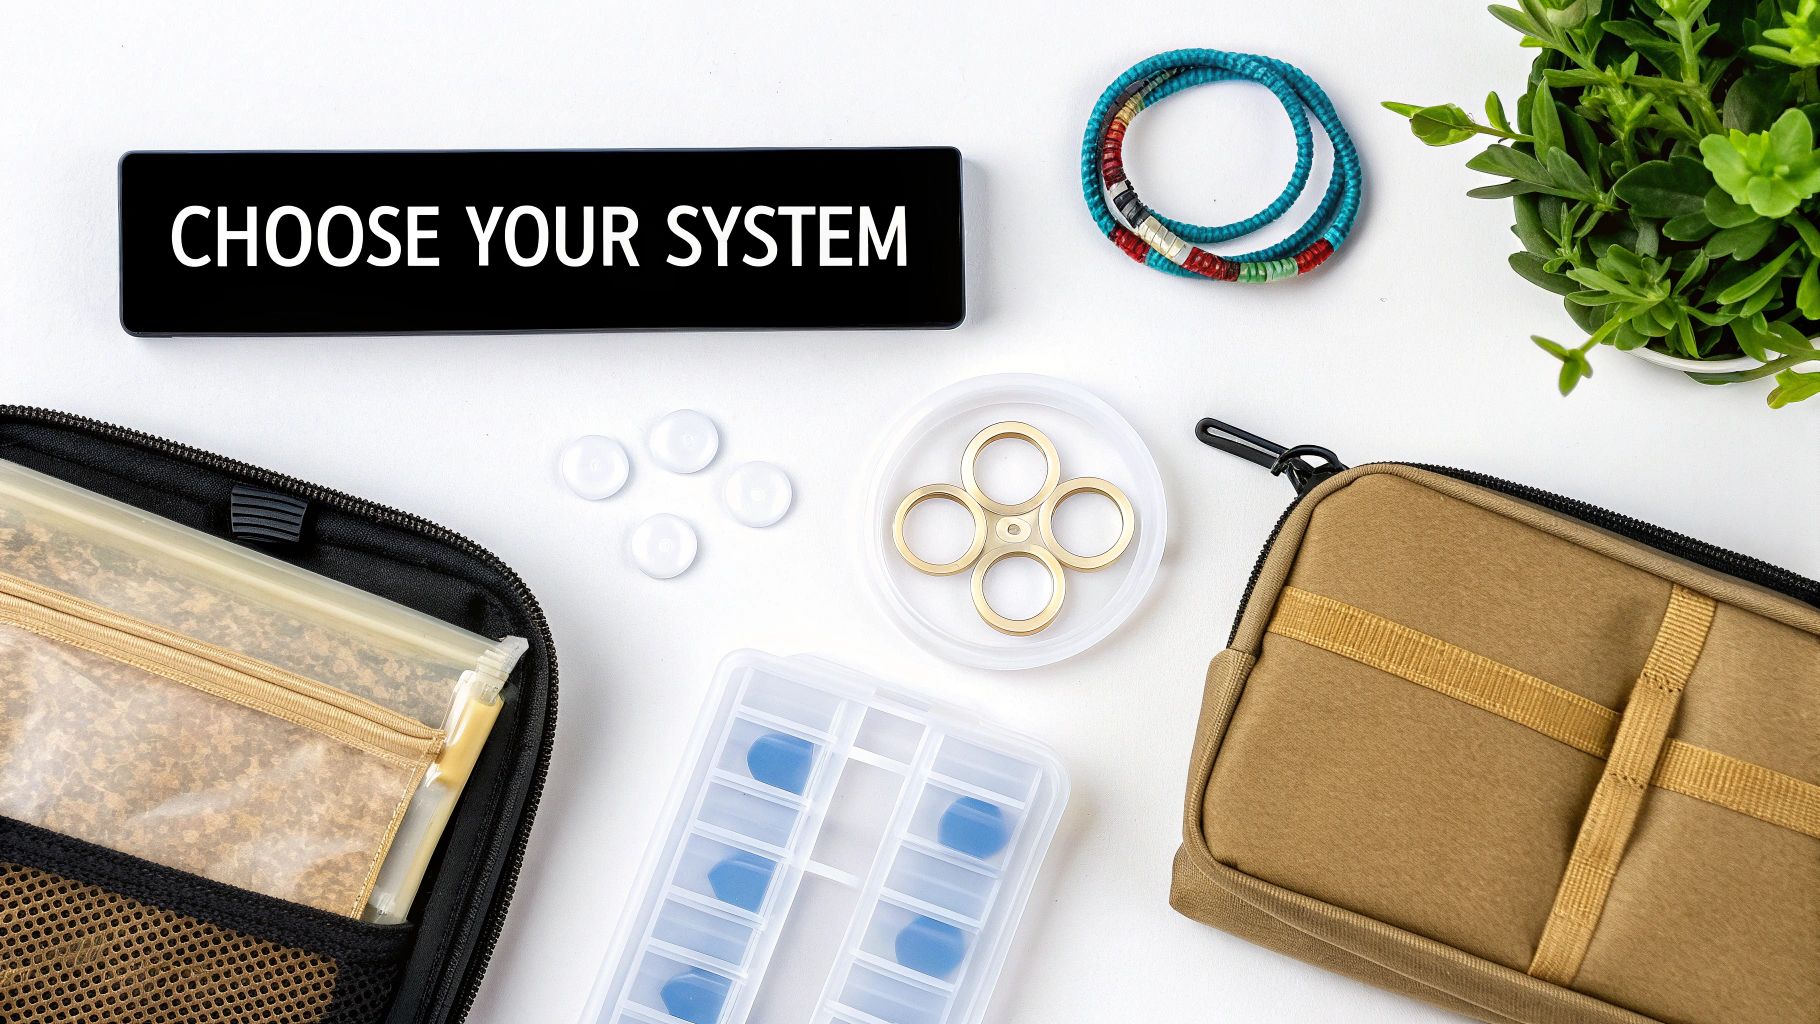
The search for the perfect cross-stitch thread organizer is a bit of a rite of passage for every stitcher. What works wonders for someone who stitches on the go might feel clunky for another with a dedicated craft room. There’s really no single "best" method, only the one that clicks with your space, your habits, and how you like to work.
When you boil it down, two main philosophies emerge in the world of floss organization: bobbins and floss drops. Each has its loyal followers, and for good reason. Your choice often comes down to what you value more: long-term, pristine storage or quick, grab-and-go project setup.
The Classic: Bobbins and Boxes
For stitchers who have been collecting floss for years (or plan to!), the bobbin system is the undisputed king. It involves winding your floss onto small plastic or cardboard bobbins and arranging them by number in compartmentalized boxes. The result is a clean, compact, and incredibly satisfying library of color that also protects your threads from dust and light.
The real win here is efficiency, especially as your stash grows. Once you’ve put in the initial work of winding and cataloging, pulling a specific DMC number is a breeze. You’re essentially building a permanent, scalable archive of your threads that’s easy to manage and expand.
My Takeaway: Bobbins are the gold standard for creating a comprehensive, long-term "master stash." They give you maximum protection and organization, letting you see your entire inventory at a glance.
The desire for storage that's as beautiful as it is practical is real. Just look on Etsy, where a deluxe acrylic thread organizer has racked up nearly 900 favorites. It just goes to show that stitchers want systems that are both highly functional and look great in their craft space.
The Nimble: Floss Drops
On the other side of the coin, you have floss drops. These are simple tags—often made of card, plastic, or acrylic—with holes designed to hold a full skein of floss. You just loop the skein through, and then group all the drops for a project onto a binder ring. Their biggest advantage is speed. You can "kit up" a new project in just a few minutes.
This system is fantastic for managing your active works-in-progress (WIPs). There’s no time-consuming winding involved, and pulling a single strand from a looped skein is incredibly easy and rarely leads to tangles.
- Speed: Minimal prep time means you can dive into a new pattern right away.
- Project-Focused: It’s the perfect way to create portable, project-specific kits.
- No Creases: Thread hangs loosely, so you don't get those little kinks that tight bobbin-winding can sometimes cause.
To help you decide, here’s a quick breakdown of the most common organizers.
Cross Stitch Thread Organizer Comparison
| Organizer Type | Best For | Pros | Cons |
|---|---|---|---|
| Bobbins & Boxes | Large, comprehensive collections; long-term storage. | Very organized, compact, protects thread, easy to find specific colors. | Initial winding is time-consuming; can create creases in the thread. |
| Floss Drops & Rings | Project-based kits; stitchers who work on multiple WIPs. | Fast to set up, keeps skeins intact, prevents kinks, very portable. | Can get bulky with many colors; less ideal for permanent stash storage. |
| Storage Bags | Storing full, unused skeins or project leftovers. | Simple, no prep required, keeps thread in original packaging. | Hard to find colors quickly; can become a tangled mess without care. |
| Thread Cards | Small projects with a limited color palette. | All colors for a project are visible at once; great for travel kits. | Can't hold full skeins; threads can tangle if not secured. |
Ultimately, the best system is the one you’ll actually use. Don't be afraid to try one and switch if it isn't working for you.
The Hybrid Approach: A Winning Strategy
Here’s a little secret: you don’t have to pick just one. In fact, many seasoned stitchers I know use a hybrid system that combines the best of both worlds. They keep their complete collection on bobbins, all neatly filed away in boxes.
When they start a new project, they simply pull the bobbins they need, cut working lengths of each color, and load them onto a project card or floss drops. This gives them a perfectly organized master stash and a nimble, portable kit for their current WIP. This strategy is one of many great accessories for cross stitch and tips that can make your hobby even more enjoyable. By blending methods, you create a system that’s as flexible and creative as your stitching.
Winding and Labeling Your Floss Correctly
Now for the fun part! Once you've picked your organizers, it's time to turn that pile of loose skeins into a beautifully organised, ready-to-use collection. I know it can seem like a big job upfront, but trust me, spending the time to wind and label everything properly now will save you countless headaches later on.
The trick is to get the tension just right. If you wind the floss too tightly, you'll end up with annoying kinks and creases that are a pain to stitch with. Wind it too loosely, and you're just trading one kind of tangle for another inside your storage box. You're aiming for a smooth, even wrap that keeps the thread secure without stretching it out.
The Winding Process
No matter if you're doing this by hand or with a gadget, the basic steps are the same. Start by carefully sliding the two paper tabs off a new skein of floss, which leaves you with one big loop of thread. Find an end, tuck it into the little slit on your bobbin to hold it steady, and you're ready to start winding.
Here are the most common ways to get it done:
-
By Hand: This is the classic method. Just hold the bobbin between your thumb and forefinger and wrap the floss around the middle. It's a surprisingly relaxing, almost meditative task—perfect for doing while you catch up on a podcast or have a movie on in the background.
-
Manual Winder: These little plastic gizmos are a huge time-saver. They usually clip onto the side of your storage box and work like a tiny fishing reel; you just turn a handle to spin the bobbin.
-
Electric Drill: Okay, this is for the truly dedicated stitcher with a massive stash! You can get a special bobbin-winding attachment for an electric drill. It sounds intense, but with this setup, you can wind a full skein in under 30 seconds.
Whatever method you choose, always secure the end of the thread when you're done. Either tuck it neatly under the floss you've already wound or use the second slit on the bobbin. This one tiny step keeps all your hard work from literally unraveling.
Perfecting Your Labeling System
A beautifully wound bobbin without a label is just a pretty but useless mystery. A good labeling system is what transforms your floss collection from a simple stash into a functional library you can actually use. The most important thing you need on that label is the brand and color number—for example, DMC 310.
You can just write the number directly on the bobbin with a fine-tipped permanent marker. If you prefer a tidier look, lots of stitchers (myself included) love using pre-printed number stickers made just for bobbins. They're easy to find online and make the process so much faster. Keeping a complete list of DMC embroidery floss numbers handy can also be a great help to double-check your work as you go.
A quick tip for specialty threads: When you're winding metallics, silks, or satins, go a bit looser than you would with regular cotton floss. Their delicate fibers are more prone to creasing. I also like to add a little note on the label (like 'M' for metallic) so I can spot them at a glance.
A Workflow for Large Collections
Staring at a mountain of 100+ skeins can feel completely overwhelming. The secret is to not even try to do it all in one go. You'll just burn out.
Instead, think of it as batch processing. Set a small, achievable goal for yourself, like winding just 10 or 20 skeins an evening. Put on some music, get comfortable, and just focus on that little pile. By breaking it down, you turn a huge chore into a series of small, satisfying tasks. Before you know it, your entire stash will be organised and ready for whatever project catches your eye next.
Building a Smart Thread Inventory
Having a beautifully organized collection of threads is a great start, but it’s only half the battle. If you don't actually know what you have, you'll inevitably end up buying duplicate skeins for your next project. This is where a smart inventory system comes in—it turns your stash from a simple collection into a functional, searchable library.
The idea is to create a system that gives you a bird's-eye view of your entire colour palette without a ton of fuss. It doesn't need to be complicated. For some stitchers, a printed checklist of all the DMC colours they can physically tick off is perfect. Others might prefer a simple spreadsheet or even a dedicated craft inventory app to track quantities right on their phone.
Kitting Up for Success
One of the most effective habits you can build is kitting up. This just means gathering all the specific threads for a single project and keeping them together in their own kit. This could be a small project bag, a ring of floss drops, or even a humble Ziploc bag with a label on it.
Kitting up is a lifesaver if you're someone who likes to juggle multiple projects at once. Instead of raiding your main stash every time you switch WIPs (works-in-progress), you just grab the self-contained kit and you’re ready to stitch. It also makes it painfully obvious which colours you're missing for a new pattern before you even make the first stitch.
Kitting up protects your main thread collection from becoming a jumbled mess. Your master cross stitch thread organizer stays pristine, and your active projects are always grab-and-go ready.
Ultimately, the entire process boils down to three simple actions: wind, label, and store.

This simple flow is the key to keeping your collection orderly and, most importantly, usable.
Tracking Your Colours
To really get a handle on your inventory, you need a reliable colour reference. Many stitchers swear by their physical shade cards, but a digital version can be just as handy for quick lookups. We have a free and incredibly detailed DMC thread colour chart that’s perfect for checking what you own and planning what you need.
This kind of thoughtful supply management is part of a bigger picture. The global embroidery market, which includes all these wonderful tools and accessories, was valued at USD 3.2 billion in 2023. It’s expected to nearly double by 2032! This just shows how much we, as crafters, value systems that make our hobby more enjoyable. By setting up your own inventory, you're creating a personal system that makes every project that much smoother.
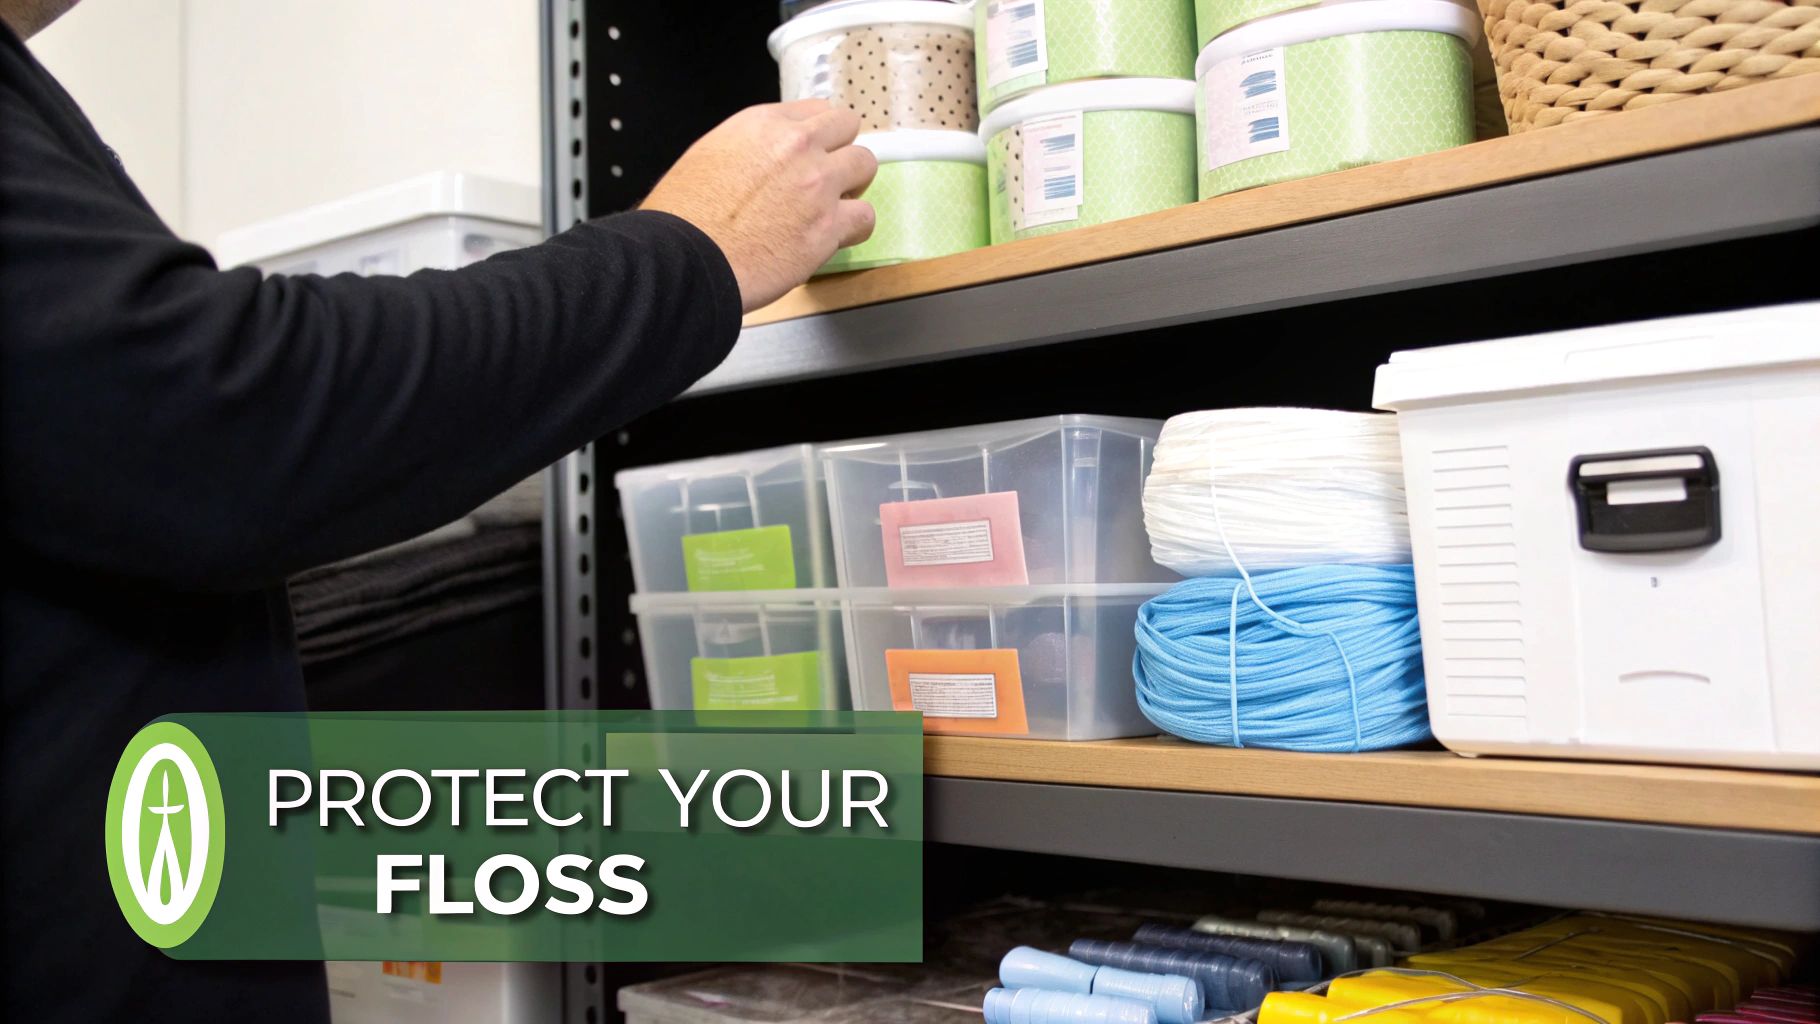
Taking Care of Your Floss for the Long Haul
Think about your thread collection for a moment. It's more than just a bunch of colourful strings; it’s a real investment of time and money in your craft. Protecting that investment goes beyond just winding bobbins. Proper long-term care will keep every strand, from your workhorse cottons to those special silks, vibrant and ready to use for years.
The biggest culprits when it comes to ruining embroidery floss are environmental. Things like sunlight, moisture, and even just household dust can weaken fibres and fade colours over time. This is where your chosen cross stitch thread organizer becomes your first line of defence. Any system with a lid, like the popular plastic bobbin boxes or a set of drawers, is going to give you a huge advantage.
Keeping Your Stash Safe from Harm
Where you store your floss is just as crucial as what you store it in. A rainbow of bobbins on a shelf in a sunny spot might look beautiful, but it's a disaster waiting to happen for your thread.
I've learned a few non-negotiable rules over the years for keeping my floss in top condition:
- Dodge the Sun: UV rays are notorious for bleaching colours. Always keep your main stash tucked away in a closet, a deep drawer, or any opaque container that's not in a direct sunbeam.
- Find a Stable Climate: Attics and basements often have wild swings in temperature and humidity, which is terrible for thread. A room inside your main living space, like a craft room or even a bedroom closet, is a much better bet.
- Stay High and Dry: Moisture is the enemy. It can lead to mildew, which will completely ruin your floss. If your home is naturally humid, popping a couple of small silica gel packets into your storage boxes is a great little trick to absorb any excess moisture.
The best mindset is to treat your thread collection like you'd treat a fine fabric. You're aiming to create a stable, dark, and dry environment that protects the integrity and colour of every single strand.
What to Do with Scraps and Leftovers
Every single cross-stitcher ends up with a pile of leftover thread pieces. The tiniest bits, which many of us call orts (an old English word for scraps), are fun to collect in a clear jar to see your progress. But those longer, still-usable strands? They're far too valuable to just throw away.
My advice is to avoid tossing those partially used threads back in with your full skeins. It just creates a mess. Instead, set up a simple "leftovers" system. You can wind these shorter lengths onto a few spare bobbins or loop them onto a small floss drop ring. This keeps them tidy and ready to grab for small details or colour-matching on another project. It's a small habit, but it makes a massive difference in keeping your entire floss library usable and waste-free.
Common Questions About Thread Organization
Even the best-laid plans can hit a snag. As you start to sort through your stash, a few common questions always seem to pop up. Getting these details right from the start can save you a ton of headaches down the road, so let's tackle some of the most frequent queries I hear from fellow stitchers.
One of the biggest hurdles, especially if you've been collecting for a while, is just the sheer time it takes. It's easy to look at a mountain of brand-new skeins and feel completely overwhelmed before you even begin.
What Is the Fastest Way to Wind a Lot of Cross Stitch Thread onto Bobbins?
If you have a massive collection to get through, nothing—and I mean nothing—beats an electric drill with a bobbin winder attachment. It might sound a little intense, but it’s an absolute game-changer. Just pop the attachment into your drill, slide on an empty bobbin, and run the drill on a low speed while you guide the thread. You can wind a whole skein in less than 30 seconds.
Don't want to bring power tools to your craft room? I get it. The next best thing is a simple manual plastic winder that clips right onto your storage box. It's still worlds faster than winding by hand and is a great, affordable option for most stitchers.
My best advice for a huge winding project is to not treat it like a chore. Don't try to power through it all in one go. Instead, wind 20-30 bobbins each evening while you watch TV. It quickly becomes a relaxing, manageable routine.
Should I Wash My Embroidery Floss Before Organizing It?
The short answer here is almost always no. High-quality floss from trusted brands like DMC is specifically manufactured to be colorfast, which means it won’t bleed when you eventually wash your finished piece. Pre-washing standard cotton floss is an unnecessary step that can create frustrating tangles and might even dull the thread's beautiful sheen.
The only exception? Some small-batch, hand-dyed threads can occasionally have a bit of excess dye. If you're worried, you can test a small piece with a damp white cloth. If you see any color transfer, just gently rinse the skein in cool water until it runs clear. Let it air dry completely before you start winding.
How Do I Organize Threads for a Large Project with Over 100 Colors?
When you’re diving into a full-coverage piece with a massive color palette, you need a dedicated game plan. Constantly pulling from your main collection will drive you crazy. The best approach is to create a project-specific kit.
Grab a separate storage box or a large binder just for that project. Inside, you can organize the colors numerically, but an even better method is to sort them by the symbol used on your chart. A lot of stitchers (myself included) find it incredibly helpful to group the floss drops for the current page onto a single large binder ring or carabiner. This keeps what you need right at your fingertips, so you can spend more time stitching and less time searching.
Are Floss Drops Better Than Bobbins?
Ah, the great debate! Honestly, one isn't "better" than the other—it all comes down to how you like to work. They really serve two different, equally important purposes.
- Bobbins are the undisputed champions of long-term storage. They keep your master stash tidy, protected from tangles, and perfectly ordered.
- Floss Drops are all about speed and project-based efficiency. They are much quicker to prep and are perfect for putting together those grab-and-go kits for your current works-in-progress (WIPs).
For this reason, many seasoned stitchers use a hybrid system. They keep their complete floss inventory on bobbins in their main storage boxes but "kit up" each new project using floss drops. It truly gives you the best of both worlds: a pristine master collection and nimble, easy-to-use project kits.
At Cross Stitched, we know that getting organized is the first step to a joyful stitching session. That's why our custom photo-to-pattern kits arrive with pre-sorted DMC threads, taking all the prep work off your plate. You can start stitching your cherished memories right out of the box. Explore our personalized kits and accessories today. Find your next project at https://cross-stitched.com.


