

Welcome to the vibrant world of embroidery! Whether you're seeking a mindful new hobby, a way to create personalized gifts, or a method to add a unique touch to your home decor, you've come to the right place. For newcomers, the sheer number of patterns and techniques can feel overwhelming. This guide is designed to cut through the noise, offering a curated collection of fantastic embroidery ideas for beginners that are not only achievable but also incredibly rewarding. We'll explore a variety of projects, each carefully selected to help you build foundational skills and confidence one stitch at a time.
Before diving into your first stitch, it's incredibly helpful to understand the fundamentals. For a comprehensive overview, read about What Is Embroidery. This will give you a solid grounding in the basic concepts, tools, and terminology that form the backbone of every project we will cover. Understanding these core principles is the first step toward successful and enjoyable stitching.
This listicle moves beyond generic patterns to provide you with actionable projects that deliver impressive results. Each entry is structured to set you up for success, detailing the required materials, key stitches, and step-by-step guidance. You'll learn to tackle everything from simple word art and charming floral designs to creating intricate-looking portraits from your own photos using specialized tools. We will even explore functional items like seasonal coasters and festive ornaments. Prepare to thread your needle and discover the joy of bringing your creative visions to life, transforming simple cloth and thread into beautiful, personalized works of art.
1. Personalized Photo Cross Stitch Portraits
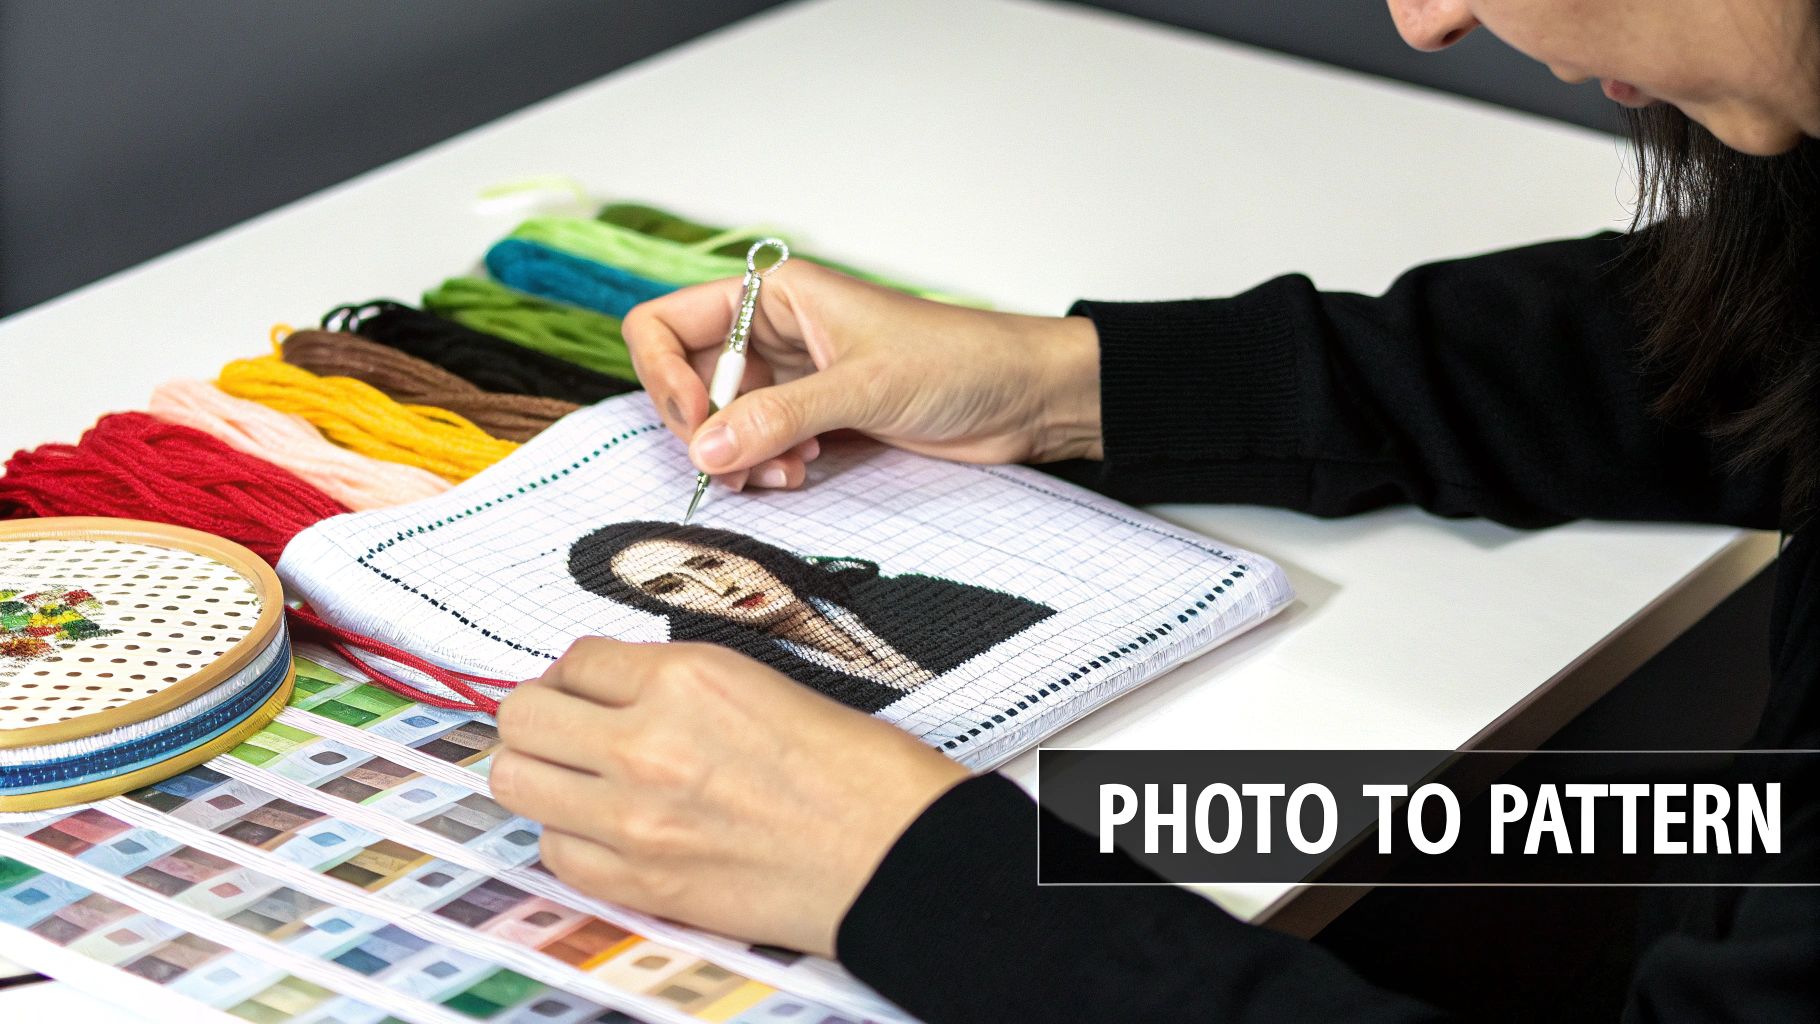
One of the most rewarding embroidery ideas for beginners is transforming a cherished photograph into a tangible work of art. This project merges the sentimental value of a personal photo with the meditative craft of cross-stitching, creating a keepsake that is truly one-of-a-kind. Thanks to modern technology, you no longer need to manually chart a design; you can use a photo-to-pattern generator to do the heavy lifting for you.
You simply upload a digital image, and a specialized algorithm converts it into a detailed, color-coded cross-stitch chart. This process breaks down complex images into manageable stitches, making it surprisingly accessible even for those new to the craft. Cross Stitched's Pic2Pat generator is an excellent tool that automates this entire process, generating patterns in various sizes to suit your preference.
Why It’s a Great Beginner Project
This project is ideal for beginners because the pattern provides a clear, guided roadmap. The color-coded chart tells you exactly where to place each stitch, removing the guesswork and allowing you to focus on mastering the basic cross-stitch technique. It's a perfect way to create a meaningful gift or piece of home decor.
Common projects include:
- Pet Portraits: immortalize a beloved furry friend.
- Anniversary Gifts: stitch a favorite photo of you and your partner.
- Memorial Keepsakes: create a touching tribute to a loved one.
- Baby Announcements: turn an ultrasound or newborn photo into a sweet memento.
Tips for a Successful Photo Stitch
To ensure your first project is a success, keep these tips in mind:
- Start Small: Choose a smaller pattern size, like 8"x12", to build your skills and confidence without feeling overwhelmed.
- Choose a Good Photo: High-contrast, well-lit photographs with simple backgrounds translate best into cross-stitch patterns.
- Work in Sections: Break the project down into smaller grids. This helps prevent thread tangling and makes the overall project feel more manageable.
For a deeper dive into turning your favorite pictures into needlepoint art, you can explore how to create stunning cross stitch patterns from photos.
2. Simple Word & Quote Embroidery
One of the most accessible embroidery ideas for beginners is bringing words to life with a needle and thread. Stitching a meaningful quote, a name, or a simple phrase is a fantastic way to master fundamental stitches while creating something personal and stylish. These projects are forgiving because they often use a single color and rely on basic line work, making them perfect for building confidence.
Word-based embroidery allows you to infuse your personality into home decor, gifts, and clothing. From a classic "Home Sweet Home" to a modern, motivational mantra, the possibilities are endless. The focus is on clean lines and consistent stitching, which helps newcomers hone their technique without the complexity of intricate color changes or shading.
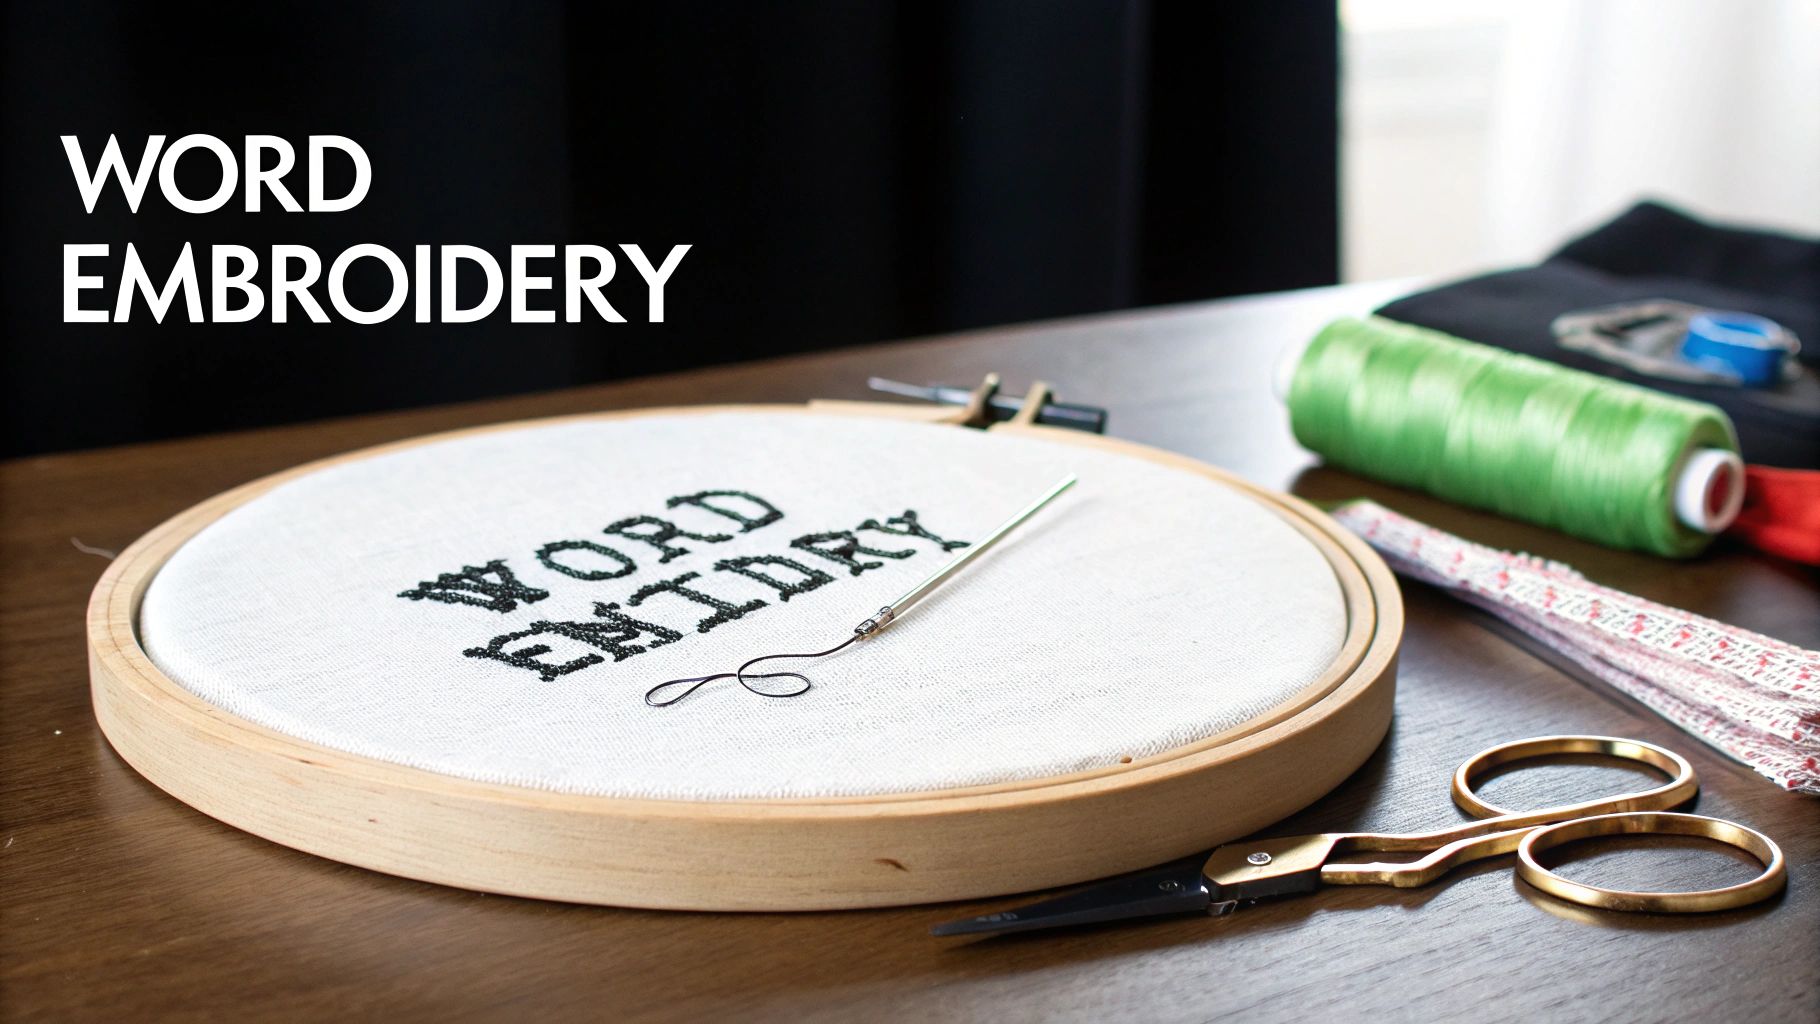 embroidery hoop with 'WORD EMBROIDERY' text, a punch needle, and crafting supplies.">
Why It’s a Great Beginner Project
This project is ideal for beginners because it provides a clear and direct path to a finished piece. Following the lines of text allows you to practice foundational stitches like the backstitch, stem stitch, and split stitch. The repetitive nature of forming letters helps develop muscle memory and control over your needle, resulting in a beautifully finished piece you can be proud of.
Common projects include:
- Motivational Hoops: Stitch an inspiring quote to hang in your workspace.
- Personalized Gifts: Add a name or initials to a tote bag, tea towel, or baby onesie.
- Wedding & Anniversary Art: Embroider wedding vows, important dates, or couple's initials.
- Home Decor: Create charming pieces with phrases like "Welcome" or your family name.
Tips for a Successful Word Stitch
To ensure your text embroidery looks crisp and professional, keep these tips in mind:
- Choose a Clear Font: Select simple, clean fonts without too many flourishes. Cursive scripts are beautiful but can be challenging for a first project.
- Use a Stabilizer: A stabilizer will prevent your fabric from puckering, especially with delicate or stretchy materials, ensuring your letters remain flat and even.
- Trace Carefully: Use a water-soluble pen or heat-erasable pen to transfer your design accurately. A clear tracing is your best guide for neat stitches.
- Keep Tension Consistent: Pull each stitch with the same amount of tension to create smooth, uniform lines. Using an embroidery hoop is essential for this.
3. Decorative Seasonal Coasters & Trivets
For those seeking practical and quick embroidery ideas for beginners, creating a set of seasonal coasters or trivets is an excellent starting point. This project is perfect for new stitchers because it involves small, manageable designs that can be completed in just a few sessions. The end result is a charming and functional piece of home decor that you can use daily or gift to friends and family.
Seasonal themes offer endless creative possibilities, allowing you to practice fundamental stitches while celebrating the time of year. From the warm colors of autumn leaves to the delicate intricacy of snowflakes, these small canvases are ideal for building confidence and honing your technique. The Cross Stitched blog often features tutorials and ready-to-stitch seasonal designs, making it easy to find inspiration year-round.
Why It’s a Great Beginner Project
Coasters are a fantastic beginner project because their small size makes them less intimidating than larger pieces. They provide a perfect opportunity to master basic stitches like the satin stitch for filling in shapes and the backstitch for outlining details. Completing a set of four or six coasters gives you a real sense of accomplishment and a cohesive, finished product.
Common projects include:
- Autumn Motifs: Stitch intricate fall leaves, acorns, or pumpkins.
- Winter Wonderland: Create patterns of snowflakes, holly berries, or cozy mittens.
- Spring Florals: Embroider delicate blossoms, buzzing bees, or garden themes.
- Summer Fun: Design bright patterns with citrus fruits, seashells, or suns.
- Holiday Specials: Craft coasters for Christmas, Halloween, or Easter celebrations.
Tips for a Successful Coaster Set
To ensure your decorative coasters turn out beautifully, follow these simple tips:
- Use a Small Hoop: A 4- or 5-inch embroidery hoop is easier to hold and keeps the fabric taut, which is crucial for small, detailed work.
- Add a Protective Backing: Finish your coasters by gluing a piece of felt or cork to the back. This hides the messy backside of your stitching and protects surfaces from scratches.
- Work Efficiently: When creating a set, complete all the stitches of one color across all coasters before switching threads to save time and materials.
- Finish the Edges: For a durable and polished look, secure the fabric edges with fabric glue or a simple binding stitch to prevent fraying.
4. Baby & Nursery Themed Embroidery
Creating gentle, heartwarming embroidery projects is a wonderful way to celebrate a new arrival. This category of embroidery ideas for beginners focuses on designs perfect for nurseries, featuring soft pastels, sweet sentiments, and charming motifs. These projects make for incredibly personal and cherished baby shower gifts or beautiful decorations to welcome a newborn home.
The concept is to stitch designs that evoke a sense of calm and wonder, using simple techniques to bring gentle characters and scenes to life. The color palettes are typically soft and soothing, with pale pinks, blues, yellows, and greens. Motifs often include sleeping animals, fluffy clouds, twinkling stars, and classic nursery rhyme characters, making these projects both adorable and timeless.
Why It’s a Great Beginner Project
Nursery-themed embroidery is fantastic for beginners because the designs are often simple, with clear outlines and blocks of color. This allows you to practice fundamental stitches like the satin stitch for filling shapes and the backstitch for defining details, without being overwhelmed by complexity. The end result is a deeply meaningful piece that commemorates a special milestone.
Common projects include:
- Sleeping Animals: Stitch a snoozing fox, bear, or bunny under a crescent moon.
- Personalized Announcements: Create a "Welcome Baby" piece with the newborn's name and birthdate.
- Whimsical Scenes: Design hot air balloons floating among clouds or friendly forest animals.
- Nursery Rhyme Art: Bring characters from "Twinkle, Twinkle, Little Star" to life.
Tips for a Successful Nursery Stitch
To ensure your handmade gift is treasured for years to come, follow these simple tips:
- Choose Quality Pastels: Invest in high-quality DMC pastel threads for vibrant, accurate colors that won't fade.
- Use Light Fabric: Stitch on white or cream-colored Aida fabric to make the soft pastel colors pop.
- Add Fine Details: Combine cross-stitch with a simple backstitch to create clean outlines and delicate details on faces or letters.
- Frame Thoughtfully: A light, natural wood hoop makes a perfect frame that complements modern nursery decor.
5. Holiday & Festive Ornament Embroidery
Creating custom embroidered ornaments is one of the most charming embroidery ideas for beginners, allowing you to capture the spirit of holidays and special occasions in a small, manageable project. These decorative pieces make excellent gifts, treasured family keepsakes, or additions to your own seasonal decor. The small scale makes them perfect for practicing new stitches without committing to a large design.
From traditional Christmas motifs to modern festive aesthetics, the possibilities are endless. You can stitch intricate snowflakes, cheerful characters, or even personalized family ornaments with names and dates. This project is a wonderful way to commemorate milestones like a baby's first Christmas or a wedding anniversary, turning a simple piece of fabric into a cherished memory.
Why It’s a Great Beginner Project
Embroidered ornaments are ideal for beginners because they are quick to complete and require minimal materials. Their small size means you can finish a project in a single afternoon, providing instant gratification and building confidence. They offer a perfect canvas for learning basic stitches like the satin stitch, French knot, and backstitch on a low-stakes, high-reward item.
Common projects include:
- Personalized Family Ornaments: Add a family name and the current year for an annual tradition.
- Baby's First Christmas: Stitch the baby's name, birthdate, or a sweet holiday-themed design.
- Pet-Themed Ornaments: Create a festive portrait of a beloved pet to hang on the tree.
- Seasonal Themes: Design ornaments for other holidays like Halloween, Thanksgiving, or Easter.
Tips for a Successful Ornament Stitch
To ensure your handmade ornaments look polished and professional, keep these tips in mind:
- Use a Small Hoop: A 2-3 inch embroidery hoop will keep the small fabric taut and give you better control over your stitches.
- Keep Designs Simple: Choose designs with clear outlines and minimal color changes to suit the small canvas.
- Finish Neatly: Cover the back with a circle of felt and use a blanket stitch around the edge for a clean, professional appearance.
- Plan Ahead: For holiday gifts, start your projects by September to ensure you have plenty of time to stitch without the holiday rush.
To find patterns and inspiration for your next creation, you can discover a variety of cross-stitch Christmas ornament patterns.
6. Simple Floral & Botanical Designs
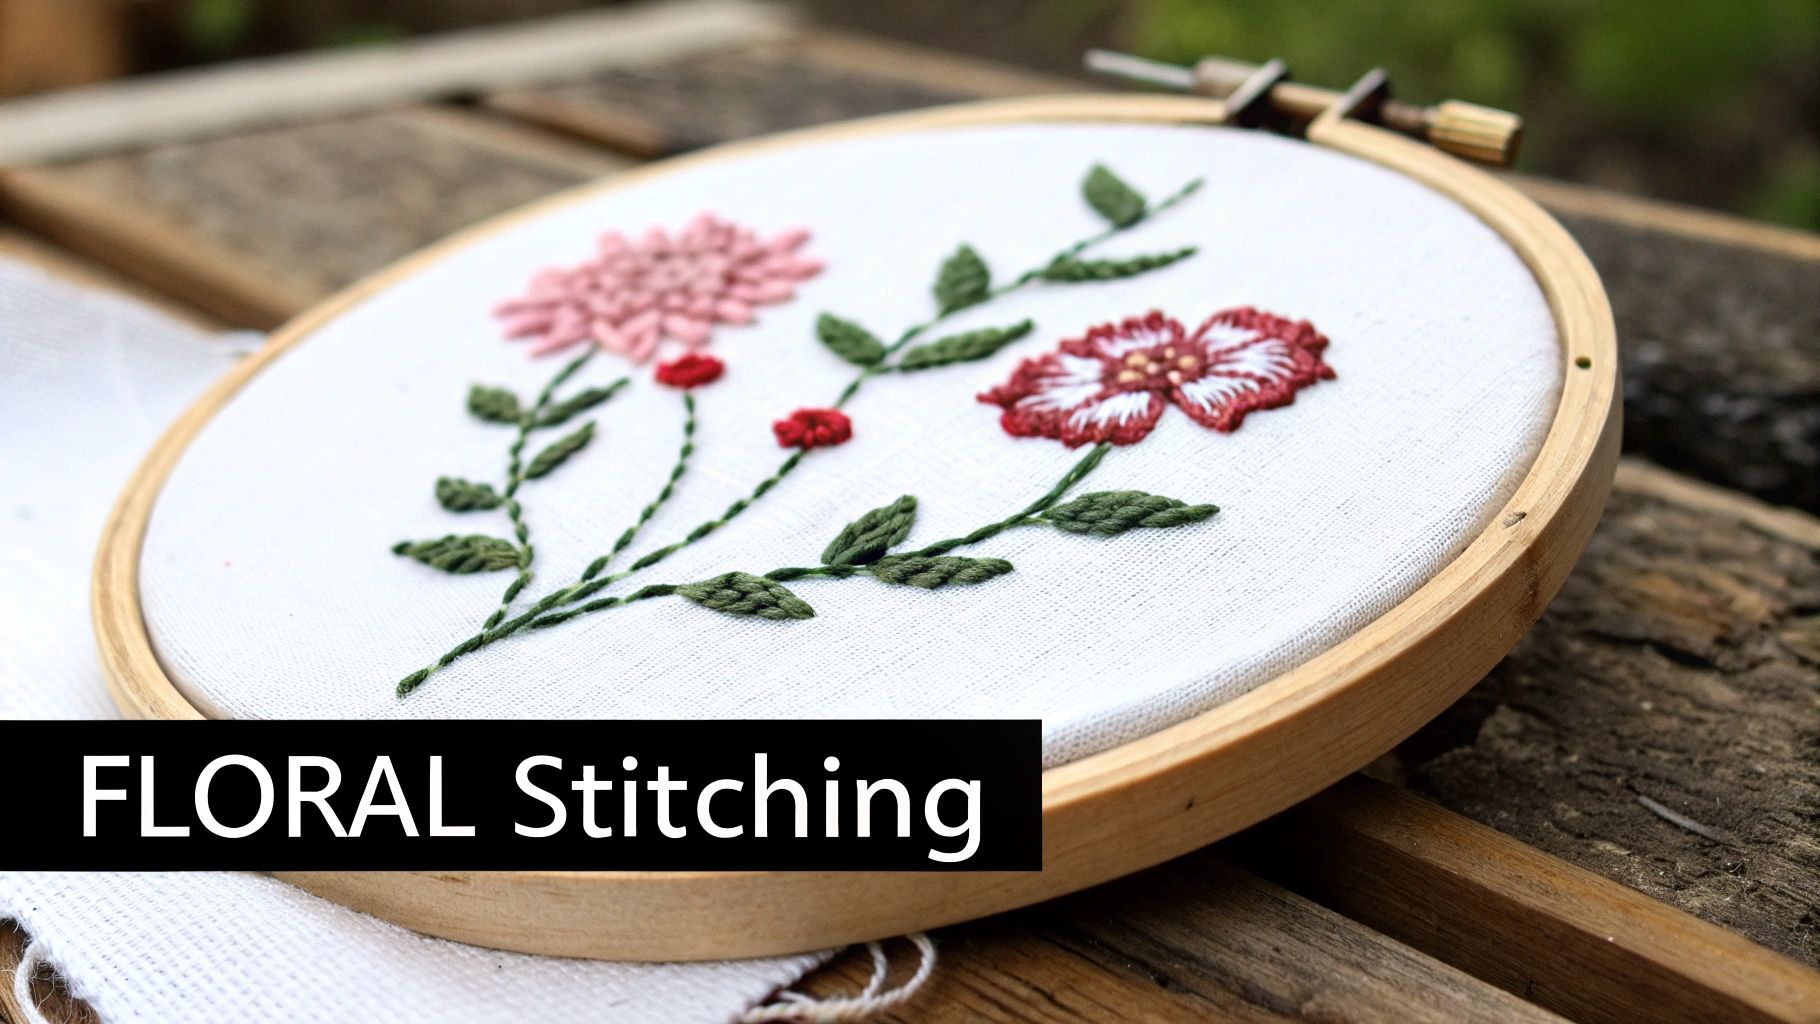
Floral and botanical designs are among the most popular and timeless embroidery ideas for beginners, allowing you to capture the beauty of nature with just a needle and thread. These projects are incredibly versatile, ranging from simple, elegant single-stem flowers to lush, detailed garden scenes. They serve as a fantastic canvas for practicing fundamental stitches and exploring color blending in a structured yet creative way.
The beauty of botanical embroidery is its scalability. A novice can start with a basic daisy or lavender sprig, while more confident beginners can tackle a bouquet. This natural progression allows you to build skills organically, making the learning process both enjoyable and visually rewarding. The final pieces are perfect for decorating your home, embellishing clothing, or giving as heartfelt handmade gifts.
Why It’s a Great Beginner Project
Floral embroidery is an ideal starting point because it introduces a variety of shapes and textures without being overly complex. Stems, petals, and leaves provide excellent practice for different stitch lengths and directions. Following a pattern for a rose or a sunflower helps you learn how to create form and dimension, turning a flat piece of fabric into a vibrant work of art.
Common projects include:
- Single Blooms: A single rose or tulip to practice petal shading.
- Wildflower Bouquets: Combine different simple flowers to create a rustic, meadow-inspired design.
- Herb Garden Hoops: Stitch various herbs like rosemary, thyme, and basil, often with their names labeled.
- Modern Succulents: Create trendy designs featuring cacti and other succulents, which often use simple shapes.
Tips for a Successful Floral Stitch
To help your botanical creations flourish, keep these tips in mind:
- Start with Simple Shapes: Begin with a large, simple flower like a sunflower before moving on to more intricate bouquets with many small elements.
- Play with Color Gradients: Use two or three shades of the same color (light, medium, dark) for petals to create a realistic, shaded effect.
- Master the Backstitch: Use a simple backstitch for clean, defined stems and delicate outlines that make your design pop.
- Combine Stitches: Experiment by using French knots for flower centers or a split stitch for textured leaves to add dimension and visual interest.
Before you start stitching, you'll need to get your design onto the fabric. You can learn more about how to transfer designs onto fabric to ensure your project begins with a clear and accurate outline.
7. Friendship Bracelets & Wearable Embroidery
One of the most charming embroidery ideas for beginners is creating small, wearable pieces of art. This approach takes traditional stitching beyond the hoop, transforming it into personal accessories like friendship bracelets, bookmarks, and other textile trinkets. These projects are wonderfully portable and combine the satisfaction of embroidery with the joy of creating something functional and shareable.
Because these projects are small-scale, they are less intimidating and quicker to complete than larger pieces. This makes them perfect for practicing new stitches and experimenting with color combinations without committing to a massive undertaking. The finished items make heartfelt, personalized gifts for friends and family, showcasing your new skills in a practical way.
Why It’s a Great Beginner Project
Wearable embroidery is ideal for beginners because the projects are compact, require minimal materials, and offer immediate gratification. You can finish a bracelet or a bookmark in a single afternoon, providing a quick sense of accomplishment that builds confidence. They are also an excellent way to use up leftover thread from other projects.
Common projects include:
- Embroidered Friendship Bracelets: stitch initials, symbols, or simple patterns for a modern take on a classic.
- Bookmark Corners: create small, embellished triangles that slip over the corner of a page.
- Hair Clip Embellishments: cover a plain hair clip with a small piece of embroidered fabric.
- Personalized Gift Tags: make reusable fabric tags with stitched initials for a special touch.
Tips for a Successful Wearable Project
To ensure your small creations are durable and beautiful, keep these tips in mind:
- Use Quality Thread: Choose high-quality threads that are colorfast and resist fraying, as wearables will see more handling.
- Reinforce Attachments: If adding clasps or other hardware, use extra stitching to secure them firmly.
- Finish Your Edges: Apply a small amount of clear fabric glue or sealant to the back edges of your fabric to prevent it from unraveling over time.
- Choose the Right Needle: Use smaller needles and thinner threads for more delicate and intricate work on small-scale items.
8. Paint-by-Numbers Embroidery Patterns
For those who find traditional color charts daunting, paint-by-numbers embroidery offers a brilliant and accessible entry point into the world of stitching. This innovative method simplifies the process by printing a numbered guide directly onto the fabric or a corresponding chart. Each number corresponds to a specific thread color, completely eliminating the need to interpret complex symbols or count squares on a grid. It's one of the most straightforward embroidery ideas for beginners available.
This approach transforms embroidery into a relaxing, color-filling exercise, much like the classic painting kits. You simply match the numbered thread to the corresponding numbered section on the pattern and start stitching. Cross Stitched’s paint-by-numbers generator can even convert your own photos or favorite designs into this simplified format, removing the traditional barrier of chart interpretation and making the craft accessible to everyone.
Why It’s a Great Beginner Project
This project is perfect for absolute beginners because it removes any potential for confusion. The direct, on-fabric guide allows you to focus entirely on the physical act of stitching, helping you build muscle memory and perfect your technique without the mental load of chart reading. It’s an incredibly satisfying way to watch a colorful image emerge with minimal stress.
Common projects include:
- Simple Animal Designs: stitch a cute fox or owl with clearly numbered color sections.
- Landscape and Scenic Patterns: create a beautiful sunset or mountain view with a guided color palette.
- Holiday Designs: easily craft festive ornaments and decor with color-coded locations.
- Children's Character Patterns: a fun and easy project to create with or for kids.
Tips for a Successful Paint-by-Numbers Stitch
To ensure a smooth and enjoyable experience, follow these simple tips:
- Organize Your Threads: Arrange your threads in numerical order before you start. A floss organizer or labeled bobbins will make finding the right color quick and easy.
- Work One Color at a Time: Complete all the sections for one number/color before moving to the next. This creates a cleaner look on the back of your fabric and is more efficient.
- Use a Highlighter: If you're using a paper chart, use a highlighter to mark off the numbered sections as you complete them. This helps you track your progress and avoid missing any spots.
To get started with this uniquely simple method, you can see how the paint-by-numbers generator makes embroidery easier than ever.
8 Beginner Embroidery Ideas — Quick Comparison
| Item | Implementation Complexity 🔄 | Resource Requirements & Speed ⚡ | Expected Outcomes ⭐ | Ideal Use Cases 📊 | Key Advantages & Tips 💡 |
|---|---|---|---|---|---|
| Personalized Photo Cross Stitch Portraits | High 🔄 — photo-to-pattern conversion; facial detail challenges | High ⚡ — 20–80 hrs; many thread colors, possible higher cost | Very high ⭐ — photorealistic, emotionally meaningful keepsake | Portrait gifts, memorials, anniversaries, pet portraits | All-in-one kits; tip: use high-contrast photos and start with smaller sizes |
| Simple Word & Quote Embroidery | Low 🔄 — straightforward lettering and repeatable stitches | Low ⚡ — 3–15 hrs; 2–5 thread colors, minimal tools | Good ⭐ — clean, personalized text pieces | Beginner practice, personalized gifts, motivational decor | Quick and affordable; tip: use a hoop and mark center for alignment |
| Decorative Seasonal Coasters & Trivets | Low–Medium 🔄 — small motifs, requires neat finishing | Low ⚡ — 2–6 hrs per coaster; limited palette, small materials | Good ⭐ — functional seasonal décor with quick turnaround | Seasonal décor, gift sets, beginner practice projects | Fast wins for beginners; tip: add felt/cork backing and work with good lighting |
| Baby & Nursery Themed Embroidery | Medium 🔄 — pastel color management and personalization | Medium ⚡ — 10–25 hrs; several pastel threads, framing optional | High ⭐ — calming, high-value nursery keepsake | Baby showers, birth announcements, nursery wall art | Emotionally valued gifts; tip: plan ahead and invest in quality pastel threads |
| Holiday & Festive Ornament Embroidery | Low–Medium 🔄 — tiny canvases and curved finishing | Low ⚡ — 2–8 hrs per ornament; small materials, pre-made backings helpful | Good ⭐ — charming, giftable ornaments | Holiday gifting, family sets, seasonal collections | Quick and portable; tip: start early and use small hoops and pre-cut backings |
| Simple Floral & Botanical Designs | Medium 🔄 — shading/blending and some specialty stitches | Medium ⚡ — 8–20 hrs; 5–8 colors for gradients | High ⭐ — attractive home décor with depth and dimension | Home décor, practice color gradients, nature-inspired gifts | Versatile and forgiving; tip: begin with single blooms and practice gradients |
| Friendship Bracelets & Wearable Embroidery | Low 🔄 — small-scale stitching with attachment finishing | Very Low ⚡ — 1–4 hrs; minimal thread and tools | Good ⭐ — shareable, wearable finished pieces | Batch gifting, classrooms, portable projects | Highly accessible; tip: reinforce attachment points and use durable thread |
| Paint-by-Numbers Embroidery Patterns | Very Low 🔄 — numbered mapping removes chart reading barrier | Low–Medium ⚡ — 5–15 hrs; requires quality printed charts | High ⭐ — consistent, low-error results for beginners | Absolute beginners, visual learners, those intimidated by charts | Excellent accessibility; tip: print on cardstock, organize numbered threads and protect the chart |
Your Next Stitch Is Just the Beginning
You've just journeyed through a vibrant collection of embroidery ideas for beginners, from the deeply personal touch of photo cross-stitch portraits to the quick, satisfying creation of festive ornaments and wearable art. The path from inspiration to creation is now laid out before you. The single most important takeaway from this guide is that the "perfect" first project is simply the one that excites you the most. Whether it’s the modern appeal of a simple quote or the timeless beauty of a floral design, your enthusiasm is the most crucial tool in your kit.
Remember that each project we explored is more than just a way to practice stitches; it's a gateway to developing your unique creative voice. The foundational skills you build with a simple backstitch on a seasonal coaster are the very same skills that will one day allow you to tackle a complex, multi-colored portrait.
From Beginner to Confident Creator: Your Actionable Next Steps
The journey into embroidery is built one stitch at a time. To ensure your momentum continues, focus on these key principles as you move forward:
- Embrace Imperfection: Your first few projects will be a learning experience. Uneven stitches, tangled threads, and miscounted squares are not failures; they are the hallmarks of a craft being learned. Each "mistake" teaches you something valuable about tension, fabric, and technique.
- Start Small, Finish Proud: The satisfaction of completing a project is a powerful motivator. Resisting the urge to start with a massive, intricate piece will help you build confidence. A finished friendship bracelet or a small embroidered patch provides a tangible sense of accomplishment that will fuel your passion for the next, more ambitious project.
- Master the Fundamentals: Focus on executing a few basic stitches with precision before moving on to more complex ones. A cleanly executed running stitch, a neat backstitch, and a tidy satin stitch are the workhorses of embroidery. Getting comfortable with these will make every future project easier and more enjoyable.
As you continue to create, you’ll find your rhythm and style. The techniques you learn will become second nature, allowing you to focus more on the artistic aspects of your work- color choices, composition, and texture.
Turning Your Passion into a Potential Pursuit
Embroidery is not just a relaxing hobby; it's a skill that produces beautiful, tangible items. As you gain proficiency, friends and family will undoubtedly admire your work. You might even find yourself considering selling your creations at local craft fairs or online. This can be a wonderfully rewarding way to share your art and fund your hobby.
If that path interests you, it's important to understand the business side of crafting. Knowing your worth and valuing your time are critical for success. To help you navigate the financial side, learn how to price handmade items effectively to ensure your creative efforts are fairly compensated.
Ultimately, the world of embroidery is vast and welcoming. The community is supportive, the creative possibilities are endless, and the sense of peace that comes from creating something beautiful with your own hands is unparalleled. You now have a wealth of embroidery ideas for beginners at your fingertips. The only thing left to do is to pick up a needle, thread it with your favorite color, and make that very first stitch. Your creative journey has officially begun.
Ready to bring your first project to life with ease and confidence? Cross Stitched provides all-in-one kits and custom photo-to-pattern tools specifically designed for beginners. Visit Cross Stitched to find the perfect starting point for your embroidery adventure and turn your inspiration into a beautiful finished piece today.


