

Ever wished you had a perfect map for every stitch you make, guaranteeing your final piece looks exactly like the design you fell in love with? That's what tracing paper does for your embroidery—it's the ultimate bridge between your pattern and your fabric. It’s an absolute lifesaver for turning custom photo kits into stitched art, keeping original patterns pristine, and tackling designs that would otherwise feel impossible.
Your Secret Weapon for Flawless Embroidery Patterns
Think of tracing paper like a stencil for a painter. It provides a clear, reliable guide right on your fabric, so you can stop worrying about freehanding a tricky design and just enjoy the creative flow of stitching. Instead of guessing where each stitch is supposed to go, you have a temporary roadmap that makes the entire process more relaxing and way more rewarding.
This method is especially helpful for intricate designs or super-personal projects, like turning a favorite photo into a cross-stitch pattern. For anyone new to embroidery, particularly those starting with an all-in-one kit, tracing paper makes everything simpler. Just lay it over your pattern, trace the design, secure it to your fabric, and you're ready to stitch.
In fact, using a tracing paper guide can slash pattern errors by up to 30%, giving new stitchers the confidence to take on more ambitious projects right from the get-go. If you're curious about the tools of the trade, you can find more tracing paper market insights on futuremarketinsights.com to see how these materials are evolving.
So, what makes this simple tool such a must-have? Let's break down why tracing paper is so valuable for stitchers at any skill level.
Why Tracing Paper Is a Game-Changer for Embroidery
This table gives you a quick summary of the core benefits of using tracing paper, showing you at a glance how it can elevate any stitching project.
| Benefit | How It Improves Your Project |
|---|---|
| Flawless Accuracy | It completely removes the guesswork. Your finished piece will perfectly mirror the original design, which is essential for detailed portraits or clean geometric patterns. |
| Pattern Preservation | You can trace your design without marking up or damaging the original paper pattern. This means you can use your favorite patterns again and again. |
| Fabric Versatility | It’s a hero for tricky fabrics. It works beautifully on dark, thick, or textured materials where other transfer methods just wouldn't be visible. |
| Easy Adjustments | Need to resize or reposition your design? No problem. Tracing paper lets you experiment with placement before making a permanent mark on your fabric. |
Simply put, it’s about having more control and more creative freedom, which is a win-win for any embroiderer.
Of course, precise stitching deserves precise finishing. To make sure your hard work looks its best, a good pair of specialized embroidery scissors is invaluable for trimming threads close to the fabric without accidentally snipping your stitches.
Choosing the Right Tracing Paper for Your Project
Think of tracing paper like a chef's knife—you wouldn't use a heavy cleaver for delicate garnishes. The same logic applies to embroidery. The right paper can make transferring your design a total dream, while the wrong one can leave you with smudged lines, damaged fabric, or stubborn marks that just won’t budge.
Picking the perfect paper really comes down to what you're working on. A whisper-thin sheet is what you'll want for silk or organza, but if you're stitching on sturdy denim or canvas, you need something that can hold its own. You're basically matching the paper's grit to the fabric's personality.
Key Tracing Paper Varieties
It's not just about see-through sheets anymore. The world of tracing papers has some really clever options, each with a unique way of getting your design onto the fabric.
- Graphite or Carbon Paper: This is the old-school classic. You sandwich a sheet of it between your pattern and fabric, trace over the lines, and the pressure transfers the design. It’s a solid choice for medium to heavy fabrics but can get a bit messy if you have a heavy hand.
- Wax-Free Transfer Paper: Think of this as the modern, tidier cousin of carbon paper. It gives you crisp, clean lines without any waxy gunk, making it a safer bet for a much wider range of fabrics. The best part? The marks usually come off much easier when you're done.
- Water-Soluble Stabilizers: These are an absolute game-changer. They often have a sticky back, so you can print or draw your design right on them, stick the whole thing to your fabric, and stitch right through it. When you’re finished, just give it a rinse, and the stabilizer melts away, leaving nothing but your stitches. A lifesaver for dark fabrics or super-detailed patterns.
- Heat-Soluble Stabilizers: These work just like the water-soluble kind, but with a twist. Instead of dissolving in water, they vanish with a hot iron. This makes them perfect for fabrics that you'd rather not get wet, like certain velvets or silks.
Getting this first step right is everything. It sets the stage for the entire project.
This simple chart really nails it: a good guide is your direct path to a flawless stitch.
Comparing Tracing Paper Types for Embroidery
To make things easier, here’s a quick-glance table to help you compare the options. Use this to find the perfect match based on your fabric, design, and how you want the transfer marks to behave.
| Paper Type | Best For | Transfer Method | Pros | Cons |
|---|---|---|---|---|
| Graphite/Carbon Paper | Medium to heavy-weight, light-colored fabrics (canvas, denim) | Pressure (tracing with a stylus) | Inexpensive, widely available, creates strong, dark lines. | Can smudge, may be difficult to remove, not for delicate fabrics. |
| Wax-Free Transfer Paper | Most fabric types, including medium-weight and dark fabrics. | Pressure (tracing with a stylus) | Cleaner than carbon, comes in multiple colors, marks are removable. | Lines can still rub off with excessive handling. |
| Water-Soluble Stabilizer | Dark fabrics, complex/detailed designs, stretchy or sheer fabrics. | Stick-on or iron-on | Precise transfers, no tracing needed, washes away completely. | More expensive, requires getting the fabric wet to remove. |
| Heat-Soluble Stabilizer | Fabrics that cannot get wet (velvet, some silks) | Stick-on or iron-on | Excellent for water-sensitive materials, disappears with heat. | Requires an iron, may leave residue if not heated properly. |
Ultimately, the best choice is the one that removes any guesswork, letting you focus on the fun part—the actual stitching.
Making the Final Decision
So, how do you make the final call? Think about your fabric's color and weight first. That dark blue graphite paper will be totally useless on black velvet, but a bright white or yellow transfer sheet will pop.
For those really ambitious projects with tons of detail, like when you want to turn a photo into an embroidery pattern, a printable water-soluble stabilizer is going to give you the precision you need.
Pro Tip: Always, always test your transfer paper on a scrap piece of your project fabric first. This little five-second check saves you from heartbreak by making sure your lines are visible enough to stitch and, more importantly, that they’ll disappear completely when you want them to.
It’s this kind of careful planning that separates good embroidery from great embroidery. With the craft projected to become a USD 3.71 billion market by 2025, it's clear that people are serious about quality. Taking a moment to pick the right tools from the start ensures your work stands out.
How to Transfer Your Embroidery Pattern Step by Step
Alright, you’ve picked out the perfect tracing paper for your project. Now comes the fun part: getting that beautiful design from the paper onto your fabric. This is where the real magic begins, turning a simple drawing into a roadmap for your stitches.
Let's walk through the two most reliable ways to do this. Both are pretty straightforward, and with a little care, you'll get a crisp, clean transfer every single time.

Whether you’re using a sunny window or a sheet of transfer paper, the goal is always the same: create a steady, accurate guide for your needle to follow.
Method 1: Using a Light Source
This classic technique is brilliant for light to medium-weight fabrics. It’s simple, effective, and you don't have to worry about any residue from transfer paper. Think of it as using light to project your pattern right onto the fabric.
-
Secure Your Pattern: First things first, tape your original pattern to a light source. A bright window is the old-school favorite for a reason, but a lightbox or even a tablet screen turned up to full brightness works just as well.
-
Position Your Fabric: Carefully lay your fabric over the pattern, making sure it’s completely smooth and pulled taut. I recommend using painter's tape or washi tape to secure the corners. It’s much gentler on your fabric than pins, which can leave annoying little holes.
-
Trace the Design: The light shining through will make the pattern perfectly visible underneath your fabric. Grab a water-soluble or heat-erasable fabric pen and trace over the lines. All you need is a light, steady hand.
Method 2: The Classic Transfer Paper Technique
This is the method you’ll want for those tricky fabrics—the dark, thick, or heavily textured ones that light just can't shine through. It works by using pressure to transfer the design.
-
Create a Fabric Sandwich: Start by laying your fabric flat on a hard, smooth surface. Next, place your transfer paper on top, making sure the coated side (the carbon or graphite part) is facing down onto the fabric. Finally, put your pattern on the very top.
-
Secure the Layers: Tape all three layers down securely. This step is absolutely crucial. If anything wiggles or shifts while you're tracing, you’ll end up with a blurry, misaligned mess.
-
Trace with Gentle Pressure: Using a stylus or a dull pencil, carefully trace over all the lines of your pattern. I actually prefer a dull pencil point; it glides more smoothly and is far less likely to tear your paper.
Key Rule: Trace lightly! You’re just creating a guide for your stitches, not a permanent, bold line. It’s always easier to go back over a faint line than it is to try and remove one that you pressed down on too hard.
A Practical Example: Transferring a Photo Pattern
Let's say you're about to start a cross-stitch project from a custom photo pattern on some sturdy Aida cloth. Since Aida is pretty opaque, the transfer paper method is definitely the way to go.
- You'd start by taping your Aida cloth securely to your work surface.
- Next, you'd layer a sheet of white or yellow transfer paper on top, double-checking that the transfer side is facing down.
- Then, you'd place your printed photo pattern over it and tape everything in place.
- Using a stylus, you would trace the main outlines and color-blocked sections from the photo pattern, applying just enough pressure to leave clean, visible lines on the Aida.
This simple process gives you a perfect map to follow with your needle. For a closer look at other techniques, check out our complete guide on how to transfer designs onto fabric, which covers even more methods.
Mastering Advanced Tracing and Transfer Techniques
Once you've got the hang of basic pattern transfers, a whole world of creative possibilities cracks open. It's time to stop thinking of tracing paper as just a copy machine and start seeing it as a canvas for creating something brand new. This is where you unlock the really complex, personal embroidery projects.
This is your chance to start mixing and matching elements from different patterns. Picture taking a floral border you love from one design and combining it with a cool central motif from another. By tracing each piece onto separate sheets, you can literally play with the layout on your fabric, shifting things around until you land on the perfect composition—all before you even thread your needle.
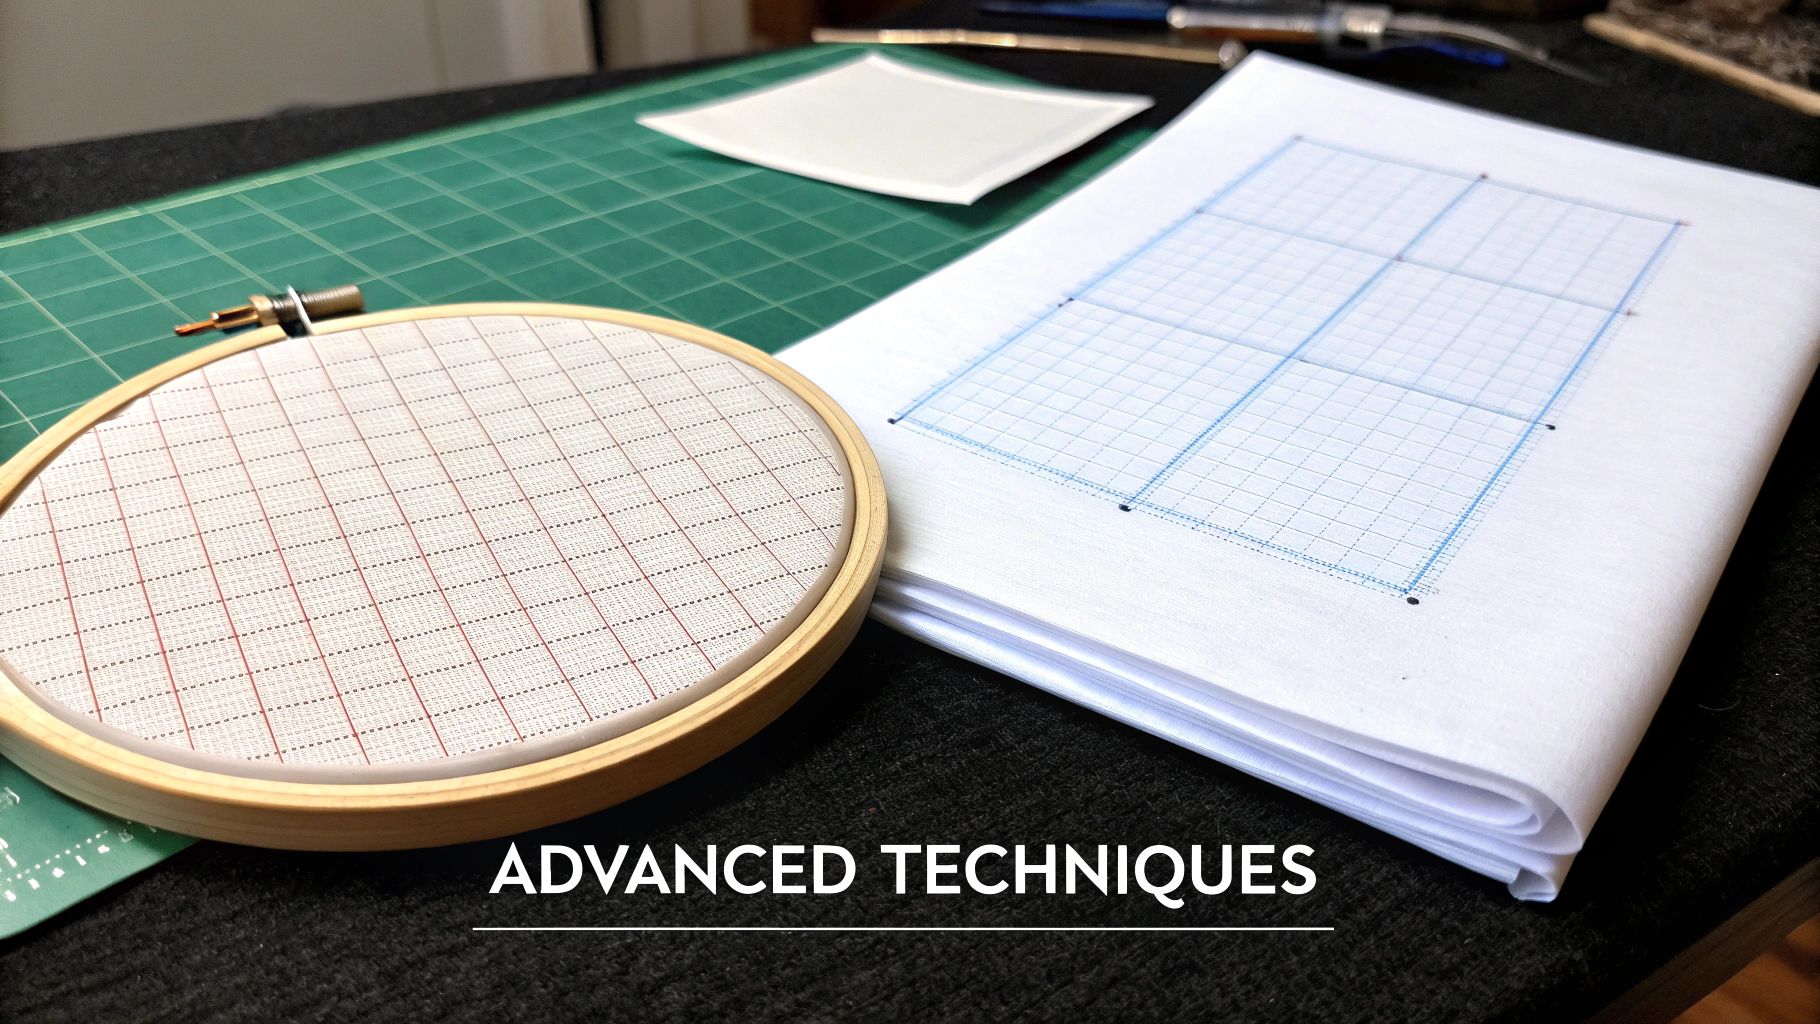 embroidery hoop with gridded fabric and a stack of gridded paper for advanced crafting techniques.">
Working with Specialty Stabilizers
Sometimes, a project throws you a curveball that standard tracing paper just can't handle. That's when you call in the big guns: specialty stabilizers. These materials are amazing because they act as both your transfer medium and a support system for your fabric. They're an absolute game-changer for fabrics that are a nightmare to work with.
For instance, water-soluble stabilizers are a stitcher’s secret weapon for embroidering on dark or fuzzy fabrics like denim, felt, or a comfy sweatshirt. On surfaces like these, your trusty transfer lines would completely vanish. Instead, you can print or draw your design right onto the stabilizer, stick it to your fabric, and stitch straight through both layers.
After you've finished your last stitch, a quick rinse in warm water makes the stabilizer completely melt away. All you're left with is your beautiful, clean embroidery. It’s a pretty foolproof way to get professional results on any background.
This technique is just one of many useful cross-stitching accessories that can help take your craft from a fun hobby to a true art form.
Mini Tutorial: Stitching on Dark Denim
Let's walk through how this works in the real world. Here’s a quick guide to adding a cool design to a denim jacket.
- Prep Your Design: First, get your pattern onto a sheet of water-soluble stabilizer. You can either print it directly or draw it on by hand.
- Position and Stick: Cut out the design, leaving a little bit of a border around the edges. Peel off the paper backing and press the sticky side firmly onto the denim right where you want it.
- Get Stitching: Hoop the denim and stabilizer together. Now, just stitch your design like you normally would, making sure your needle goes through both the fabric and the stabilizer. The stabilizer gives you a super clear guide and keeps the denim from stretching out of shape.
- Dissolve and Dry: Once all the stitching is done, take the hoop off. Submerge the embroidered area in a bowl of warm water and gently swish it around with your fingers. You'll see the stabilizer start to dissolve. Once it's all gone, let the jacket air dry completely.
Using a stabilizer lets you completely sidestep the headache of trying to see your lines on a tricky surface. It guarantees every single stitch lands exactly where it's supposed to, turning even the most difficult fabrics into a perfect canvas.
Troubleshooting Common Tracing Paper Mishaps
Even with years of experience, every stitcher runs into a snag with tracing paper now and then. But don't let it throw you off your game! Nearly every common problem has a surprisingly simple fix.
Think of this as your go-to guide for those moments when your transfer just isn't cooperating. Instead of feeling frustrated, we can pinpoint the issue and get you back to the fun part: stitching.
My Lines Are Too Faint or Too Dark
Getting your lines just right—visible enough to follow but not so bold they peek through your stitches—is a classic challenge.
-
If your lines are too faint: Try tracing on a harder surface. A cutting mat or even a large hardcover book placed under your fabric provides the firm backing you need for a crisp transfer. Your tool might also be the issue; a slightly sharper pencil or a fine-tipped stylus can make all the difference.
-
If your lines are too dark: You’re probably pressing too hard. Lighten up your touch! All you need is a gentle, steady pressure to create a clear guide. If you're using carbon-style paper, consider switching to a lighter color like gray or white, which is much more forgiving than a stark black.
My Markings Keep Smudging
There's nothing more discouraging than a clean design turning into a blurry mess before you've even started stitching.
This usually happens when your hand or arm rests on the transferred lines as you work. To avoid it, try to stitch from the top down and work from the center of the design outwards. A great trick is to place a spare piece of paper or a small scrap of fabric under your hand, creating a protective barrier.
Key Takeaway: Don't panic over mistakes! A little patience and a small adjustment can fix almost any transfer issue. Think of it as building your embroidery problem-solving skills with every project.
The Paper Rips While I’m Tracing
A torn pattern mid-transfer is a massive pain, but it's easily preventable.
Most of the time, the culprit is a tracing tool that's just too sharp. A pointy pencil tip can easily catch and rip delicate paper. Swap it out for a tool with a rounded tip, like a dedicated embossing stylus or even a ballpoint pen with the ink retracted. These will glide smoothly across the paper instead of digging into it. Using washi tape to secure your pattern instead of pins can also reduce stress on the paper.
Tracing paper is the unsung hero that bridges the gap between a design and the fabric, making personalized projects possible for stitchers everywhere. This is why the global tracing paper market, valued at USD 0.53 billion in 2024, is expected to grow to USD 0.72 billion by 2035 as the demand for customization continues to climb. You can find more details in this tracing paper market analysis on thebrainyinsights.com.
Your Tracing Paper Questions, Answered
Even the best guides can leave you with a few questions when you're actually sitting down with your needle and thread. I've been there! So, I’ve pulled together the most common questions stitchers ask to give you quick, practical answers. Think of this as your personal cheat sheet for those "what if" moments.
Let's clear up everything from reusing your paper to working with tricky fabrics, so you can get back to stitching with total confidence.
Can I Reuse My Tracing Paper for Multiple Projects?
For most types, absolutely. Good quality graphite or wax-free transfer paper is made to last. You can easily get several uses from a single sheet before the lines start to look a little faint.
My trick is to just shift the pattern to a fresh spot on the paper for each new transfer. It's a simple move that really extends the life of the sheet, making it a super budget-friendly part of your embroidery stash.
But, there's a big exception to this rule.
Heads up: Specialty products like water-soluble or heat-soluble stabilizers are strictly a one-and-done deal. Their whole purpose is to disappear after you're finished stitching, so once they're gone, they're gone for good.
What’s the Best Way to Remove Transfer Lines After Stitching?
How you clean up your lines depends entirely on the type of transfer paper you used. There's no single magic eraser, and trying the wrong method can lead to some real frustration.
Here’s a breakdown of the most common scenarios.
- Standard Graphite: Ideally, your stitches will cover most of the lines. If you have a few stubborn marks peeking out, a gentle dab with a kneadable art eraser usually lifts them right off without messing with your beautiful thread work.
- Wax-Based Papers: Some waxy transfer lines can be coaxed out with a bit of low heat. Just place a scrap piece of cloth over the area and press it with a cool, dry iron. The heat gently melts the wax, and the scrap fabric soaks it right up.
- Modern Soluble Options: This is where things get really easy. Marks from water-soluble pens simply rinse away with a little cool water. Lines from heat-erasable pens vanish like magic with a quick pass of a warm iron.
A word of advice from someone who learned the hard way: always test your removal method on a small, hidden corner of your project fabric first. This little step can save you from any unwanted surprises later.
Will Tracing Paper Damage Delicate Fabrics Like Silk?
That's a smart question. Delicate fabrics definitely need a lighter touch. Pushing down hard with a sharp stylus on traditional transfer paper can absolutely snag, pucker, or even leave a permanent crease in materials like silk, satin, or organza.
Thankfully, there are much safer ways to get your design onto the fabric without applying any real force.
The best method by far is using a light source. Just tape your pattern to a lightbox or a sunny window, lay your fabric over it, and trace the design directly with a removable marker. This technique avoids any direct pressure or messy residue.
Another fantastic choice for delicates is a water-soluble stabilizer. You can baste it or use a self-adhesive version, stitch your design right through it, and then simply dissolve it away with water. It even gives the sheer fabric a bit of extra support while you work, leaving nothing behind but your perfect stitches.
What Can I Use If I Don’t Have Tracing Paper?
Don't let a missing supply stop you! If you're itching to start a project and realize you're out of tracing paper, there are several great workarounds you probably already have at home.
For light-colored fabrics, the old window or tablet screen trick is a lifesaver. Tape up your pattern, place the fabric over it, and trace away with your favorite fabric pen.
Working on dark fabrics? Dressmaker's carbon paper is a brilliant substitute. It works just like embroidery transfer paper but comes in light colors like white or yellow, which show up beautifully on those deeper-toned materials.
Another go-to for many stitchers is a printable water-soluble stabilizer. You can print your design directly onto a sheet, stick it to your fabric, stitch through both layers, and then just wash it away. It’s a modern approach that gives you incredible precision, especially for detailed patterns.
At Cross Stitched, we believe that having the right tools makes creating so much more joyful. Let us help you turn your cherished photos into timeless art with our custom cross-stitch kits, designed to make every step of your creative journey a delight. Explore our collections and find everything you need at https://cross-stitched.com.


