

If you've ever wanted to create cross-stitch projects that are more structural—think ornaments, gift tags, or even little stand-up figures—then you'll want to get familiar with perforated paper. It's a special kind of needlecraft that swaps traditional fabric for a sturdy, card-like paper that comes with pre-punched holes.
This simple switch opens up a world of possibilities. Because the paper is rigid, you can make three-dimensional projects that hold their shape perfectly, all without ever needing an embroidery hoop. It gives your finished work a uniquely crisp and clean look that you just can't get with fabric.
The Unique World of Stitching on Paper
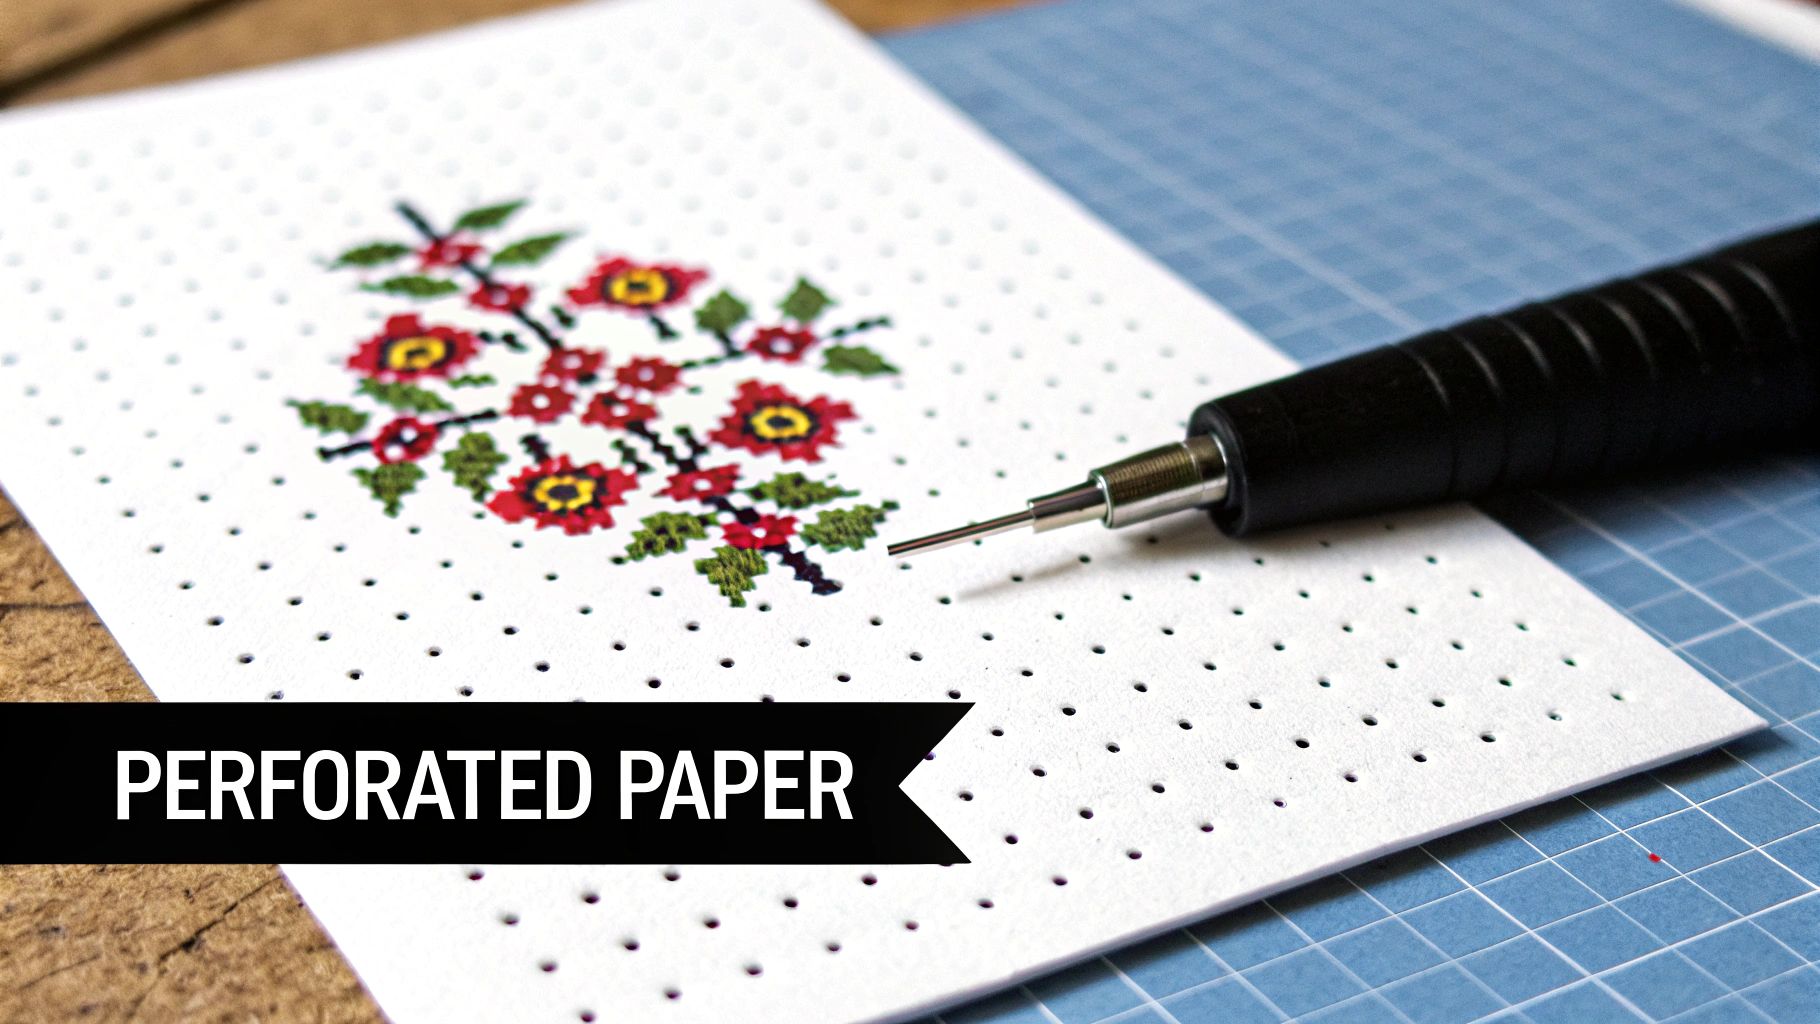
Unlike soft, pliable fabrics like Aida or linen, perforated paper gives you a firm, stable surface to work on from the get-go. I like to think of it as the perfect middle ground between papercraft and needlework. You get the grid-like precision for your stitches, but with the creative freedom of embroidery floss, all on a material that behaves like high-quality cardstock.
This sturdiness is its biggest selling point and the main reason stitchers like me turn to it for specific projects. While the basic stitching is the same (you can learn more in our guide on what is cross stitch), the real magic of perforated paper is how it lets you build dimensional objects.
A Rich History and Modern Revival
Stitching on paper isn't some new fad; it actually has a fascinating history. This craft was incredibly popular during the Victorian era, especially between 1860 and 1900. People all over Europe and North America used punched paper to create everything from sentimental mottos to hang on the wall to beautifully detailed bookmarks.
Back then, the most common paper count was a versatile 14-16 holes per inch—a size that's still a favorite today. It's fun to think that we're using a material with such deep historical roots, a point you can explore further with historians at Second Generation Antiques.
Today, this Victorian craft is enjoying a serious comeback. Modern designers are creating fresh, contemporary patterns made just for paper, and stitchers are rediscovering just how fun and versatile it is.
The real appeal is in its simplicity and versatility. The holes are perfectly uniform and easy to see, which is fantastic for beginners. At the same time, its rigidity opens up a ton of creative finishing possibilities that fabric just can't match.
Why Choose Paper Over Fabric?
So, when should you reach for paper instead of your usual Aida? It almost always comes down to the final form you want your project to take.
Here are a few of the biggest advantages I've found:
- No Hoop Needed: The paper is stiff enough to hold comfortably in your hand, which makes the whole stitching process feel a bit more direct and simple.
- Clean, Defined Edges: When you cut the paper, you get a crisp, precise edge. No fraying, no fuss.
- Perfect for 3D Projects: Its structure is a game-changer for making ornaments, stand-up figures, decorative boxes, and anything else that needs to hold its shape.
- A Great Starting Point for Beginners: The large, clear holes make it incredibly easy to form neat, even stitches from your very first project.
Choosing the Right Tools for Stitching on Paper
When you’re gearing up for a perforated paper project, grabbing the right supplies from the start makes all the difference. Unlike fabric, paper doesn't have much give, so you need tools that will work with it, not against it. The paper, needle, and thread you choose are the trio that will really define how your finished piece turns out.
Your Paper, Needle, and Thread
First up is the paper itself. Just like Aida cloth, perforated paper comes in different "counts," which simply means the number of holes per inch. The most common size you'll find is 14-count, and it's a fantastic starting point for anyone new to stitching on paper. The holes are big enough to see and work with easily, which helps you get a feel for your thread tension without a struggle.
If you're tackling a more detailed design, you might look for a higher count, but keep in mind that more holes per inch means smaller holes and a more delicate project overall.
Now, let's talk about the most crucial tool in your kit: the needle. You absolutely want to use a tapestry needle. These have a blunt tip and a large eye, which is exactly what you need. A sharp needle will tear the paper, and trust me, that's a frustration you want to avoid.
For standard 14-count paper, I always reach for a size 26 or 28 tapestry needle. These needles are slim enough to pass through the holes without stretching or damaging them, which is the secret to a neat, professional-looking finish. If you want to dive deeper into needle types, our guide on embroidery needle sizes is a great resource.
Your thread choice is all about coverage. Standard six-strand embroidery floss is perfect for this. How many strands you use really comes down to the look you're going for, but I do have some recommendations.
To make this easier, here's a quick reference table I've put together from experience. It's a great starting point for matching your materials.
Matching Your Paper Count with Needles and Thread
| Paper Count | Recommended Tapestry Needle Size | Number of Floss Strands |
|---|---|---|
| 14-count | Size 26 or 28 | 2-3 strands |
| 18-count | Size 28 | 1-2 strands |
Pro Tip: For 14-count paper, two strands of floss give great coverage without looking crowded. If you want a really lush, full look, try three strands. My advice? Test it out on a scrap piece of paper first to see which you prefer before committing to your main project.
This little bit of prep helps you dial in the exact texture and finish you want for your piece.
Essential Finishing Tools
Beyond the basics, a couple of extra tools will make your life so much easier, especially when it comes to finishing your project. Precision is key when you're trimming your final piece.
- Sharp Embroidery Scissors: A small, sharp pair is a must-have. You'll use them constantly for snipping threads close to the paper and for carefully trimming around the edges of your design.
- Craft Knife: When you have to cut out intricate shapes or smooth curves, a craft knife and a self-healing mat are your best friends. They give you way more control and a much cleaner edge than scissors ever could.
Getting these tools lined up before you start is the best way to set yourself up for success. It helps you sidestep common headaches like torn paper or messy stitches, so you can just relax and enjoy the process.
Essential Techniques for Perforated Paper
Working with perforated paper is a whole different ballgame compared to stitching on fabric. Paper is stiff and doesn't forgive mistakes easily, so your technique needs to be both precise and gentle. Getting a handle on a few core skills will save you a ton of frustration and give your finished projects that crisp, professional look we all strive for.
Unlike fabric, paper can't hide bulky knots or mask uneven tension. The name of the game is a perfectly flat back, which is especially important if you plan on turning your piece into an ornament or mounting it on a card. This means you'll have to ditch the traditional knots you might use for starting and ending your threads.
This little flowchart breaks down how your main tools work together.
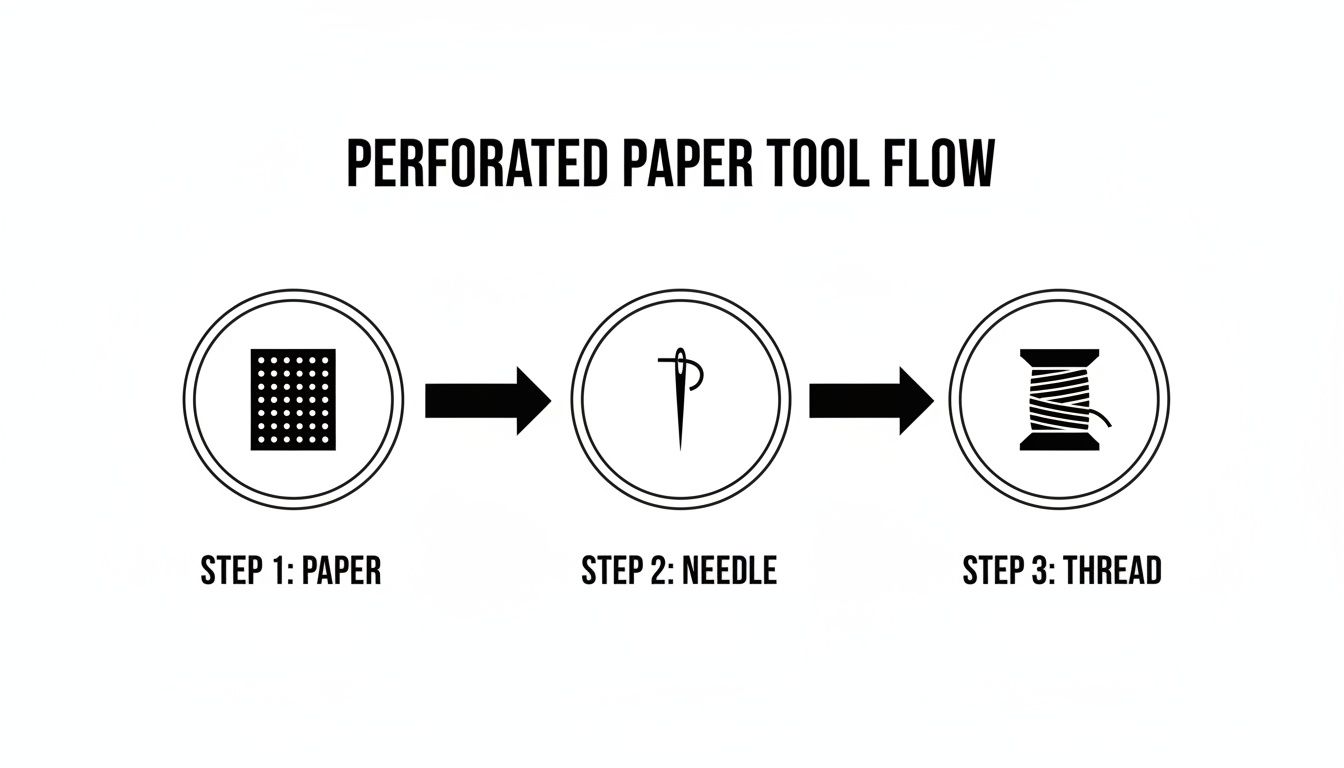
As you can see, the paper count dictates your needle choice, and your thread thickness directly impacts how your stitches look. It's all connected.
Starting and Ending Threads Neatly
The absolute best way to start your first stitches is the loop start method. The only catch is that it only works when you're using an even number of strands, like the two strands I recommend for 14-count paper.
Here's how it's done:
- Cut a single strand of floss that’s double the length you actually need.
- Fold it perfectly in half.
- Thread the two cut ends through the eye of your needle, which will leave a nice loop at the other end.
- Bring your needle up from the back of the paper to make the first half of your stitch, but don't pull the floss all the way through.
- Flip your work over, guide your needle through that loop, and gently pull it snug.
Voila! A completely flat, knot-free start.
When it’s time to end a thread or start a new color where you've already stitched, just weave the tail under three or four completed stitches on the back. This anchors it securely without creating any bumps.
Mastering Your Thread Tension
I can't stress this enough: thread tension is probably the most critical skill for stitching on perforated paper. If you pull your stitches too tight, you’re going to warp the paper or, even worse, tear the fragile little bridges between the holes. But if your stitches are too loose, they’ll look messy and undefined.
You're aiming for that "just right" Goldilocks tension. The stitch should lie flat against the paper but not be so tight that it strains the holes.
Strive for a "kiss," not a "hug." Your floss should just gently rest on the surface of the paper. This light touch is the secret to uniform stitches and keeping your paper perfectly flat from beginning to end.
Imagine your thread just laying smoothly across the hole without tugging at the edges. It takes a little practice, but soon you'll develop a natural feel for the perfect tension, and your consistency will skyrocket.
Best Practices for Working with Paper
Finally, it’s worth remembering that you’re stitching on paper, not cloth. This brings a few unique rules to the table that will protect your project and guarantee a beautiful result.
- Keep It Clean: Always, always work with clean hands. Perforated paper isn't washable, so any dirt or finger oils that transfer onto it are there for good.
- Handle with Care: Try your best not to bend or crease the paper. When you’re not working on it, store your project flat inside a folder or a dedicated project bag to keep it in pristine condition.
- Stitch with Good Lighting: The holes are easy to see, but good lighting makes a world of difference. It cuts down on eye strain and helps you make those consistently neat stitches every single time.
Finishing Your Projects for a Polished Look
Once you’ve made that final stitch, the real magic happens. How you finish your perforated paper project is what elevates it from a simple piece of stitched paper into a polished keepsake. Unlike fabric, you don’t have to worry about washing or ironing. Here, it’s all about precise trimming, clean backings, and beautiful edges.
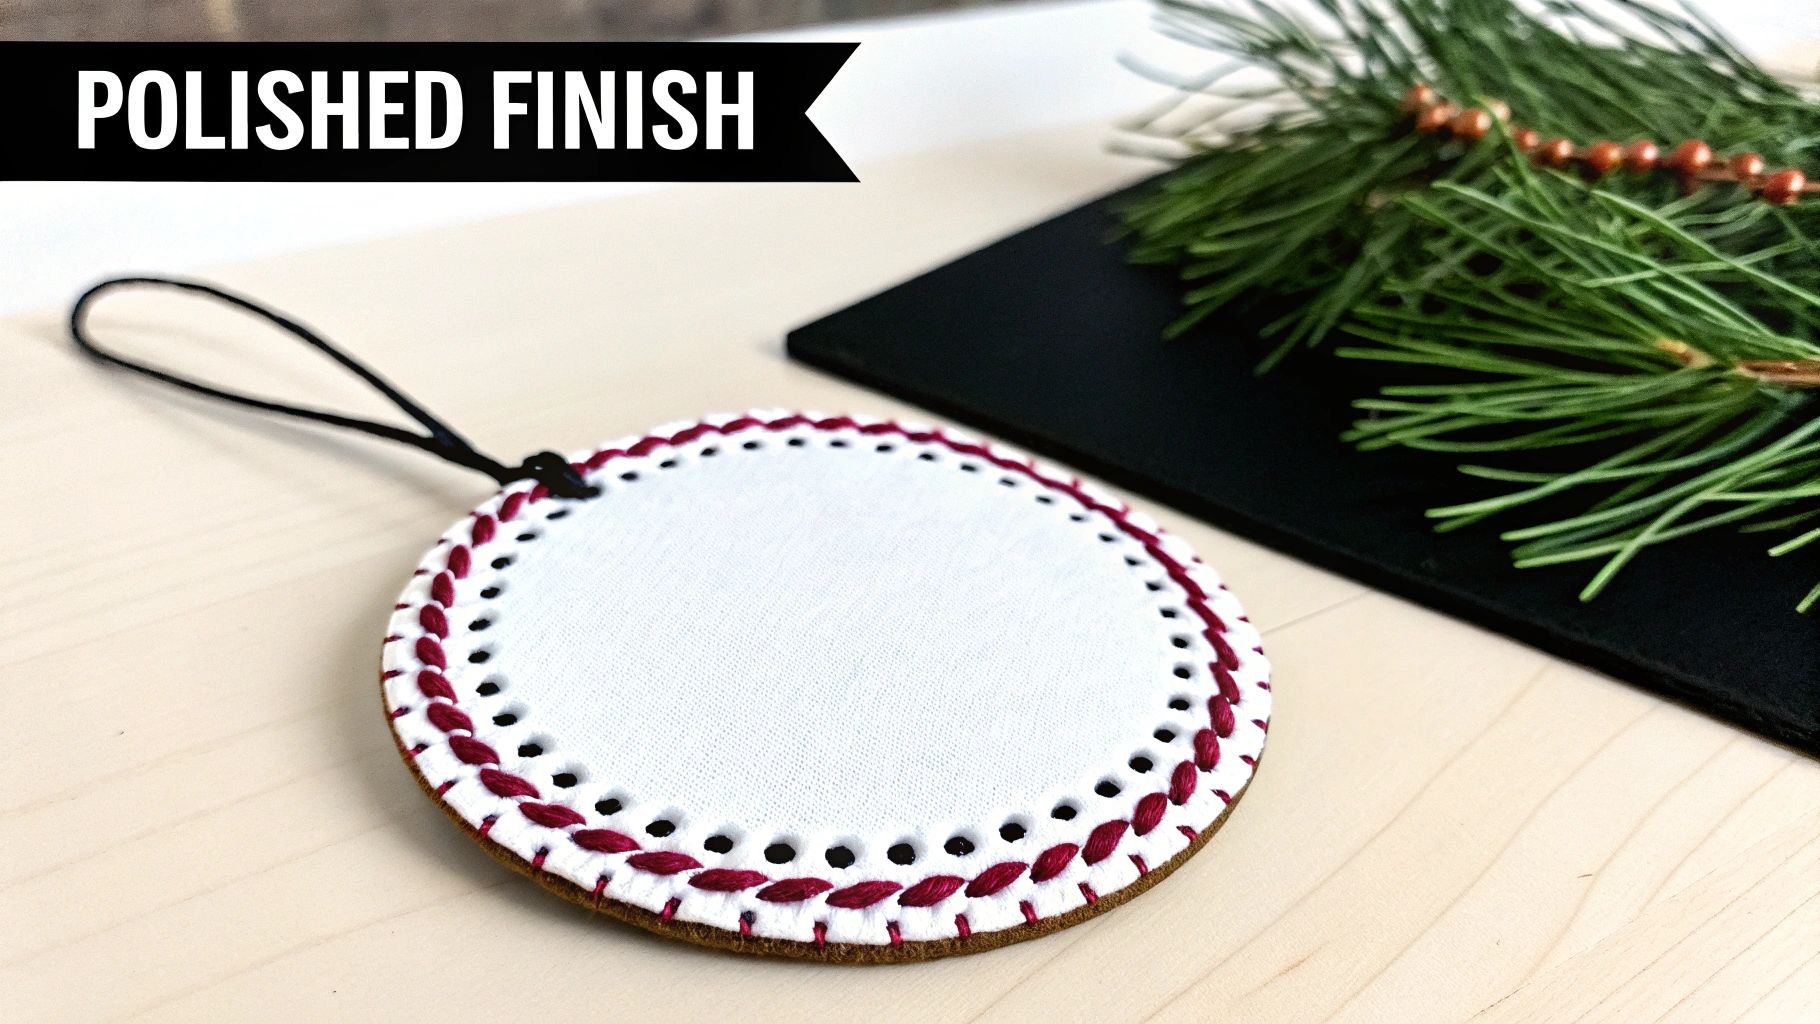
This is where perforated paper really shows off its best quality: its rigidity. This stiffness allows you to create standalone items like ornaments, magnets, and gift tags that hold their shape perfectly. A clean finish isn't just about looks—it’s about making something that will last.
Trimming for a Clean Border
First things first, you need to trim away the excess paper. For this job, you'll want a small, sharp pair of embroidery scissors or a craft knife and a cutting mat for the best control.
Here’s the golden rule I always follow: leave a small border around your design. A buffer of one or two unstitched holes is perfect. This little margin frames your work beautifully, keeps the edges from looking crowded, and protects your stitches from being accidentally snipped. Take your time and cut slowly, using the paper’s grid to guide you for straight lines and smooth curves.
Adding a Professional Backing
For projects like ornaments or keychains where the back is visible, a backing is a must. It neatly hides the messy bits of your stitching, adds a layer of sturdiness, and gives your project a more substantial, high-quality feel.
You’ve got a few great options to choose from:
- Felt: This is the classic choice. It’s soft, forgiving to cut, and comes in every color imaginable to match your floss.
- Cardstock: If you want a stiffer finish, patterned or colorful cardstock can add an extra decorative element.
- Adhesive Felt: This seems convenient, but I find the adhesive can gum up my scissors and make clean cuts tricky. I usually get a cleaner result by using regular felt and a good craft glue.
To add the backing, just lay your stitched piece on the felt or cardstock, trace its outline, and cut it out. A thin, even layer of craft glue will secure it perfectly to the back of your paper.
Decorative Edging Techniques
Want to add an extra touch of polish? A decorative border is the way to go. Not only does it look fantastic, but it also helps seal the paper and backing together. The whip stitch is a popular, easy technique that creates a lovely, corded look around the entire piece.
Perforated paper has a rich history, most famously used for the motto pieces popular between 1860 and 1900. These were often stitched on 14-count paper, a testament to how these historical techniques still inspire us today. You can dive deeper into this history over at the Perforated Paper website.
Final Embellishments and Assembly
The final step is adding any hardware or embellishments that turn your stitchwork into a finished item. This could be gluing on a magnet, attaching a pin back to make a brooch, or adding a hanging loop for an ornament.
For an ornament, it’s easiest to thread a ribbon or cord through a top hole before you glue the backing on. This locks it in place for a secure, seamless finish. These little details are what truly bring your creation to life. For even more inspiration, check out our guide on how to finish a cross stitch project.
Troubleshooting Common Stitching Mishaps
Even the most seasoned stitchers hit a snag now and then. While perforated paper is a dream to work with, it doesn't forgive mistakes quite like fabric does. The key is a gentle touch. But don't fret—nearly every common issue has a simple fix that will get you back on track without compromising your beautiful work.
Oh No, I Tore the Paper!
The most common heart-sinking moment is tearing one of those tiny paper bridges between the holes. It happens to the best of us, usually from pulling a stitch just a little too tight. The good news is, the fix is surprisingly simple and almost invisible.
Just grab some clear tape. Snip a minuscule piece—seriously, just a few millimeters—and carefully place it over the tear on the back of your paper. Press it down firmly. This tiny patch provides just enough reinforcement to stabilize the hole, so you can go right back to stitching through it as if nothing happened.
Unpicking Stitches (Gently!) and Taming Your Thread
What happens when you realize you've used the wrong color or gone off-pattern? On Aida cloth, you might grab a seam ripper and go to town, but that's a recipe for disaster on paper. A much lighter hand is needed here.
To safely remove a stitch without causing damage:
- Flip your needle around and use the eye, not the point, to gently slide under the floss and lift it.
- Slowly pull the stitch out, one leg at a time.
- Whatever you do, don't tug or use sharp tools. They’ll catch the paper and cause a tear you can't undo.
Tangled floss is another classic frustration. It’s usually a sign that your thread is too long, or it's gotten twisted up as you work.
Here’s a little trick I swear by: every few stitches, just let your needle and thread dangle freely for a second. The floss will naturally untwist itself, which cuts way down on knots. It's a tiny habit that saves you a world of frustration.
Keeping Your Project Flat and Clean
The secret to preventing your paper from warping or buckling is consistent thread tension. If you start to see your project curve, that’s your cue—you’re pulling your stitches too tight. Take a moment, relax your grip, and think about letting the floss glide across the surface rather than cinching it down.
And since you can't just toss perforated paper in the wash, keeping it clean from the get-go is critical. Always make sure your hands are clean before you start stitching. When you take a break, tuck your project away in a clean folder or a plastic sleeve. A little bit of care along the way ensures your piece stays pristine from the very first stitch to the last.
Creative Project Ideas to Get You Started
Now that you've got the basics down, it's time for the really fun part—actually making something! The best thing about perforated paper is its stiffness. It opens up a whole new world of projects you just can't do with regular fabric. You can start thinking in 3D, creating things that are not just pretty but practical, too.
When you're just starting out, the trick is to pick small, manageable projects. Getting a few quick wins under your belt is a huge confidence booster and a great way to practice your tension and finishing skills without committing to a massive pattern.
Quick and Charming Beginner Projects
If you're new to stitching on paper, jumping into a small-scale project is the perfect way to get a feel for it. There’s something so satisfying about finishing a piece in just an evening or two.
Here are a few simple but lovely ideas to try:
- Custom Bookmarks: A small rectangular design is ideal. You could stitch a monogram, a tiny flower, or a simple geometric pattern. They make fantastic gifts!
- Refrigerator Magnets: Stitch a miniature cupcake, a cute cat, or a little seasonal shape like a pumpkin or a snowflake. Once you trim it, just glue a flat magnet onto the back.
- Gift Tags: Make your gifts stand out with a hand-stitched tag. A tiny Christmas tree or a birthday cake adds a personal, handmade touch that people really appreciate.
A big reason perforated paper has made such a comeback is its versatility. Today, you can easily find 14-count A4 sheets, which are perfect for ornaments, cards, and tags. It’s a great material for beginners because the holes are 100% visible, it won't fray like fabric, and its stiffness means you don't even need a hoop. If you're curious, you can find more insights about perforated paper's history and modern use.
Stepping Up to Intermediate and Advanced Creations
Once you’re comfortable with the paper and have your thread tension figured out, you can start exploring more complex and dimensional projects. This is where perforated paper really gets to show off its structural strength, letting you build intricate 3D objects that hold their shape beautifully.
For stitchers who are ready for a bit more of a challenge, think beyond two dimensions:
- Holiday Ornaments: You can create some truly stunning holiday decor by layering stitched pieces or making standalone 3D figures like stars or tiny gingerbread houses.
- Decorative Boxes: Small, stitched boxes are perfect for holding little treasures or jewelry. You’ll find lots of patterns for "bisconru" or cube shapes that you stitch flat first and then fold and assemble.
- Needlebooks and Scissor Fobs: Why not craft some beautiful and useful accessories for your own stitching kit?
- Napkin Rings: Create a set of elegant, stitched rings for a special dinner party. It’s a unique, handmade detail that will definitely get noticed.
These more advanced projects often require more precise cutting and some careful assembly, but the incredible results are more than worth the extra effort. You’re not just stitching a picture; you’re creating a piece of functional art that showcases what this amazing material can do.
A Few Common Questions
Working with perforated paper is a bit different from your standard Aida or linen, so it's natural to have a few questions pop up, especially when you're just starting out. I've been there! Let's clear up some of the most common queries I hear from fellow stitchers.
Do I Need a Hoop for Perforated Paper?
This is probably the most-asked question, and the answer is a simple no. In fact, you should definitely skip the hoop.
Perforated paper is rigid enough on its own, so you can just hold it in your hand while you stitch. Trying to force it into a hoop or Q-snap frame will likely bend, crease, or even tear it, which is the last thing you want. Its built-in stiffness is one of its best features—making it super portable and ready to stitch on the go.
My Project Got a Little Dusty. How Do I Clean It?
Whatever you do, don't wash it! Unlike fabric, perforated paper projects cannot handle water. It will simply fall apart. Your best defense here is a good offense: always start with clean hands to keep oils and smudges off the paper from the get-go.
If you notice a bit of dust has settled on your work, you have a couple of safe options:
- Gently blow the dust off.
- Use a clean, very soft paintbrush to lightly sweep the surface.
I always recommend keeping your work-in-progress tucked away in a project bag or a clean folder when you're not stitching. It's the easiest way to keep it looking perfect.
My Advice: Treat your perforated paper project just like a fine art print. Keep it away from liquids and grime, and you'll have a pristine finish.
What’s the Best Way to Cut Out My Finished Design?
Getting a clean cut can make all the difference in your finished piece. You'll want to aim for precision. Your best tools for this job are a small, sharp pair of embroidery scissors or a craft knife paired with a self-healing cutting mat.
I always plan my cuts by leaving a border of one or two unstitched holes around the entire design. This creates a really neat, professional-looking edge. When you're ready to cut, take it slow and steady, using the grid of holes as your guide. I find that a craft knife is especially handy for navigating tricky curves where scissors might not be able to get a smooth line.
Ready to turn your favorite photos into timeless keepsakes? At Cross Stitched, we provide everything you need to create a personalized masterpiece. Explore our custom kits and find your next project today.


