

Have you ever looked at a favorite photo—a family portrait, a goofy picture of your pet—and thought it deserved to be more than just a file on your phone? What if you could turn that memory into a handcrafted piece of art? This guide is all about showing you how to do just that by creating a custom cross stitch pattern from a photo.
It's a beautiful way to blend a personal memory with a timeless skill, creating something far more meaningful than a standard store-bought kit.
The Modern Revival of a Timeless Craft
Cross-stitching saw a huge resurgence during the 2020 lockdowns, and it hasn't slowed down since. People of all ages rediscovered this relaxing hobby, but with a modern twist. The days of being limited to generic patterns of cottages and flowers are long gone.
Today, the biggest trend is turning our own photos into patterns. We can stitch our loved ones, our pets, and our favorite vacation spots. Crafters are even leaning into simplified, almost cartoon-like versions of their subjects, which makes even complex portraits feel approachable for beginners. You can dive deeper into these modern stitching trends to see how much the craft has evolved.
This isn't your grandmother's cross stitch anymore—unless she's using an app to turn a selfie into her next project. The ability to create a custom cross stitch pattern from a photo has made the craft more personal, accessible, and meaningful than ever before.
What Makes This Craft So Special
The magic is in the mix of personalization and artistry. When you stitch from a photo, you're doing more than just following a pattern; you're preserving a moment. Each tiny 'x' becomes a pixel in a cherished memory, transforming a fleeting digital image into a tangible, textured keepsake.
This guide will walk you through everything, step by step, to make sure your first project is a success. We're going to cover the essentials:
- Choosing the Perfect Image: I’ll share what makes a photo "stitchable" and how to pick one that will translate beautifully into thread.
- Using Digital Pattern Tools: We'll take the mystery out of using online generators to turn your picture into a printable, easy-to-follow pattern.
- Putting Your Kit Together: You'll learn exactly what supplies you need to bring your unique design to life.
By the time we're done, you'll feel ready and excited to start your own project, turning your favorite photos into stitched art that will last for years to come.
Picking the Right Photo for Your Project
The secret to a stunning custom cross-stitch piece isn't just in the stitching—it starts with the photograph. Think of your photo as the blueprint for your project. A weak blueprint will inevitably lead to a frustrating process and a disappointing result. So, let's talk about what makes a photo truly great for cross-stitching.
First and foremost, lighting is everything. You're looking for an image with a good mix of highlights and shadows. This contrast is what gives your final stitched piece a sense of depth and life. Photos taken in flat, even lighting, like on a cloudy day, can often look a bit dull and muddy when translated into thread.
Nail the Clarity and Composition
The quality of the image itself is absolutely critical. You need a high-resolution photo, period. A crisp, clear image allows the pattern-making software to define edges and assign colors accurately. If you start with a blurry or pixelated photo, you’ll end up with a confusing mess of random, isolated stitches that stitchers call "confetti."
To get the best possible starting point, make sure your image file is clean and high-quality. If the photo you love is on Instagram, you might want to use an Instagram downloader with no watermark to grab the best version without any logos cluttering it up.
Beyond technical quality, think about what you want the finished piece to look like. The composition of your photo makes a huge difference.
- Go for Simple Backgrounds: A busy, cluttered background is your enemy. It distracts from your main subject. A clean, out-of-focus, or even a single-color backdrop will make your portrait or pet really stand out.
- Crop in for Impact: Don't be afraid to get close! A tight crop focusing on your subject—a smiling face, the unique markings on your dog—creates a far more engaging and personal design than a full-body shot from far away.
The whole point is to direct the eye right to the heart of the image. A strong, clear focal point is the key to a successful photo-to-stitch project.
What Kinds of Photos to Avoid
Knowing what not to choose is just as important as knowing what works. Some photos just don't play well with the cross-stitch conversion process, and spotting these issues early will save you a world of headaches.
I'd strongly suggest steering clear of photos with these common problems:
- Tiny Faces in a Crowd: If you're using a group shot where people are far from the camera, their faces will become unrecognizable smudges of color. You lose all the detail that makes them them.
- Super Intricate Patterns: Things like delicate lace on a wedding gown or a complex floral print on a shirt are a recipe for confetti. Those fine details just turn into a jumble of single stitches that are a nightmare to sew and don't look right.
- Bad Lighting (Too Dark or Too Bright): Photos that are too dark lose all the important detail in the shadows. On the other hand, pictures with "blown-out" highlights—like a bright sun flare—will just become big, flat patches of white or cream thread.
At the end of the day, the best photos are simple, clear, and have a definite focus. Taking a little extra time to choose the perfect image is the single best thing you can do for your project. You'll thank yourself for it every step of the way. For a deeper dive, check out our guide on how to cross stitch from photographs for even more tips.
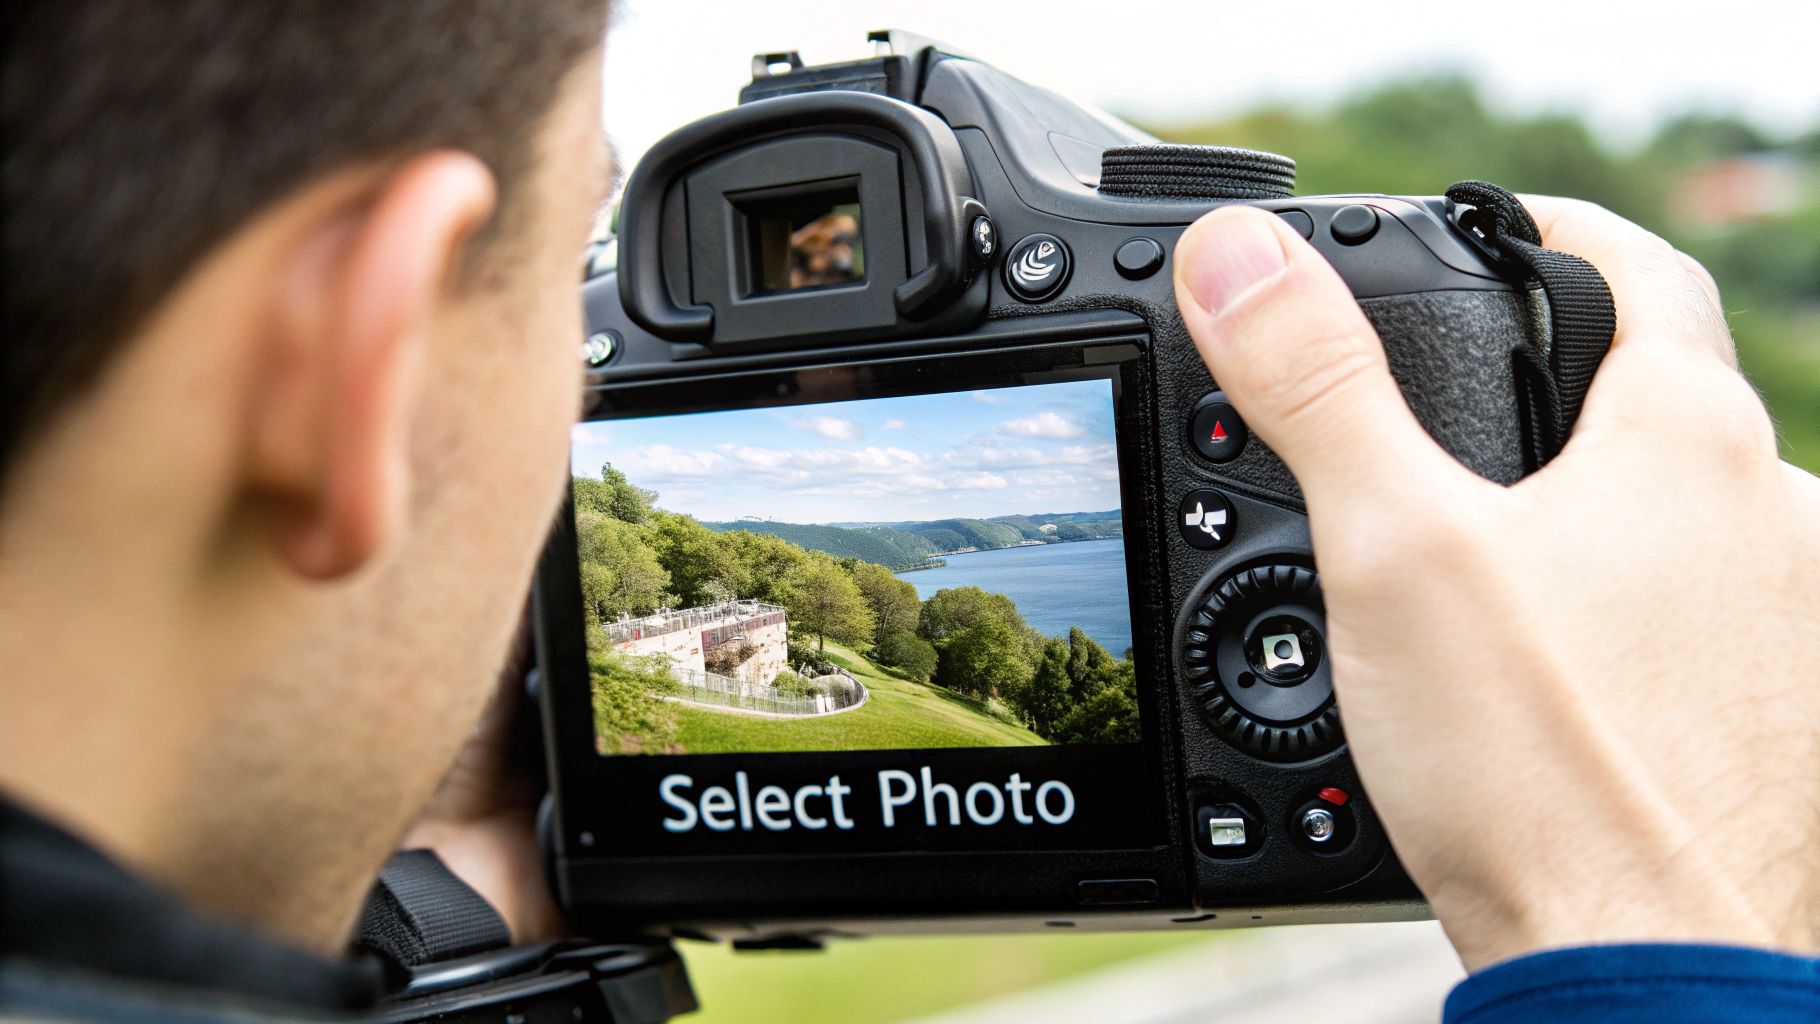
Bringing Your Photo to the Cross-Stitch Canvas
Alright, you've got the perfect photo picked out and edited. Now for the magic trick: turning that digital image into a stitchable pattern. Thanks to some fantastic online tools, this part is easier than you might think. We're going to walk through how to use these pattern generators to get a result you'll be excited to stitch.
The basic idea is simple. You upload your picture, and the software's algorithm does the heavy lifting, analyzing every pixel and translating it into a grid of cross-stitch symbols. It’s a bit like digital alchemy.
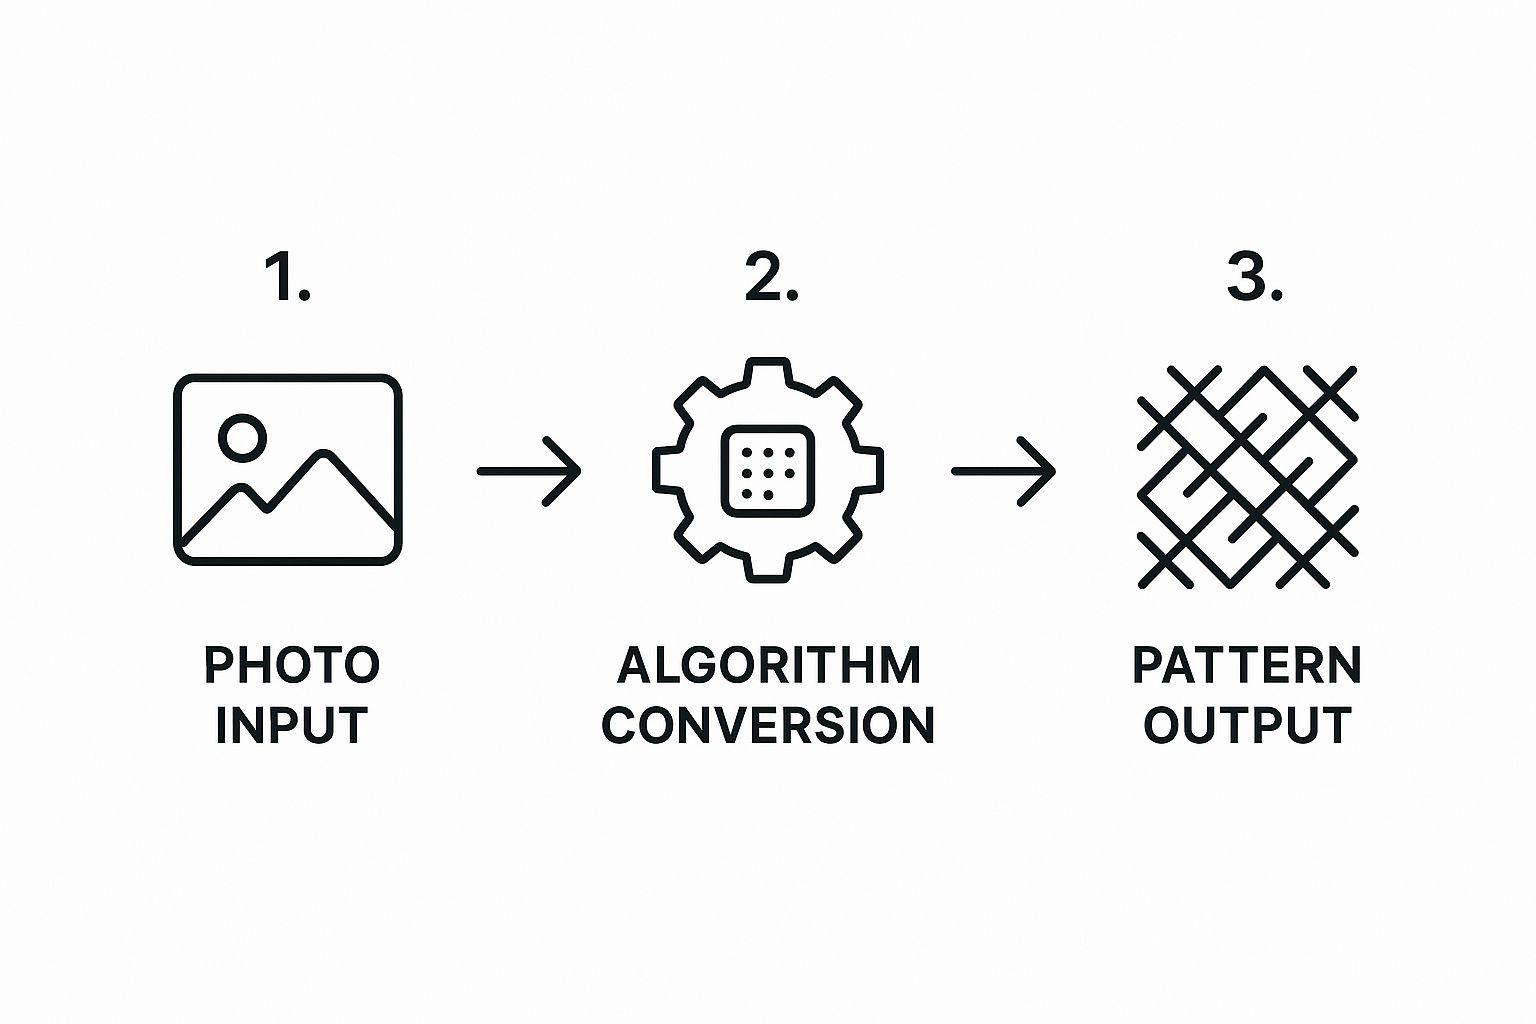
But just uploading the photo is only the first step. The real art comes from tweaking the settings to get the pattern just right. Let's dive into those crucial adjustments.
Getting the Settings Just Right
Once your photo is uploaded, you'll see a dashboard with several options. Don't just click "generate" and hope for the best! These settings are your creative controls, and they directly shape how your final project will look, feel, and how complex it will be to stitch.
The two most important dials you'll need to turn are fabric count and the number of thread colors.
-
Fabric Count: This number simply tells you how many stitches fit into one inch of fabric. Aida 14 (meaning 14 stitches per inch) is a classic for a reason—it’s easy on the eyes and a great starting point. Your finished piece will be larger. If you're after finer detail, something like Aida 18 packs more stitches into each inch, creating a smoother, less "pixelated" look. For something like a detailed pet portrait where you want to capture the texture of fur, I almost always lean toward 18-count Aida.
-
Number of Colors: This is where you have to find your sweet spot. A higher number of colors (say, 40-60) will give you a stunning, photo-realistic piece with gorgeous, subtle shading. The downside? You'll be juggling a lot of different threads, which can be tricky and more expensive. On the other hand, using fewer colors (20-30) simplifies the whole process. It creates a bold, stylized look—almost like a pop art version of your photo—which can be incredibly striking and is much more manageable for a beginner.
Pattern Settings Choosing Guide
Deciding between these options can feel a bit overwhelming, but it's really about balancing the look you want with the experience you want to have while stitching. Here’s a quick guide to help you choose the right path for your project.
| Setting | Beginner Friendly (Less Detail) | Intermediate (Balanced) | Advanced (High Detail) |
|---|---|---|---|
| Fabric Count | 11 or 14-count Aida. Stitches are larger and easier to see. Great for first-timers. | 16-count Aida. A good middle-ground that offers more detail without being too tiny. | 18-count Aida or higher. Creates tiny, tight stitches for a very refined, smooth image. |
| Number of Colors | 20-30 colors. Creates a clean, graphic look. Fewer color changes make for faster stitching. | 30-45 colors. Captures good shading and depth. The most common range for custom patterns. | 45-60+ colors. Delivers photorealism with intricate shading. Best for experienced stitchers. |
| Project Size | Smaller dimensions (5x7 or 8x10 inches). A quicker project to build confidence. | Medium dimensions (e.g., 11x14 inches). A substantial piece without being overwhelming. | Large dimensions (16x20 inches or more). A true heirloom piece that requires serious commitment. |
Ultimately, there's no single "correct" answer. The best settings are the ones that get you excited to pick up your needle and thread.
Finding the Balance Between Detail and Doability
Think of these settings as a trade-off. Let’s say you’re stitching a photo of your golden retriever in a field of wildflowers. Using 50+ colors will capture every golden highlight in his fur and distinguish between all the different flower petals. Dropping that to 25 colors might blend his fur into a few solid tones and simplify the flowers into pops of color. Both can look amazing—they just have different artistic vibes.
Remember, the goal isn't just to replicate a photo perfectly. It's to create a piece of art that you enjoyed making and are proud to hang on your wall. Always choose settings that feel right for your skill level, budget, and the style you're going for.
The amazing thing is that the technology behind these pattern generators is getting smarter all the time. Experimentation is your best friend here. Upload your image and play around. See what happens when you switch from 14-count to 18-count Aida. Watch the preview change as you slide the color count from 50 down to 30. Taking five extra minutes to test these options can make all the difference and ensure your final pattern is one you absolutely love.
For a deeper look with more visual examples, our guide on how to turn a picture into a cross-stitch pattern can help you see these differences in action.
Assembling Your Complete Stitching Kit
You’ve done the hard part—your custom pattern is finalized and looks fantastic! Now comes the fun part: getting all your supplies together. A great pattern is the roadmap, but you still need the right materials to bring your photo to life, stitch by perfect stitch.
This is where you have a choice to make. You can either hunt down every item yourself or get the convenience of an all-in-one kit. Both routes get you to a finished piece, but a kit built specifically for your custom cross stitch pattern from photo can save you a ton of time and potential headaches.
The demand for personalized crafts like this has exploded. The global cross-stitch market was valued at around USD 0.15 billion in 2024 and is only expected to keep growing. It's really being driven by people like us who love DIY projects and the magic of turning a personal photo into a piece of art. If you're curious, you can read more about these craft market trends and see how much personalization is influencing what’s available.
What to Look for in a Complete Kit
An all-in-one kit is a lifesaver. It takes away the hassle of running to the craft store with a long shopping list, which is why it’s my go-to recommendation for beginners or anyone who just wants to start stitching now. A good kit is essentially your entire project, boxed and ready to go.
So, what should you expect to find inside?
- Your Printed Pattern: This is non-negotiable. It should be a clear, easy-to-read chart, ideally with both a color block version and a symbol version so you can use whichever you prefer.
- Aida Fabric: The fabric should already be cut to the perfect size for your design, plus a generous margin on all sides to make framing a breeze later on.
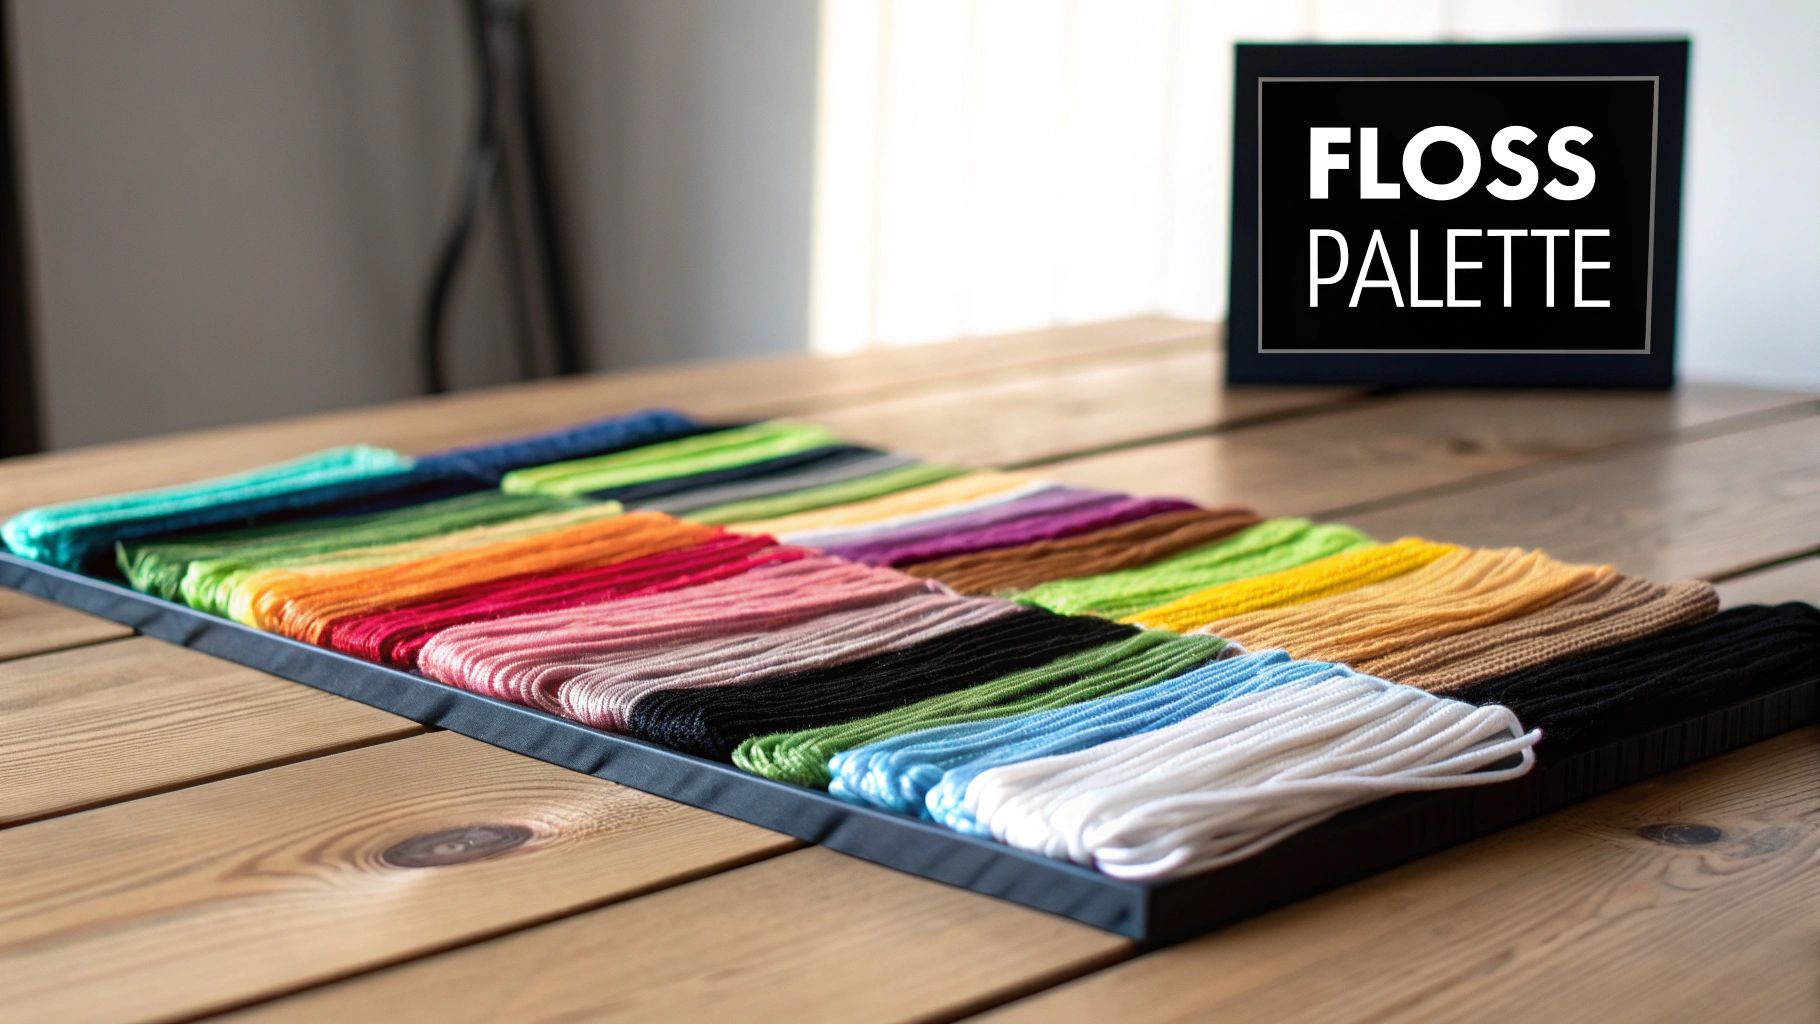
- Pre-Sorted DMC Floss: Honestly, this is the best part. All the DMC thread you need is included, usually pre-cut and organized on a floss card. No more untangling a massive knot of threads!
- Quality Needles: You should get at least two tapestry needles that are the right size for the Aida count in your kit.
The single biggest win with a kit? Guaranteed color accuracy. The threads have been perfectly matched to your pattern's color key, so you don't have to worry about accidentally buying a shade of blue that’s just a little bit off.
Before You Make Your First Stitch
Even with a perfect kit, I always recommend doing a quick inventory before you dive in. Think of it as a final pre-flight check for your project. Taking just a few minutes here can save you a lot of frustration down the road.
Lay out your floss and hold it up against the color key on your pattern. Make sure all the symbols and color numbers match what you have. It's also a great idea to quickly measure your fabric just to confirm the dimensions are correct and leave you with that comfortable border.
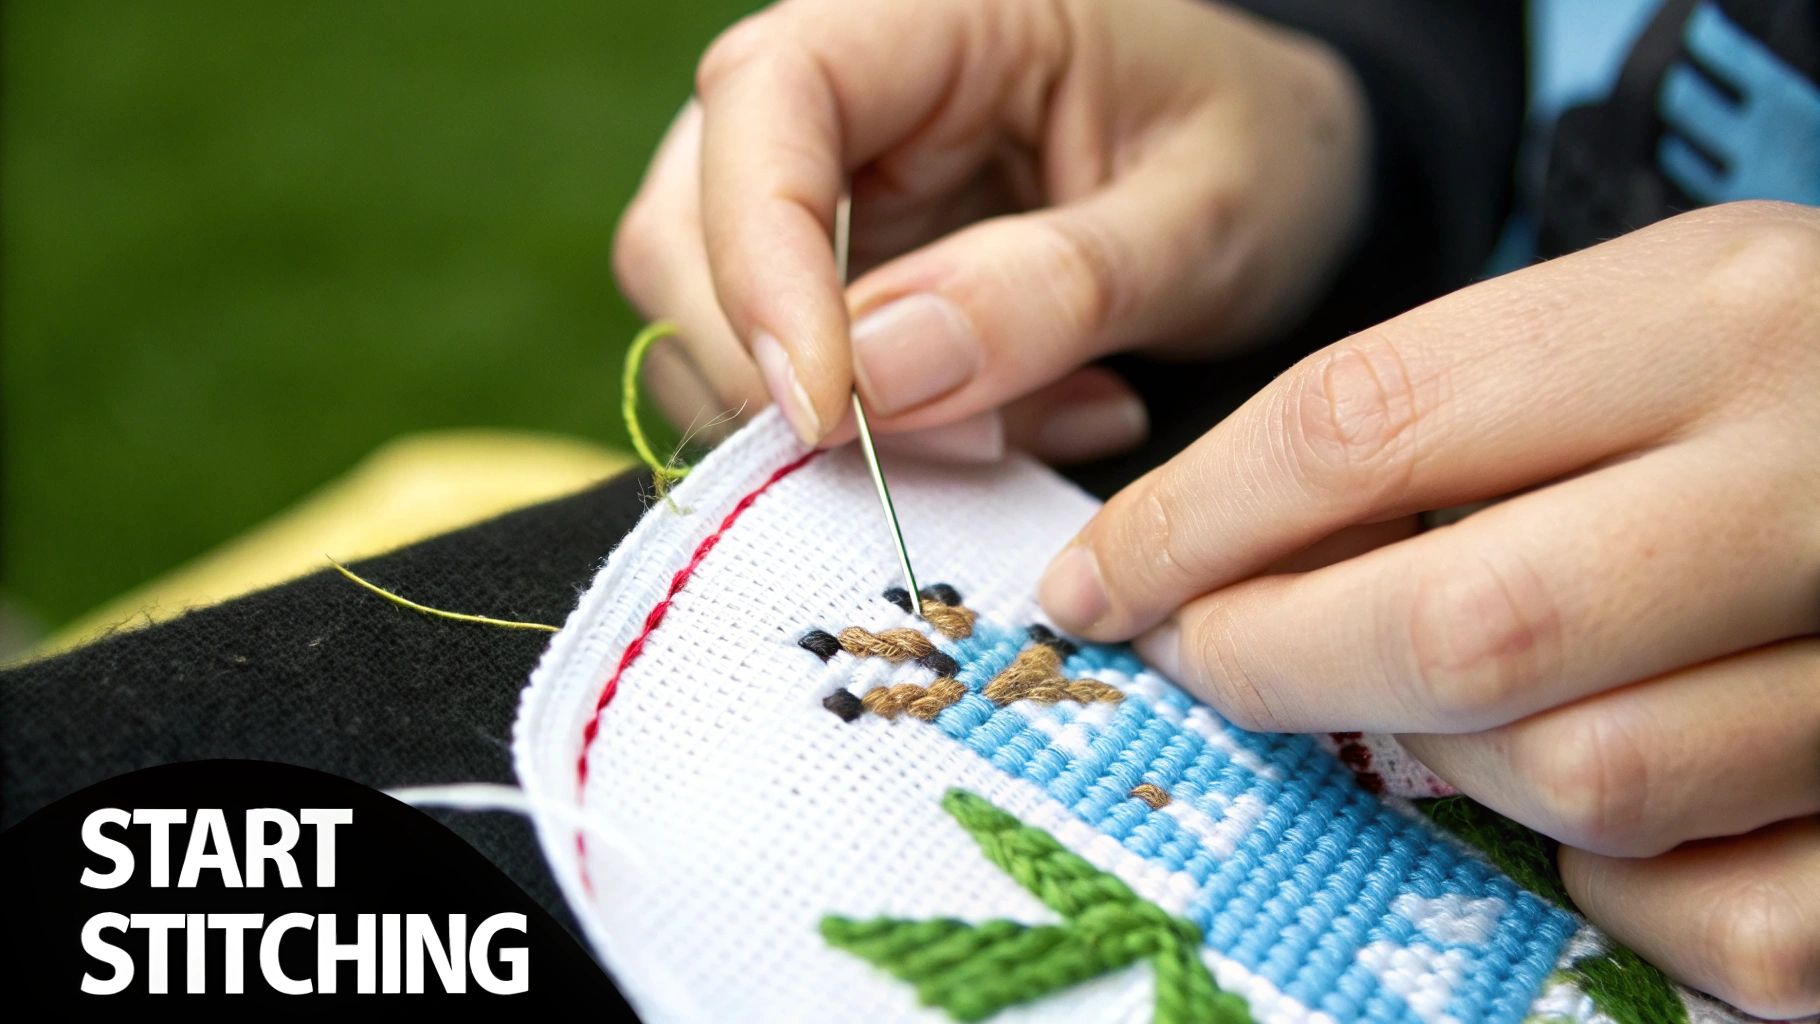
Once you’ve confirmed everything is there, you're officially ready. You won’t get halfway through a section only to discover you're missing a crucial color. Now, you can confidently thread that first needle and watch your photo start to reappear in beautiful, textured detail.
Pro Tips for Stitching Photo-Realistic Patterns
Alright, you've got your custom kit, and the pattern is staring back at you. It's go-time! Diving into a big, detailed piece converted from a photograph can feel a little daunting, but trust me, a few simple strategies will make the entire experience a joy. This is where your skill as a stitcher really brings the image to life.
The first thing you need to figure out is your plan of attack. When it comes to complex designs, stitchers usually fall into one of two camps: the 'parking' method or the 'cross-country' style. Your choice really just depends on what feels right for you and your stitching rhythm.
Choosing Your Stitching Strategy
Most of us start out with cross-country stitching because it just makes sense. You pick a color, stitch all of its spots within a certain area, and then move on to the next color. It’s incredibly satisfying to see big chunks of your picture fill in, and it works great for designs with large blocks of solid color.
But for photo-realistic patterns with a zillion different shades? The parking method is a total game-changer. Here, you work stitch by stitch across a row or within a small square. After making a stitch, you bring your threaded needle up in the next spot that same color appears and just "park" it there for later. This trick is a lifesaver for managing confetti stitches and practically eliminates the need to count huge gaps between stitches.
Confetti stitches are those single, lonely stitches of color sprinkled all over a pattern. They're a classic feature of a custom cross stitch pattern from photo, and while they can be a headache, the parking method makes them feel systematic and much less chaotic.
Mastering Your Materials and Technique
Let's talk thread management. Juggling dozens of colors can get messy fast. My best advice? Ditch the skeins and wind your floss onto bobbins—plastic or cardboard, your choice. Make sure to label every single one with its DMC number and the symbol from your pattern chart. It’s a bit of prep work upfront, but it saves so much time and frustration later.
Next up, and this is non-negotiable for a big project: grid your fabric. You can use a water-soluble fabric pen or buy pre-gridded Aida to mark out a 10x10 stitch grid. This grid is your map, corresponding directly to the bold lines on your pattern. It makes tracking your position a breeze and drastically reduces the chance of a miscounting disaster.
Finally, keep an eye on your tension. You want each stitch to lie smoothly on the fabric without being so tight that it puckers the Aida. When your tension is even and consistent, you get that gorgeous, professional finish that really lets the details of the original photo shine.
Once you’ve placed that final stitch, it's time to show off your creation! For some great ideas on how to frame and display your work, check out our guide to cross stitch finishing techniques.
Common Questions About Turning a Photo into a Cross-Stitch Pattern
When you’re turning a cherished photo into a cross-stitch pattern, a few questions always seem to pop up. It's totally normal. After all, you want your finished project to be something you're proud to display. Let's walk through some of the most common queries I hear from fellow stitchers.
A big one is whether any photo will work. Technically, you can upload almost any digital picture, but the final result is only as good as your starting image. My best advice? Start with a high-resolution photo. Good lighting, clear focus, and decent contrast make all the difference—those are the details that translate beautifully into thread.
Avoid blurry or dark photos, especially those with busy, chaotic backgrounds. They just don't chart well. I've found that close-up portraits of people or pets almost always produce a better pattern than sprawling landscapes or large group shots. Always, always use the preview tool to see how your photo looks as a pattern before you commit.
How Many Colors Do I Really Need?
The right number of colors really hinges on the style you're going for.
If you want something a bit more stylized or artistic, sticking to 20-30 colors can look fantastic. It's also a great choice for beginners because you won't be changing your thread every five stitches.
For a photorealistic portrait packed with detail, you’ll want to aim higher, probably in the 40-60 color range. Most pattern generators will give you a default suggestion, but don't be afraid to tweak it. If the digital mock-up looks a little fuzzy or the colors feel muddy, nudging the color count up can often sharpen the whole image.
Just keep in mind that more colors mean a more complex project and a higher cost for all that floss. It's a balancing act between the detail you crave and the stitching experience you want.
What's the Best Fabric Count?
For a pattern with lots of fine detail, a higher fabric count is your best friend. I often recommend 18-count Aida; it's a popular sweet spot. You get more stitches per inch compared to 14-count, which gives your final piece a smoother, less "pixelated" appearance.
Are you a seasoned stitcher who loves a challenge? You could go even further with a 22-count Hardanger or a 28-count linen for maximum definition.
On the other hand, if you're new to the craft or find smaller stitches tough on your eyes, there's absolutely nothing wrong with 14-count Aida. It’s much easier to work with and still yields a beautiful result—your finished project will just be a little larger.
Ready to turn your favorite photo into a work of art? At Cross Stitched, we make it simple. Upload your image today and we'll send you a complete, high-quality kit with everything you need to start stitching your memories. Create your custom kit now!


