
Here's the simple truth: Mill Hill cross stitch kits are all-in-one crafting packages that bring together traditional cross stitch and the shimmering texture of beadwork. I like to think of them as miniature art projects in a box, perfectly designed for creating small, dimensional treasures like ornaments, pins, and magnets.
What Makes Mill Hill Kits So Special

If you’ve ever seen a piece of needlework that seems to pop with life and catch the light just right, you've probably witnessed the magic of a Mill Hill design. What sets these kits apart from standard cross stitch is that they don't just rely on thread to build an image—they create it with layers of gorgeous texture. The real secret is in their signature mix of materials.
Instead of fabric, most Mill Hill kits come with perforated paper. It’s a sturdy, gridded canvas that provides a solid foundation for both your stitches and the beads. This clever choice means your finished piece holds its shape perfectly without a hoop or frame, making it ideal for standalone objects you can actually use.
A Legacy of Beaded Beauty
The story of Mill Hill is built on this fantastic combination of materials. The brand first caught the crafting world's attention back in 1989 with its bead embroidery series, which became an instant hit. By 1991, Mill Hill had already launched at least four different series of these kits, marking a 100% increase in their product lines in just two years. Their business model was pure genius: by offering free patterns, they fueled sales of their own perforated paper and signature glass beads, building a devoted community of stitchers along the way. You can discover more insights about Mill Hill's growth and impact on the crafting world to see how they became such a beloved name.
At their core, Mill Hill kits are all about delivering a complete, high-quality experience. They give stitchers of any skill level the confidence to create a polished, finished item without the headache of tracking down all the individual supplies.
More Than Just a Pattern
The real charm of a Mill Hill kit goes beyond its unique materials. It’s the all-in-one convenience. Everything you need is right there in the package, which makes them a wonderful starting point for anyone curious about adding beads to their needlework. This guided approach practically guarantees a beautiful result.
Here are a few key things that really make these kits shine:
- Dimensional Art: The mix of floss, beads, and sometimes little charms creates a fantastic 3D effect that makes the final piece stand out.
- Quick and Rewarding: Most designs are small enough to finish in a weekend, giving you that great feeling of accomplishment without a huge time commitment.
- Functional Creations: These aren't just meant to be framed. The projects are designed to become ornaments, magnets, brooches, or lovely gift tags.
In the end, these kits are the perfect gateway into the delightful world where cross stitch and beading come together. They give you the structure and supplies you need to start creating beautiful, high-quality pieces right away.
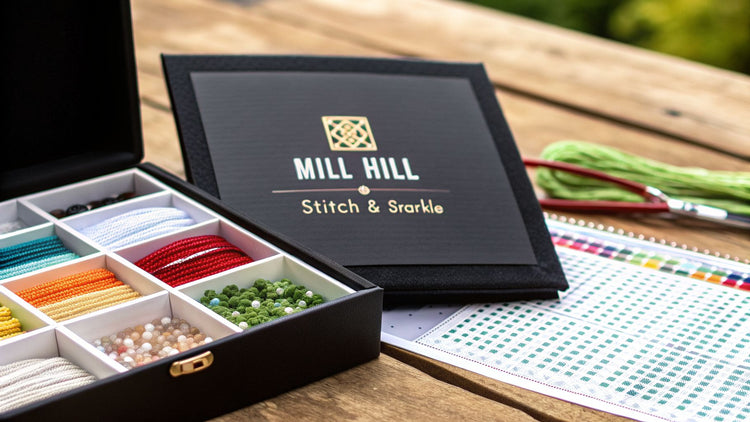
What’s Hiding Inside Your Mill Hill Kit?
Opening a new Mill Hill kit feels a bit like Christmas morning. It's this perfectly curated little package, a treasure box with everything you need to create something truly special. For stitchers of all stripes, from total beginners to seasoned pros, this all-in-one approach is a huge part of the appeal.
You get to skip the scavenger hunt of tracking down the exact right beads, threads, and fabric. Mill Hill has already done the heavy lifting, putting together a complete crafting experience where every single piece has its place.
Let's unpack what you'll find.
The Foundation: Perforated Paper
The first thing that usually stands out is the perforated paper. This isn't the soft Aida or linen you might be used to. Instead, you get a sheet of sturdy, 14-count paper with a grid of pre-punched holes. It’s a totally different stitching experience, and it's brilliant for these projects.
Why paper? It's the secret sauce for a few reasons:
- It’s got backbone. The paper is firm enough to support the weight of all those glass beads without ever sagging or warping.
- Ditch the hoop. Because it’s so rigid, you don’t need to wrestle with an embroidery hoop. Just hold it in your hand and stitch.
- Perfect for finishing. It holds its shape beautifully, making it a dream to trim down for ornaments, magnets, or brooches.
This unique material is really the skeleton of every Mill Hill design, giving it the structure it needs to shine.
The Sparkle: Mill Hill Glass Beads
Next up are the stars of the show: the Mill Hill Glass Beads. These aren't your average, run-of-the-mill craft beads. We're talking high-quality glass, celebrated for their uniform size, vibrant colors, and the gorgeous way they catch the light. Your kit will have every color and style you need, all neatly packaged and labeled.
You'll quickly notice a few different types, each adding its own unique texture:
- Seed Beads: The classic, small, rounded beads perfect for creating fine details.
- Antique Beads: These have a slightly rustic, aged appearance that adds a lovely depth.
- Frosted Beads: With a matte finish, they provide a soft, almost ethereal shimmer.
Honestly, the beads are what elevate a Mill Hill project from a simple cross stitch to a dimensional piece of art.
The real magic of a Mill Hill kit is how these different materials—the sturdy paper, the vibrant floss, and the glistening beads—work together. Each element supports the others to create a finished product that is greater than the sum of its parts.
The Colors: DMC Floss and Needles
Of course, you can't have cross stitch without thread. Mill Hill kits come stocked with pre-sorted DMC cotton floss, which is the gold standard for a reason—the quality and color consistency are unmatched. The floss is already organized for you, so you can just grab the color you need without any fuss.
The kit also thoughtfully includes two different needles. You'll typically find a standard cross stitch needle for your thread and a much finer beading needle specifically designed to slip through the tiny holes in the beads. Having the right tool for the job makes all the difference.
The Map: Your Chart and Instructions
Now for the most critical piece of paper in the bag: the chart. This is your roadmap. It uses a system of symbols to show you exactly where to place every single cross stitch and every single bead. The chart comes with a key that links each symbol to a specific DMC floss color or Mill Hill bead number, so you're never left guessing.
If you're new to this kind of stitching, we've put together a handy guide on getting started with beginning cross stitch kits that can help you get your bearings.
And for the final flourish, many kits include a special little accent called a Mill Hill Treasure. This might be a tiny ceramic button, a little metal charm, or some other unique bauble that adds that perfect finishing touch and a pop of personality.
Mill Hill Kit Components at a Glance
To give you a clearer picture, here’s a quick breakdown of everything you'll find inside and why it's there.
| Component | Material | Primary Function | Why It's Included |
|---|---|---|---|
| Perforated Paper | 14-Count Paper | The stitching surface or "fabric" | Provides a rigid, no-hoop-needed foundation that supports bead weight. |
| Mill Hill Beads | Glass | Embellishment and texture | Adds sparkle, dimension, and intricate detail to the design. |
| DMC Floss | 6-Strand Cotton | The thread for cross stitching | High-quality, colorfast thread for creating the base design. |
| Needles | Metal | Stitching and beading tools | Includes a cross stitch needle for floss and a finer beading needle for beads. |
| Chart & Key | Paper | The pattern and instructions | Your visual guide showing where every stitch and bead goes. |
| Mill Hill Treasure | Varies (Ceramic, Metal) | A final decorative accent | A unique charm or button that adds a special finishing touch. |
Each of these components is chosen with care to ensure your final piece is not only beautiful but also a joy to create from start to finish.
Mastering Beading and Stitching Techniques
This is where the magic really happens. At the heart of every Mill Hill kit is a beautiful partnership between thread and bead, transforming a flat design into a sparkling, dimensional piece of art. While you'll use basic cross stitch for some parts, the real showstopper is attaching the beads—a technique that's surprisingly simple and incredibly rewarding.
The process is a satisfying layering of materials. You start with the paper, add the foundation of floss, and then bring it all to life with the dazzling beads.

This visual really captures how each layer builds on the last, creating that signature texture Mill Hill is so famous for.
Getting this right isn’t about learning a dozen complex stitches. It’s all about precision and consistency. The goal is simple: make each bead sit neatly and securely on the paper, creating a uniform, shimmering surface. And trust me, it's much easier than it sounds.
Decoding the Mill Hill Chart
Before you even think about threading your needle, your first job is to get friendly with the chart. Think of it as your treasure map, with symbols guiding you to every single stitch and bead. The chart key is your essential decoder ring.
- Floss Symbols: You’ll see standard cross stitch symbols (like squares, circles, or triangles) that correspond to a specific DMC floss color. These are for the foundation of your design, which you’ll do in full cross stitches.
- Bead Symbols: The chart will also show different symbols that represent the Mill Hill beads. The key will tell you the bead number and often its color name. Pay close attention here, as this tells you exactly where to add that pop of sparkle.
The chart is designed to be clear, so you’ll always know whether you should be reaching for floss or a container of beads. A quick glance at the key is all it takes to keep you on the right path.
The Half Cross Stitch for Beading
The go-to technique for attaching beads in a Mill Hill kit is the half cross stitch. It's elegant, it's efficient, and it makes sure your beads lie flat and face forward. If you think of a full cross stitch as an "X," the bead stitch is just the first diagonal leg of that "X"—a simple "/".
Here’s how you do it, step-by-step:
- Thread Your Needle: Use two strands of the floss color shown on the chart for the bead you're about to attach.
- Come Up from the Back: Bring your needle up through the bottom-left hole of the square on your perforated paper.
- Add the Bead: Slide one bead right onto your needle.
- Complete the Stitch: Take your needle down through the top-right hole of that same square.
- Secure and Repeat: Gently pull the thread taut. That's it! The bead is now anchored with a neat diagonal stitch.
This single, simple motion is what you'll use for all the beading in these kits. After you've done it a handful of times, you'll fall into a comfortable rhythm. For anyone wanting a broader look at different stitches, this printable embroidery stitch guide is a fantastic resource for general needlework techniques.
Tips for Perfect Tension and Flow
The secret to beadwork that looks truly professional lies in your thread tension. It's a bit of a delicate balance. If your thread is too loose, the beads will look saggy and floppy. But pull too tight, and you risk warping the paper or making the beads sit at weird angles.
You're aiming for a "Goldilocks" tension—just right. The thread should be snug enough to hold the bead securely against the paper without distorting it. The bead should sit flat, not get sucked down into the hole.
To keep your project looking clean and organized, try to stitch with a consistent flow. Many of us find it easiest to work in rows, finishing all the beading for one color in a section before moving on to the next. This method also helps prevent long, messy thread carries on the back of your work.
Pro-Tips for Flawless Beading
- Use a Beading Mat: A small piece of felt or a proper beading mat is a lifesaver. It’ll stop those tiny glass beads from rolling all over your table and onto the floor.
- Sort Your Beads First: Before you start, pour the beads for your current section into a small tray or organizer. It saves you from constantly having to fish through the little packets.
- Wax Your Thread: Running your floss through a bit of beeswax or thread conditioner can make a world of difference. It helps prevent tangles and makes the thread glide through the bead holes much more smoothly.
- Check Bead Direction: As you work, make sure all your half stitches—and therefore your beads—are angled in the same direction (for example, always bottom-left to top-right). This uniformity is what gives the final piece a polished, professional finish.
By focusing on these simple but incredibly effective techniques, you'll unlock the full potential of your Mill Hill cross stitch kits. Every stitch you make and every bead you place is one step closer to a tiny, sparkling masterpiece you can be genuinely proud of.
How to Choose Your Perfect Mill Hill Project
Walking into the world of Mill Hill cross stitch kits feels a bit like walking into a candy store. With hundreds of charming, sparkly designs to choose from, it’s easy to feel both excited and a little overwhelmed. Where do you even start?
The secret to a great experience is picking a project that’s the right fit for you—your skills, your interests, and the time you have. It’s not about just grabbing the prettiest picture off the shelf. It’s about setting yourself up for a fun, rewarding stitch from the very first needle poke.
Match the Kit to Your Skill Level
Mill Hill has something for everyone, whether you’ve never held a needle before or you’re a seasoned stitcher looking for your next masterpiece. The difficulty of a kit really boils down to two things: the total number of beads you’ll be attaching and how complex the chart is.
Beginner-Friendly Kits If you’re just getting your feet wet, start here. These kits are usually smaller, use a simpler range of colors, and won’t overwhelm you with a ton of beads.
- What to Look For: Look for designs specifically marked "beginner" or any kit with a finished size under 3 inches. The classic holiday ornament kits are a fantastic starting point.
- Why They Work: They give you the perfect chance to get the hang of the basic beading stitch without committing to a massive project. Most can be finished in just a few evenings!
Intermediate Kits Feeling comfortable with the basics? It might be time to level up. These kits offer a more engaging challenge that builds on the skills you’ve learned.
- What to Look For: You’ll see larger designs with more color changes and a higher density of beads. The floss work is often more detailed, creating lovely shading effects.
- Why They Work: These projects help you really nail down your tension control and get better at reading more complex charts, all while creating a more substantial piece.
Advanced Kits For the stitcher who loves a good challenge, these kits are true miniature works of art.
- What to Look For: These are the biggest, most intricate scenes Mill Hill offers. Expect a very high bead count and a wide variety of bead types and floss colors.
- Why They Work: These are deeply immersive projects. They demand focus and skill, but the reward is a breathtaking piece you’ll be proud to show off.
Consider the Project Type
Beyond just the difficulty, it helps to think about what you want to do with your finished piece. Mill Hill offers several different lines, each with a specific end-use in mind. This is also a great way to find unique cross-stitching ideas for gifts or home decor.
- Button & Bead Kits: These are probably the most iconic Mill Hill kits. They combine cross stitch, beading, and a cute little ceramic button that adds a final touch of whimsy. They’re almost always designed to be finished as ornaments.
- Beaded Pin Kits: Want to create some wearable art? These tiny kits are designed to be finished as beautiful brooches you can fasten to a jacket, scarf, or bag.
- Framed Kits: These are your more traditional, larger designs intended to be framed and hung on the wall. They often feature beautiful, detailed landscapes or seasonal scenes.
A huge part of Mill Hill's appeal is how accessible they make beaded stitching. Most kits are consistently priced around $10.00, making them an affordable treat. Popular kits like 'Love Stitching' (MH16-3104) and 'Pinecone' often sell for $8.99-$10.00. With finished sizes around 2.5" x 3", they are perfect ornament projects. This smart pricing has led to massive adoption, with craft stores stocking hundreds of different designs. For stitchers, it means a quick and satisfying project—a 3-inch kit can be finished in just 5-10 hours. That’s a huge plus for the 70% of stitchers who are beginners looking for a win. You can explore a wide variety of these affordable options and learn more about Mill Hill's pricing and selection.
Stitch What You Love
At the end of the day, the most important rule is to pick a design that makes you happy. Your motivation to finish a project will always be highest when you’re stitching something you genuinely love looking at.
Mill Hill’s collection is so vast that it covers just about every theme you can imagine. Whether you’re into seasonal holidays, peaceful nature scenes, quirky characters, or elegant floral patterns, there’s a kit out there calling your name. Match a design you adore with the right skill level, and you’re all set for a wonderful, creative experience.
Finishing and Caring For Your Masterpiece

You’ve placed the final bead and tied off the last thread. It feels like you're done, right? But the next part—the finishing—is where the real magic happens. This is how you transform your stitched piece from a project-in-progress into a polished keepsake that’s ready to show off.
Taking the time to finish your work properly is what elevates it. It’s the difference between a pretty craft and a durable, professional-looking memento you can proudly display or give as a gift.
Trimming and Preparing Your Project
First things first, you need to free your design from the larger sheet of perforated paper. The idea is to cut a clean, crisp outline that perfectly frames your stitching.
Grab a small, sharp pair of craft scissors for the best precision. Carefully cut around your design, leaving a border of two empty squares from the outermost stitches and beads. This little margin is crucial; it frames the piece beautifully and prevents you from accidentally snipping a thread.
For designs with lots of curves or tricky corners, take it slow. It helps to turn the paper as you cut, rather than trying to steer the scissors around tight bends. This border gives you a clean edge to glue a backing onto and keeps everything secure.
Once your piece is neatly trimmed, it’s ready for the next step. Whether it’s destined to be an ornament, a magnet, or a pin, adding a backing will give it the structure it needs.
Creating a Polished Backing
A good backing does more than just hide the messy back of your stitching. It adds a bit of sturdiness and gives the whole thing a clean, completed feel. For Mill Hill cross stitch kits, felt is the go-to choice—it's easy to work with and looks great.
Here’s a simple rundown for a perfect finish:
- Trace Your Shape: Lay your trimmed piece on a sheet of felt and trace its outline with a pencil or fabric marker.
- Cut the Backing: Now, cut out the felt shape, but cut just inside the line you drew. This makes the felt slightly smaller than the paper, so you get a clean edge with no fuzzy felt peeking out from the front.
- Attach the Hanger (for Ornaments): If you're making an ornament, create a loop from a piece of ribbon or cord. Use a tiny dab of craft glue to secure the ends to the top back of your perforated paper.
- Glue Everything Together: Run a thin, even layer of craft glue (something like Tacky Glue works perfectly) on the back of the paper. Press the felt backing on, hold it firmly for a minute, and then let it dry completely.
If you’re making a magnet, just stick a self-adhesive magnet onto the felt once it’s dry. For a pin, you can glue a pin-back right onto the felt. Easy!
Long-Term Care and Storage
Your finished Mill Hill piece is a tiny work of art. The glass beads and cotton floss are surprisingly durable, but a little care will keep them looking vibrant and sparkly for years to come.
To keep your creations looking brand new, just remember a few things:
- Cleaning: A soft, dry makeup brush is perfect for gently dusting your pieces. If you need a bit more, a slightly damp cloth can be used to gently dab the surface—never rub!
- Storage: When you pack away your ornaments, wrap them individually in acid-free tissue paper. This stops them from snagging on each other and protects the delicate beads from getting scratched.
- Avoid Direct Sunlight: Just like any textile, the beautiful DMC floss colors can fade over time with too much sun exposure. Try to display your finished pieces somewhere they won't be in a harsh, direct sunbeam all day.
By taking these few simple steps, you can ensure that every one of your beautiful Mill Hill cross stitch kits becomes a treasured keepsake you can enjoy for decades.
Common Questions About Mill Hill Kits
Even after you've got the basics down, a few questions always pop up when you're trying a new kind of craft. It's completely normal! Here are some of the most common things stitchers ask about Mill Hill kits, with straightforward answers to get you stitching confidently.
Think of this as your personal troubleshooting guide—a quick way to solve those little puzzles that can come up so you can get back to the fun part.
Can I Use Fabric Instead of the Perforated Paper?
This is a popular question! While Mill Hill kits are designed specifically for their perforated paper (it gives the finished piece the structure it needs to support the beads), you can adapt a pattern for fabric like Aida. Just know it isn't a simple one-for-one swap and takes a bit of extra work.
The biggest hurdle is the weight of the beads. On soft fabric, those beautiful little gems can cause some serious sagging and puckering. To avoid a droopy finish, you’ll definitely need to use a good, sturdy stabilizer behind your fabric. You'll also have to supply your own Aida or linen, of course.
Honestly, if you're new to Mill Hill or just want the intended result, I highly recommend sticking with the paper that comes in the kit. It's built for the job and ensures your piece will hold its shape perfectly.
What Should I Do If I Run Out of Beads or Floss?
It’s pretty rare to run out of supplies with these kits. Mill Hill is known for being generous, and you'll almost always have extra beads and thread left over once you're done.
But, if you do find yourself coming up short, don't worry. Your best friend is the color key included in your kit. It lists the exact Mill Hill bead number and the corresponding DMC floss color code. With those numbers in hand, you can easily pick up more at your local craft store or from an online supplier.
If you suspect materials were missing right out of the package, it’s worth contacting the shop you bought it from or the official distributor, Wichelt Imports. A good tip is to dump all your beads and threads into a small organizer tray before you start—it helps keep everything accounted for.
Are Mill Hill Kits Good for Complete Beginners?
Absolutely! A lot of Mill Hill cross stitch kits are actually perfect for beginners. They’re a fantastic way to dip your toes into beaded needlework because you get everything you need in one go.
If you're just starting, I'd suggest looking for the smaller designs, like the ones in their holiday ornament series. These kits usually have fewer beads and simpler charts, so they're a great way to learn the techniques without feeling overwhelmed. A little magnet or pin kit is a wonderful first project to build your confidence.
The real beauty for newcomers is that there’s no guesswork. You get the paper, beads, floss, needles, and chart all in one tidy package. All you need to know is the basic cross stitch and a simple beading stitch, both of which are a breeze to pick up.
How Do I Read the Chart for Floss and Beads?
Mill Hill charts look a little busy at first, but they use a clear, symbol-based system that's easy to follow once you get the hang of the legend, or key. The key is basically your map for the entire project.
Every symbol on the grid corresponds to a specific material. For instance:
- A solid black square might stand for DMC 310 floss, which you’d use to make a regular cross stitch.
- A hollow red circle could mean you need Mill Hill bead #02014, which you’d attach with a half cross stitch.
Your workflow is simple: find a symbol on the chart, locate that same symbol in the key, and then grab the thread or bead it tells you to use. The instructions will also spell out which stitch to use for beads versus floss. If you just match the symbols methodically, you'll find the chart is a really effective roadmap.
Ready to create your own masterpiece? At Cross Stitched, we turn your cherished photos into one-of-a-kind cross stitch kits, complete with everything you need to start stitching your memories. Explore our custom kits and best-selling patterns today.


