
Chunky Crochet Ear Warmer Pattern - A Free Crochet Pattern
Skill Level: Easy
Materials:
- Crochet hook J 6.00 and I 5.5 mm - Lion Brand Wool Spunin Maghoney or any bulky yarn (5) - Yarn needle - Scissors - Measuring tapeFinished Sizes:
This pattern is written in 7 standard sizes, but it can easily be customized for any size by subtracting or adding any # of stitches.
Notes:
- Each size is listed after the end of each round in parentheses.
- Written in standard U.S. terms.
Crochet Abbreviations:
- hdc = half double crochet
- hhdc = herringbone half double crochet
- sl st = slip stitch
- ch = chain
- rep = repeat
- st = stitch
Gauge:
12 stitches x 9 rows = 4”. You will need to make sure you have 12 stitches for every 4 inches of the headband for the correct fit. Gauge is essential for proper sizing.
Headband Size Chart & Yardage:
Yardage & size was calculated using a bulky #5 weight yarn. If you use a different weight yarn, the yardage and size will not be the same.
Height | Cir. | Starting Chs | Yardage
- Preemie: 4” x 9.5” - 36 sts - 50 yds
- Baby: 4.5” x 10.5” - 42 sts - 62 yds
- Toddler: 5” x 11.5” - 48 sts - 76 yds
- Child: 5.5” x 12” - 54 sts - 94 yds
- Tween: 6” x 12.5” - 60 sts - 106 yds
- Woman: 6.25” x 13” - 63 sts - 115 yds
- Man: 6.5” x 13.5” - 66 sts - 120 yds
The Crochet Headband Pattern Steps:
Round 1:
With the 6 mm hook ch 36 (42, 48, 54, 60, 63, 66), sl st to first ch forming a circle, making sure not to twist ch.
Round 2:
With the 5.5 mm hook, ch 1, hhdc in every st around, sl st to the top of first hhdc NOT the ch. 36 (42, 48, 54, 60, 63, 66)
Round 3:
Ch 1, hdc in every st around, sl st to the top of first hdc, not the ch 1. 36 (42, 48, 54, 60, 63, 66)
Round 4:
Repeat round 2.
Round 5:
Repeat round 3.
Round 6:
Repeat round 2.
Round 7:
Repeat round 3.
Round 8:
Repeat round 2, fasten off the yarn, leaving a 6-inch tail.
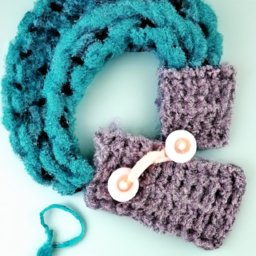
Finishing:
Squeeze the headband together as shown. Using a yarn needle and the yarn tail, guide the yarn through as shown. Repeat this back and forth as needed to secure. Weave in all other loose ends throughout the headband.


