

Welcome to the wonderfully creative and surprisingly calm world of cross-stitch. If you've ever looked at a beautiful piece of handmade decor and thought, "I could never make that," I'm here to tell you that you absolutely can. At its heart, cross-stitch is beautifully simple—you’re just making a series of 'X' stitches on gridded fabric to create a picture.
Why You Should Learn to Cross Stitch
Cross-stitch is so much more than just a craft. For a lot of people, it’s a mindful escape and a really satisfying way to create personal art. The rhythmic, repetitive motion of stitching can be incredibly relaxing, making it the perfect way to de-stress after a long day.
It's also a wonderfully accessible and affordable hobby. You don't need a huge, expensive pile of gear to get started, and the basic skills are easy to pick up and build on.
The real magic of cross-stitch is just how versatile it is. Once you get the hang of it, you can make almost anything you can dream up. Think modern wall art, custom pillows, or truly thoughtful, one-of-a-kind gifts for your friends and family. This guide is your complete roadmap, designed to get you stitching with confidence right from the start.
What We’ll Cover
I’ll walk you through everything you need to know, so you feel prepared and excited to begin. Here's a peek at what's ahead:
- Your Essential Starter Kit: We'll go over the handful of tools you actually need—no fluff, just the essentials to get you started.
- The Basic Stitches: Simple, clear instructions to help you make that first perfect "X" and secure your threads like a seasoned stitcher.
- How to Read a Pattern: I'll demystify those charts and symbols so you can follow any design you fall in love with.
- Finishing Your Project Like a Pro: We'll cover the final steps to wash, press, and frame your piece so it looks polished and ready to show off.
It’s not just you—this craft is making a huge comeback. The global cross-stitch market was valued at around USD 0.15 billion in 2024 and is expected to hit USD 0.22 billion by 2033. It seems a lot of us are rediscovering the joy of DIY and personalizing our homes. You can dig into more data on the cross-stitch market growth if you're curious.
By the time you're done here, you’ll have everything you need to finish your very first project and proudly display your work. Let’s get this creative journey started.
Gathering Your Essential Cross Stitch Tools
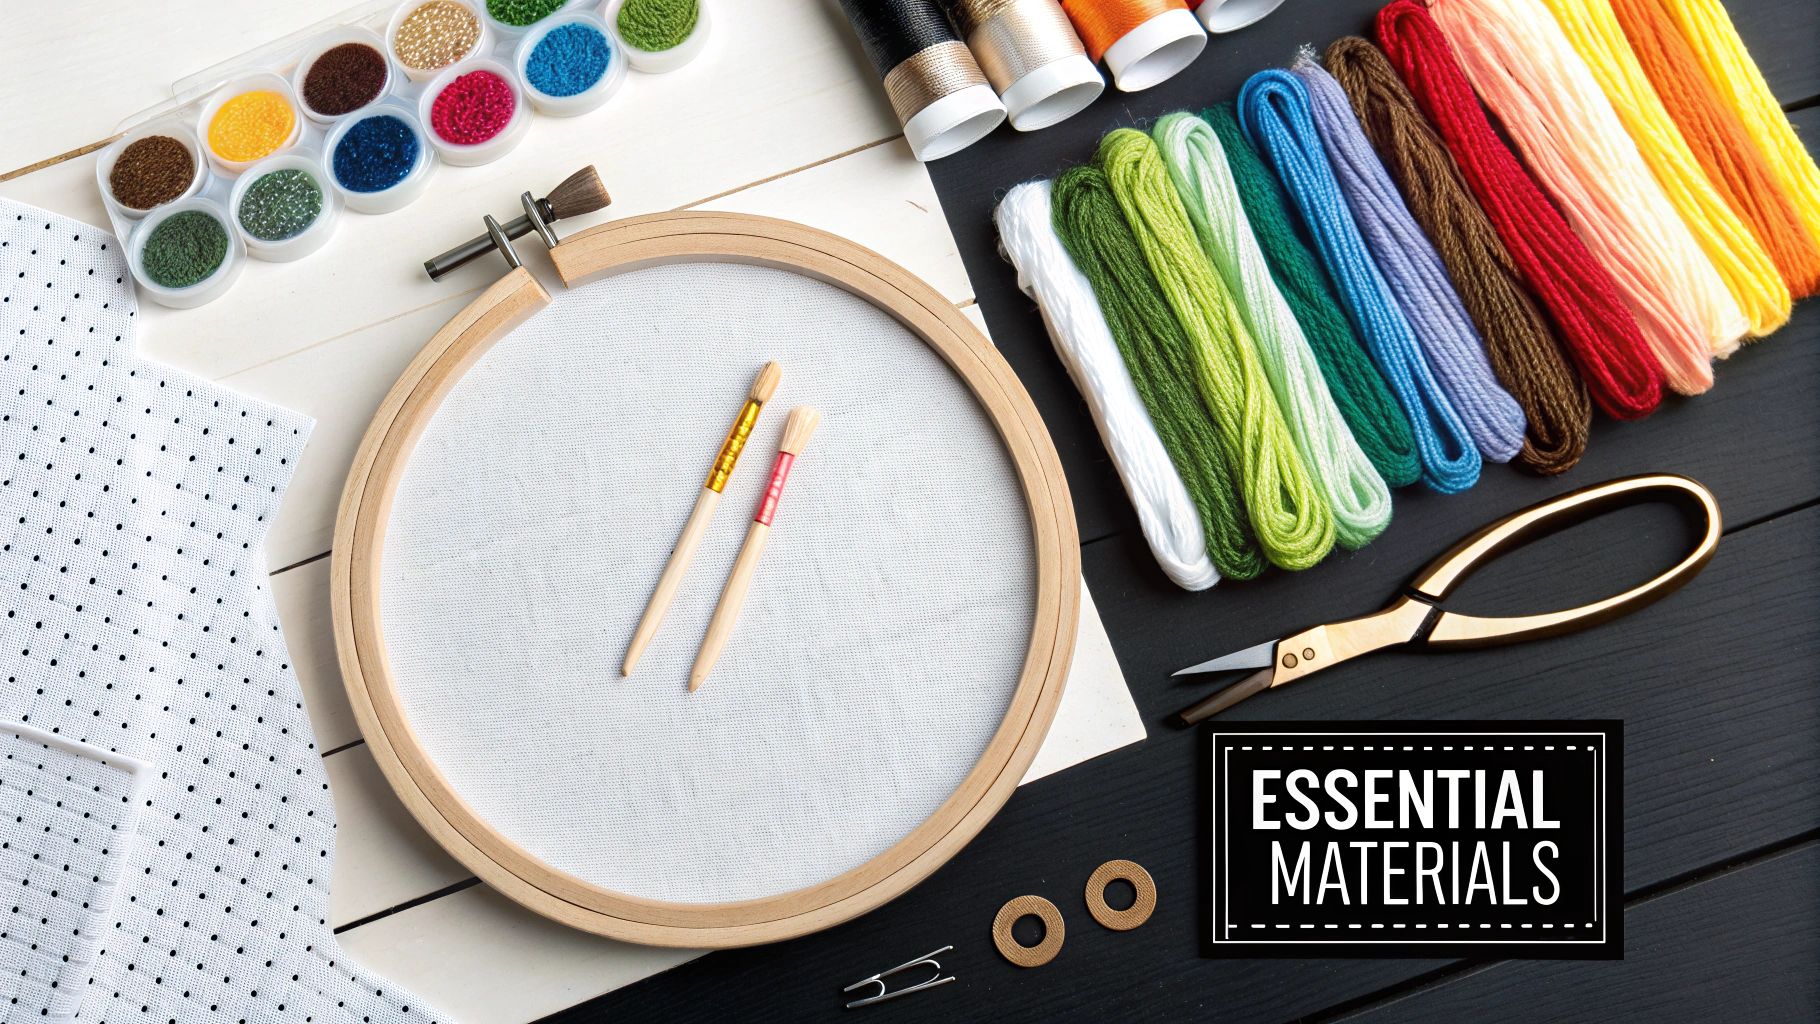
When you first walk into a craft store, the sheer volume of supplies can feel overwhelming. But here's the good news: you don't need a whole cart full of gear to start cross-stitching. You only need a few key items to get your first project off the ground.
While an all-in-one kit is a fantastic, no-fuss way to dive in, picking out your own supplies gives you a ton of creative freedom from the very beginning. Let's walk through exactly what you need to start with confidence.
The Foundation: Your Fabric
The go-to fabric for anyone new to cross-stitch is Aida cloth. This cotton fabric is cleverly woven to create a perfect grid of squares with easy-to-see holes, which takes all the guesswork out of making neat, uniform stitches.
You'll see Aida labeled with different "counts," like 14-count or 18-count. This number just tells you how many squares fit into one inch of fabric. I always recommend newcomers start with 14-count Aida; the squares are big enough to work with comfortably, which really helps you get the hang of the stitching motion.
The Color and Tools: Floss and Needles
This is the fun part—the color! Embroidery floss brings your design to life. It's usually sold in a "skein" which is made up of six individual strands of thread twisted together. Most patterns will specify using just two of these strands at a time, so your first step will often be to gently separate them.
For a high-quality finish, you might explore different threads like DMC Pearl Cotton, which can add a lovely sheen and texture to your work.
As for needles, you’ll want to grab tapestry needles. They have a blunt tip that won't split the fabric fibers and a large eye that makes threading your floss so much easier. For that 14-count Aida we talked about, a size 24 tapestry needle is your perfect match.
My Favorite Tip: Get a needle minder! It's a small magnetic pin that holds onto your needle when you take a break. It's a lifesaver for preventing lost needles, especially if you have curious pets or little ones around.
The Support Crew: Hoops and Scissors
To make stitching easier and more precise, you'll need an embroidery hoop. This simple tool holds your fabric tight and smooth, which is the key to creating stitches with nice, even tension. A 5-inch or 6-inch hoop is a great, manageable size for most beginner projects.
And finally, a small, sharp pair of scissors is a must-have for snipping floss cleanly. Embroidery scissors are perfect because their tiny, pointed tips let you trim the threads very close to the fabric, leaving the back of your work looking tidy.
For a bit more on these core components, you can find a detailed breakdown in our guide to cross stitch basics.
Beginner's Cross Stitch Shopping List
To make it even easier, here’s a quick-glance table of everything we just covered. Think of this as your first-trip-to-the-craft-store checklist.
| Supply | What It Is | Beginner's Tip |
|---|---|---|
| Aida Cloth | A woven cotton fabric with a natural grid for easy stitching. | Start with 14-count Aida. The larger squares are much easier to see and work with. |
| Embroidery Floss | The colored thread used to create the design. Comes in 6-strand skeins. | Your pattern will tell you which colors you need. You'll usually only use 2 strands at a time. |
| Tapestry Needles | Needles with a blunt tip and a large eye, designed for cross-stitch. | A size 24 needle is the perfect companion for 14-count Aida fabric. |
| Embroidery Hoop | A ring (often wood or plastic) that holds your fabric taut while you work. | A 5" or 6" hoop is a versatile size that's comfortable to hold for most projects. |
| Embroidery Scissors | Small, sharp scissors for snipping thread cleanly. | The sharp, fine tip allows you to trim threads close to the fabric for a neat finish. |
With these five simple items, you'll have everything you need to start your cross-stitch journey and create something beautiful.
Mastering Your First Stitches
Alright, let's get to the fun part! This is where your supplies—that fresh Aida cloth, those colorful threads—start to become a real piece of art. We’re going to get you stitching, turning that blank canvas into your chosen design, one simple 'X' at a time. I'll show you how to skip the clunky knots and use clean techniques right from the start, so your work looks polished from the very first stitch.
First up, let's prep your thread. Most embroidery floss is made of six individual strands twisted together, but for 14-count Aida, you’ll almost always use just two. Trying to pull them apart can lead to a tangled bird's nest if you're not careful.
The trick is to cut a piece of floss about 18 inches long—roughly from your fingertips to your elbow. Pinch one end and gently pull a single strand straight up and out. It’ll look like it's bunching up, but it will slide right out. Repeat for a second strand, and you're ready to go.
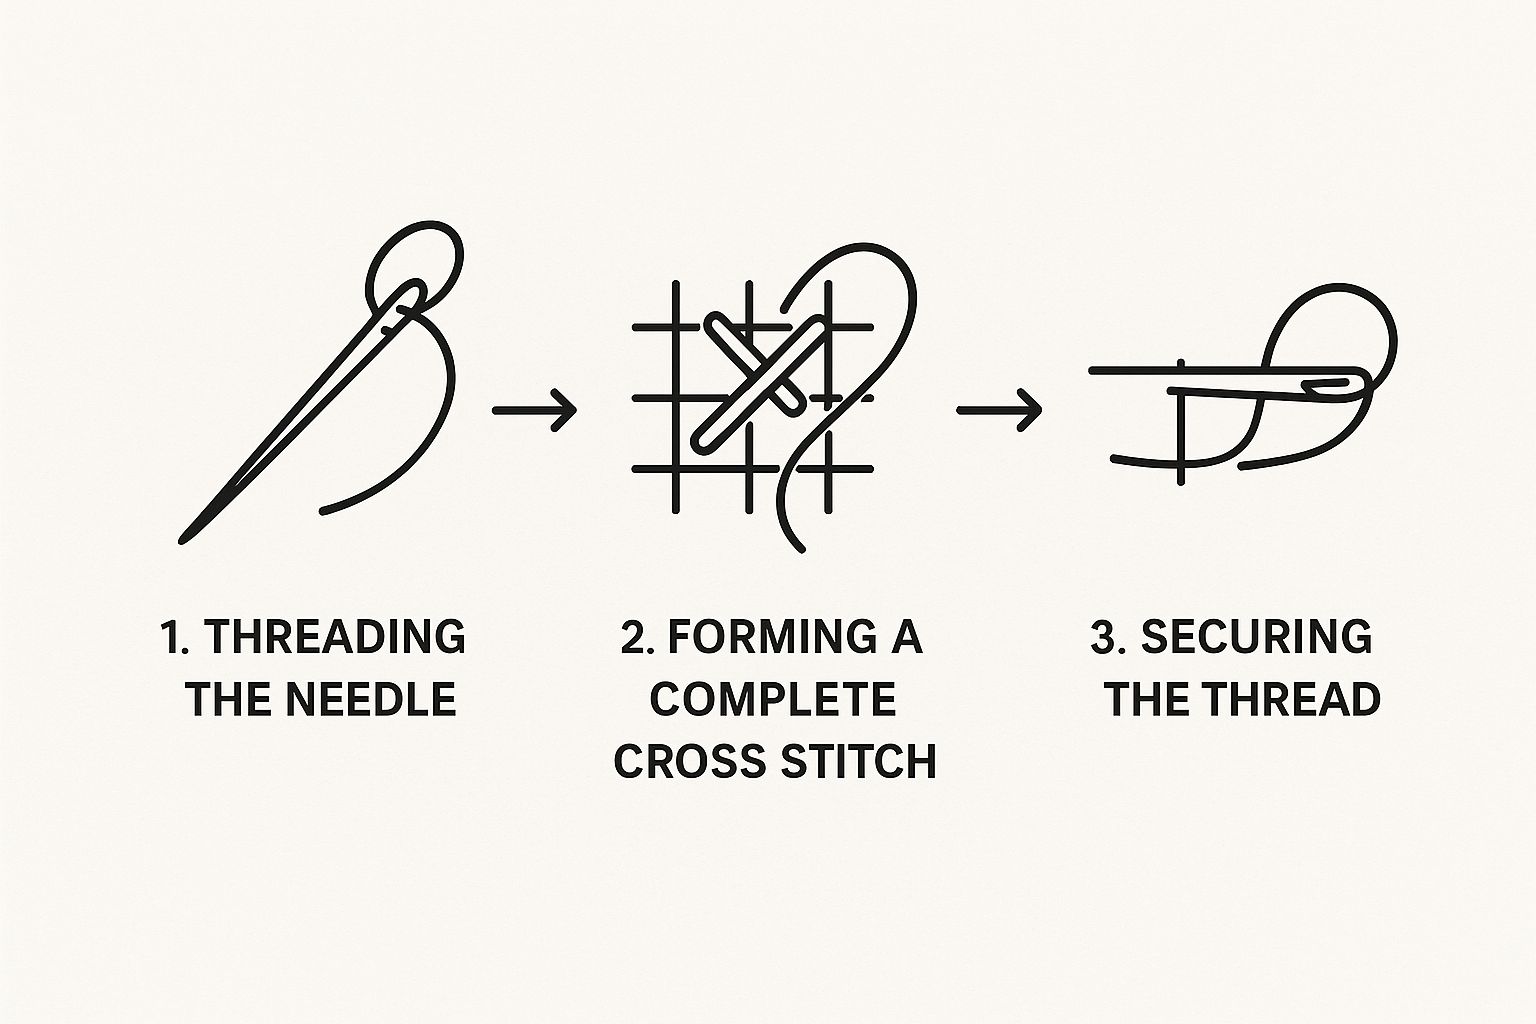
As you can see, the whole process is about creating a clean start and a secure finish. Getting this foundation right is what makes for tidy, long-lasting cross stitch.
Starting Your Thread Without Knots
One of the best habits you can build is starting your thread without a knot. My favorite way to do this is with the loop start method. It's incredibly neat, but keep in mind it only works when you're using an even number of strands (like the two we just prepped).
Here’s how it works:
- Take just one of those 18-inch strands you separated and fold it perfectly in half.
- Thread the looped end (the fold) through the eye of your needle.
- From the back of your fabric, push the needle up through the hole where you want to start your first stitch. Don't pull it all the way through! Leave a little loop of thread hanging on the back.
- Make the first half of your cross stitch on the front. As your needle comes back down, slide it through the loop you left on the back and gently pull it taut.
And that's it! Your thread is now anchored securely, and the back of your work stays perfectly flat. It’s a tiny detail that makes a massive difference in the overall quality of your piece.
The Two Core Stitching Methods
When it comes to actually making the 'X's, there are two main schools of thought. Neither is "better" than the other; they're just different tools for different situations. You'll likely end up using both.
-
The Danish Method: This is my go-to for efficiency. You work a whole row of bottom-half stitches first (they'll look like this: ///), and then you come back along the row, stitching the top half to complete all the X's (making them look like this: XXX). This method is fantastic for large blocks of a single color because it gets you into a rhythm and helps keep your stitches looking remarkably even.
-
The English Method: With this technique, you complete each 'X' fully before moving on to the next square. This is your best friend when dealing with what stitchers call "confetti"—those random, single stitches of color that seem to be scattered all over a pattern. It prevents you from dragging long, messy threads across the back of your fabric.
My advice? Use a hybrid approach. Stick with the Danish method for solid rows and color blocks to speed things up. When you hit a lone confetti stitch, switch over to the English method. Your stitching will be faster, and the back of your project will be so much neater.
Securing Your Thread Neatly
When you're running out of thread or have finished all the stitches for one color, you need to secure the end. Just like when you started, the goal is to avoid knots.
Simply flip your work over to the back. Take your needle and slide it underneath the last three or four stitches you just made. Pull the thread all the way through and then snip off the excess, close to the fabric.
This simple tuck is all you need to keep your work from unraveling. It keeps everything secure without adding any bulk. For a closer look at this and other techniques, you can explore a variety of basic cross stitch stitches in our more detailed guide. Mastering these little finishing touches is what ensures your hard work looks beautiful from the front and is durable enough to last a lifetime.
Making Sense of a Cross Stitch Pattern
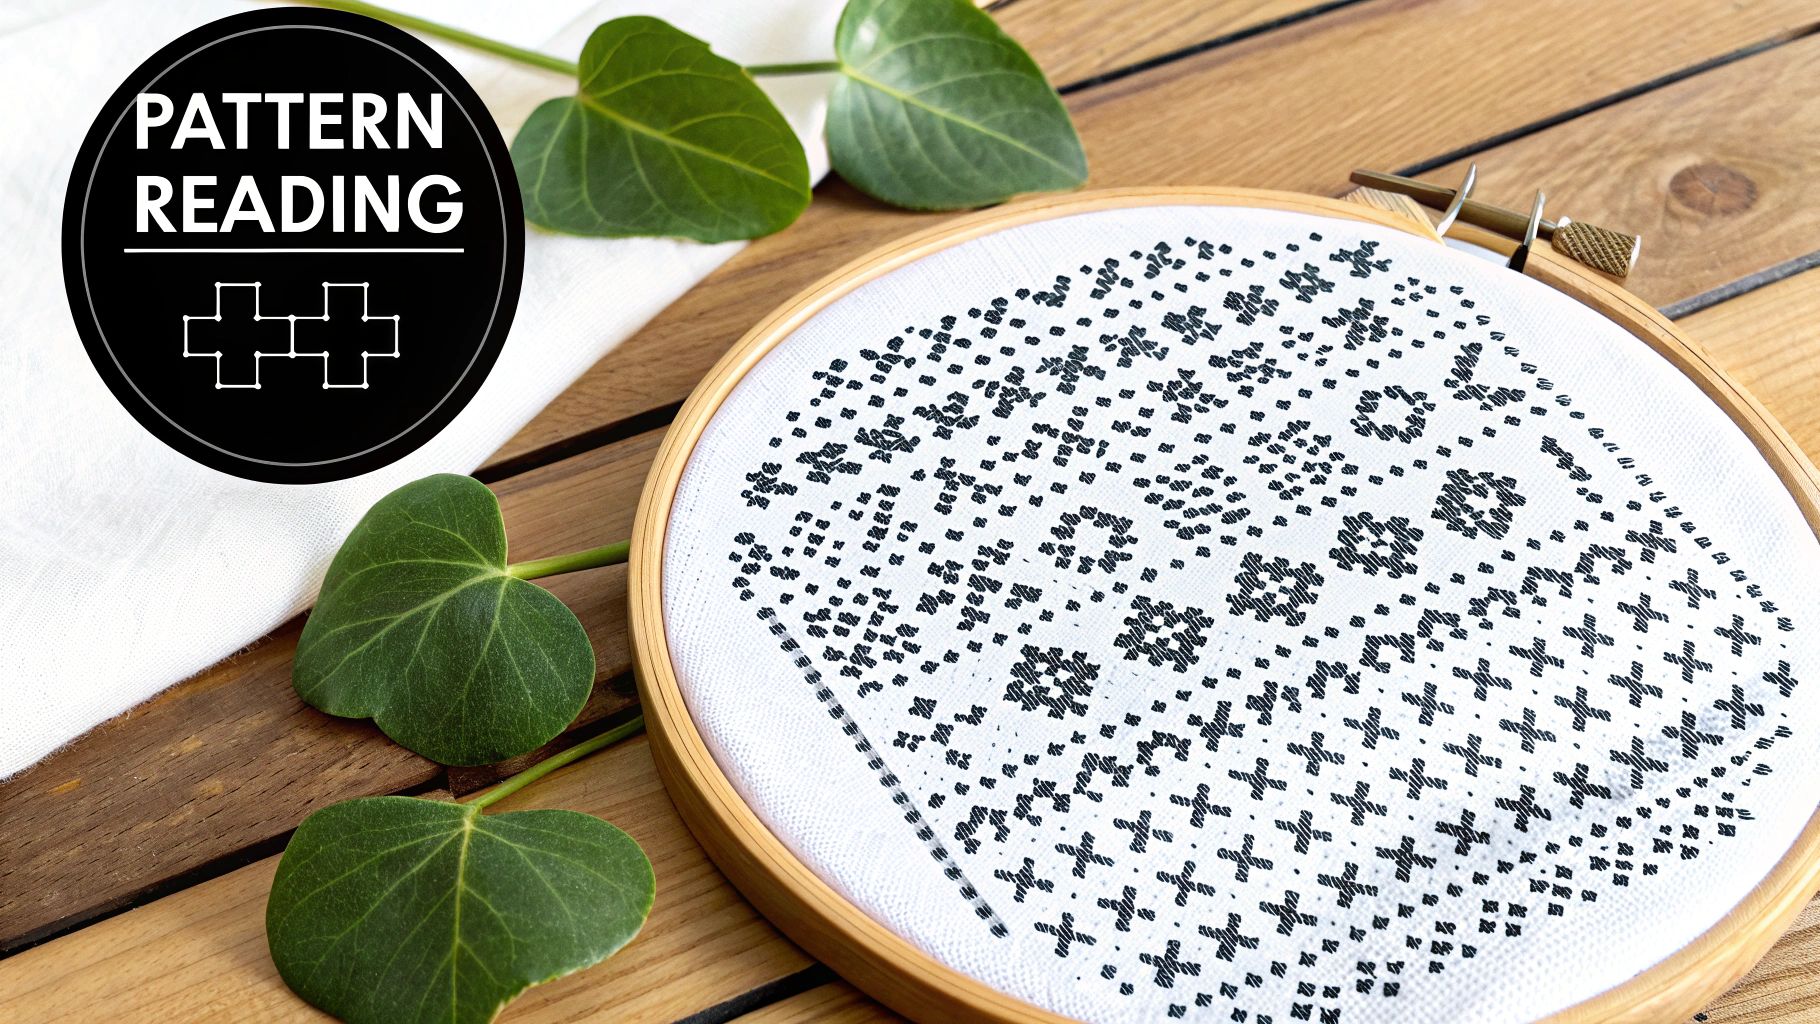
The first time you unfold a new cross stitch pattern, it can look like you’re trying to crack some kind of secret code. You’re staring at this big grid filled with funky symbols, colors, and lines, and it’s easy to feel a little overwhelmed. Don't worry! Every chart follows the same basic logic, and once you get the hang of it, you’ll be reading them like a pro.
Think of the pattern as a perfect, one-to-one map for your needle. Each square on that grid corresponds directly to a single square on your Aida fabric. The symbol sitting inside that square? That's your instruction, telling you exactly which floss color to use for your next 'X' stitch. It’s as simple as that.
Decoding the Chart's Key
Every single pattern worth its salt will have a legend, or a "key." This is your Rosetta Stone. It’s the part of the chart that translates all those abstract symbols into the actual floss colors you'll be working with.
- The Grid: Your whole design lives on a grid. You’ll usually see darker lines every 10 squares, both horizontally and vertically. These are lifesavers for counting and keeping your place. They line up perfectly with the weave of your Aida cloth.
- The Symbols: Each square on the grid contains a symbol. It might be a simple black-and-white icon (like a tiny heart or triangle), a block of color, or a combination of both. Every unique symbol stands for a different color of thread.
- The Legend (Key): Here's where it all clicks into place. The legend lists every symbol from the grid right next to its matching floss color number (like DMC 310) and often the color name ("Black").
My best advice for any new stitcher is to always trust the floss number (e.g., "DMC 742") over the color name. Shades can look different on screen or vary between dye lots, but that number is the designer's precise choice. Sticking to it guarantees your project will look just right.
Finding Your Starting Point
So, where do you begin? The last thing you want is to pour hours into a project only to realize your beautiful design is off-center and about to fall off the edge of the fabric. It happens, and it's heartbreaking.
That’s why finding the center of both your pattern and your fabric is the first real step.
Most charts make it easy by marking the center with arrows or bolded lines along the top and side edges. Follow them to where they would meet in the middle, and that’s your starting point on the pattern.
Now, for your fabric:
- Fold your piece of Aida in half lengthwise. Pinch the crease at the fold to mark it, but don't press a hard line into it.
- Now, fold it the other way (widthwise) and give that crease a little pinch, too.
- The spot where those two soft creases cross is the dead center of your fabric.
I like to pop a pin in that spot or even make a tiny, temporary stitch that I can pull out later. Start your first stitch right there, and you can relax knowing your design will be perfectly framed.
Tracking Your Progress
One of the trickiest parts of starting out is just keeping your place. You look away for a second, and suddenly you have no idea where you were on that sea of symbols. The easiest low-tech solution? Grab a highlighter.
Work from a photocopy of your pattern (never the original!) and simply color in the symbols as you stitch them. It’s immensely satisfying to watch the color fill up the page as your project grows on the fabric. This gives you a crystal-clear visual of what’s done and what’s next. If you're working with a digital pattern, most PDF readers have a highlight tool that works just as well.
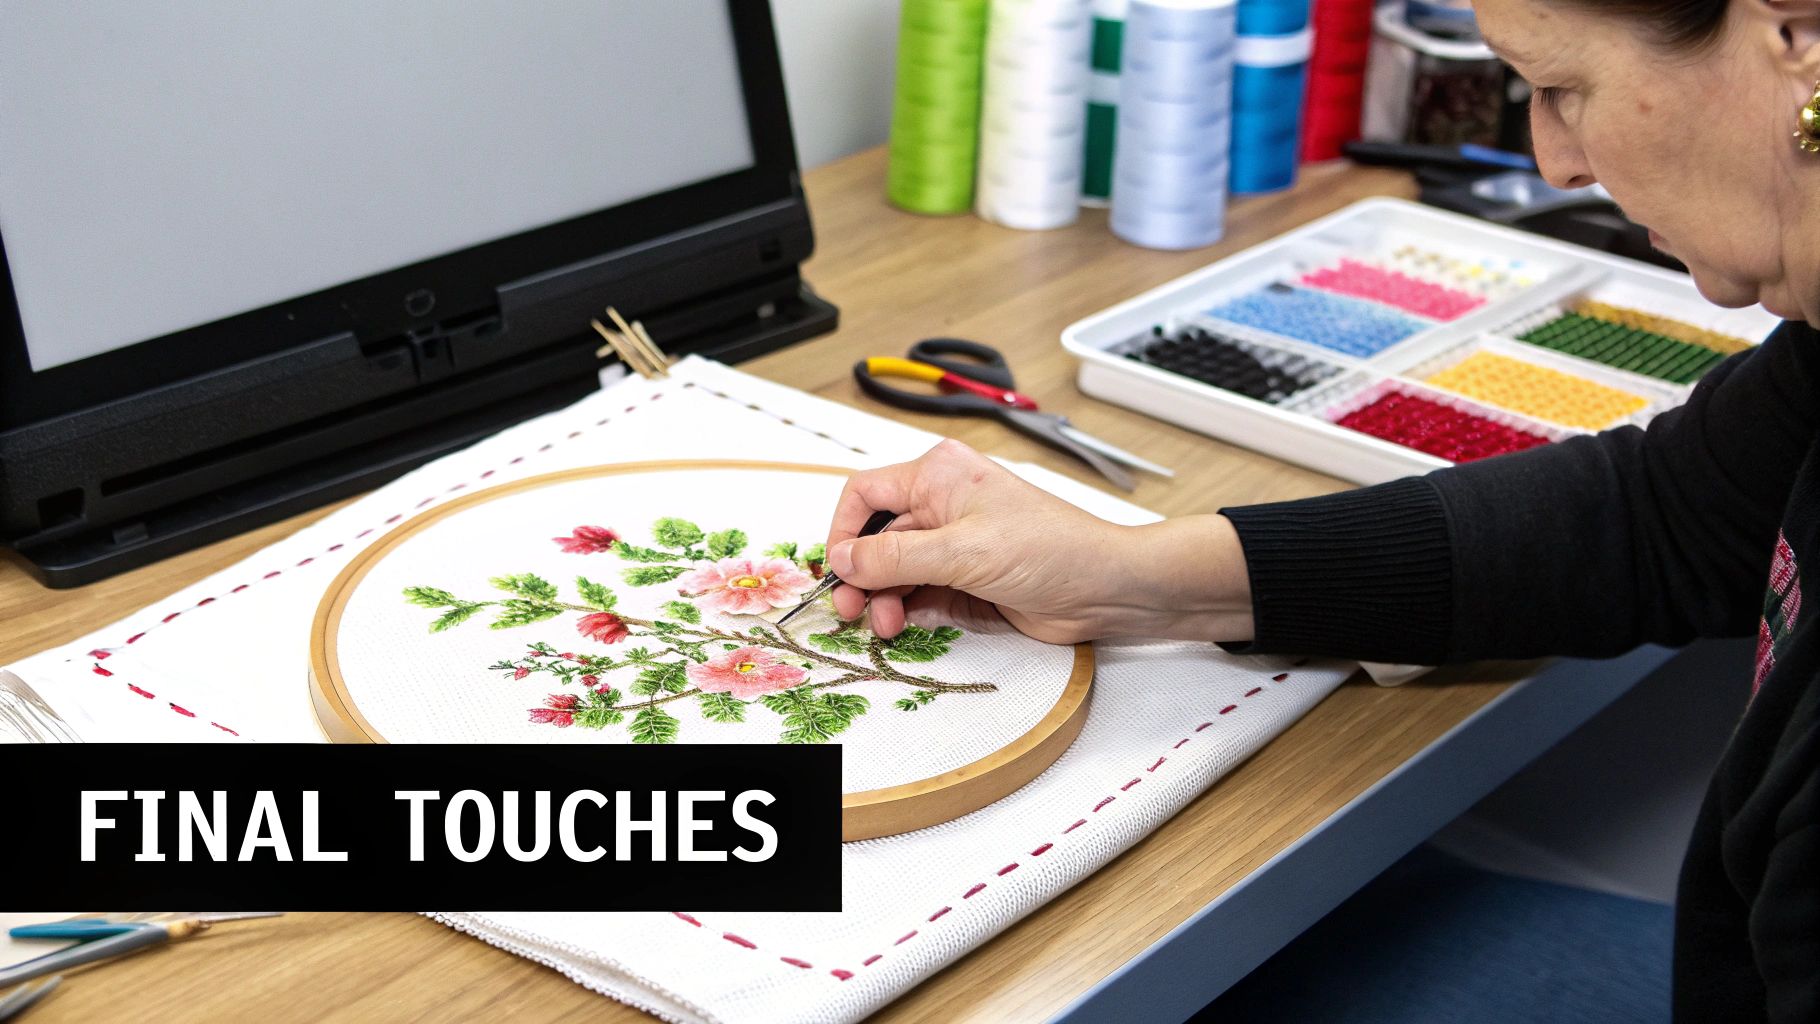
Finishing Your Project for Display
You did it! You’ve placed that very last stitch. There's nothing quite like that feeling, is there? But before you rush to hang it on the wall, a few simple finishing steps will take your work from a finished project to a true piece of art. Trust me, taking a little extra time right now makes a world of difference.
First things first, let's give your piece a gentle bath. No matter how clean you think your hands are, oils and dust inevitably find their way onto the fabric while you're stitching. You'll also likely have some stubborn hoop marks. Fill a clean sink or basin with lukewarm water and just a tiny drop of a mild, clear dish soap. Let your project soak for about 15 minutes, then rinse it under cool, clean water until there are no suds left.
Prepping for Its Debut
After its bath, please don't wring out your fabric! That's the fastest way to distort all those perfect stitches you just made. Instead, lay your damp piece on a clean, thick towel and gently roll it up to squeeze out the excess water.
Now, it's time to iron. The trick here is to place your project face-down on a fresh, fluffy towel. This protects your stitches and keeps them from getting squashed flat. Use a dry iron on a medium heat setting and press the back of the fabric until it’s smooth and completely dry. The towel acts as a cushion, keeping your stitches looking plump and defined.
Displaying Your Work in a Hoop
One of the easiest and most popular ways to show off your new creation is right in the embroidery hoop you might have used to stitch it. It’s a built-in frame that gives your art a charming, modern vibe. This method is perfect for anyone just starting out who wants to learn to cross stitch and get that first piece on the wall fast.
Here’s how I like to frame a project in a hoop:
- Get it centered. Lay your freshly ironed fabric over the inner ring of the hoop. Take a moment to make sure your design is perfectly centered.
- Secure it. Place the outer hoop over the inner one and start tightening the screw. As you tighten, gently pull the fabric taut all the way around. You want it smooth, but not so tight that you warp the stitches.
- Trim the back. Once you’re happy with how it looks, trim the extra Aida cloth, leaving about a one-inch border around the outside of the hoop.
- Tidy up the back. To give it a really clean, professional look, you can add a felt backing. Just cut a circle of felt that’s a little smaller than the inner hoop. I usually run a quick running stitch around the edge of the leftover Aida, pull it tight like a drawstring, and then glue the felt circle over the gathered fabric.
A great finish is what separates a good project from a great one. If you're ready to try something more advanced, like mounting your work in a picture frame or even making a small pillow, you'll find some great ideas in these cross stitch finishing techniques.
This simple process not only protects the back of your stitching but also makes it instantly ready to hang on a wall or give as a beautiful handmade gift.
Common Questions for New Stitchers
As you get comfortable with your new favorite hobby, a few questions are bound to pop into your head. It happens to everyone! Here are some straightforward answers to the little hiccups that almost every beginner runs into.
The biggest fear for anyone just starting to learn to cross stitch is making a mistake. So, what happens if you put a stitch in the wrong spot? First off, don't panic. If you catch it right away, you can usually just use your needle to gently back the stitch out. No big deal.
But what about mistakes you don't notice for a few rows? You've got options. If it’s small and doesn't really bother you, feel free to leave it—it's part of what makes your project handmade and unique! If it’s really noticeable and you want it gone, a seam ripper or the very tip of your embroidery scissors can help you carefully snip the thread from the back and pull it out.
Taming Your Floss and Fabric
Tangled floss is the bane of every stitcher's existence. The best way to avoid a knotty mess is to work with shorter lengths of thread. I find about 18 inches is the sweet spot. Also, when you separate your strands of floss, pull them out one by one. It seems slow, but this one little trick prevents so many headaches.
Another common issue is keeping your fabric clean, especially on a project that might take weeks or even months. To protect the edges and keep grime off, you can wrap the borders with masking tape. Some stitchers also like to baste a scrap piece of fabric over the parts they aren't actively working on.
A question I get constantly is, "Does the back of my work need to be neat?" Honestly? Not really. As long as you're framing it, no one is ever going to see the back. The only time you really need to be mindful of a tidy back is if you're making something like a double-sided ornament or a banner where both sides might be on display.
Why Is Everyone Stitching?
It’s no secret that people are flocking to this hobby, and it’s more than just a fleeting trend. Cross-stitch is a huge part of the global embroidery market, which was valued at an incredible USD 2.57 billion back in 2021 and is still on the rise. North America actually makes up about 34% of that market, which just goes to show how many of us have fallen in love with this craft. If you're curious, you can dig into more details about the global cross-stitch industry's growth and see just how big it is.
And finally, a few quick troubleshooting tips to keep in your back pocket:
- My stitches look warped! This is almost always a tension problem. Try to relax your pull. Your stitches should lie flat against the fabric, not pucker it.
- My fabric is fraying! An easy and effective fix is to run a line of masking tape along the edges. It works like a charm.
- I keep losing my place! I always recommend working from a photocopy of your pattern. That way, you can use a highlighter to mark off the sections you’ve finished without ruining your original chart.
Learning how to handle these little challenges will build your confidence and make your stitching journey a lot more fun and less frustrating.
Ready to turn your favorite photos into timeless art? At Cross Stitched, our custom kits provide everything you need to create a personalized masterpiece. Start your next project today at https://cross-stitched.com.


