
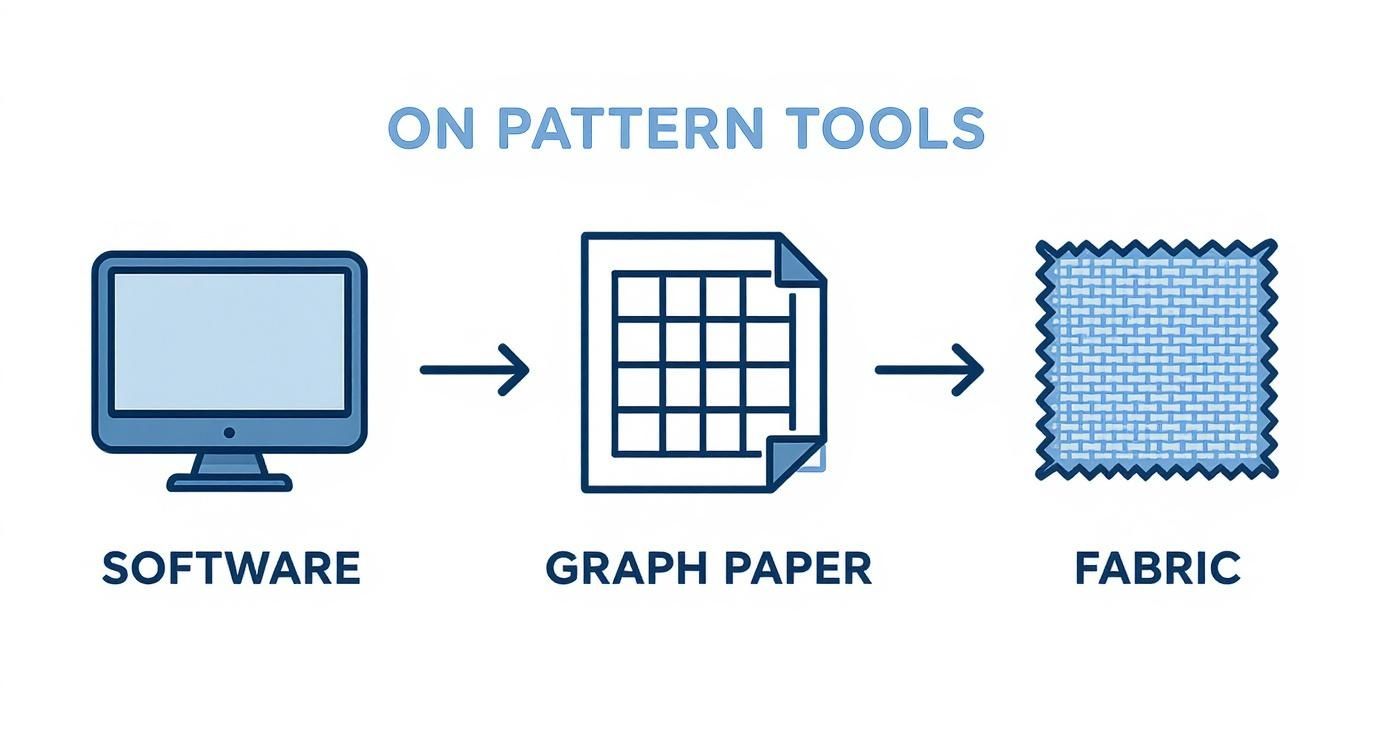
At its heart, creating a cross stitch pattern is all about translating a digital image into a grid. Using either specialized software or good old-fashioned graph paper, you’ll pick a clear picture, simplify its colors, and then map it out so that each little square on the grid becomes a single cross stitch. This is how you can turn pretty much any photo or design into a stitchable work of art.
Your Guide to Designing Custom Cross Stitch
Have you ever looked at a photo and thought, "That would make an amazing cross stitch"? If you've been wanting to move beyond pre-made kits and create something truly personal, you're in the right place. This guide will walk you through the whole process, showing you just how easy it is with today's tools to turn your favorite images into beautiful patterns.

We've come a long way from painstakingly drawing charts by hand. While that method has its charm, modern software has seriously streamlined the process, cutting down pattern creation time by about 50%. This digital shift has opened up a world of creativity for stitchers and contributed to a global cross stitch market valued at USD 0.15 billion in 2024. If you're curious, you can learn more about the growing market for cross stitch patterns and its trends.
From Idea to Stitched Reality
Turning that initial spark of an idea into a finished piece is a rewarding journey with a few key milestones. We'll cover everything you need to know, from choosing the right image to creating a chart you can actually use.
Here’s what we’ll dive into:
- How to choose the perfect image that will translate well into stitches.
- Using simple software to convert your picture into a professional-looking chart.
- The best ways to refine your design by cleaning up colors and tweaking details.
- How to finalize and print a chart you can start stitching from right away.
Think of this as your personal roadmap. By the time we're done, you won't just know the steps; you'll have the confidence to design pieces that truly reflect your style and capture your favorite memories. Let's get started.
So, you have an idea for a cross-stitch pattern. Now what? Before you can bring that vision to life, you'll need the right toolkit. The first big decision is how you're going to create the chart, and you've got a couple of great options, from modern software to the good old-fashioned hands-on approach.
These days, most people lean on dedicated cross-stitch software. These programs are built from the ground up to turn images into stitchable charts, help you manage floss palettes, and spit out a professional-looking PDF when you're done. They really do take the guesswork out of converting a photograph into a workable pattern.
This digital shift has been a game-changer for so many stitchers, and it's a huge reason why the needlecraft market is booming—it's projected to grow from USD 1.2 billion in 2023 to an incredible USD 2.4 billion by 2032. The easy access to downloadable patterns and design tools is fueling this creative fire. You can dive deeper into the growth of the needlecraft patterns market here.
Digital Versus Traditional Methods
When it comes to creating a cross-stitch pattern, you'll find stitchers generally fall into two camps: those who use digital software and those who prefer to draft things by hand. There's no right or wrong answer here; it’s all about what feels best for you and your project.
-
Digital Software: This is the way to go for turning photos into patterns or tackling complex designs with tons of colors. The software gives you speed and powerful features, like automatically matching colors to a thread brand or generating the symbols for your chart.
-
Graph Paper: The original method! This is perfect for simpler, more graphic, or pixel-art-style designs. It’s also a wonderful choice if you just enjoy a more tactile, unplugged creative process. You get total manual control right from the start.
Pro Tip: If you're new to this, I always recommend trying a free online pattern maker first. It gives you a feel for how the digital process works without you having to spend a dime. You can always invest in more powerful software down the road.
Picking the right software can feel like a big decision, but there are tons of options out there for every skill level and budget. For a detailed breakdown, check out our guide on the best cross stitch pattern maker software. We've compared the top contenders to help you find your perfect match.
A Quick Look at Pattern Software
Choosing the right tool can make or break your design experience. Some programs are simple and intuitive, while others are incredibly powerful but have a steeper learning curve. Here’s a quick comparison to give you an idea of what's out there.
Comparing Popular Cross Stitch Pattern Software
A look at common software options for creating cross stitch patterns, highlighting their key features, price, and who they're best for.
| Software Name | Key Features | Price Range | Best For |
|---|---|---|---|
| PCStitch | Extensive floss palettes, advanced photo conversion, lots of stitch types. | $30 - $50 (one-time) | Windows users who want a powerful, feature-rich design studio. |
| MacStitch | The Mac equivalent of PCStitch, with a similar robust feature set. | $30 - $50 (one-time) | Mac users looking for a professional-grade pattern maker. |
| WinStitch | Essentially the same program as MacStitch and PCStitch for Windows. | $30 - $50 (one-time) | A solid alternative to PCStitch for Windows. |
| Stitch Fiddle | Web-based, easy to use, supports multiple crafts (knitting, crochet). | Free (with premium options) | Beginners or anyone wanting a quick, accessible online tool. |
| KG-Chart | Lightweight, intuitive interface, great for pixel art and smaller designs. | Free (Pro version available) | Hobbyists who prefer a straightforward, no-fuss design process. |
Ultimately, the "best" software is the one that fits your workflow. Don't be afraid to take advantage of free trials to see which one feels the most natural to you before committing.
Thinking About Your Final Project
Your design tools are only half the story. The materials you actually stitch on will have a huge impact on the final look and, most importantly, the size of your piece. It’s a good idea to think about this stuff early on.
Two key choices you'll make are:
-
Fabric Type: Aida is the go-to for most stitchers, especially beginners, because its open weave creates a clear grid. For a more refined look, experienced stitchers often prefer Evenweave fabrics like linen, which have a higher thread count and allow for more detailed work.
-
Fabric Count: This is simply the number of stitches you can make in one inch of fabric. A lower count, like 14-count Aida, means your stitches will be bigger, resulting in a larger finished project. A higher count, like 18-count Aida, gives you smaller, more detailed stitches and a more compact piece.
Let's put that into practice. Imagine your pattern is 140 stitches wide. On 14-count fabric, it will finish at 10 inches wide. But on 18-count fabric, that same pattern will only be about 7.8 inches wide. That’s a pretty big difference, especially if you have a specific frame in mind! Sorting these details out now saves a lot of headaches later.
Turning an Image Into a Stitchable Chart
This is where the magic really happens—where pixels become thread. Taking a favorite photo and transforming it into a cross-stitch pattern is incredibly rewarding, but the quality of your finished piece depends almost entirely on the image you start with.
Truth be told, not all pictures are created equal when it comes to stitching.
A fantastic source image is your most important ingredient. I always look for photos with good contrast, clear subjects, and simple backgrounds. A portrait with a nice, blurry background will convert beautifully, while a busy group photo at the park will likely turn into a muddy-looking mess. Think bold and clear, not subtle and shadowy.
Selecting and Preparing Your Image
Let's walk through a real-world example: turning a pet portrait into a pattern. Say you’ve got a great photo of your golden retriever basking in a sunny spot. The lighting is good, the dog is the star of the show—it's a perfect candidate!
Before you even think about opening your pattern software, a little prep work can go a long way.
- Crop with a Purpose: Is there a distracting lamp or a pile of laundry in the background? Crop it out. You want the focus squarely on your furry friend. A tight crop on the head and shoulders usually gives the best results.
- Tweak the Contrast and Brightness: Give the contrast a little boost. This helps the software tell the difference between similar shades—like all the different tones in that golden fur—which is key to preventing your final pattern from looking flat.
If you don't have the perfect personal photo, or you just want to find some fresh inspiration, looking through high-quality stock photos is a great way to find images that are already optimized for a clean conversion.
Importing and Setting the Dimensions
Once your image is prepped and ready, it's time to import it into your pattern-making software. The first thing the program will ask for is the final size of your project and the fabric count you intend to use (like 14-count Aida). This is a critical step because it sets the grid size and determines how much detail your final piece will have.
A larger size, maybe 10 inches wide on 14-count fabric, will capture more detail but also means a much bigger, more time-consuming project. If this is your first time, I'd suggest starting smaller, maybe around 6x8 inches. It’s a great way to get the hang of it without feeling overwhelmed. For a deeper dive, check out our guide on how to turn a photo into a cross stitch pattern.
Wrangling Your Color Palette
This is where your artistry really comes into play. The software will analyze your image and probably suggest an overwhelming number of thread colors—often more than 100. Let’s be real, nobody wants to stitch with that many different flosses. Your next job is to dial that back to something manageable.
The sweet spot for most custom photo patterns is 20-30 colors. This range typically captures the essence and detail of the image without making the stitching process a total headache.
Most programs have a simple slider or a box where you can set your maximum number of colors. As you lower the count, the software will merge similar shades. Keep a close eye on the pattern preview as you do this. Did reducing the count from 25 to 24 suddenly make your dog's eye look flat and lifeless? Bump it back up to 25. It's all about finding that perfect balance between simplicity and detail.
The software takes your image, maps it to a grid, and assigns thread colors from a library like DMC, which has over 500 options. More experienced stitchers often look for complex patterns with 30+ colors and thousands of stitches, but there’s no shame in starting simple.
Once you’ve settled on a color count, the software generates your first draft of the chart, complete with symbols and a thread key. Now you've got something to work with, and you're ready to move on to the crucial refinement stage.
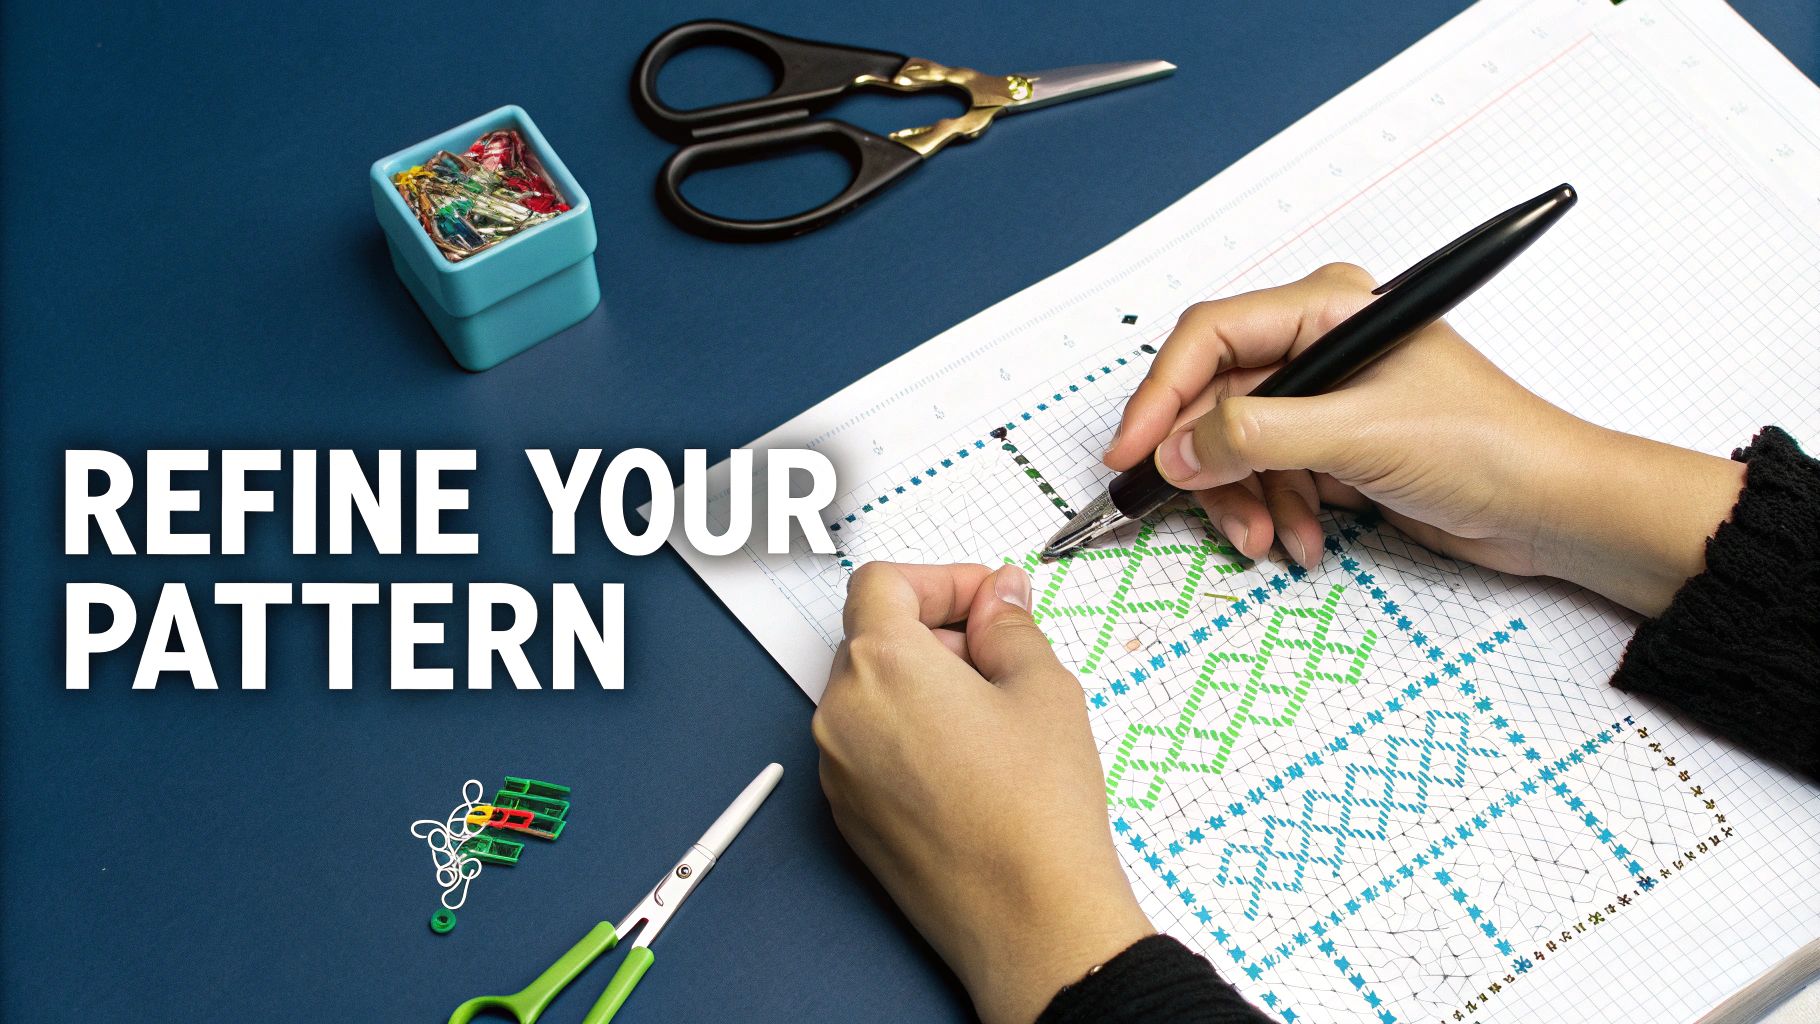
Bringing Your Pattern to Life with a Human Touch
An automated conversion is a fantastic starting point, but it's rarely the finish line. The real magic happens when you step in to refine what the software spits out. This is where you transform a computer-generated chart into a polished, genuinely enjoyable project to stitch. Think of the initial draft as a rough sketch—often messy and full of digital noise that needs a patient hand to clean up.
The process isn't that different from editing a photograph. In fact, learning how to edit photos effectively shares a lot of the same principles, like tweaking colors and sharpening details to make your final design really shine.
Banishing the Dreaded "Confetti"
If you've ever used a pattern generator, you've met "confetti"—those pesky, isolated single stitches of a random color. They’re a stitcher’s nightmare, forcing you to constantly change your thread for a single stitch. They also tend to make the finished piece look muddy and pixelated. Hunting them down is your first and most important job.
Most pattern software includes a "find and replace" tool that becomes your best friend here. I like to zoom way in on a section and start swapping out those rogue stitches for a color that’s already in the surrounding area. This simple act creates smoother blocks of color and makes the entire stitching experience so much more relaxing.
- Zero in on a color: Pick one of the colors that’s only appearing as a few stray stitches.
- Judge its purpose: Ask yourself, "Does this single blue stitch add a crucial sparkle to an eye?" If the answer is no, it’s got to go.
- Swap it out: Change that lonely stitch to a nearby, dominant color so it just blends right in.
Honestly, this manual cleanup is the single biggest thing you can do to take your pattern from just okay to truly fantastic.
A well-refined pattern isn't just about how it looks; it's about making it a joy to stitch. Just reducing the confetti by 20-30% can dramatically cut down on thread changes and make the whole project feel less like a chore.
Fine-Tuning Your Color Palette
Sometimes the software’s color choices are almost there, but they just need a bit of human intuition. A classic example is when it picks two nearly identical shades—say, a dark charcoal grey and a true black—and places them right next to each other. From a normal viewing distance, you’d never see the difference. In these cases, you can just merge them into one color and simplify your thread list.
On the other hand, you might notice that a key detail got lost in the conversion. Maybe your dog’s unique brown nose got blended into the surrounding fur. This is your chance to go back in and manually add that specific color back into the chart. It's all about using your artistic eye to make sure the final piece really captures the spirit of your original image. When I'm stuck, I often consult one of the DMC conversion charts online to find the perfect substitute shade.
Adding Definition with Backstitching
Backstitching isn't necessary for every design, but for some, it’s a total game-changer. Think of it as outlining your work with a pen to make things pop. It’s perfect for creating crisp text, defining facial features, or creating a clean separation between two areas of similar color.
Most programs let you draw backstitch lines right onto your chart. The key is to use it strategically, not everywhere. A few well-placed lines can be the difference between a design that looks a bit fuzzy and one that looks sharp and professional.
Assembling a Professional-Grade PDF
Finally, you need to package your masterpiece into a clean, easy-to-follow PDF. A high-quality pattern isn't just the chart; it's the whole package. It should always include:
- A Cover Page: Show off your work! This should have a full-color mockup of what the finished piece will look like.
- A Multi-Page Symbol Chart: Don't cram it all onto one page. The chart should be large and clear, spread across several pages with overlapping guides so it’s easy to follow from one page to the next.
- A Detailed Thread Key: This is crucial. It needs to list every DMC color number, the symbol used for it on the chart, and—this is a pro tip—the estimated stitch count for each color. That way, you or anyone else using your pattern knows exactly how much floss to buy.
Insider Tips for Flawless Designs
Getting the pattern chart finished is a huge step, but making sure it’s actually a joy to stitch is a whole different ballgame. I’ve learned a few things the hard way over the years—small tweaks that can take a design from good to truly great.
One of the most valuable habits I’ve adopted is to test-stitch a small, critical section of any new pattern. This is an absolute must for designs converted from photos, where the software might generate a palette that looks perfect on screen but turns into a muddy mess with actual thread.
Let's say you're designing a portrait. The eyes and skin tones are make-or-break. Before I even think about the full piece, I’ll stitch a tiny patch of a cheek or part of an eye. This little 30-minute test can save you from dozens of hours of frustration down the road when you realize two shades of beige look identical.
Sidestepping Common Design Pitfalls
When you first learn how to create a cross stitch pattern, it's easy to fall into a few common traps. The biggest one? Making a pattern that's way too large or ambitious for a first go. Trust me, it’s much more rewarding to finish a small, beautiful piece than to get overwhelmed and abandon a massive one.
Another classic mistake is cramming too many similar shades together. Your software might spit out five different grays for a single shadow, but you’ll probably find that two or three will work just as well. Manually merging those colors will not only make the stitching process smoother but often looks better, too.
My Personal Rule: If I can’t easily tell two colors apart on the floss bobbins in good light, I don’t put them side-by-side in a pattern. Simplicity often creates a more striking and enjoyable project.
Smart Choices for a Better Stitching Experience
Beyond the chart itself, a few practical decisions can really elevate your project. Thinking about these details during the design phase sets you up for success long before you pick up a needle.
- Fabric Color Matters: Don't just default to white Aida. A design with lots of light colors or negative space can absolutely pop on a colored fabric like oatmeal, gray, or even navy blue. I always hold my floss skeins up to different fabric swatches to see what makes the colors sing.
- Plan Your Floss Organization: If your pattern uses more than 20 colors, think about organization from the get-go. A simple floss drop system or a labeled project card can prevent a tangled nightmare and make finding the right color so much faster.
- Consider the “Stitchability” Factor: As you're finalizing your design, ask yourself one simple question: "Would I enjoy stitching this?" Try to avoid huge, boring blocks of a single color unless that’s a specific part of the aesthetic. Breaking up those big areas with even a few details keeps the process from feeling like a chore.
Got Questions About Making Your Own Patterns?
Jumping into pattern design is exciting, but it's totally normal to have a few questions swirl around. Getting these cleared up early on will save you a ton of headaches and help you make patterns you’re genuinely proud to stitch. Let's tackle some of the things that trip up new designers the most.
Right off the bat, most people wonder about the best kind of picture to use. My best advice? Start with an image that has high contrast and a really clear subject. A photo with sharp lines and a simple background is going to translate into a much cleaner, more readable pattern than something with a million subtle color shifts or a busy, chaotic backdrop.
How Many Colors Is Too Many?
This is probably the number one question I hear. It’s so tempting to let the software throw every possible shade into the mix, but that’s a fast track to a confetti-filled nightmare that's no fun to stitch.
When you're just starting out, try to keep your color count between 15 and 25 colors. It’s a sweet spot—enough to create beautiful detail without overwhelming you or your wallet. Most pattern programs have a feature that lets you cap the number of colors when you first convert the image, which is the perfect place to start.
You're not locked in forever! You can always go back and manually swap colors or add a crucial shade if you feel a key detail got lost. Think of that initial limit as a starting point, not a hard-and-fast rule.
Can I Actually Sell My Patterns?
Yes, you absolutely can! But there’s a huge "if" attached to this one. You can sell any pattern you design, as long as you have the legal right to use the original image.
So, what does that mean in practice? You're in the clear to sell patterns you make from:
- Your own photographs.
- Artwork or illustrations you drew yourself.
- Images that are in the public domain (meaning their copyright has expired).
What you can't do is create and sell patterns based on someone else's copyrighted work. That includes characters from movies, video games, or TV shows, company logos, or any other art you didn't create yourself. Unless you've gone through the process of getting an official license, stick to your own original creations to stay out of legal trouble.
Ready to turn a favorite photo into a work of art? Cross Stitched makes it simple with our custom photo-to-pattern kits. Just upload your image, and we’ll put together everything you need to get started. Create your personalized kit today!


