
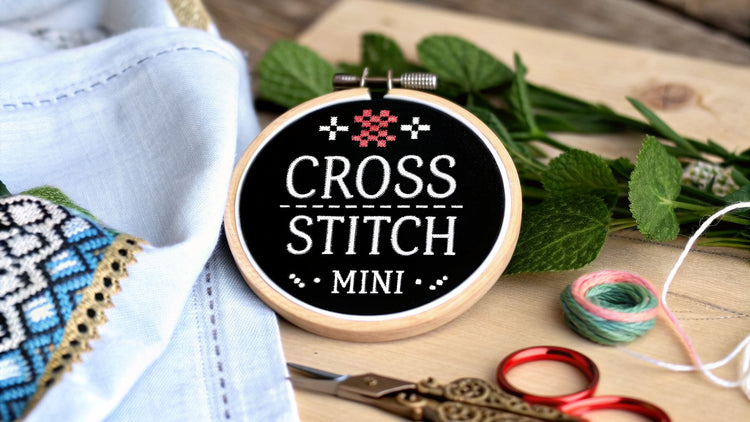
Ever wondered what makes a cross-stitch pattern "mini"?Think of them as small-scale designs, usually under 50x50 stitches, that you can finish in a couple of hours or over a relaxed weekend. They pack all the satisfaction of a big project into a wonderfully manageable size, which is why they’re a huge hit with beginners and seasoned stitchers who are short on time.
The Growing Charm of Miniature Crafting

In a world that’s always moving, there's something special about slowing down to create something beautiful with your own hands. This is where the magic of miniature crafting really shines, offering a creative escape without needing a massive time commitment. Mini cross-stitch patterns are a perfect example of this, giving you a quick and deeply satisfying creative fix.
I like to think of a full-sized cross-stitch project as a novel—it's an immersive experience that unfolds over weeks or even months. A mini pattern, on the other hand, is like a short story. It tells a complete, charming tale in a fraction of the time, letting you enjoy that "I made this!" feeling in just one afternoon.
And this isn't just a niche hobby; it’s a real shift in the crafting community. People want projects that fit into their busy lives. In fact, 40% of top-selling cross-stitch patterns are now these small, quick-to-stitch designs. This trend shows how much we value projects that deliver big on charm without demanding weeks of our time. You can read more about current cross stitch pattern trends on accio.com.
What Defines a Mini Pattern
So, what officially makes a pattern "mini"? While there isn't a strict rulebook, a few key traits consistently pop up. These are the very things that make them so approachable and popular.
A mini pattern isn’t just about size; it's about speed and satisfaction. It’s the art of creating a complete, detailed picture within a compact frame, offering a sense of accomplishment in a short amount of time.
To give you a clearer idea, here’s a quick look at what usually defines these delightful little projects.
Characteristics of a Mini Cross Stitch Pattern
| Characteristic | Typical Specification | Main Benefit |
|---|---|---|
| Stitch Count | Generally under 50x50 stitches | Projects can be finished in a few hours or a weekend. |
| Finished Size | Usually less than 4x4 inches on 14-count Aida | Easy to frame, gift, or turn into small items like keychains. |
| Color Palette | Often uses fewer than 15 colors | Simplifies the stitching process and reduces supply costs. |
| Complexity | Minimal use of complex stitches like French knots | Makes them perfect for beginners learning the basics. |
These small projects are far more than a passing fad. They serve as a fantastic gateway into the world of needlecraft, giving newcomers an easy win and providing experienced stitchers a relaxing break between larger endeavors.
Turning Your Cherished Photos into Tiny Treasures
Imagine holding a stitched portrait of your pet or a precious family memory in the palm of your hand. That’s the magic of this craft—transforming your favorite photos into tangible, stitched art is one of the most rewarding things you can do. It's what makes cross stitch mini patterns so incredibly personal, turning digital memories into physical keepsakes you can actually hold.
The key to a beautiful result isn't some technical wizardry; it's all about starting with the right ingredients. A great photo-to-pattern conversion begins with choosing the perfect source image. Think of it like a sculptor picking out a block of marble—the quality of the raw material really dictates the potential of the final piece.
Don't worry, you don't need to be a professional photographer. A simple, well-lit smartphone picture can work wonders. The goal is to find an image that tells its story clearly, even when it’s shrunk down to just a few dozen stitches across.
Selecting the Perfect Source Photo
Before you even think about opening a pattern generator, take a moment to scroll through your camera roll with a critical eye. The truth is, not every photo is destined to become a great mini pattern. Here’s what you should be looking for to set your project up for success from the start:
- A Clear and Uncluttered Subject: The best photos have one, obvious focal point. A portrait of a single person or pet is so much easier to convert than a busy group shot or a cluttered landscape.
- Strong Contrast and Good Lighting: Look for photos where your subject really stands out from the background. Images with weird shadows or washed-out lighting will lose all their definition once they’re converted into a limited color palette.
- Simple Backgrounds Are Your Friend: A busy, detailed background just competes with your main subject for attention. A plain wall, a clear blue sky, or even a soft, out-of-focus backdrop will make your subject pop in the final stitched piece.
Once you have a few candidates, think about how you can crop the image to really dial up its impact. For a mini pattern, you want to zoom right in on the most important details. Crop out all that unnecessary background noise and focus tightly on the face, the flower, or whatever element tells the real story of the picture. This one simple step is absolutely crucial for keeping the details recognizable in such a small format.
Using a Pattern Maker to Create Your Chart
With your perfect photo selected and cropped, it’s time for the fun part. Online tools like Pic2Pat make the conversion process surprisingly simple. These generators work by analyzing the pixels in your image and translating them into a stitchable grid, assigning a specific floss color to each little square.
Here's a peek at the Pic2Pat interface, where you'll upload your image and tweak the settings.
This screenshot shows the simple upload and settings panel, which gives you control over the final size and thread count for your cross stitch mini patterns.
Now, let's walk through the essential settings you’ll need to adjust. This isn't a complex process at all; it’s more about making a few smart decisions to get the best possible pattern.
- Set Your Stitch Count: This is the most important step for a mini pattern. You'll want to aim for a small grid, something like 40 stitches wide by 50 stitches high. This keeps the project manageable and makes sure it stays truly "mini."
- Choose Your Fabric Count: Select the fabric you're planning to use, like 14-count or 18-count Aida. The generator uses this info to accurately predict the final physical size of your stitched piece.
- Refine Your Color Palette: A typical photo contains thousands of colors, which is way too many for a tiny project. Your pattern generator will automatically reduce this, but you have control. I recommend starting by limiting the palette to around 15-20 DMC thread colors. This is usually enough to create nice shading and detail without making a small design overly complicated. Too few colors, and it might look blocky; too many, and you’ll just create a headache for yourself.
The goal of converting a photo isn't to replicate every single pixel perfectly. It’s to capture the essence and character of the subject. Think of it more like creating an impressionistic painting with thread—you’re focused on the overall feeling, not photorealism.
After the generator spits out your pattern, take a good, hard look at it. Does it still look like your pet? Can you recognize the smile in the portrait? If not, go back and try adjusting the color count or cropping the photo a little differently. Sometimes, a tiny tweak is all it takes to make it click. For a much deeper dive, our guide on how to cross stitch from a photograph has even more advanced tips and tricks.
This method of preserving memories is incredibly powerful. And if you're looking for other creative ways to keep memories alive, you can also turn your cherished photos into a personalized book to tell a complete story.
Choosing Your Tools for Small-Scale Stitching
When you’re working on cross stitch mini patterns, the materials you choose can make or break the final piece. It's a bit like a gourmet chef picking out ingredients—every single choice has a direct impact on the finished product. The right tools don't just make stitching easier; they’re what give your tiny project that crisp, professional look.
Getting these fundamentals right is the secret to making those small-scale details really pop. Let's walk through the best fabrics, threads, and needles that create the perfect toolkit for your miniature masterpiece.
This simple visual breaks down the creative journey perfectly.

It all boils down to three core steps: Choose, Crop, and Stitch. This is the heart of turning any photo into a piece you can be proud of.
Finding the Perfect Fabric Canvas
Your fabric is easily the most important decision you'll make for a mini pattern. It's what determines the final size and how much detail you can pack in. While 14-count Aida is a fantastic go-to for many stitchers, smaller projects really shine on a tighter weave.
Higher-count fabrics like 18-count or 22-count Aida are your best friends for miniature work. The woven squares are much smaller, meaning you can fit more stitches into the same amount of space. This is the key to creating recognizable details in a tiny design and avoiding that blocky, pixelated look.
Think of fabric count like screen resolution. A higher count (like 18 or 22) gives you more pixels per inch, resulting in a sharper, more defined image. For mini patterns, you absolutely want that high-resolution canvas.
To see just how much of a difference this makes, let's look at how the same pattern shrinks or grows depending on the fabric.
How Fabric Count Affects Final Project Size
This quick table shows how a 50x50 stitch pattern works out on different Aida counts. It’s a great way to visualize the scale of your project before you even start.
| Stitch Count (e.g., 50x50) | 14-Count Aida Size | 18-Count Aida Size | 22-Count Aida Size |
|---|---|---|---|
| 50 x 50 stitches | 3.6 x 3.6 inches | 2.8 x 2.8 inches | 2.3 x 2.3 inches |
As you can see, just by switching from 14-count to 22-count, your project shrinks by more than an inch! This is perfect for fitting designs into small frames, keychains, or ornaments.
Selecting Your Threads and Needles
Once you've got your fabric sorted, it's time to pick your threads and the needle that will bring it all together.
For thread, you can't go wrong with a high-quality, six-strand embroidery floss like that from DMC. It’s the industry standard for a reason—the colours are consistent, vibrant, and the smooth texture makes for beautiful, uniform stitches. When working on high-count fabric, the trick is to use fewer strands.
- For 14-count Aida: Two strands of floss will give you nice, full coverage.
- For 18-count Aida: One or two strands work well. Two gives you a lush, thick look, while one is better for more delicate detail.
- For 22-count Aida: Definitely stick with one strand. This keeps the stitches from looking bulky and makes it easier for the needle to pass through the tiny holes.
Finally, choosing the right needle is just as important. A needle that's too big for your fabric will stretch the holes and can make your stitches look messy.
- 14-count Aida: A size 24 tapestry needle is your best bet.
- 18-count Aida: Go for a size 26 tapestry needle.
- 22-count Aida: You'll want a smaller size 28 tapestry needle, which will glide through that tight weave without a fight.
By carefully matching your fabric, thread, and needle, you're setting yourself up for success. This little bit of prep makes the entire stitching process smoother and guarantees a stunning final result.
Mastering Stitches and Colors on a Small Canvas
Once you have your fabric, thread, and needle ready, the real fun begins. Bringing mini cross-stitch patterns to life isn't just about making a simple 'X' on fabric. It’s about using clever stitching and smart color choices to create something with real depth and definition, even on a tiny canvas.
Think of the basic cross stitch as your broad brushstroke. It fills in the color and lays the foundation. But to make your miniature subject truly pop, you’ll need a few more tricks up your sleeve. These are the fine-tipped pens in your toolkit, adding the sharp details and outlines that make everything recognizable.
One of the most powerful and simple techniques is the backstitch. This is what you’ll use to outline shapes and separate different color areas, giving your work a clean, defined edge. Without it, the colors in a small pattern can easily blur together, leaving you with a fuzzy, pixelated look.
Adding Definition with Simple Stitches
Imagine you've just stitched a tiny portrait of your dog. The cross stitches perfectly capture the colors of his fur, but it's the backstitch that will define the curve of his floppy ear, the outline of his wet nose, and that little sparkle in his eye. For small designs, it’s a total game-changer.
To get a better handle on this and other essential techniques, take a look at our guide to the most common cross stitch stitches. Mastering these basics is what gives your work that polished, professional touch.
When you convert a photo into a pattern, you’ll often run into what stitchers call "confetti" stitches. These are the single, isolated stitches of a color scattered around the design. They add nuance, but they can be a pain to work with.
- Plan Your Path: Before you switch colors, scan ahead for any nearby "confetti" in the same shade. Stitching them all at once saves you from constantly re-threading your needle.
- Keep It Tidy: Since many minis become keychains or ornaments, a neat back is important. Make sure you secure these lonely stitches well by tucking their tails under neighboring stitches so they don't unravel.
The secret to a beautiful mini pattern is finding that sweet spot between color and clarity. You want enough color variation to suggest detail, but enough sharp backstitching to make sure everyone knows exactly what they're looking at.
Strategies for Smart Color Reduction
When a pattern generator analyzes your photo, it might spit out a list of 50+ colors to capture every last shadow and highlight. For a mini pattern, that’s just too much. Your goal is to capture the essence of the image with a limited, effective palette.
Think like a cartoonist. They don't use photorealistic shading to bring a character to life; they use a few well-chosen colors to convey personality and form. That's your job here, too.
Start by manually going through the suggested color list. Look for shades that are almost identical and merge them. For example, if the pattern calls for three nearly-indistinguishable shades of blue for a tiny patch of sky, just pick the mid-tone and use it for all three. This simple step can drastically cut down on thread changes without harming the final look.
This back-to-basics approach is part of a huge DIY movement, especially in North America, which holds a massive share of the global cross-stitch market. The demand is particularly strong in the United States, where crafters can easily find materials on platforms like Etsy and Amazon. You can find more details about the growing global cross stitch market on Business Research Insights.
By combining clean stitching with thoughtful color editing, you’ll be able to tackle any cross stitch mini patterns with confidence and turn them into tiny, treasured masterpieces.
Finishing and Gifting Your Miniature Masterpieces

When you make that final stitch, there's a real sense of accomplishment. But that moment isn't the end—it's just the beginning of the fun. Your beautifully finished cross stitch mini patterns are now ready to be transformed from a simple piece of fabric into something charming, useful, and deeply personal.
Think of your stitched piece as the main ingredient. It can become the star of a handmade greeting card, a festive ornament for the holidays, or a keychain that adds a little handmade joy to someone's daily life. Let's look at a few simple ways to give your minis a new purpose.
Transforming Your Stitches into Greeting Cards
There's nothing quite like a handmade card, and adding a cross-stitched design makes it an instant keepsake. This is probably one of the easiest and most effective ways to finish a mini pattern.
What You'll Need:
- Blank greeting cards with an aperture (a pre-cut window)
- Your finished and cleaned mini cross stitch piece
- Double-sided craft tape or a good fabric glue
- A thin piece of cardstock to cover the back
The steps are straightforward. Trim your fabric so it's a little larger than the card's window—about a half-inch border is perfect. Use double-sided tape to carefully stick the fabric to the inside of the card, making sure your design is nicely centered. To give it a clean, professional look, glue the thin cardstock over the back of the fabric on the inside.
Creating Durable and Charming Keychains
A custom keychain is a brilliant way to carry a tiny piece of art everywhere. This project is perfect for those really small cross stitch mini patterns, like an initial, a tiny floral motif, or a simple geometric shape.
For a keychain that can handle daily wear and tear, you'll want to mount your work in a mini embroidery hoop or a clear acrylic case.
- Mini Hoop Method: Pop your finished stitch into a tiny, one-inch embroidery hoop. Once it's pulled taut, tighten the screw, trim the extra fabric from the back, and run a bead of hot glue to seal the edges. All that's left is to add a jump ring and a keychain clasp to the hoop's hardware.
- Acrylic Casing Method: You can buy small, snap-together acrylic keychain blanks online. Just trim your stitched piece to fit inside, snap the case shut, and you’re done! It’s protected, durable, and looks fantastic.
The real beauty of gifting a handmade item is the story it tells. It’s not just a keychain; it’s an hour of your time, a thoughtful selection of colors, and a piece of your creativity, all wrapped up in a tiny, tangible form.
Crafting Festive Holiday Ornaments
Mini patterns feel like they were made for holiday ornaments. Their small size makes them light enough for any tree branch, and you can stitch them to match any theme, from classic Christmas red and green to modern, icy blues.
There are dozens of ways to finish an ornament, but a perennial favorite is the "biscornu" or small pillow style.
Pillow Ornament Mini-Tutorial:
- Trim your stitched piece and a matching piece of backing fabric (felt works great) into identical squares.
- Place the two pieces with their right sides facing each other. Sew around the edges, but be sure to leave a small one-inch gap.
- Turn the little pillow right-side out, use a pencil or chopstick to gently poke out the corners, and stuff it with a bit of polyester fiberfill.
- Use a neat ladder stitch to close the opening. To finish, just attach a loop of festive ribbon to one corner for hanging.
When you're giving a gift, the presentation is part of the experience. To make your heartfelt gift feel even more special, consider using protective and attractive packaging like these small cube cardboard boxes. Whether it's for a birthday, a holiday, or "just because," these miniature creations are more than just crafts—they're tiny expressions of care.
Finding Your Next Project in Ready-to-Stitch Kits
Sometimes you just want to get straight to the stitching, without the hassle of tracking down every last supply. That’s where a ready-to-stitch kit is an absolute dream. These all-in-one packages are designed to include everything you need for your cross stitch mini patterns the moment you open the box. They take all the guesswork out of the equation, letting you dive right into the fun part.
It’s a bit like getting a great meal kit delivered to your door. Instead of running to the store for a dozen different ingredients, everything is perfectly portioned and ready to go. A mini cross-stitch kit gives you that same feeling of instant satisfaction, turning a quiet afternoon into a finished piece with zero prep.
The All-in-One Advantage
So, what’s actually inside one of these handy kits? A quality kit is built to set you up for a great stitching experience, whether you're brand new to the craft or a seasoned stitcher just looking for an easy, portable project.
A typical high-quality kit will have:
- High-Quality Fabric: Usually a piece of Aida cloth, pre-cut to the perfect size for your design.
- Pre-sorted Premium Threads: All the floss colors you'll need, often from trusted brands like DMC, sorted and labeled to save you time.
- The Right Needle: A tapestry needle that’s just the right size for the fabric in the kit.
- A Clear Pattern Chart: A professional, easy-to-read chart to guide you stitch by stitch.
What makes kits so fantastic is that they guarantee all your materials are perfectly matched. You won't have to second-guess if your needle is too big for your fabric or if you grabbed the wrong shade of green. Everything is chosen to work together, which means a smoother, more enjoyable time stitching. For anyone new to this, our guide on choosing a cross stitch beginner kit has even more tips on what to look for.
Exploring Popular Kit Themes
The world of mini kits is packed with charming designs for every style. Seasonal motifs are a huge hit—think festive ornaments for the holidays or a tiny pumpkin to celebrate autumn. Projects like these tap into that cozy feeling we all love about the changing seasons.
Animal and nature themes are another perennial favorite. You can find everything from adorable cat portraits and tiny buzzing bees to delicate floral bouquets. These cross stitch mini patterns are perfect for turning into keychains, magnets, or little framed pieces for your desk.
The best part about starting with a kit is the immediate sense of progress. With all the decisions already made for you, you can focus entirely on the meditative rhythm of stitching and watch your creation come to life.
Ultimately, these kits are a direct line to your next creative escape. They offer a perfect, low-commitment way to try out a new style or simply unwind with a project that promises a beautiful result. By removing the barriers to entry, they make the wonderful art of cross stitch accessible and fun for everyone.
Your Mini Cross-Stitch Questions, Answered
Jumping into the world of mini cross-stitch patterns can spark a lot of questions. It's totally normal to wonder how much detail you can really pack into such a tiny space or how long a project might take. Let’s clear up some of the most common things stitchers ask.
One of the biggest questions I hear is about turning photos into patterns. People worry that a small design just can't do a detailed picture justice.
Can I Get Good Detail in a Mini Pattern From a Photo?
You absolutely can, but the magic is in the choices you make upfront. The key is to start with a photo that has a simple, clear subject and really good lighting. Think a well-lit portrait, not a busy landscape.
From there, using a higher-count fabric like 18-count Aida lets you squeeze more stitches (and therefore, more detail) into a smaller area. Modern pattern generators are pretty smart, too; they're designed to zero in on the most important features to make sure your finished piece looks just right.
Another thing people always ask about is time. After all, nobody wants another project lingering in a basket for months.
The beauty of a mini project is the instant gratification. It’s the perfect antidote to the "unfinished project" guilt that so many of us feel, delivering a quick and rewarding creative win.
How Long Does a Mini Cross-Stitch Project Take?
This is where minis really shine—they’re fast! Of course, it depends on how complex the pattern is and your personal stitching rhythm, but most mini patterns (think something around 2x3 inches) can easily be finished in just a few evenings or over a weekend. They're perfect for when you crave that "I made this!" feeling without a massive time investment.
Finally, a lot of newcomers wonder if they should start their stitching journey with something so small.
Are Mini Patterns Good for Absolute Beginners?
Yes, they're the perfect place to start. A small project lets you get the hang of the basic stitches and actually finish something before you have a chance to feel overwhelmed. There's nothing like completing your first piece to build the confidence you need to take on bigger, more ambitious designs down the road. I always recommend beginners start with an all-in-one kit—it takes all the guesswork out of gathering supplies.
Ready to turn your favorite photo into a tiny work of art? At Cross Stitched, we make it easy with custom, all-in-one kits that have everything you need to start stitching today. Create your personalized mini pattern kit now.


